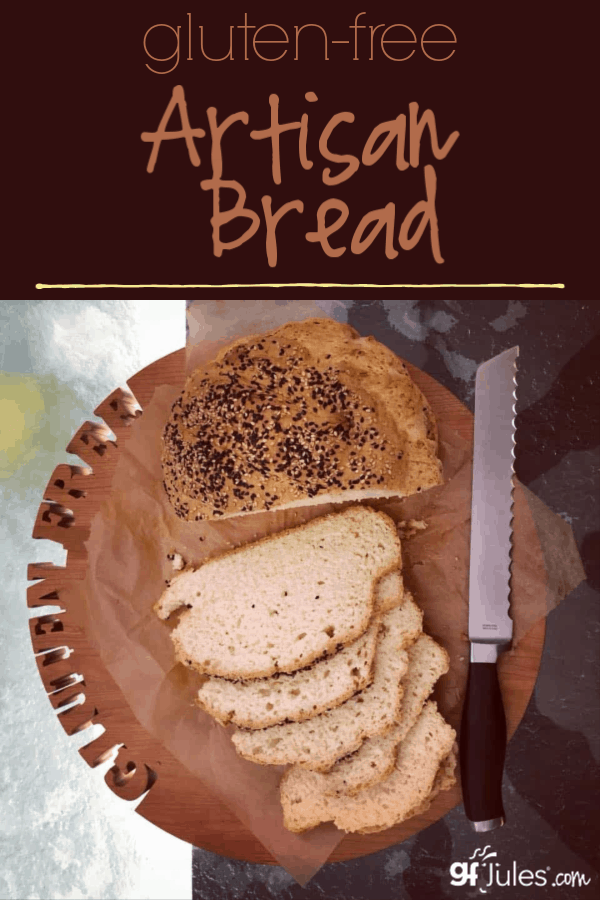
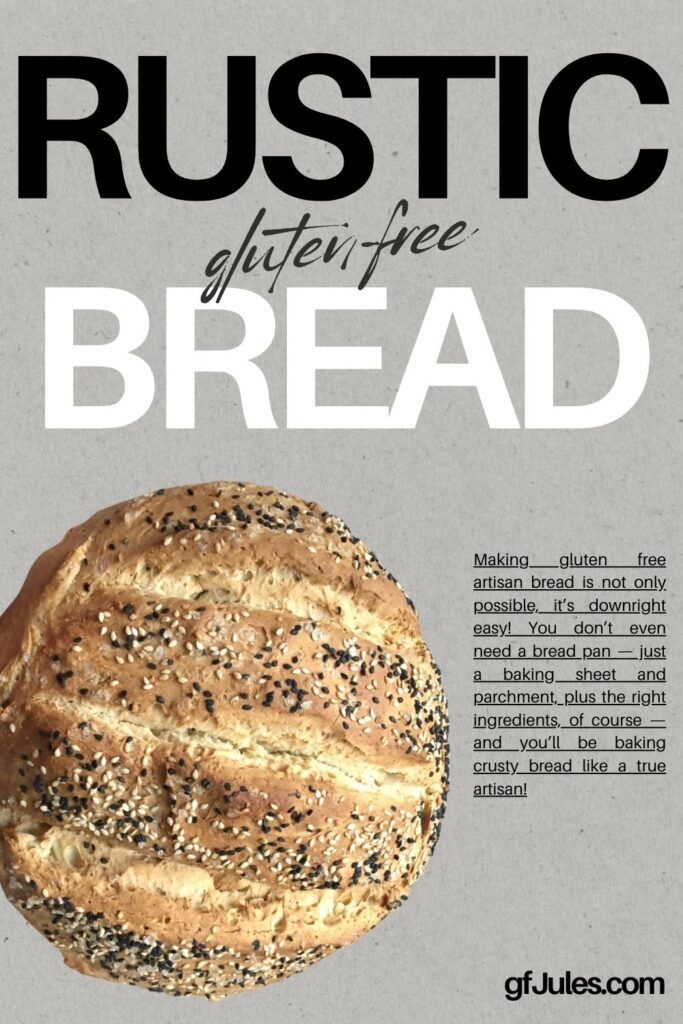
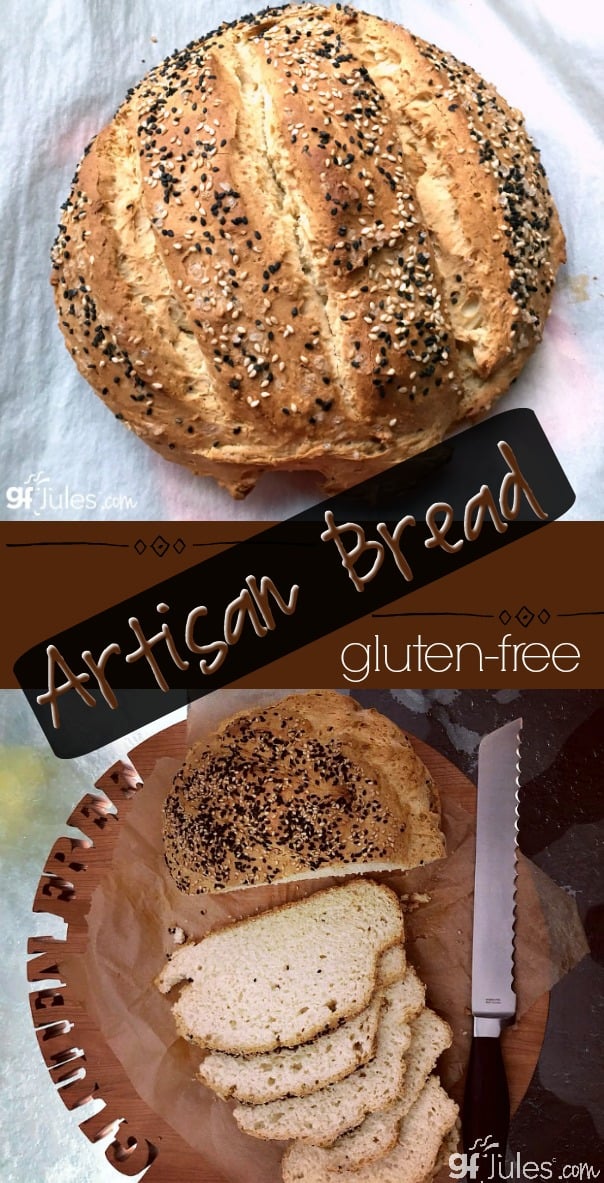
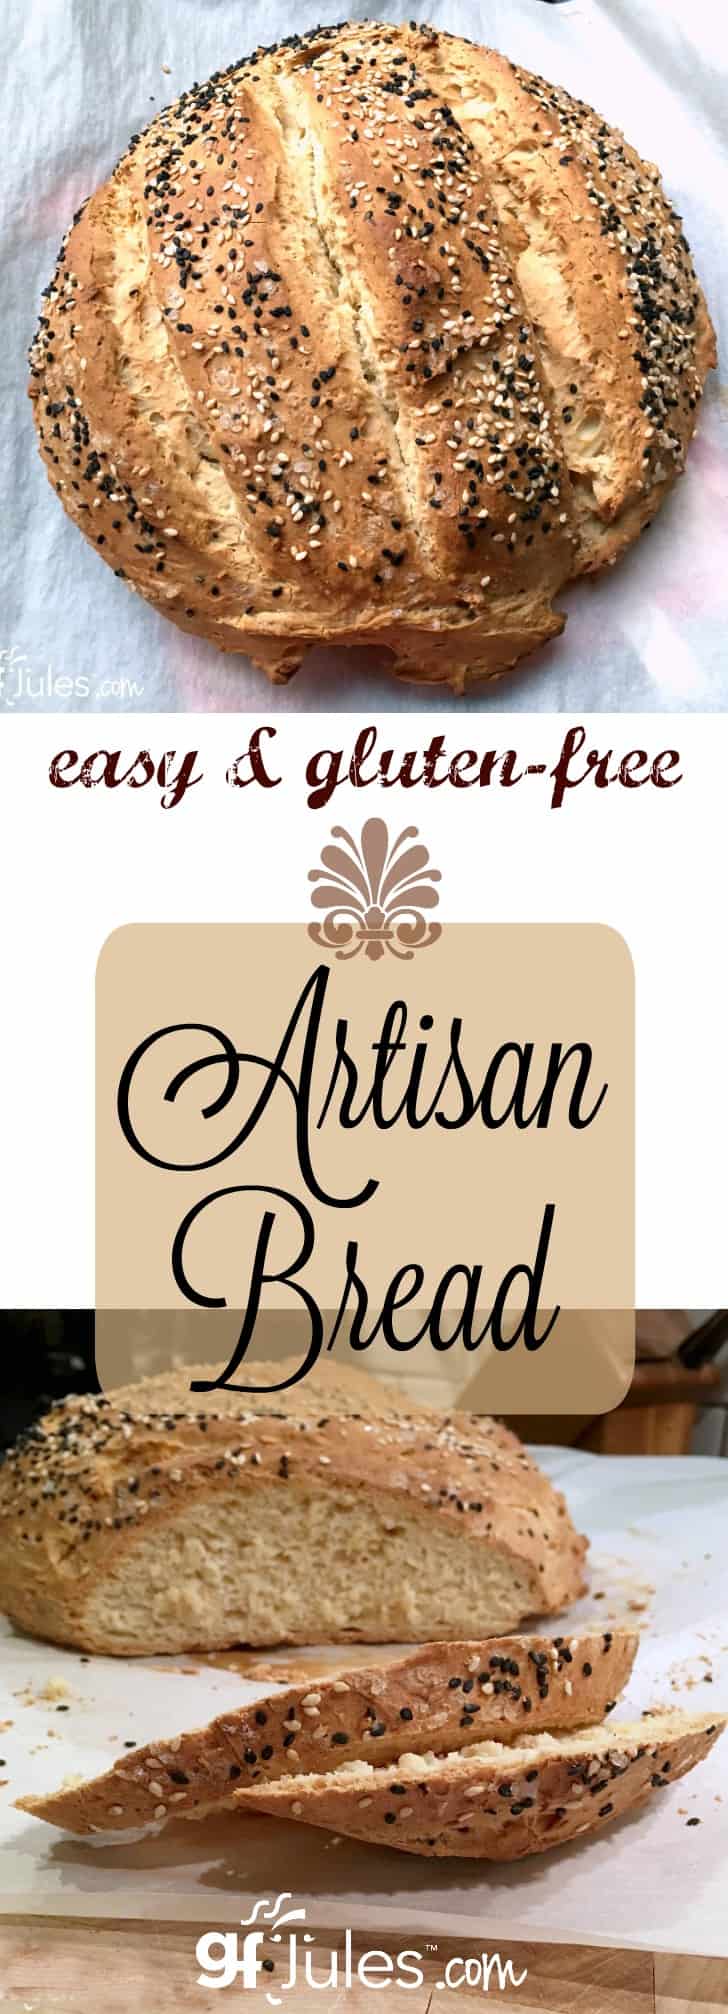
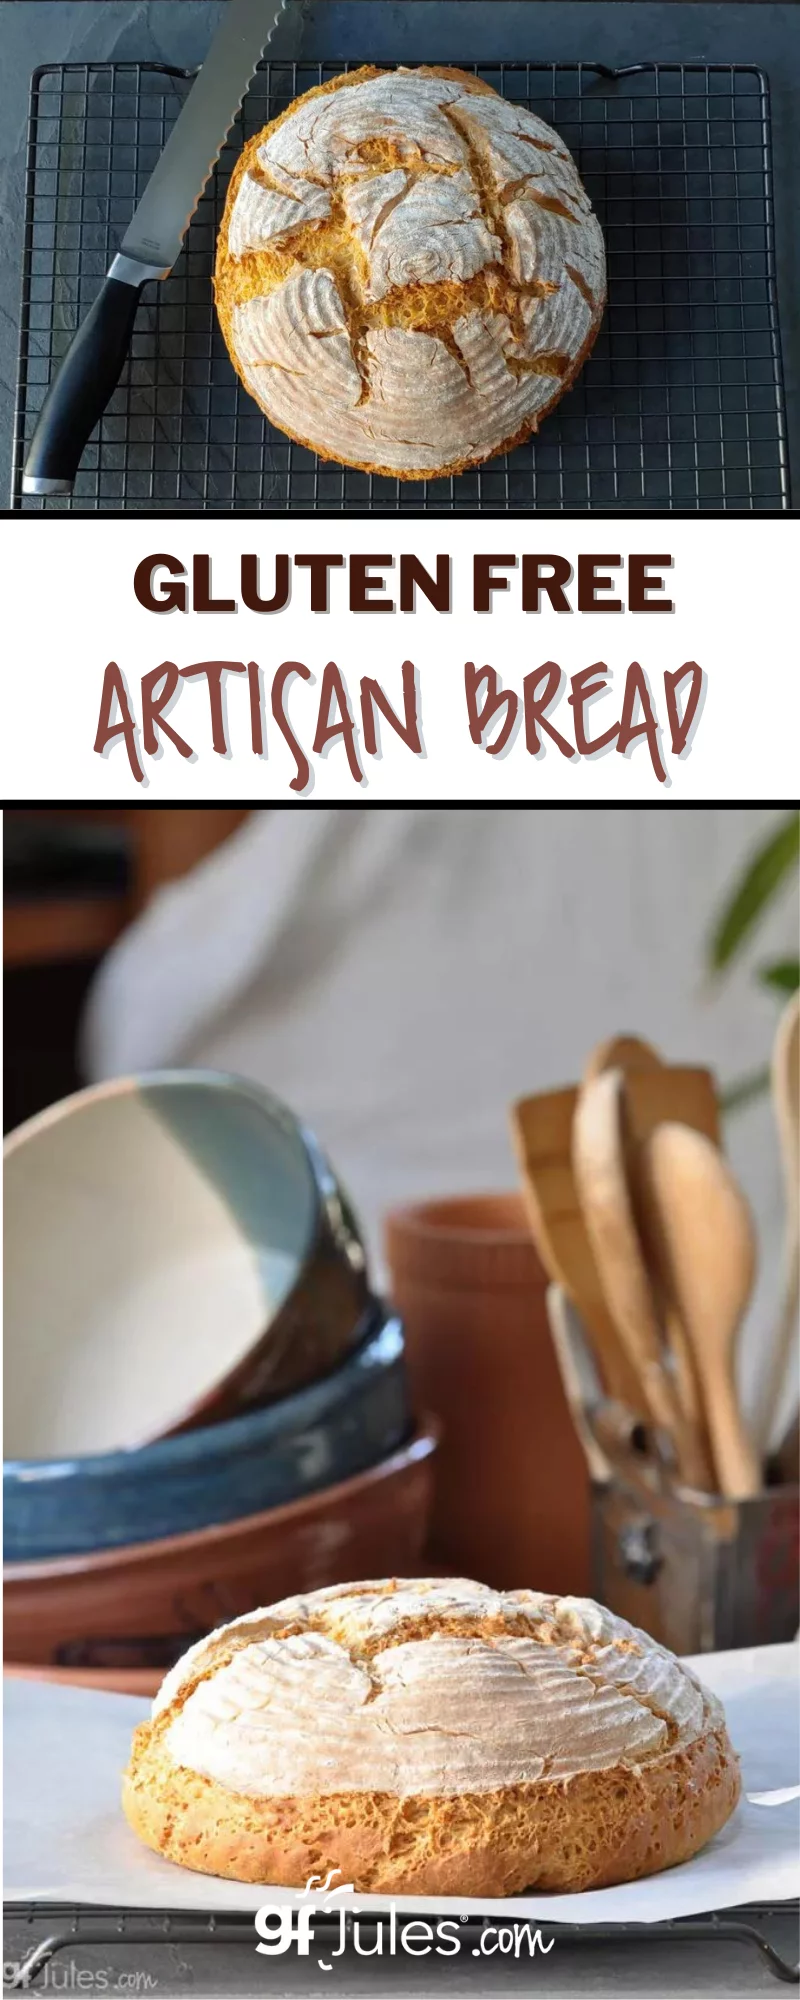
Making gluten free artisan bread is not only possible, it’s downright easy! You don’t even need a bread pan — just a baking sheet and parchment, plus the right ingredients, of course — and you’ll be baking crusty bread like a true artisan!
You don’t want to use heavy, gritty gluten free flours if you want your loaf to be light and airy like this one, so follow along and you’ll be serving beautiful, impressive, crusty gluten free artisan breads in no time!
How Do I Make Gluten Free Artisan Bread?
You know me — I’m always here for you with options! This gluten-free artisan bread recipe is no exception.
I give two options to make this delicious bread: use my award-winning super easy gfJules Bread Mix or my from-scratch recipe. And within that from-scratch recipe, there are two major options for baking without a pan for a true gluten free artisan bread look or partially baking in a round or springform pan for a more rounded loaf that even works well as a bread boule for soup!
Which will you choose?
Especially if using bubbly water or gingerale or even gluten free beer(!) as the liquid in this recipe, your dough will need some help holding together until mid-bake (*unless using my gfJules Gluten Free Bread Mix — see recipe cards).
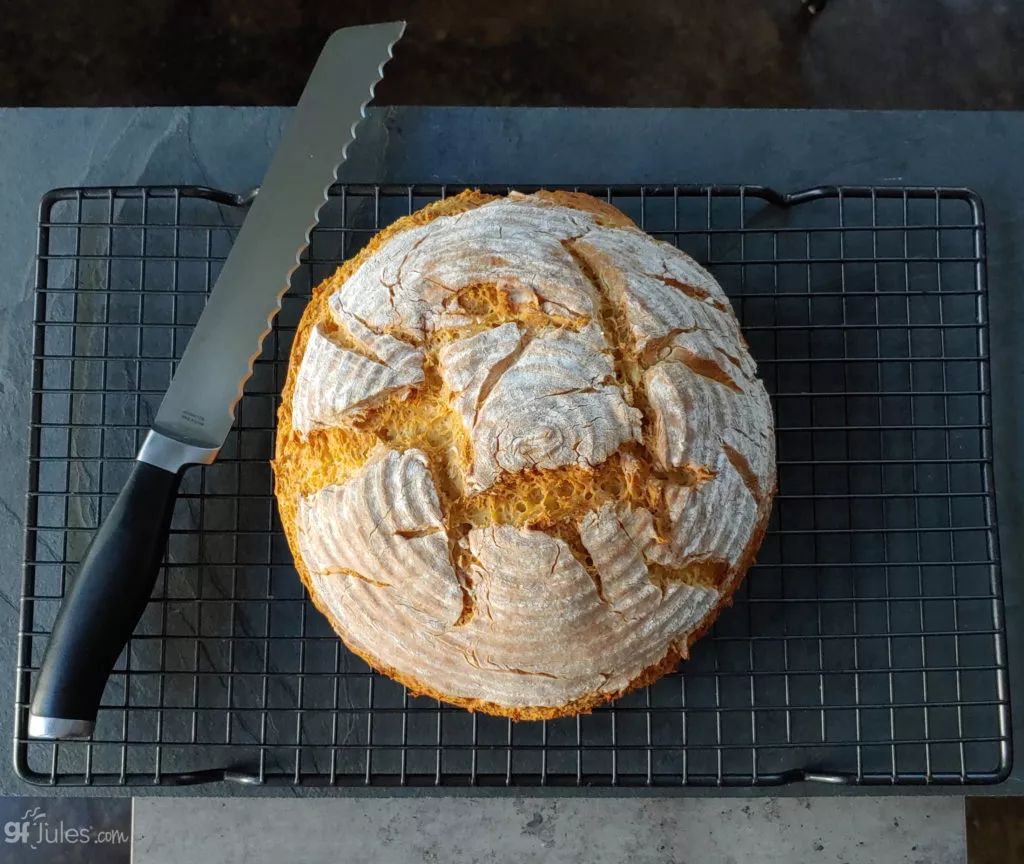
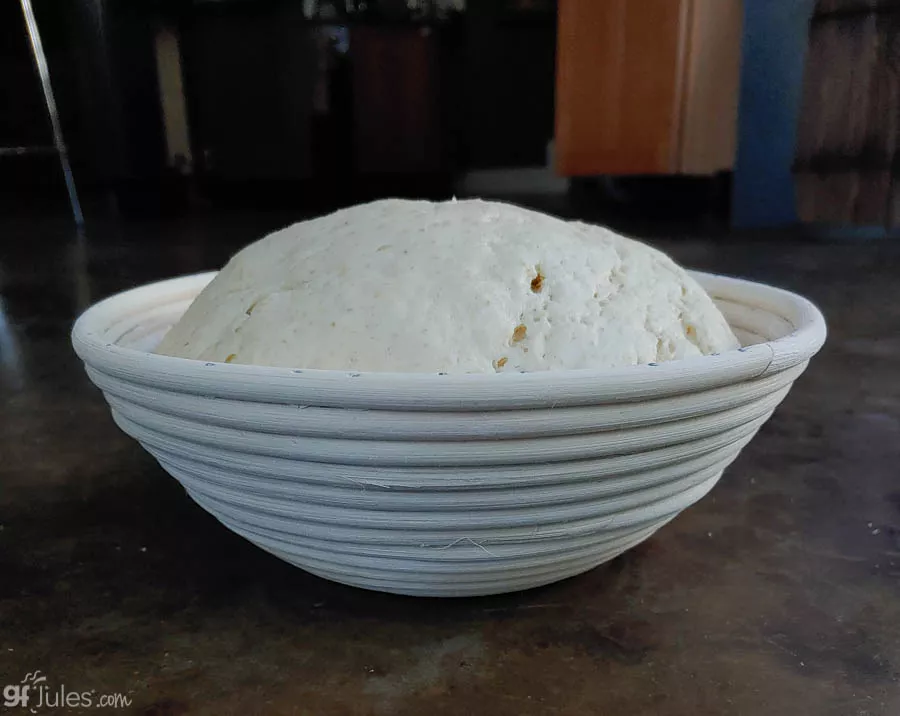
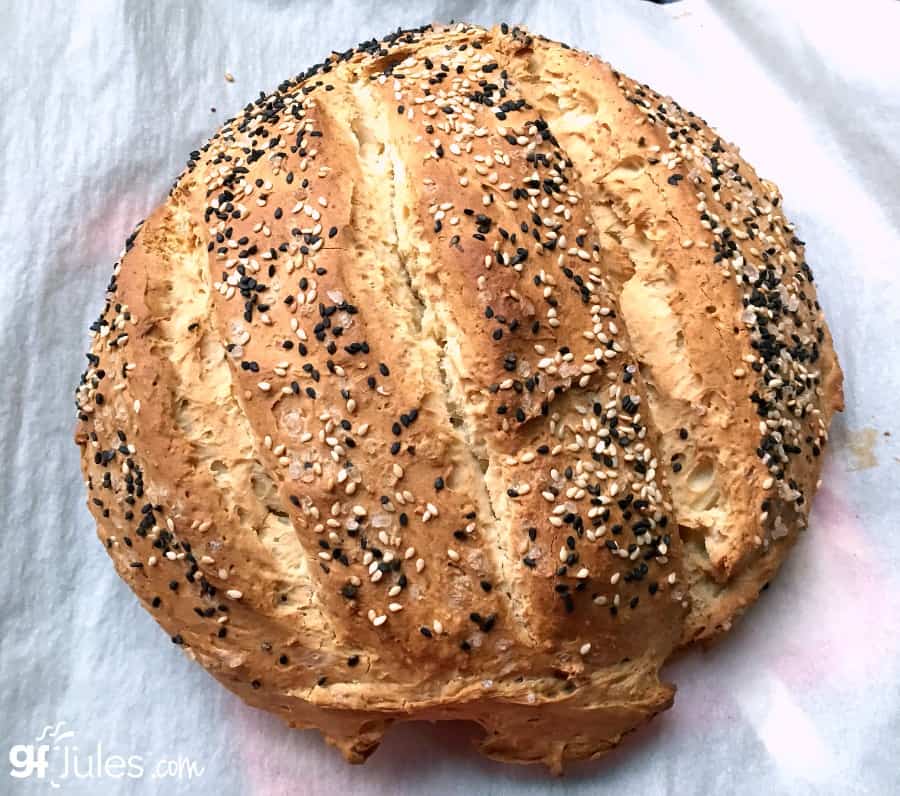
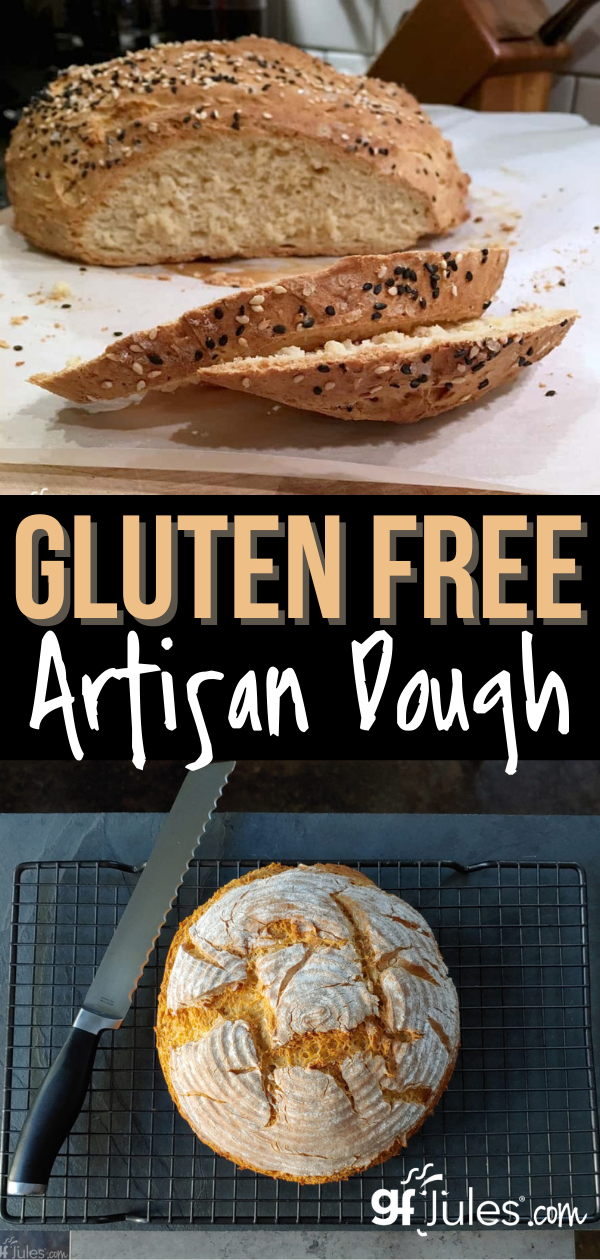
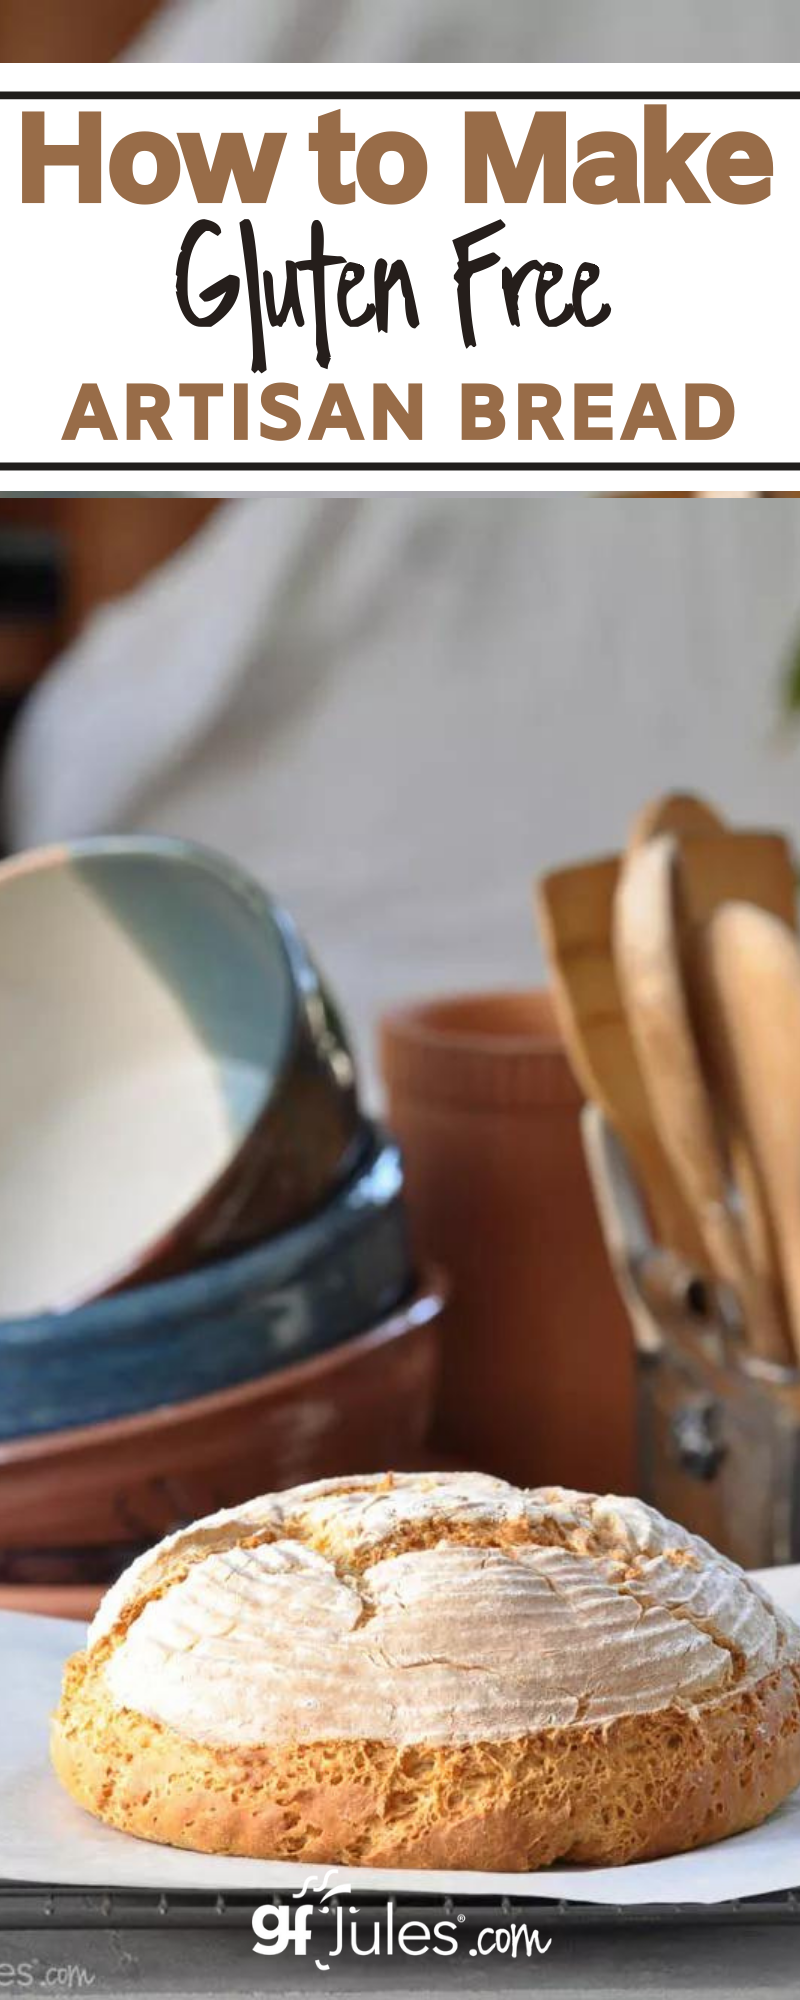
I prefer yogurt (I use vegan yogurt) for this recipe if baking from scratch and without a pan for the best, roundest shape, and using a bowl or proofing basket is always a handy way to help it rise in a rounder shape. How beautiful is this risen bread in a banneton?
Use a proofing basket like this one, a parchment-lined springform pan, or even a glass (oven-safe) bowl lined with oiled parchment, the dough can rest for as little as 30 minutes to overnight (covered) in the refrigerator while rising in the style of sourdough, if you like.
If using a thinner liquid in the recipe — like sparkling water or club soda — you may choose to leave it in the pan or bowl (not the basket) for half the bake time, then gently pull up on the parchment to remove it from the pan and place it (with parchment) onto a baking sheet and return to the oven.
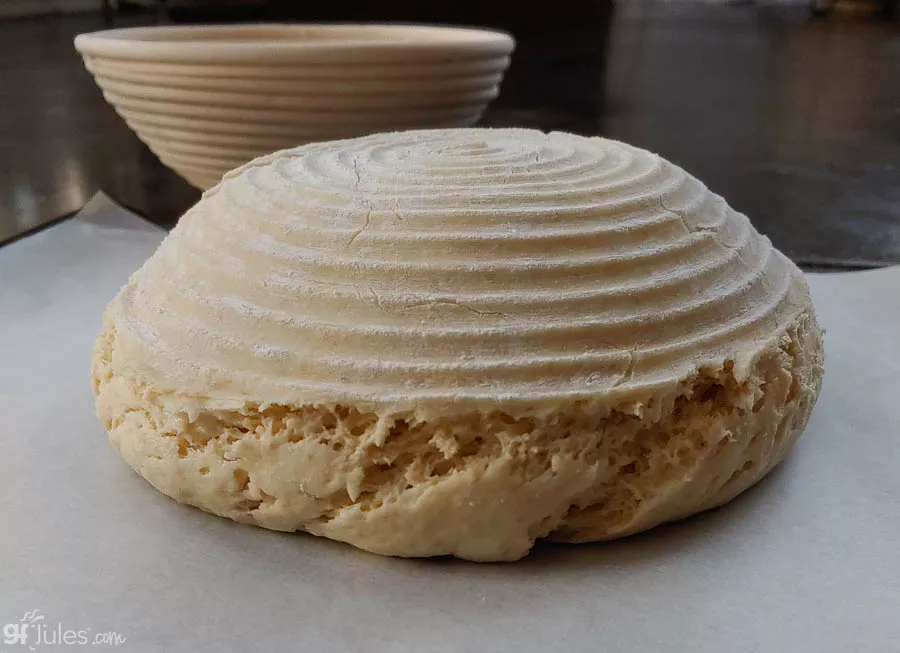
If using yogurt and a proofing basket, remove it before baking and it will keep a lovely round shape but not rise quite as high.
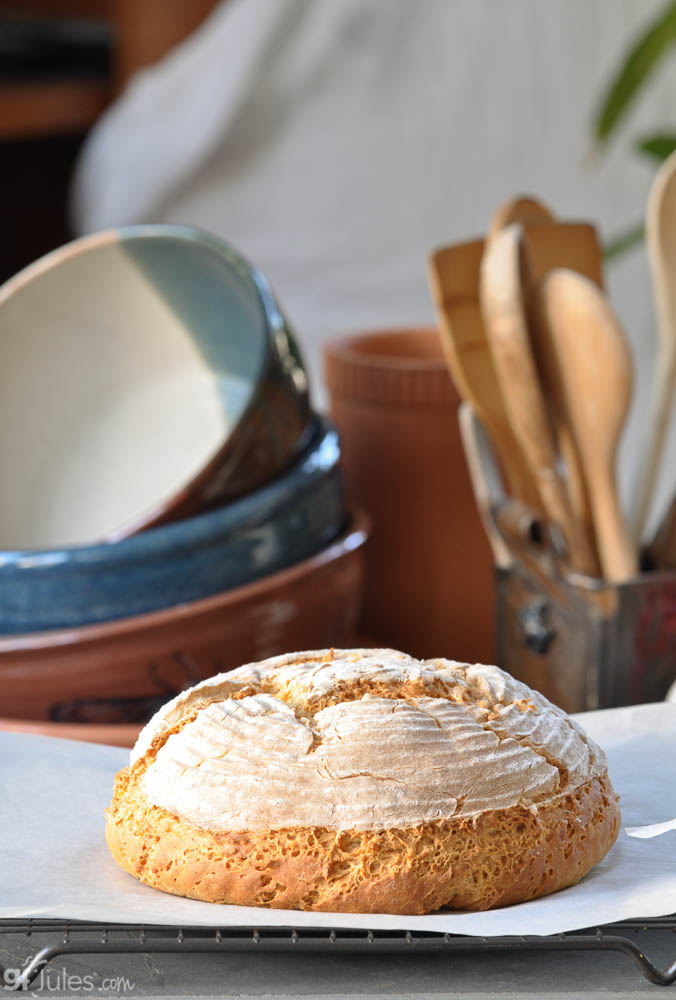
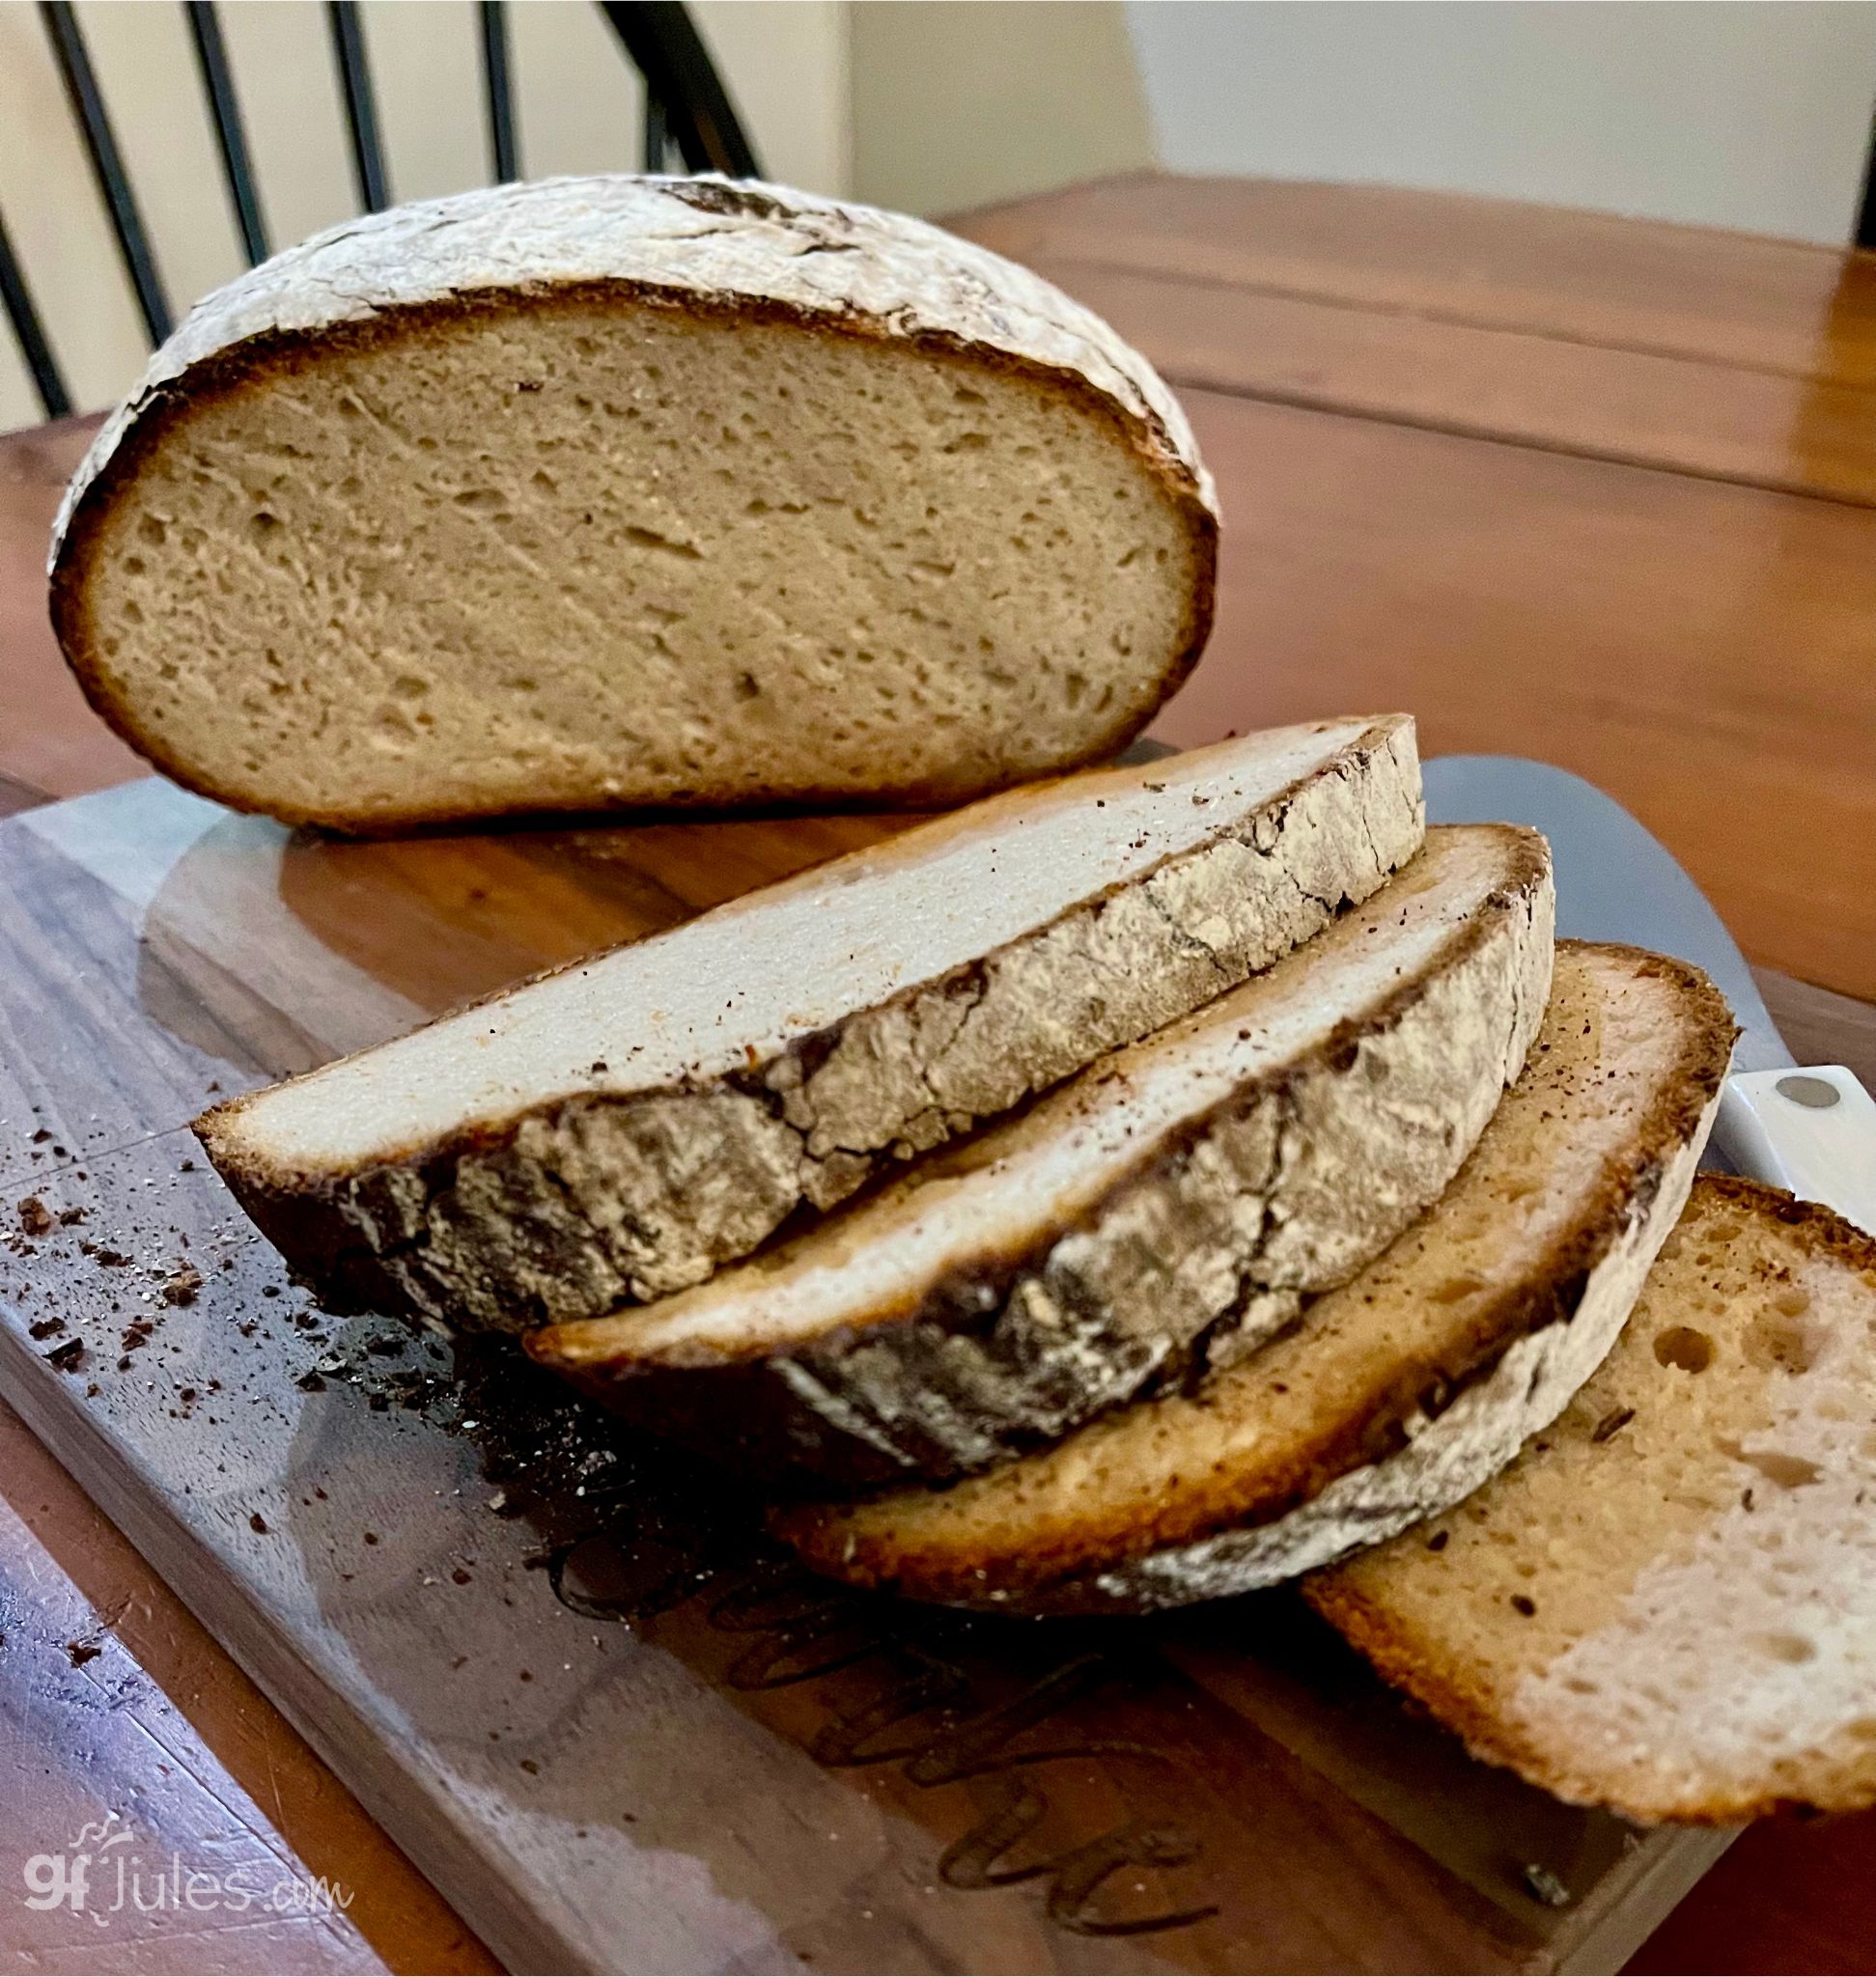
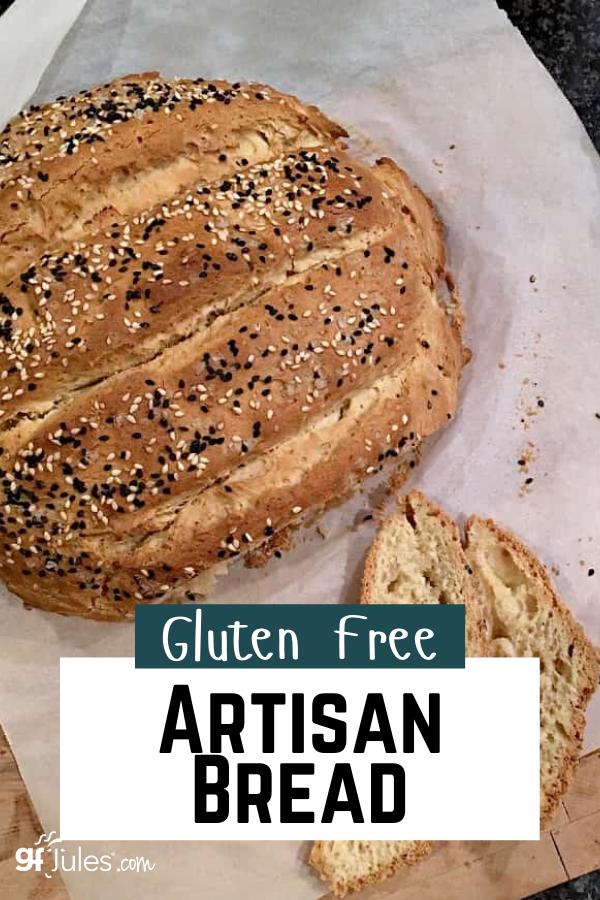
Every time you bake this gluten free artisan bread, it will take its own shape. It’s part of the beauty of this bread. No two breads will ever look alike, nor should they. Like snowflakes, they’re each unique and beautiful.
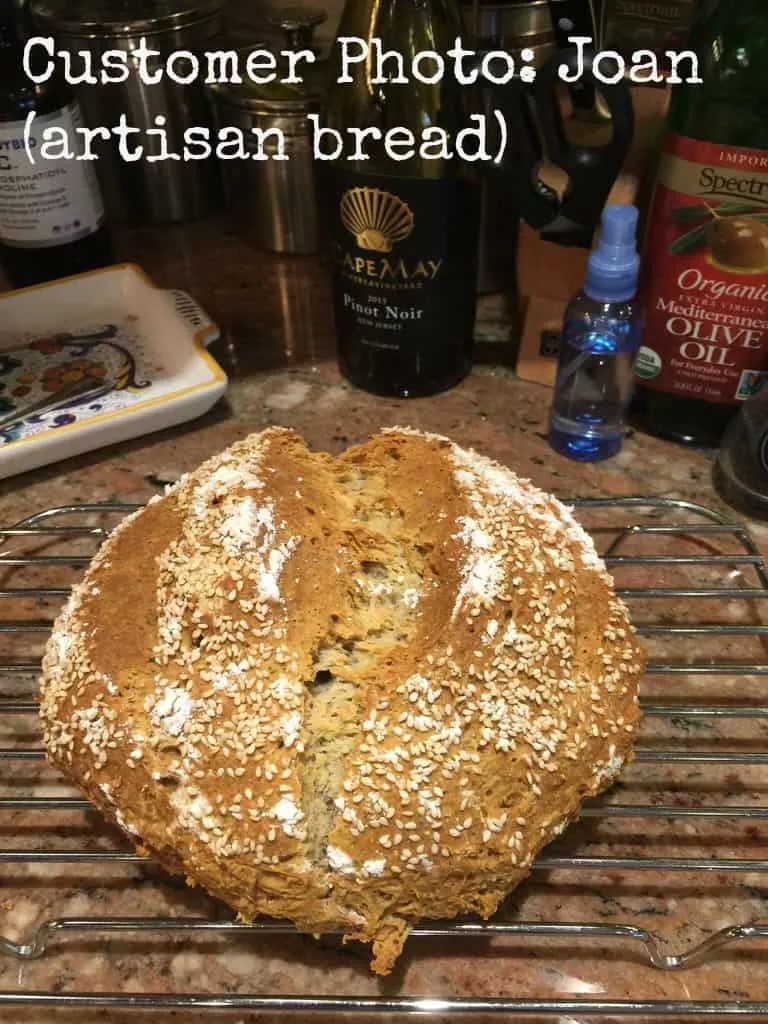
Here’s a picture of one reader’s lovely loaf. See, you can do it, too!
I can’t stop taking pictures of these loaves because every time they’re show-stoppers.
Check out the video below to watch me make gluten free artisan bread in a springform pan in case you don’t have any of these other options … so you know just how easy it is!
NOTE: my gfJules Gluten Free Bread Mix is now UPDATED and stays soft and fresh even longer! It also does NOT require a springform pan for rising in this recipe, although I love the look of it after rising in a banneton proofing basket!

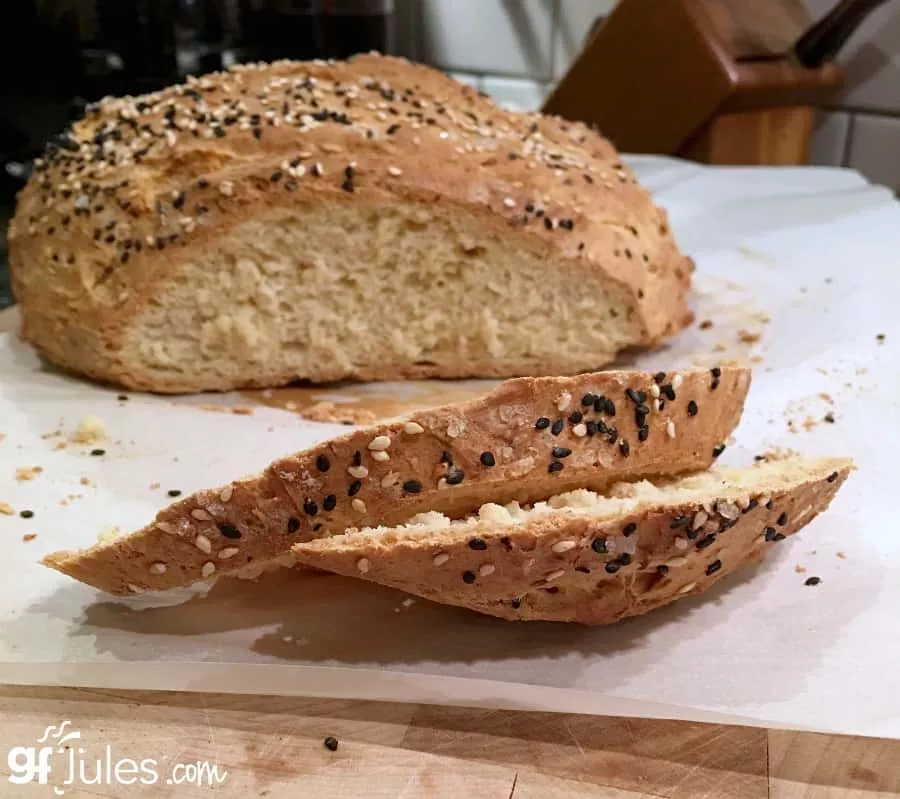
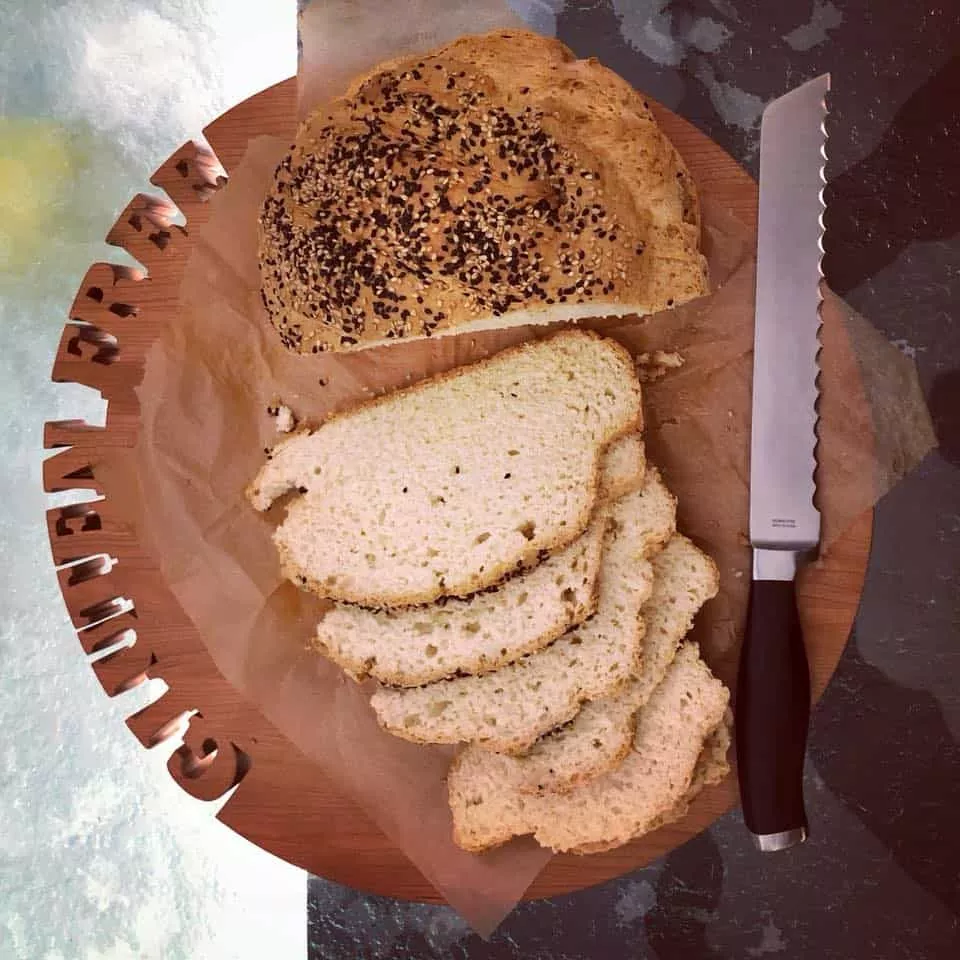
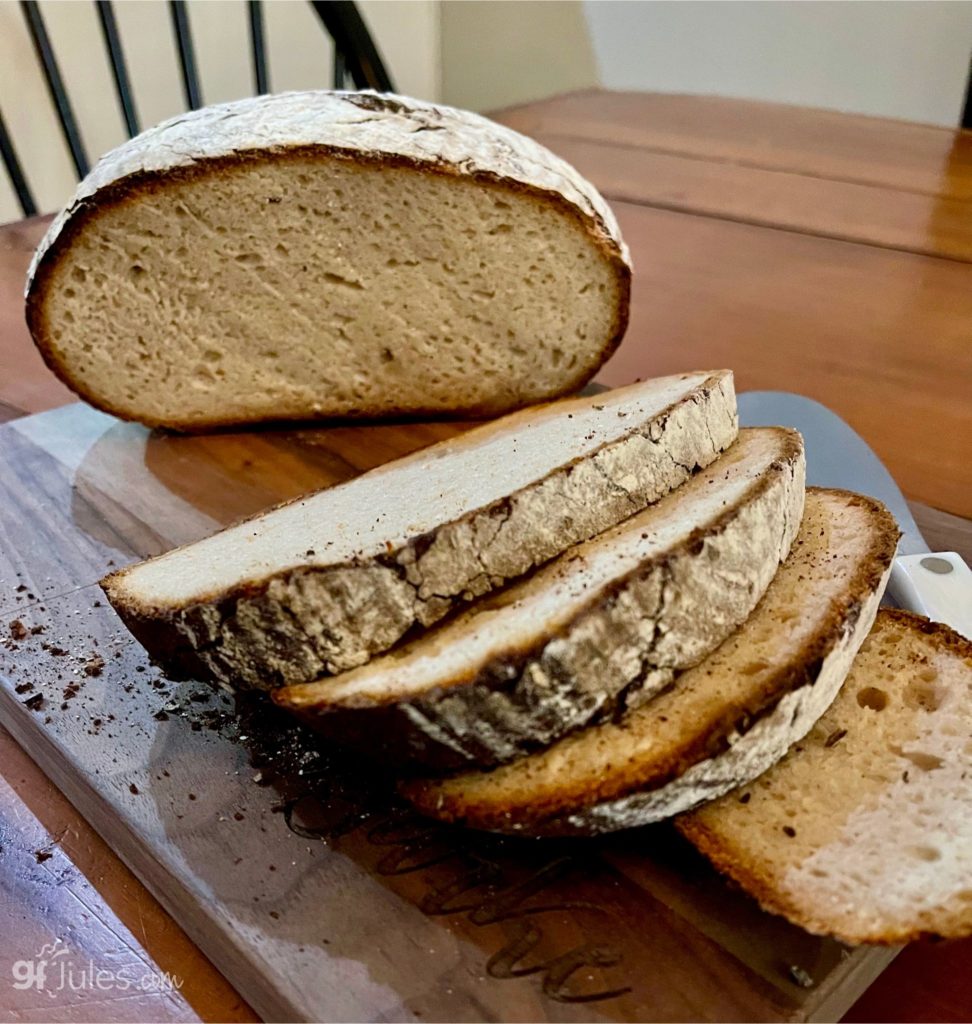
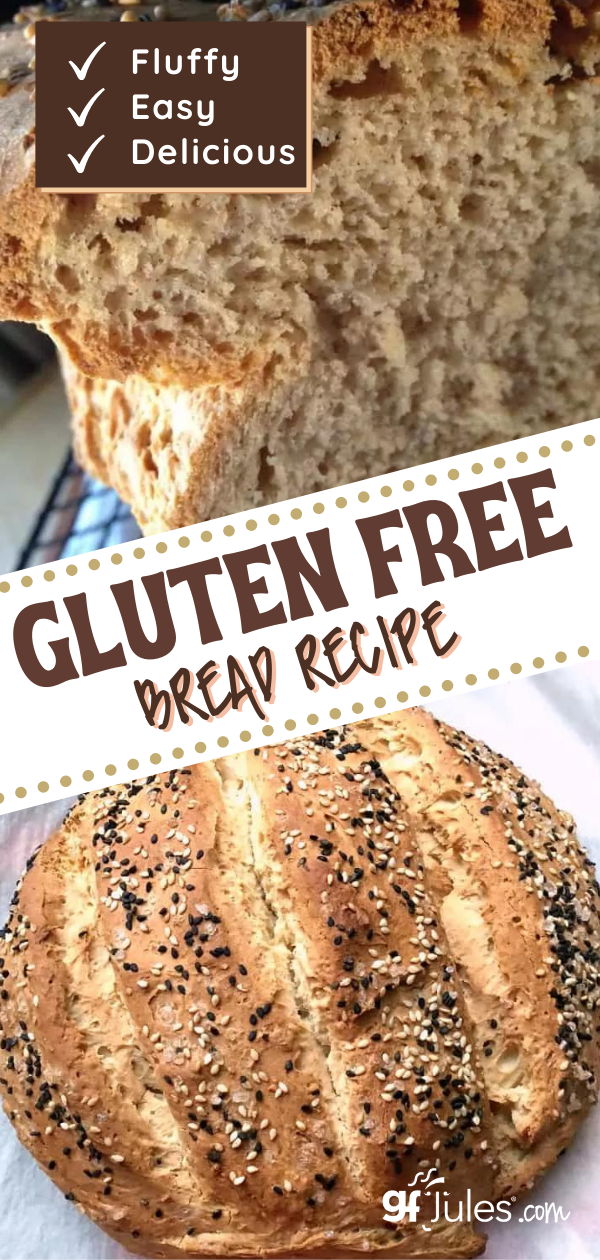
Here’s a look at it sliced. This bread, as baked is vegan (egg-free), but feel free to add an egg or two if you prefer a more open cell structure.
Gluten Free Artisan Bread Recipe made with gfJules Bread Mix
Gluten Free Artisan Bread Recipe made with gfJules Bread Mix
Equipment
Ingredients
PLUS
- 2 1/4 tsp quick rise yeast 1 packet like Red Star
- 4 1/2 Tbs. sugar 56 grams or sugar sub OR 3 Tbs. honey or agave or maple syrup
- 1 3/4 cups warm water OR bubbly liquid like GF beer or ginger ale or 1 1/2 cups water + 1 large egg
Instructions
- In the large mixing bowl of a stand mixer or just a mixing bowl, stir together the liquids with gfJules Gluten Free Bread Mix, yeast, and sugar by pouring slowly into the bowl while mixing with the paddle attachment. Beat well – 2-3 minutes.
- Dust a pastry mat or clean counter with more gfJules Flour and transfer the dough onto the surface, rolling gently in the flour to cover all sides. Knead to form a smooth ball.
- Transfer to a proofing basket (as pictured), bowl or oiled parchment-lined glass bowl.
- Cover loosely with a warm, damp tea towel or piece of oiled parchment paper and place in a warm spot to rise for 30 minutes - 1 hour.
- Preheat oven to 475º F (static) or 450º F (convection).
- Gently transfer to a parchment-lined baking sheet (flip so that the bottom of the proofing basket is the top of the bread). Remove proofing basket or bowl and dust with more gfJules Flour.
- Wet a large serrated knife or use dough lame and cut into the bread across the top or use the lame to cut into the bread in a decorative pattern. This will give the bread natural rifts to rise from, and make it even prettier once baked.
- Bake for 30-35 minutes on a lower rack, placing another baking pan on the rack below with ice cubes, testing with an instant read thermometer to ensure it's fully baked before removing from the oven. The thermometer should have reached 205º F. If the top of the bread is getting too dark, cover with foil.
- Remove to cool on a wire rack (at least 20 min) before slicing or the bread may get rubbery when pushed down upon while slicing.
** Please keep in mind that nutrition information provided is per serving, which may vary. While we have taken care to provide you with the most accurate nutritional values possible, please note that this information may differ significantly depending on the exact ingredients and brands that you choose to use to make this recipe. Additionally, where options are given for ingredients, the resulting calculation may include all ingredient options instead of only one per line, skewing the totals significantly.
Recommended Products
Any links to Amazon may earn me a small amount from qualifying affiliate purchases; this amount goes to fund this blog and does not cost you anything additional.
Gluten Free Artisan Bread Recipe from Scratch with gfJules Flour

Gluten Free Artisan Bread Recipe
Equipment


Ingredients
- 3 (405) cups (grams) gfJules® Gluten Free All Purpose Flour
- 1/4 cup flax seed meal or gfJules Gluten Free Multigrain Baking Flour
- 1/4 cup dry milk powder dairy or non-dairy (e.g. Coconut Milk Powder) - preferred - OR almond meal (in a pinch)
- 1/2 tsp. baking soda
- 2 tsp. baking powder
- 1 tsp. sea salt
- 1 tsp. apple cider vinegar
PLUS:
- 2 Tbs. honey agave nectar or coconut palm nectar
- 1 1/4 cup room temperature liquid: EITHER plain yogurt* OR milk not skim OR sparkling water OR ginger ale OR gluten free beer (bubbly liquids make the bread rise higher and lighter but will need support from a bowl to rise and partially bake - see intro before recipe card)
- 1/4 cup extra virgin olive oil
- 2 large eggs OR 2 Tbs. flax seed meal steeped for 10 minutes in 6 Tbs. hot water
- 2 1/4 tsp. one packet rapid rise or bread machine yeast, gluten-free (Red Star Quick Rise®)
toppings (optional):
- flaxseeds or sesame seeds
- coarse sea salt
- egg mixed with 1 Tbs. water to brush onto crust for darker color optional
- oil to brush on top
Instructions
- Whisk these dry ingredients together in a large bowl: flours, milk powder, baking soda, baking powder and salt. Set aside.
- In the large mixing bowl of a stand mixer or just a mixing bowl, stir together the wet ingredients (honey, yogurt, apple cider vinegar, oil, and egg or flax seed and water mixture). Gradually add the dry ingredients in with the wet by pouring slowly into the wet bowl while mixing with the paddle attachment. Once incorporated, add the yeast granules, and beat well – 2-3 more minutes.
If baking with yogurt:
- The dough will be very thick (much more like regular wheat flour bread dough than you may be used to with gluten free); however, if the dough seems too thick or dry, gradually mix in milk, one tablespoon at a time, until the dough is still thick, but able to be smoothed with a spatula.
- Liberally dust a pastry mat or clean counter with more gfJules Flour and transfer the dough onto the surface, rolling gently in the flour to cover all sides. Knead slightly, if necessary, to form a smoother ball.
- Transfer to a proofing basket, bowl or oiled parchment-lined glass bowl.
- Cover loosely with a piece of oiled parchment paper and place in a warm spot to rise for 30 minutes - 1 hour.
- Preheat oven to 350º F (static) or 325º F (convection).
- Gently transfer to a parchment-lined baking sheet.
- Brush with egg wash or oil, then lightly dust the top with more gfJules Flour.
- Wet a large serrated knife and press into the bread in 2 or 3 lines 1/2 inch deep, rocking the knife back and forth to open the cuts slightly wider or use a lame to cut into the bread in a decorative pattern. This will give the bread natural rifts to rise from, and make it even prettier once baked.
- Spritz with water once risen, if you prefer an even crunchier crust.
- Place an oven-safe bowl or pan on the bottom shelf of your oven and fill with ice cubes. The steam from melting ice cubes will help your bread get even crustier!
- Bake for 30-40 minutes, testing with an instant read thermometer to ensure it's fully baked before removing from the oven. The thermometer should have reached 200º F.
- Remove to fully cool on a wire rack.
If baking with another liquid:
- The dough will be more batter-like, so it still needs some support while rising and baking. Choose an oven-safe deep, round pan or bowl, pyrex, or even a springform pan. Line with oiled parchment and transfer the dough to the pan, smoothing the top with a wet spatula and mounding it more in the middle of the pan rather than flattening it out.
- Cover loosely with a piece of oiled parchment paper and place in a warm spot to rise for 30 minutes - 1 hour.
- Brush with egg wash or oil, then lightly dust the top with more gfJules Flour.
- Wet a large serrated knife and press into the bread in 2 or 3 lines 1/2 inch deep, rocking the knife back and forth to open the cuts slightly wider or use a lame to cut into the bread in a decorative pattern. This will give the bread natural rifts to rise from, and make it even prettier once baked.
- Spritz with water once risen, if you prefer an even crunchier crust.
- Preheat oven to 350º F (static) or 325º F (convection).
- Place an oven-safe bowl or pan on the bottom shelf of your oven and fill with ice cubes. The steam from melting ice cubes will help your bread get even crustier!
- Bake for approximately 15 minutes, then lift up on parchment and remove the bread from the pan. Lay parchment with bread on top of a flat baking sheet. Otherwise, leave dough inside the pan for support.
- Bake for 20-25 more minutes, testing with an instant read thermometer to ensure it's fully baked before removing from the oven
- Depending on the size of the pan used, and therefore the height of the loaf, it may need to cook longer to be fully done. The thermometer should have reached at least 200º F.
- Remove to full cool on a wire rack for 10 minutes.
Video
Notes
** Please keep in mind that nutrition information provided is per serving, which may vary. While we have taken care to provide you with the most accurate nutritional values possible, please note that this information may differ significantly depending on the exact ingredients and brands that you choose to use to make this recipe. Additionally, where options are given for ingredients, the resulting calculation may include all ingredient options instead of only one per line, skewing the totals significantly.
Recommended Products
Any links to Amazon may earn me a small amount from qualifying affiliate purchases; this amount goes to fund this blog and does not cost you anything additional.
No matter which liquid you choose, no matter which rising method, be sure to use my award-winning gfJules Flour or Bread Mix for the absolute best results.
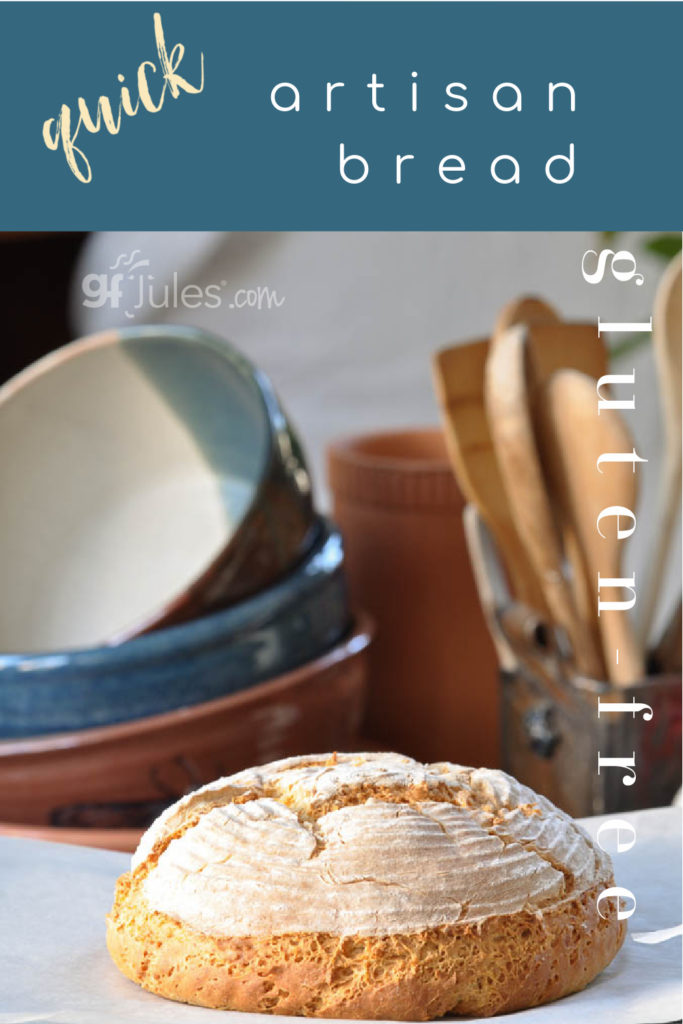
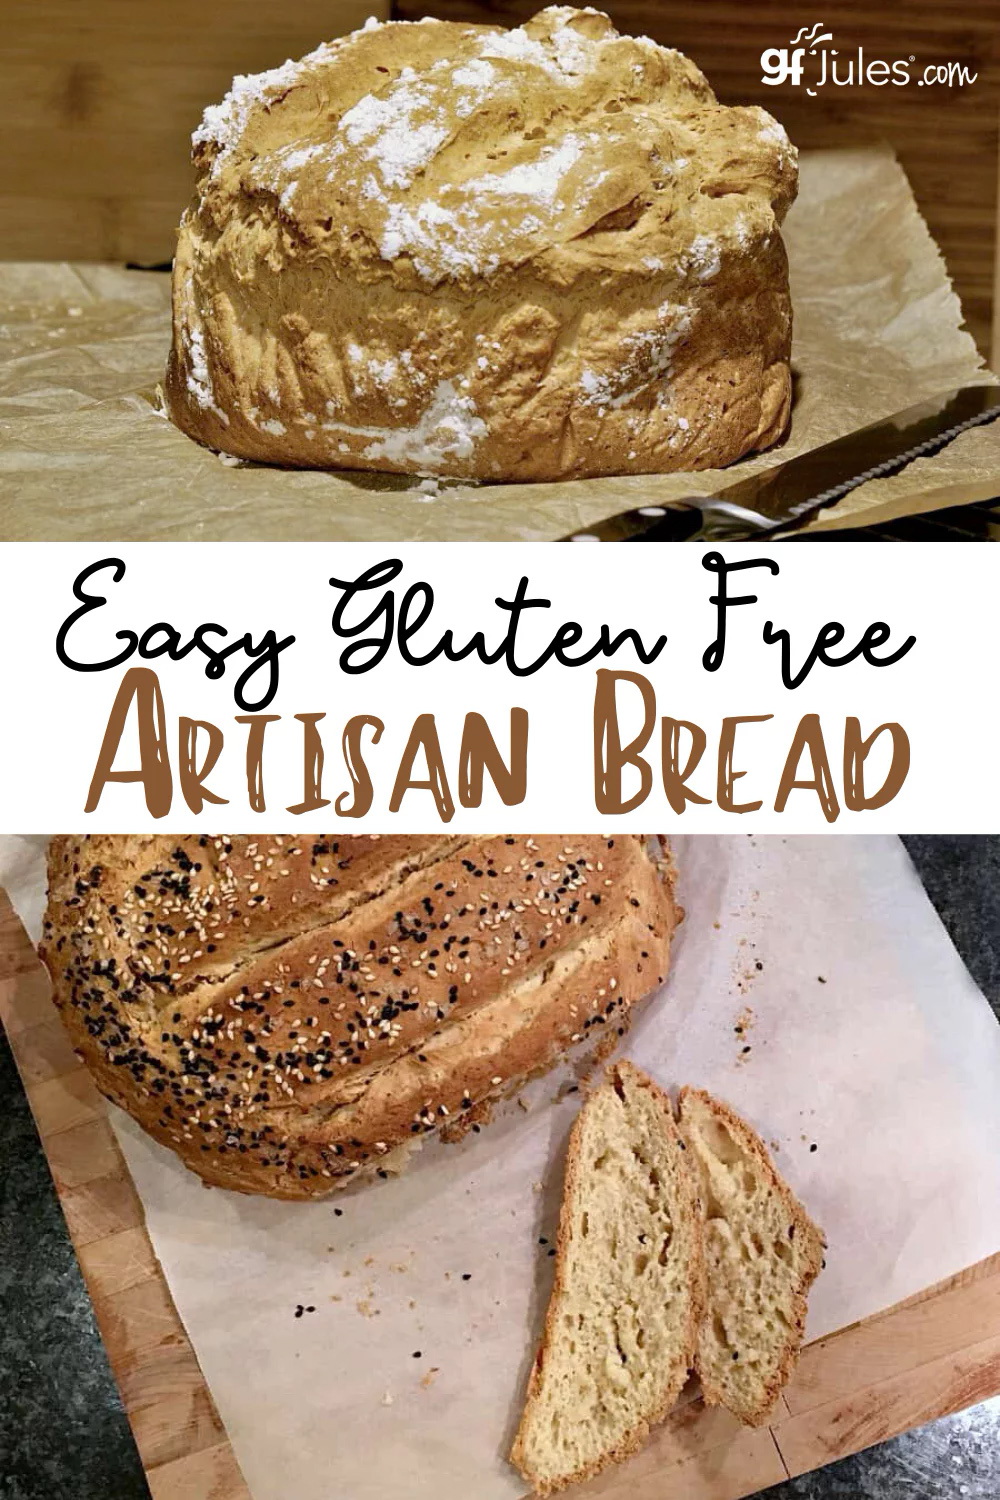
Pin for later!


Super delicious and easy to make vegan following your instructions! Thank. you:)
SO glad you loved it!!!
~jules
Can you make this in a bread machine?
Hi Joy, this delicious gluten free bread can absolutely be made in a bread machine. It won’t be the same shape or be as crusty, but the texture of the bread inside will still be wonderful! Here are directions for making this gluten free bread recipe in the bread machine and general tips for baking gluten free bread in a bread machine.
~jules
hi…! I do not use dairy so how can I replace the ” powder milk ” ?
there is no “powder soy or oat milk ”
I can’t wait to try. Just heard that to avoid inflammation of joints one needs to stop eating regular bread because of the gluten..
thank you @
Corinna
Hi Corinna, I have linked to a potato-based milk powder in the recipe, or you could use coconut milk powder. Hope that helps!
~jules
Hi Jules, I’m getting ready to make this delicious bread, and I’m realizing I only have ground chia seeds and not flax meal…… I’m wondering if the ground chia seeds will work in place of the flax?
Hi Nicole, while I haven’t tried it myself in this recipe, chia generally works well as a sub for flaxseed meal. You could also sub with another whole grain gluten free flour instead, if you like. Hope you love the recipe!
~jules
I did not have the your flour so I used gf almond flour. Also used the ginger ale option. The dough was soupy, so I added 2 more cups of almond flour, but dough was still too wet. I had to break down and add a full cup of regular bread flour. The dough did not rise after an hour but it was a sizable chunk of dough (since I had added so much more flour). It rose a little during baking. It was nicely crunchy on the outside and a little moist on the inside. I told my friends about the wheat flour, and most were willing to give it a try. It was quite tasty.
If it requires a specific brand of gf flour, you might state that up front. I’d like to try it again.
Hi Janet, my gfJules Flour is highly specialized for recipes like this, and all my recipes are developed using it (the ones which call for flour, at least!). No matter what flours you’re using, it’s never a good idea to just switch out and use something like almond flour in place of a blend, especially not mine. Almond flour is totally different and I wouldn’t expect it to have worked in this recipe. Here’s an article on different gluten free flours which explains how different each flour is and why they are not interchangeable. I hope it helps you understand what went wrong with the switch you made and gives you hope for much better baking outcomes in the future!
Also, I’m not sure your reason for baking gluten free, but I hope you never feel like you have to add wheat flour to a gluten free recipe, again! If you’re gluten free for health reasons, there’s no reason to jeopardize your health by eating wheat again. No matter how much you feel a recipe is failing!
~jules
Thx for the info on gf flours. I’m trying gf for interest, not requirement. And I live remotely so it was either salvage as best as I could or throw it out (YIKES!). It was tasty, but I hope for a better outcome next time.
Don’t use almond flour when it calls for gfJules.
Jules does indicate you need to use a Gluten Free flour BLEND.- specifically GF JULES ALL PURPOSE FLOUR BLEND or her sandwich flour blend .
You can’t replace a Gluten Free flour blend with almond flour – it just won’t work. If you supstituted Better Batter GF flour , or Bob Redmill all purpose GF baking flour, it would have worked. You need to use a blend of certain Gluten Free flours specific to their protein or starch makeup, for baking to work properly.
(Also adding regular gluten flour to your dough pretty much defeats the purpose of Gluten Free baking )
You might want to do some reading about how to bake Gluten Free & about different Gluten Free flours.
Hey Jules. I tried this recipe with an overnight rise because I like sourdough and I figured it would give time for the yeast to create that flavor. That part worked, but the dough rise to triple the size and then collapsed after I took it out of the oven. Any advice?
Yep, the sourdough flavor would come through with an overnight rise and milk as ingredient. Perhaps you need a pan with high sides next time for support? Or you can always do a slow rise (covered) in the fridge to build the flavor but not the extreme rise. I wouldn’t cut back on the yeast if you can help it, as it lends that wonderful yeasty flavor and aroma. Let me know how that works out!
~jules
Would I be able to substitute your flour for any existing cookie or cake recipe I have? Is it a cup for cup substitute?
Hi Patricia, yes! You can use my gfJules Flour in any recipe calling for regular all purpose flour or even cake flour. There’s a lot more info in this article about successfully converting recipes to gluten free. Check it out and let me know if you have any other questions. Happy Baking!
~jules
Wow! This is a gorgeous loaf. Just pass me the butter! Everything I have made with your flour turns out perfect.
Oh Leslie that makes me so happy to hear!! YAY!
~jules
Hi! I love your flour! I just made this and it turned out wonderfully. Is there any way to make multiple batches of dough and freeze or refrigerate them?
Hi Crystal, you should be able to double this recipe if your mixing bowl is large enough and your mixer can handle it. I wouldn’t recommend doubling it if you’re mixing by hand, though. Freeze the dough and allow it to thaw then rise and bake as the recipe is written. Let me know how it goes!
~jules
Hi, I haven’t tried this yet,….but wondering….Do I still add yeast if using your bread mix? thanks
Hi Trish, my gfJules Bread Mix comes with a yeast packet that you would add when making this recipe. Enjoy!
~jules
I just made my first ever homemade GF yeast bread with this recipe!
This worked great using tonic water for the liquid, but it did take 3-4 hours to rise properly, so my guests had gone home before the bread went into the oven. However, I had made a loaf of glutenous French bread also, so they ate that, and I had an incredible late night snack!
Sounds like you made the best of it (and got to enjoy the whole loaf yourself!). Next time know that you don’t need to let it rise that long — most of the rising actually comes during the bake. It doesn’t hurt to let it rise, but you don’t have to wait around if you’re in a hurry. Happy baking!
~jules
I can’t wait to try it again, and I won’t wait for it to double in size!
Even easier, right Barbara? 🙂 Enjoy!
~jules
Hello, interested in your bread recipe as this is all new for me (eating gulten free) and was wondering if I could mix in whole grains for that multi grain bread that I can no longer have.
Hi Ginger, if you plan to follow my recipe, I would suggest adding some seeds for more of that whole grain texture. Sunflower seeds, chopped pepitas … that kind of thing. They taste delicious in this bread, and it will still be light enough and have delicious texture and chew. Enjoy!
~jules
Can I substitute something else for the dry milk.
Hi Jean, you could use almond meal or dried potato flakes as another option. Even easier is to just use my gfJules Gluten Free Bread Mix next time!
~jules
It’s ashamed bc I tried this recipe- unfortunately you can’t buy this specific mix in the store and so when you substitute it totally fails.
Aw, I’m sorry you didn’t have success with another blend. Here’s a link to purchase my gfJules Flour on-line and we deliver right to your door!
~jules
Hey!
I’m just about to put the bread in the oven – lol! I’m baking it on a baking sheet with no edges around it, will it puff up? Also, when I wrapped it, it didn’t rise, is that supposed to happen? Thanks 🙂 let me know!
Hi Indiana, sorry I’m just now seeing this. How did it turn out?!!
~jules
I’ve tried your recipe twice with the beer, but both times my bread has not risen… It’s almost a flat bread. What might be the problem?
Hi Brandy – are you using my gfJules Bread Mix or my gfJules Flour to bake from scratch? Are you rising it with a form around it or just letting it sit on the parchment-lined sheet to rise?
~jules
I’ve tried this recipe twice now and it is amazing!!! I even messed up a little the first time (used seltzer but followed some of the yogurt instructions and totally overworked it). I didn’t even realize I’d made a mistake until I was making it a second time because it rose and was delicious! This time I used a dry hard cider and made sure not to overwork it, and it puffed up SO beautifully. I put “everything” seasoning on it and it is absolutely delicious!! I already can’t wait to make it again with other spices and toppings.
Also, I’ve made so many gf breads over the years and my bread maker always made it the best, so I stopped trying to make it by hand. But this took a lot of the fun out of baking bread! Until I found this artisan recipe, which is the perfect balance of involved and easy 🙂 Thank you!!
Oh Jules, I’m so happy to hear you didn’t give up and were eager to try the recipe again! I love hearing that you’re excited to bake more bread!!!
~jules
Dear Jules, thank you so much for this spot on recipe. I am new to baking, healthy clean foods and all thas. Since i dont know how a good dough should look like half the time things dont turn out as supposed for me 🙂 This recipe is great! I like the way you explain everything and point substitutions. The bread is so delicious ???? i cant believe it turned out so yummy. I wish i could’ve shared a picture.. so proud and happy.
I used 2 eggs, Milk what ive got(Half goat’s half cashew) 2/3 Gluten free all purpose flour (here in the UK im not familiar with the brands usualy listed in recipes:/ ) and 1/3 Coconut flour
My loaf is more yellow and didnt pop up like tours but still it risen and is absolutely delicious!
My search for a good healthy bread recipe is over 🙂 Thank you sincerely!
That makes me so very happy to hear, Veselina! Thank you so much for taking the time to let me know that my recipe and directions are helpful. Baking homemade, truly delicious (now gluten free) bread is one of life’s great joys!
~jules