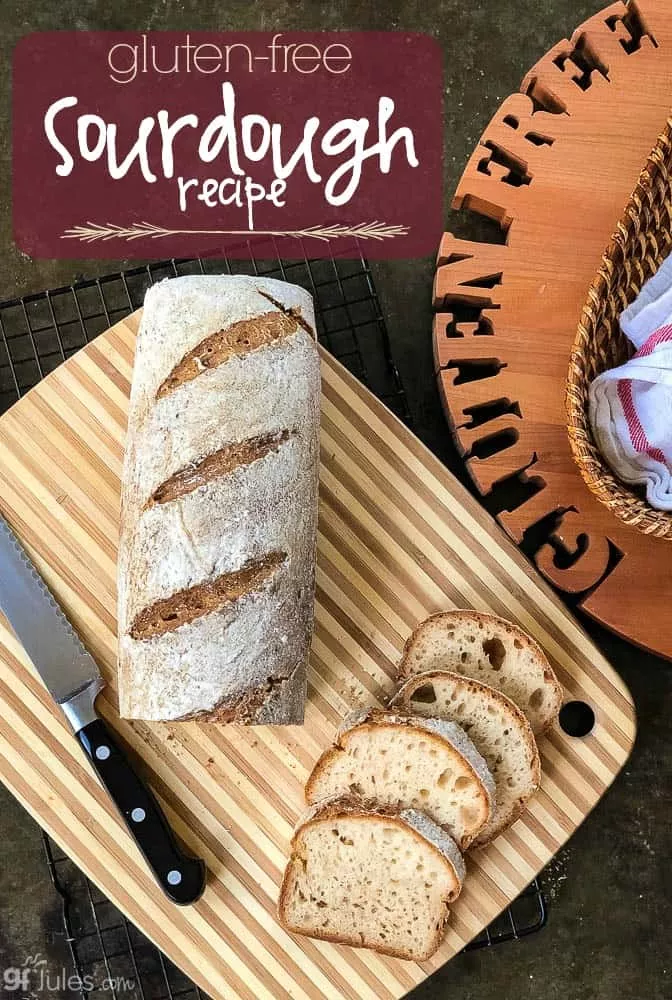
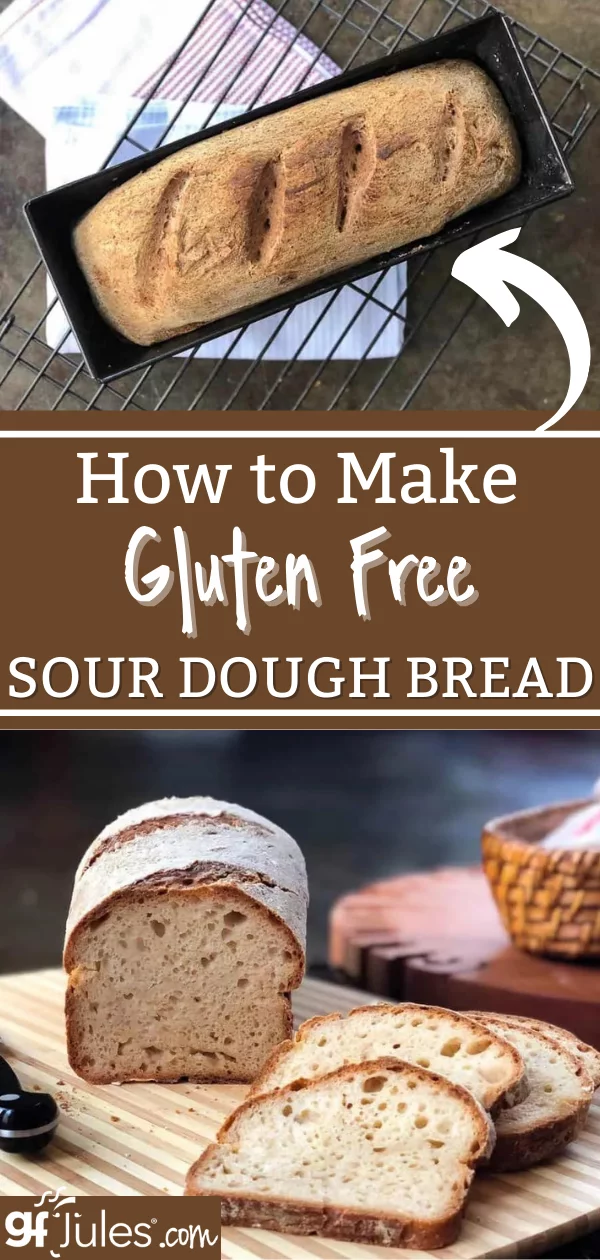
Sourdough is the most popular bread right now, and just because we’re gluten free doesn’t mean we’re left out of the fun! Isn’t it lovely to know that you, too, can bake a lovely gluten free sourdough in nearly any kind of pan, any time you like?
Expert Gluten-Free Sourdough Tips
Years of gluten-free sourdough experimentation and feedback from the gluten-free baking community have gone into formulating this base gluten-free sourdough recipe and these tips. You should be able to find all your gluten-free sourdough questions answered here, along with the best gluten-free sourdough recipe! So sit back with a cup of your favorite beverage and enjoy reading through all the information gathered here for your perusal.
Some things are the same about making gluten free sourdough bread as they are with making any other gluten free bread. There’s no kneading the bread and stretching the gluten because there’s no gluten! But as with other sourdoughs, you do need to make a starter. REGULAR SOURDOUGH STARTER IS NOT GLUTEN-FREE and is not safe to use for making gluten-free bread. (Regular sourdough bread is not gluten-free either.)
Follow my recipe for making homemade gluten-free sourdough starter first, then pop back here to start making your own gluten-free sourdough breads anytime you like!
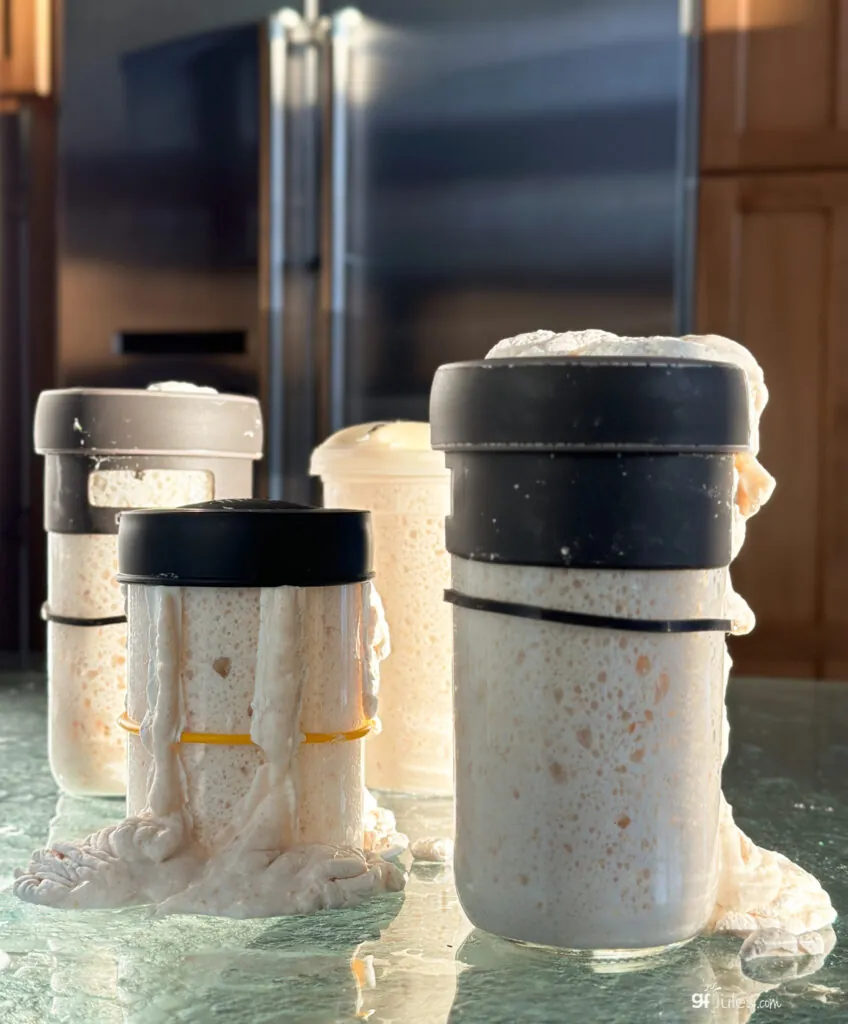
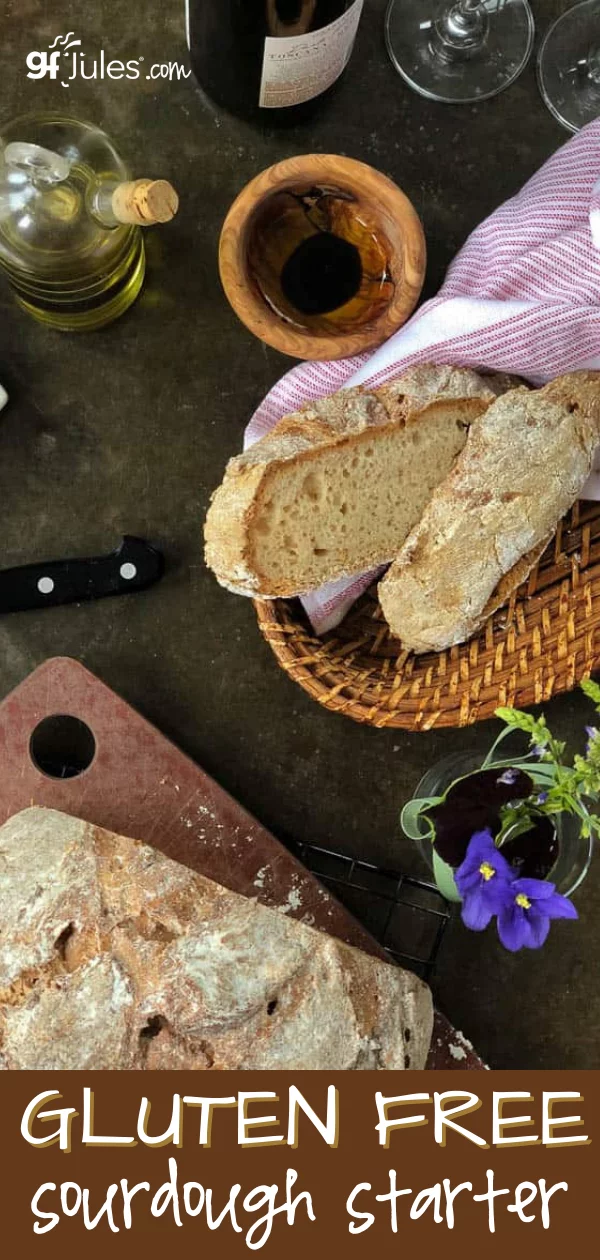
Here’s how to make your very own gluten free sourdough starter!
For those who love and miss sourdough, take heart! The art of making sourdough isn’t lost without the gluten. There’s still a lot of feeding, caring and waiting for the sourdough starter to mature and bloom into all its potential. But for those new to sourdough, don’t be put off by the process. While there are more steps to making gluten-free sourdough than regular gluten-free breads, it’s not difficult, and it’s so rewarding!
Also, to make things even easier, I highly recommend skipping the trouble of gathering loads of different flours — just use my gfJules Gluten Free All Purpose Flour or gfJules Multigrain Baking Flour (or even my gfJules Bread Mix) — and sit back to watch the magic happen.
I urge you to hang in there and read through my entire post, as I outline what has worked best and what has not worked best through years of sourdough experiments.
There are definitely some tricks of the trade, including how to get your gluten free sourdough to be sour!
What’s the Best Gluten-Free Flour for Sourdough?
In anticipation of many questions to come, this recipe and process was developed using my gfJules Gluten Free All Purpose Flour and gfJules Gluten Free Multigrain Baking Flour because they work, I can rely on them every time, using these blends makes it easy, and they don’t have funky taste or any grit.
If you want bread as pictured, use the ingredients I used. If you try this recipe with a bunch of other gluten-free flours or another blend, it really may not work. But if you do, please don’t leave comments about how it didn’t work, because I’m telling you so before you waste your time.
Gluten free flours are tricky business. It took me two years to develop my original blend way back in 2003 (I’ve been gluten free since 1999!) and I’ve been tweaking and improving it ever since. Just because you think you can read ingredients and intuit how much of anything to use or to buy something off the shelf that sounds similar … you can’t. It won’t be the same, and the results won’t look like those pictured.

Not to belabor the issue, but tenths of a percentage point difference in proportions and a different brand or country of origin for any given ingredient are things that can make huge changes in outcomes. It amazes me all the time how tiny variances make big differences.
Which is why I developed my gfJules Flour to begin with. Selfishly, I didn’t want to have to make it in my kitchen every time I baked! And unselfishly, I wanted to prevent fellow gluten-free bakers (and newbies to gluten free baking) from having to mess around with mediocre flours only to achieve mediocre results.
In the process of developing this gluten free sourdough recipe, I learned that my Gluten Free Multigrain Baking Flour is the PERFECT flour for sourdough starter. It goes crazy for it! So if you’re looking for the easiest way to get to gluten free sourdough nirvana, arm yourself with just two gluten free flour blends: gfJules Gluten Free All Purpose Flour and gfJules Gluten Free Multigrain Baking Flour. It’ll make your sourdough baking so much easier!
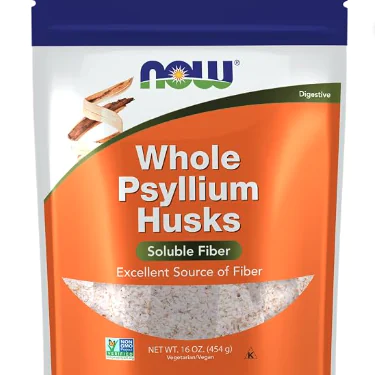
I’ve also recently done some testing to determine whether psyllium powder or whole psyllium husk is a better ingredient for making sourdough. I’ve come to the conclusion that whole psyllium husk is the better ingredient. I’ve linked a quality gluten-free psyllium husk ingredient for you here and in the recipe.
For more help with gluten free bread baking, in general, hop to my 18 Top Gluten Free Bread Baking Tips.
Baking Gluten Free Sourdough — What’s the Best Pan?
There are many different options when it comes to baking your gluten free sourdough bread.
Artisan Style Gluten Free Sourdough Bread Method – Dutch Oven and Baking Sheet
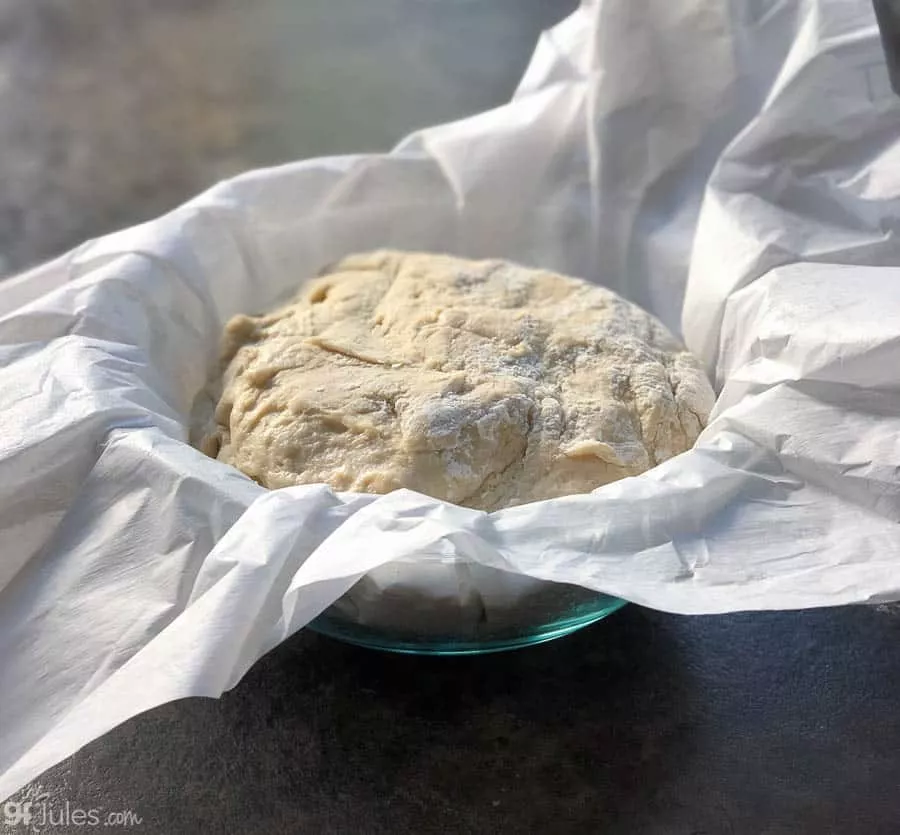
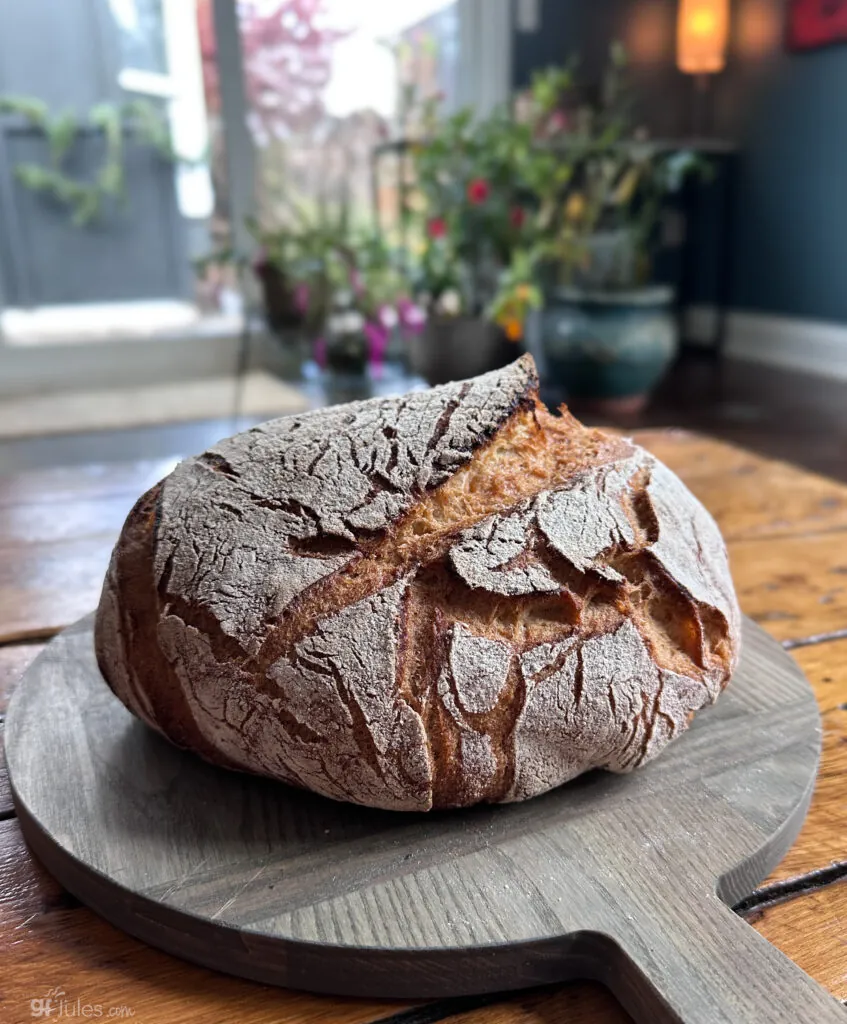
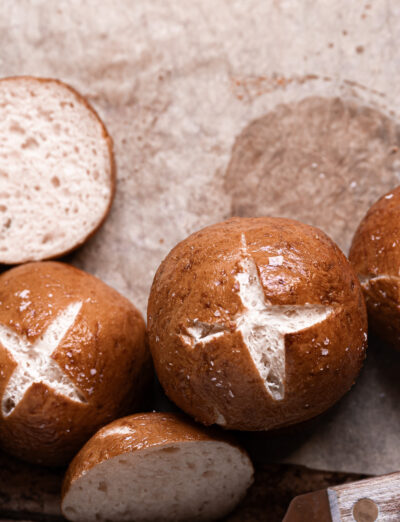
For an artisan-style boule, I prefer lining a banneton (proofing basket) or large glass bowl with oiled parchment sprinkled with more gfJules Flour to support the bread as it rises.
Once risen, I simply lift up on the parchment and lay it out onto a baking sheet for the bread to bake, or put it into a Dutch Oven, or slide onto a baking steel and cover with a baking shell.
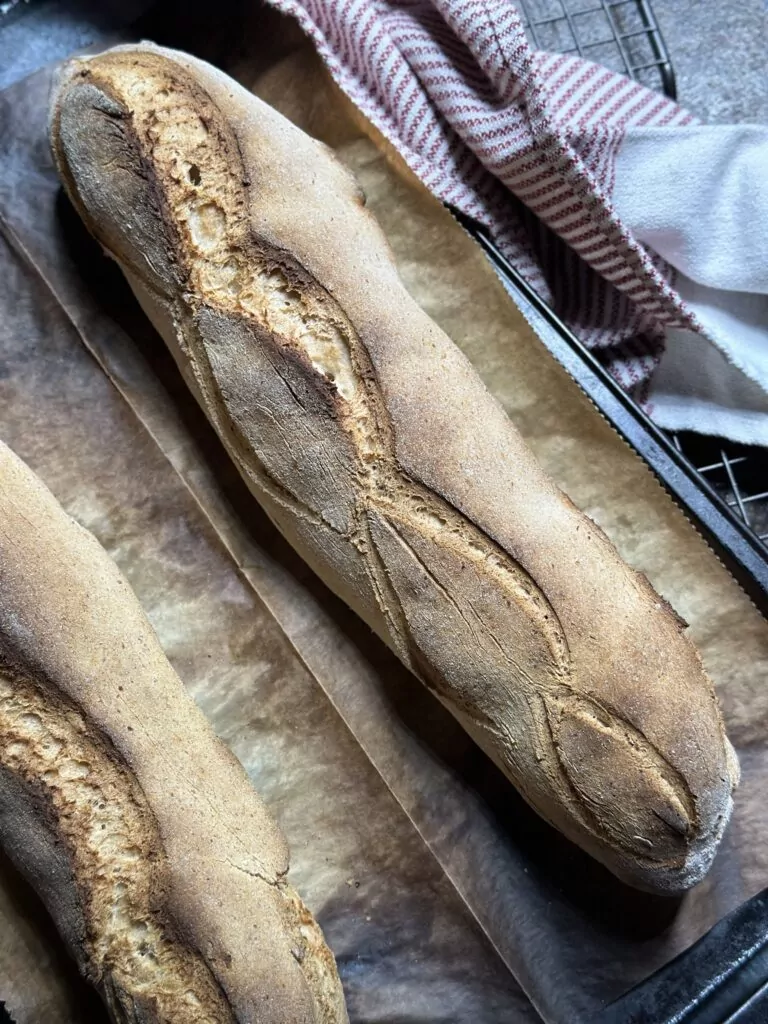
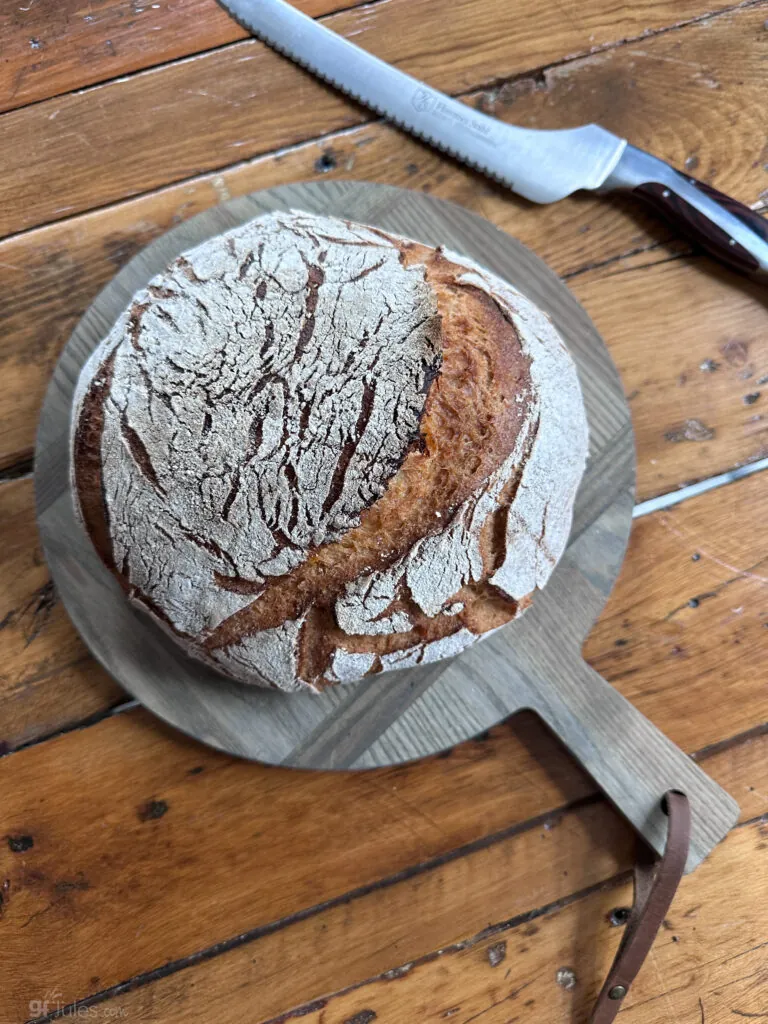
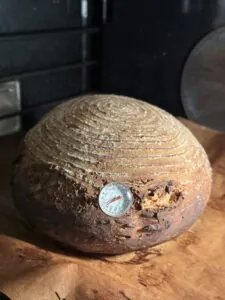
Here’s the loaf baked on a baking sheet.
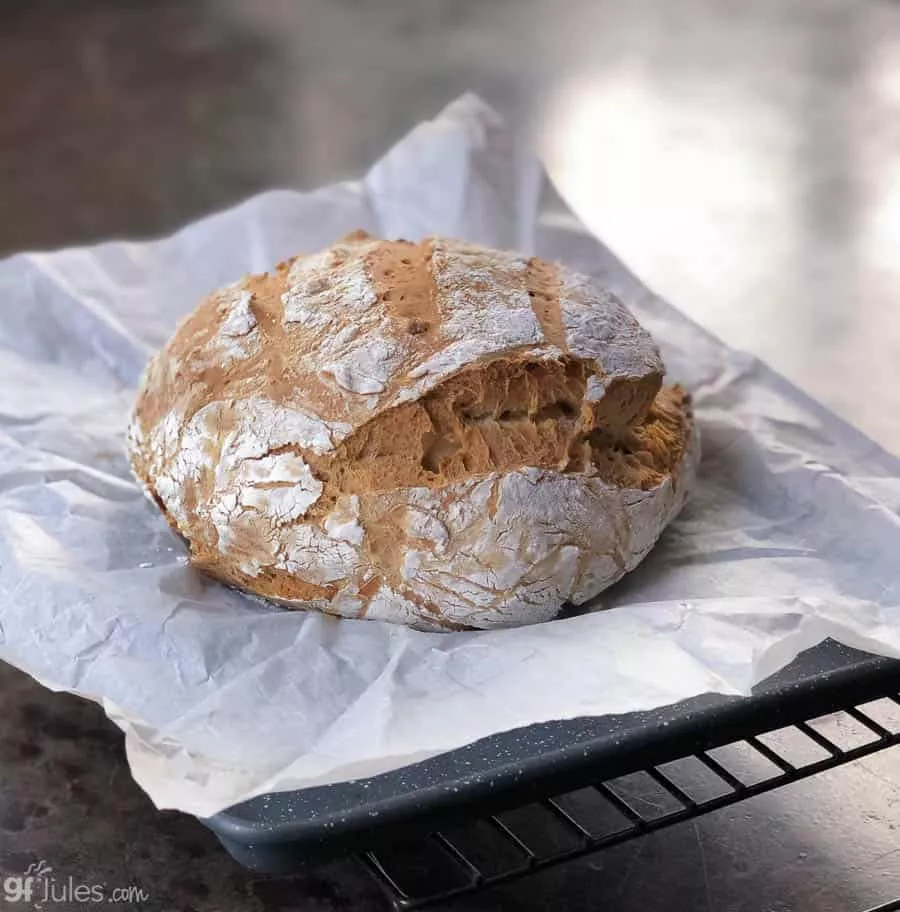
The bread will take more of a free-form shape, but it’s really beautiful and impressive!
Here’s gluten free sourdough baked in a 6 quart Dutch Oven.
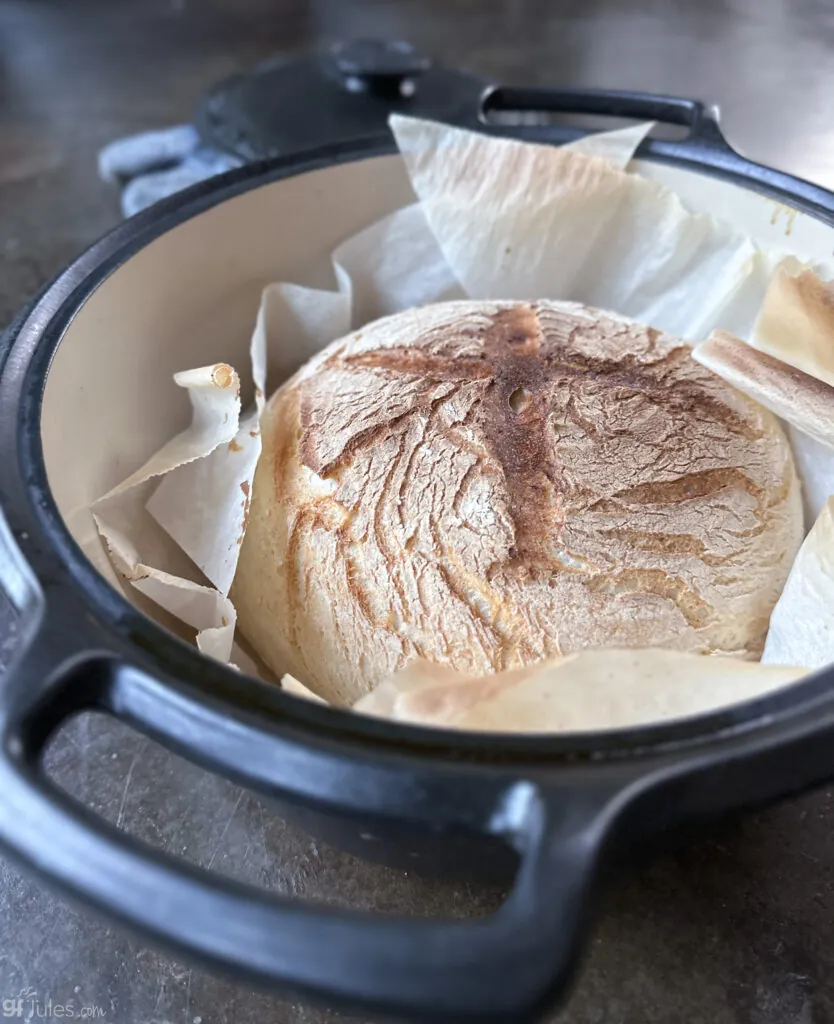
Using either the artisan or bread pan method, you may choose to dust the top of the loaf with gfJules Flour before baking for a more rustic look, or simply brush olive oil onto the top, or both.
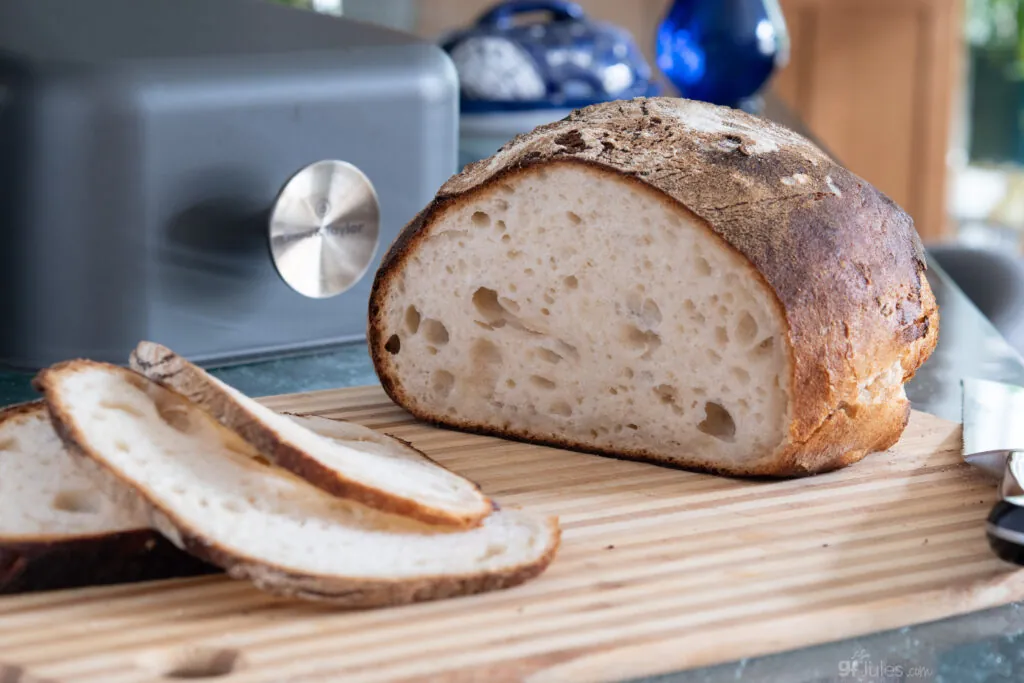
Gluten free sourdough baked on a baking steel and ultralight baking shell from Brod & Taylor. I’m loving this new-to-me method, by the way.
It’s similar to baking with a Dutch Oven, but the baking shell is so easy to handle and only weighs 1 pound 1 ounce! Comes in batard shape (shown here) or boule.
Loaf Pan Gluten Free Sourdough Method
For those who prefer a gluten-free sourdough loaf instead of a boule, here are some baking options for you.
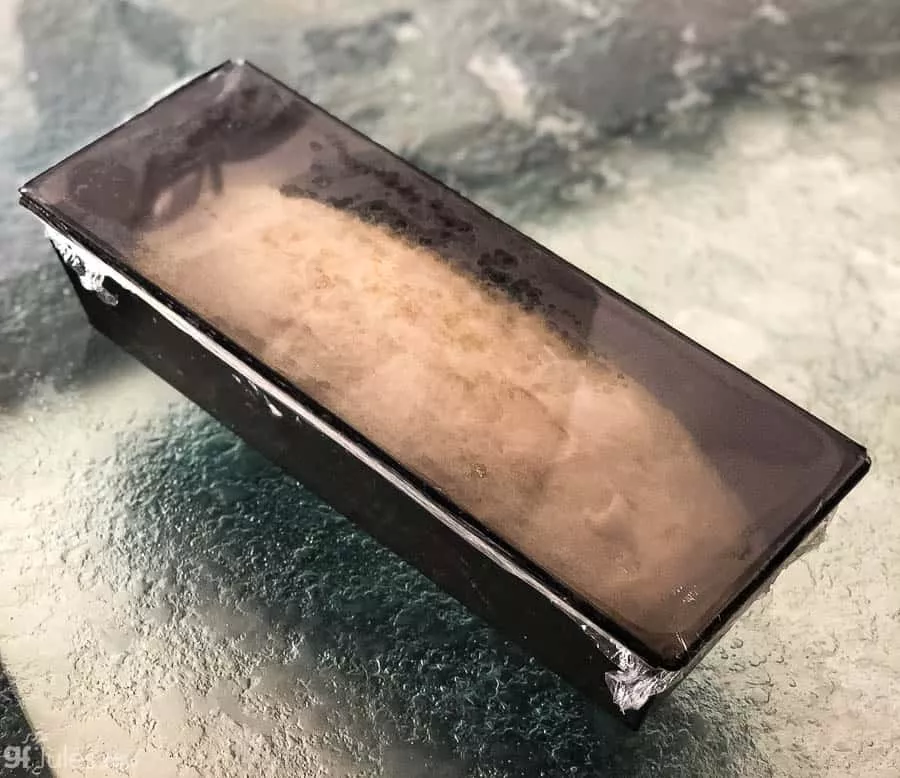
Place the dough into an oiled or parchment-lined pan and brush with oil. Allow the dough to rise covered with oiled plastic wrap to help keep the loaf warm and moist. I like putting the loaf into a preheated 200F oven, then turning the oven off, but turning the light on. I do this with the bread rising in either the bowl or the oiled and floured bread pan.
You can allow the bread to rise here for a minimum of 1 1/2 hours. I find around 2 hours is about right unless you’re choosing an overnight rise.

NOTE: The bread won’t have risen a lot, as most of the rising happens when it’s baking.
Feel free to oil and flour the bottom and sides of the pan or use lightly oiled and floured parchment for easier removal from the pan.
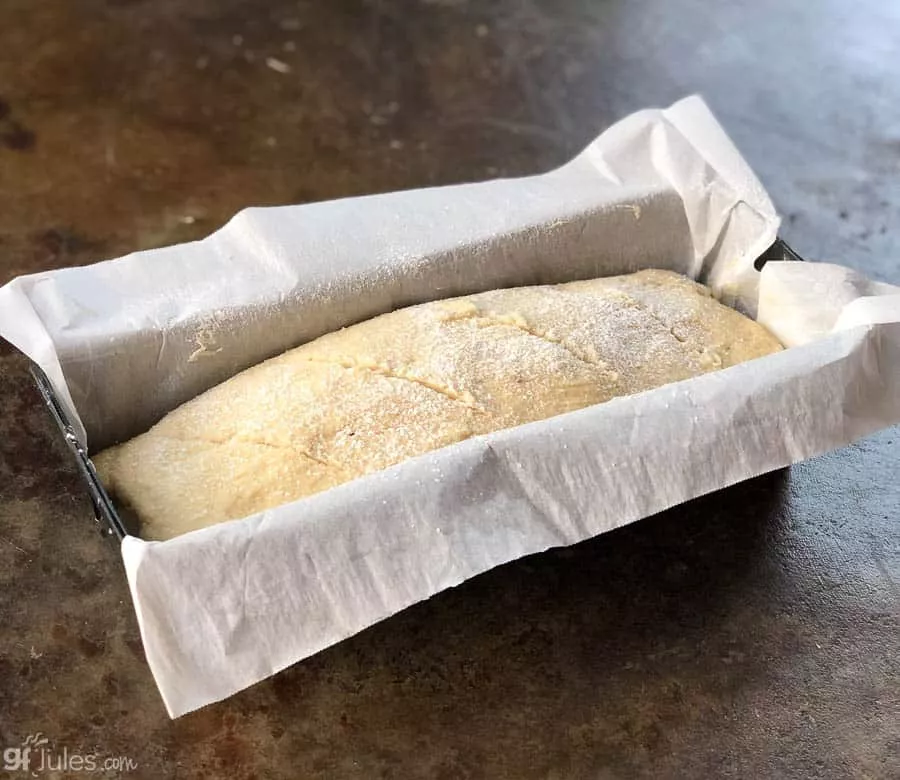
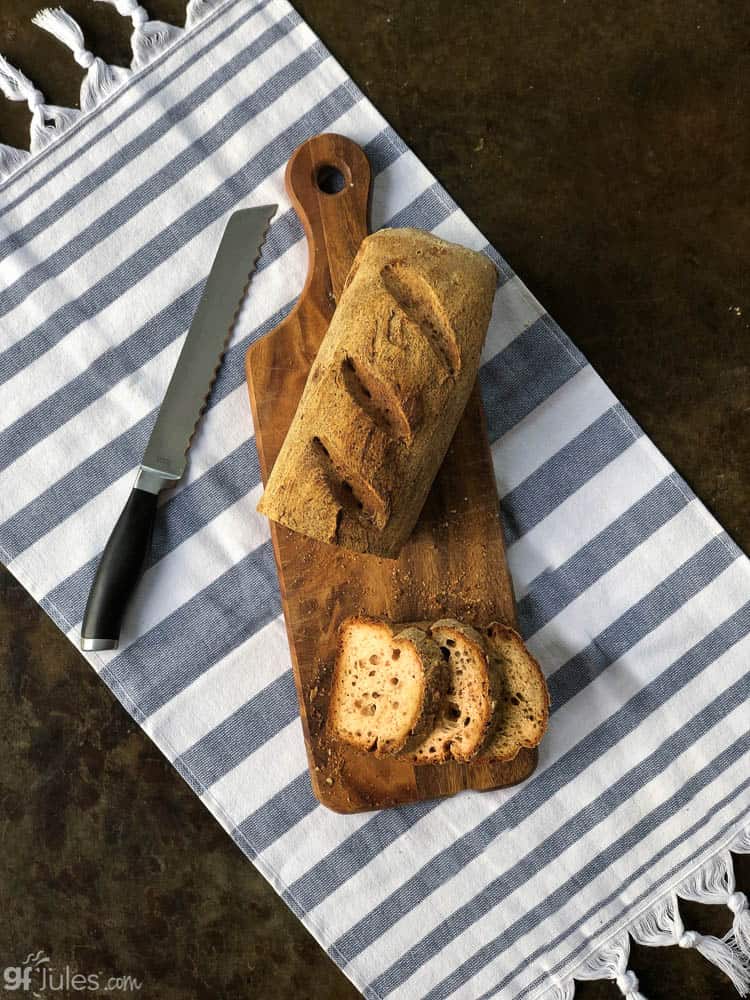
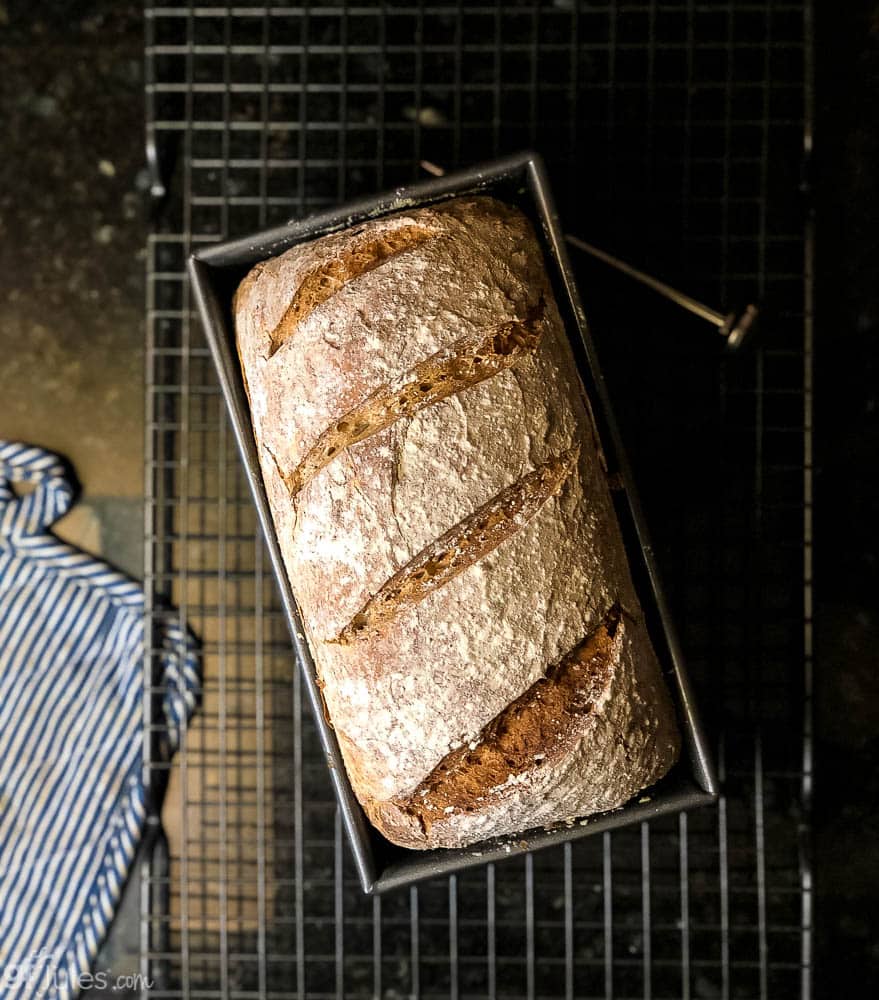
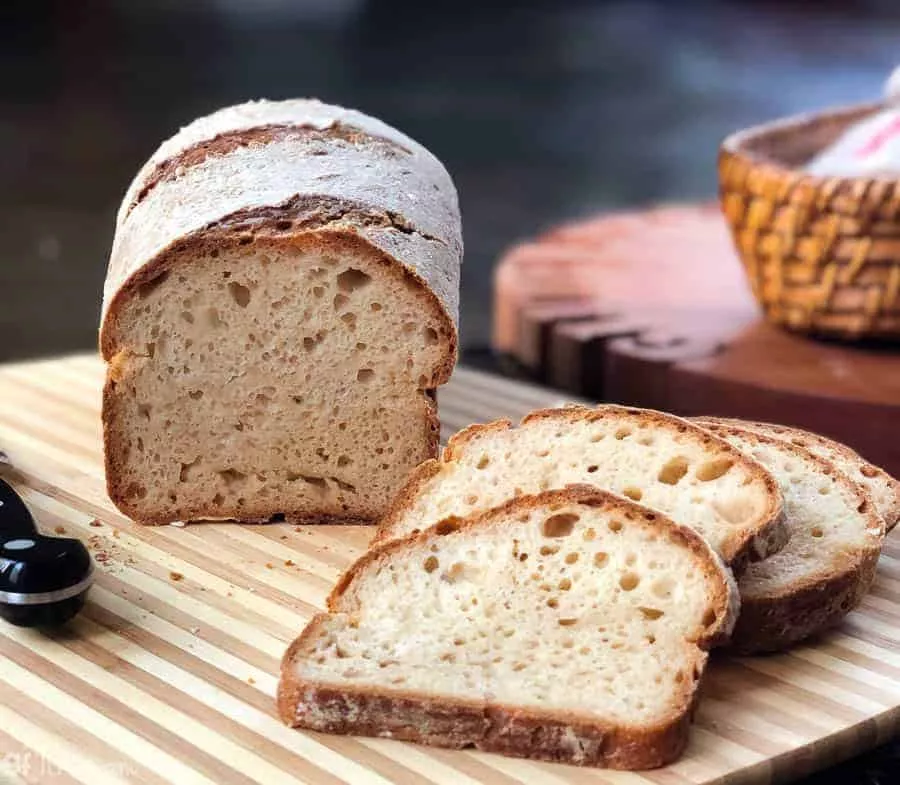
After rising, cut slits in the top of the loaf to direct the rise. Since the oil and/or the flour were applied before the slits were cut, the inside of the slits will appear different from the crust and it gives the sourdough the hand-made look it deserves.
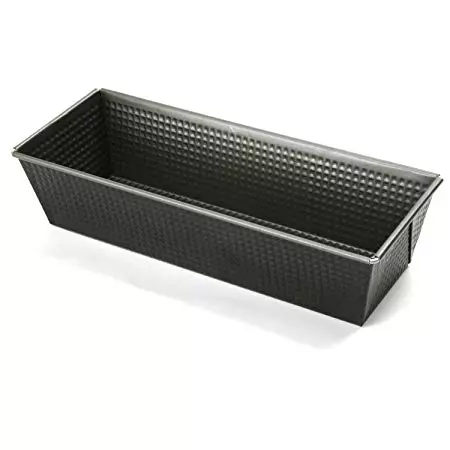
Regarding bread pans, I experimented with all kinds and sizes. For loaves, I really like a Pullman Pan like I used in most of these photos, but a baker with a lid creates a Dutch oven effect which is great for the crust. The bread dough is a bit too voluminous for a traditional 9 x 5 (or smaller) bread pan; in those, this wet dough would rise high and then tended to collapse a bit, leaving some un-cooked looking areas in the center.
The Pullman Pan (mine is 12 x 4 1/2) seemed to be the perfect size to allow the bread to rise with support up the taller sides.
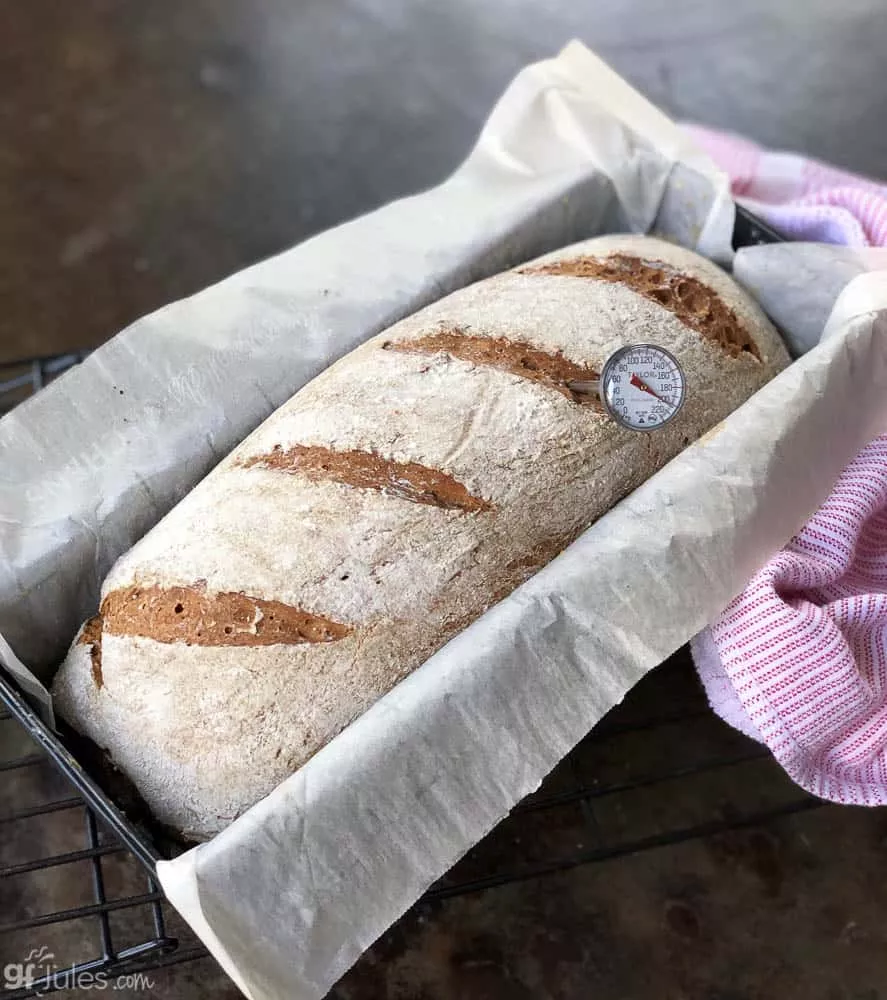
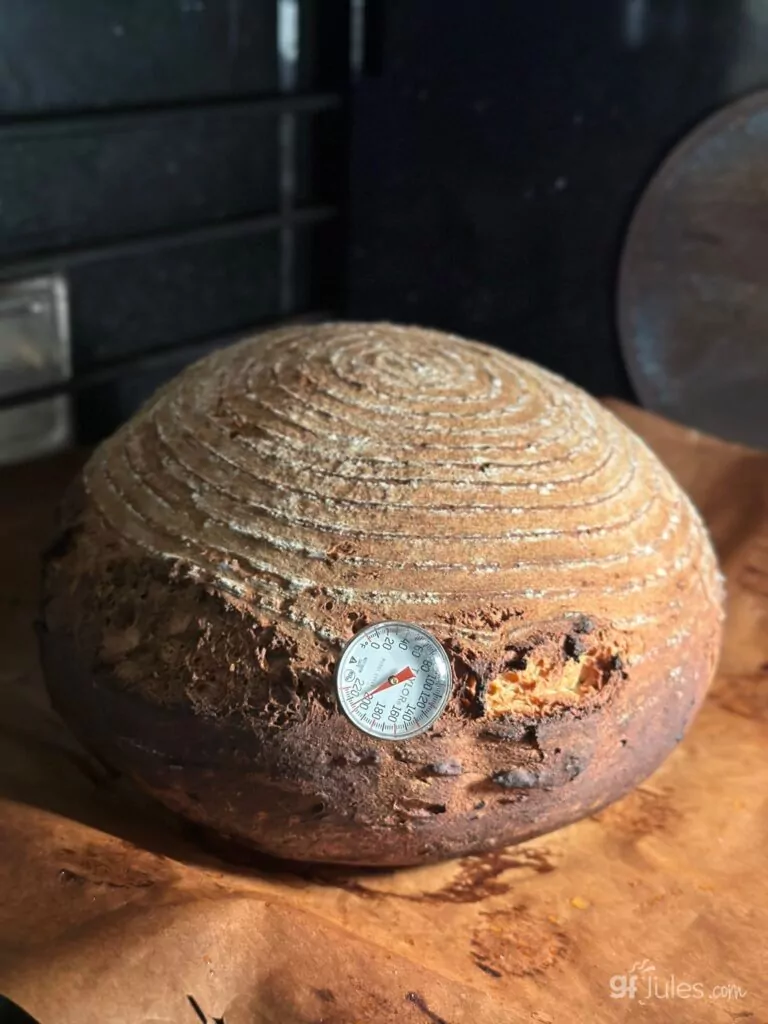
The time it takes to bake this bread will differ based upon the pan used and of course, on individual oven variations. I highly recommend buying an internal thermometer to take the bread’s temperature before removing it from the oven.
The internal temperature should be at least 205F before removing it from the oven to cool.
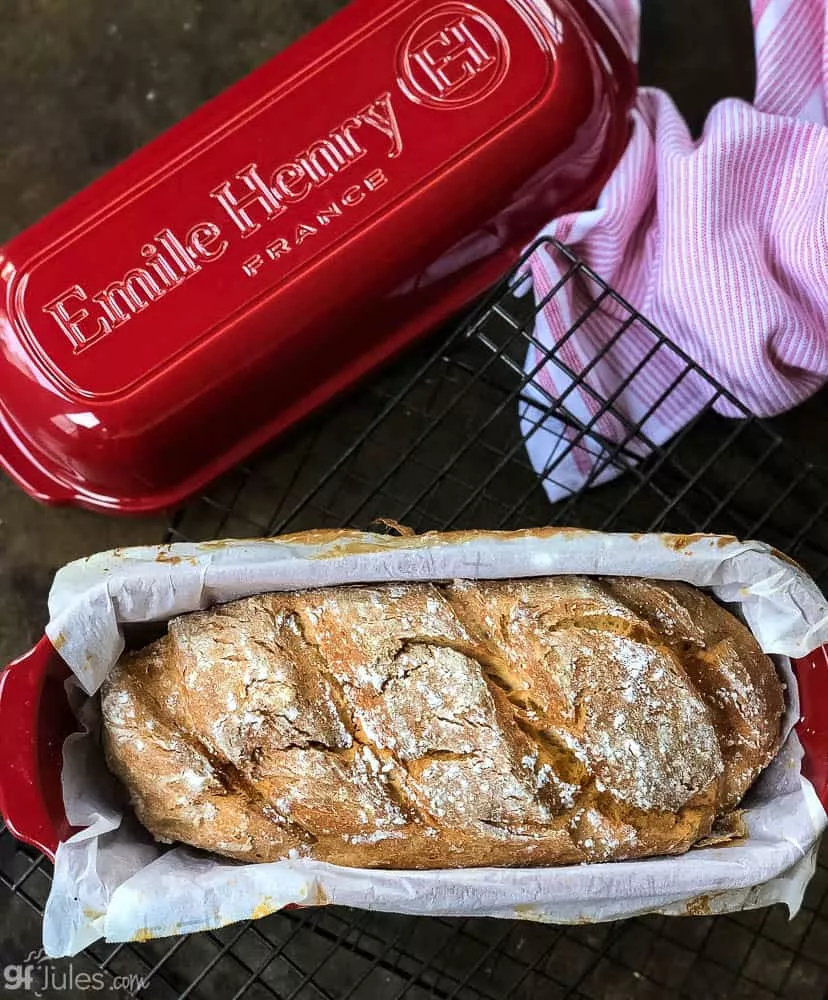
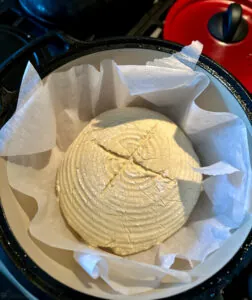
Gluten free sourdough made in an Emile Henry bread baker …
How Do I Make Gluten Free Sourdough Taste Sour?
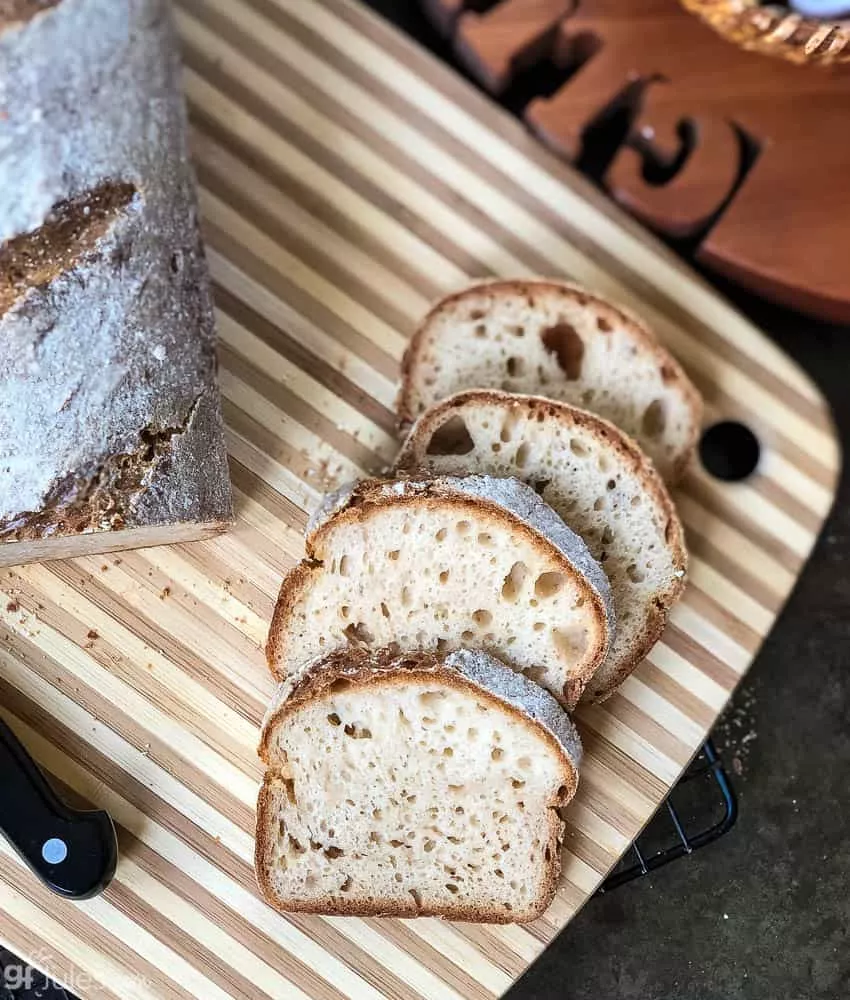
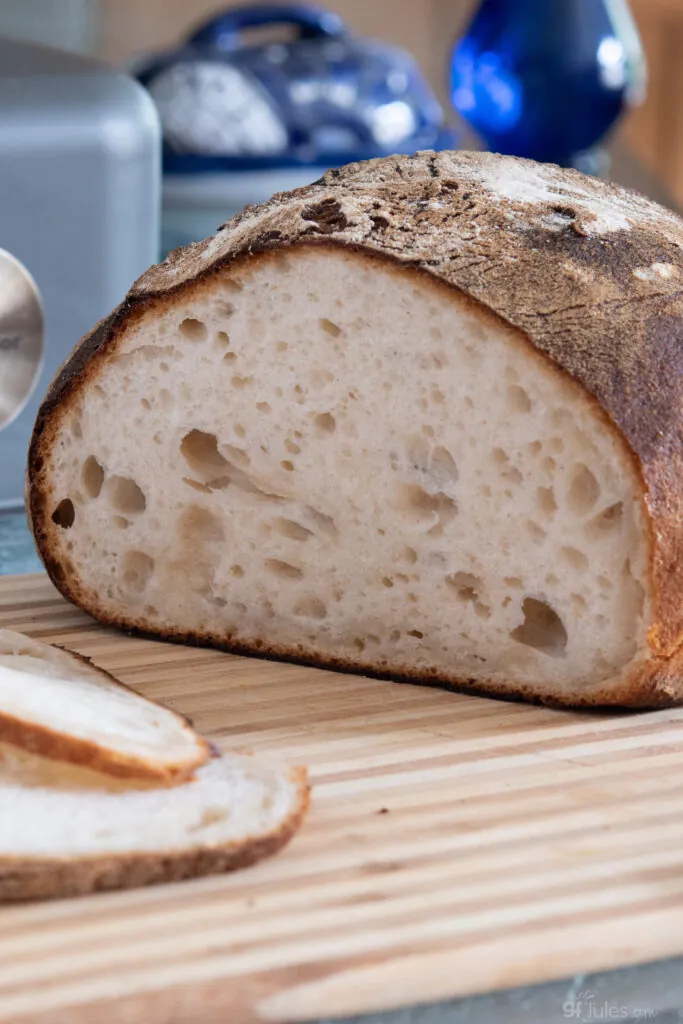
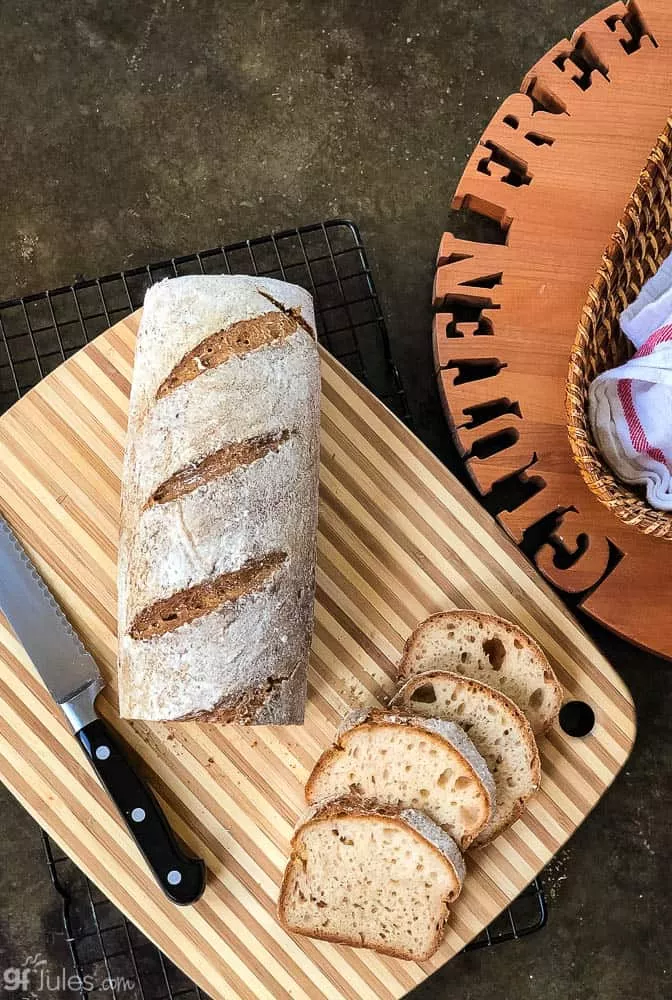
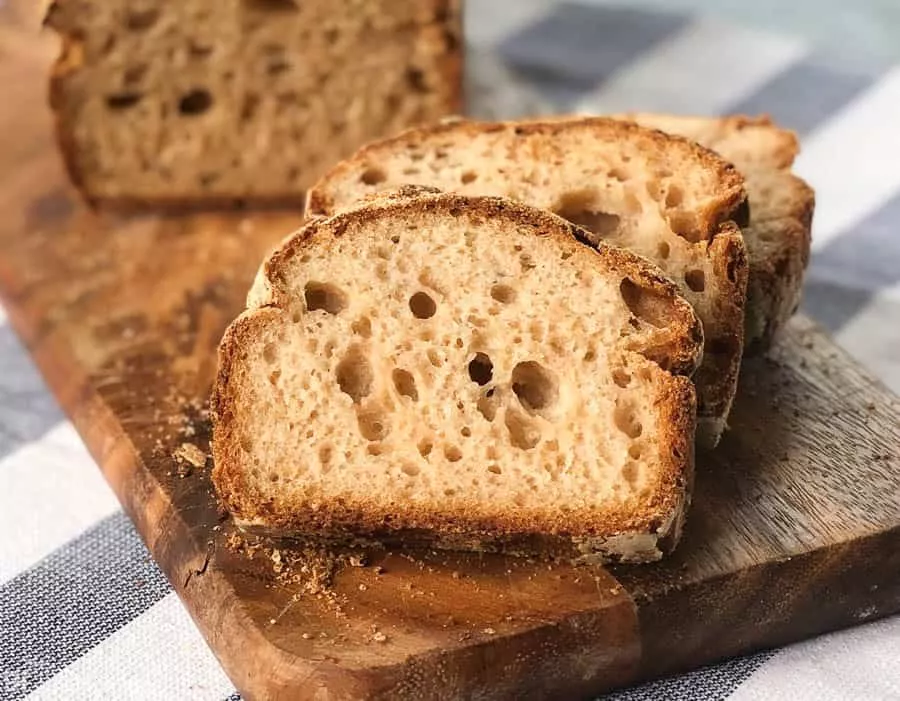
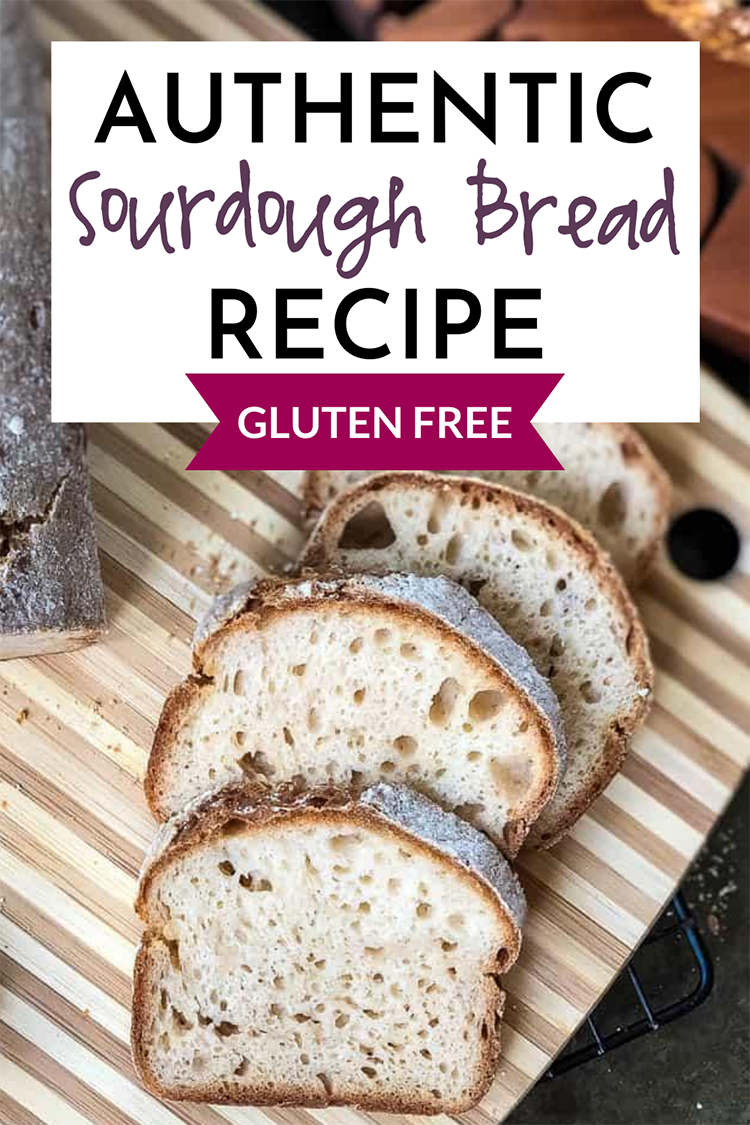
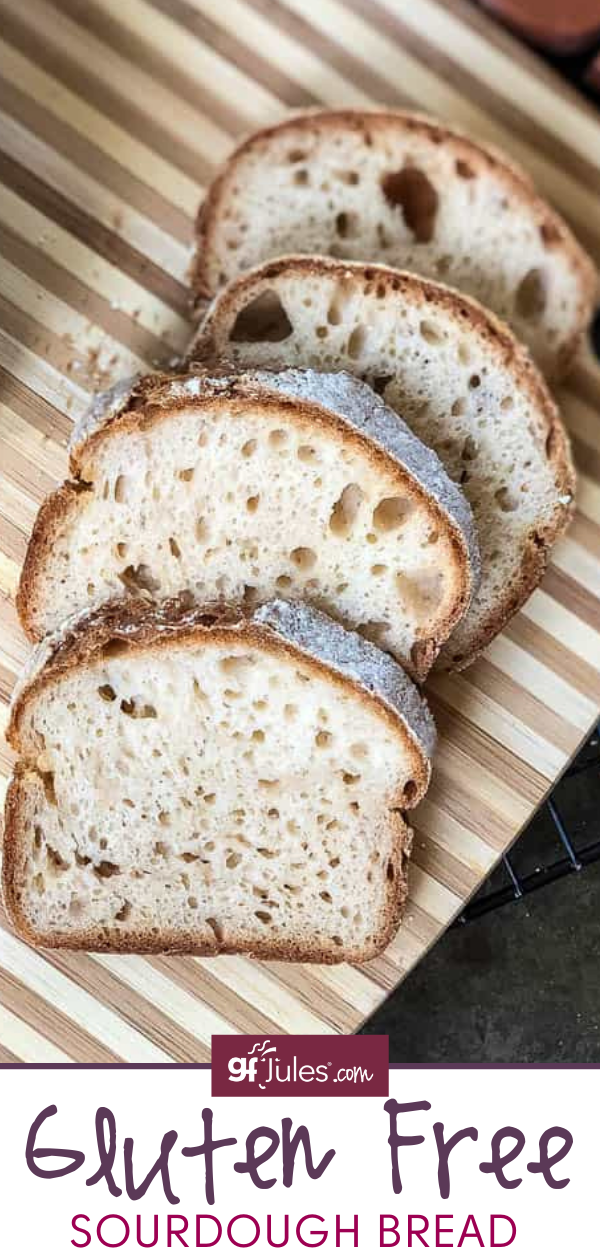
There are three main distinguishing features of sourdough: taste; smell; and texture. You might expect that the most difficult feature to achieve in gluten free sourdough would be texture, but as you can see from the photos, the artisan texture, open cell structure and crunchy crust are present in each of my loaves made with my gfJules Flours (plus psyllium husk) or my gfJules Bread Mix.
The smell is something that is quite noticeable from the starter. It should be tangy and rather sour smelling to know it’s really active. If your starter isn’t smelling very sour, it needs to age longer and/or be fed more.
But the sour taste was the thing that seemed to be most elusive for me in my early bread experiments.
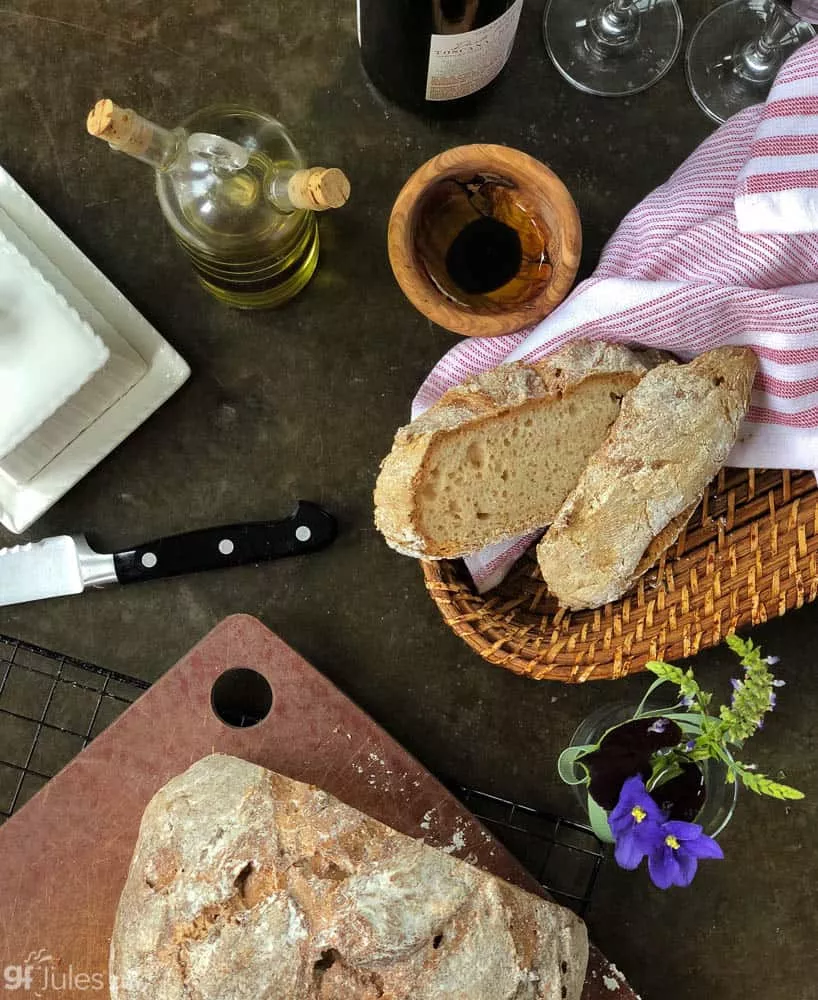
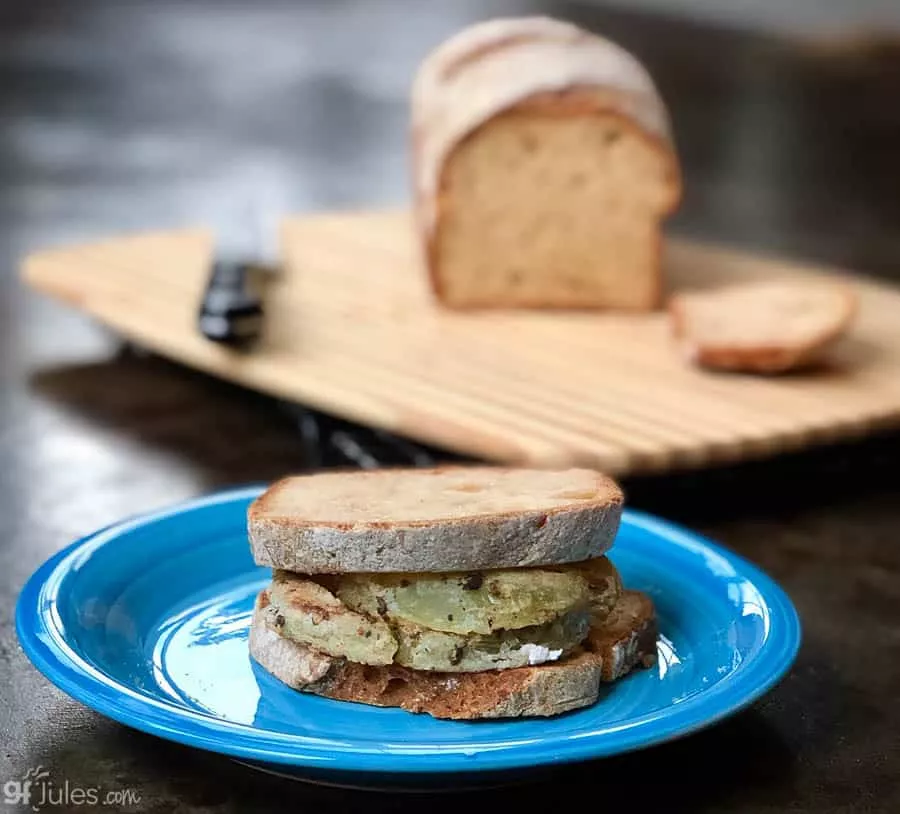
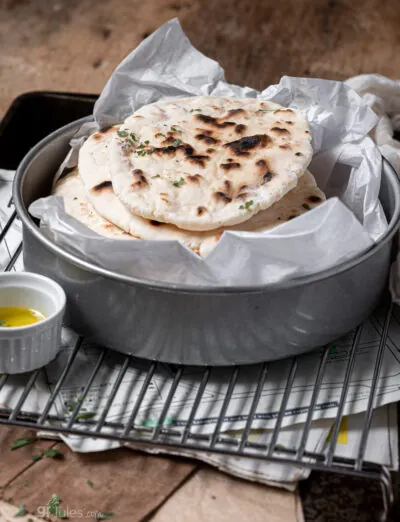
My first breads came out tasting yeasty and mild, just perfect for sandwiches or dipping in olive oil and balsamic (which we’ve been doing nearly every night for weeks now!).
No, the sour taste didn’t come easily. I did achieve it somewhat when I allowed the bread to rise overnight, so if you are searching for that sour, I recommend budgeting time for an overnight rise. But I wanted MORE SOUR. Lucky for you, I cracked the code on that too.
How Do I Make Gluten-Free Sourdough Taste More Sour?
- Overnight Rise. I allowed my bread to rise as I described above, then placed it in the refrigerator overnight (still covered), then removed it the next day to sit on the counter to come to room temperature before baking. THEN the sour started to show through! (note: if you’re baking egg-free, leaving the dough covered in the oven turned off overnight is a good way to get that sour taste.)
- I’ve recently changed my recipe to remove any chemical leaveners (baking powder, baking soda) which altered the pH and allowed the sour flavor to shine through. Those ingredients counteract the sour tang, so adding them negates the sour. This tweak has really made the difference in my gluten free loaves tasting more sour.
- Use more gfJules Multigrain Baking Flour. It makes the loaves smell and taste more sour because of the whole grains.
- Another site has recommended NOT feeding your sourdough starter again before baking with it in order to increase the sour flavor of the bread. This will also decrease the rise and will necessitate a longer proofing time, however. (Go here for the recipe to make your own gluten free sourdough starter)
- Add more apple cider vinegar. You can always add another tablespoon or two, and reduce the liquid in your recipe to compensate.
If you do any experimenting of your own and find other ways to make this bread taste sour-er, please share in the comments below!
How Do I Store My Homemade Gluten Free Sourdough Bread?
I always recommend storing your baked goods at room temperature in a sealed container, and this gluten free sourdough bread is no exception. The simple truth is that if you put baked goods into the refrigerator, they will dry out. You can put them into the freezer when they are fully cooled, but they will need to be warmed or toasted before enjoying again.
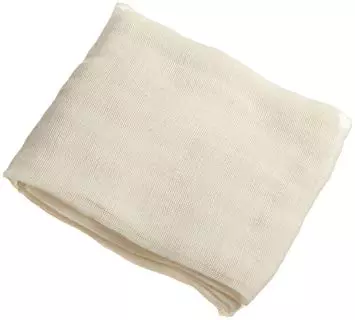
This gluten free sourdough bread is still soft and delicious after a few days in a zip top bag with the air squeezed out of it and stored at room temperature. Depending on the size of your loaf, you may need to cut it in half to get it to fit into a gallon sized bag, but other than that, it’s easy to just seal it up and grab a slice whenever you like! You can also store the bread European-style in a cloth or bread blanket.
If you’d like to bake a regular gluten free artisan loaf without the sourdough starter, check out my Gluten Free Artisan Bread Recipe. And of course, my award-winning gfJules Gluten Free Bread Mix works well for any kind of sandwich bread, oven or bread machine, hamburger/hot dog bun or baguette recipe! Click on the “description” tab to find links to all these gluten free bread recipes or use the search bar above.
Also note that if you don’t have an aversion to using actual yeast, the best way to get a great rise AND the sourdough taste is to use a little yeast in your bread along with the sourdough starter. In France, in fact, it is permitted to add up to .2% active yeast to sourdoughs and still call the bread a naturally leavened sourdough. You’ll see I’ve recently added an option to add 1 teaspoon active dry or instant yeast to the dough if you’d like to try that method.
So let’s get down to baking great gluten free sourdough, shall we?
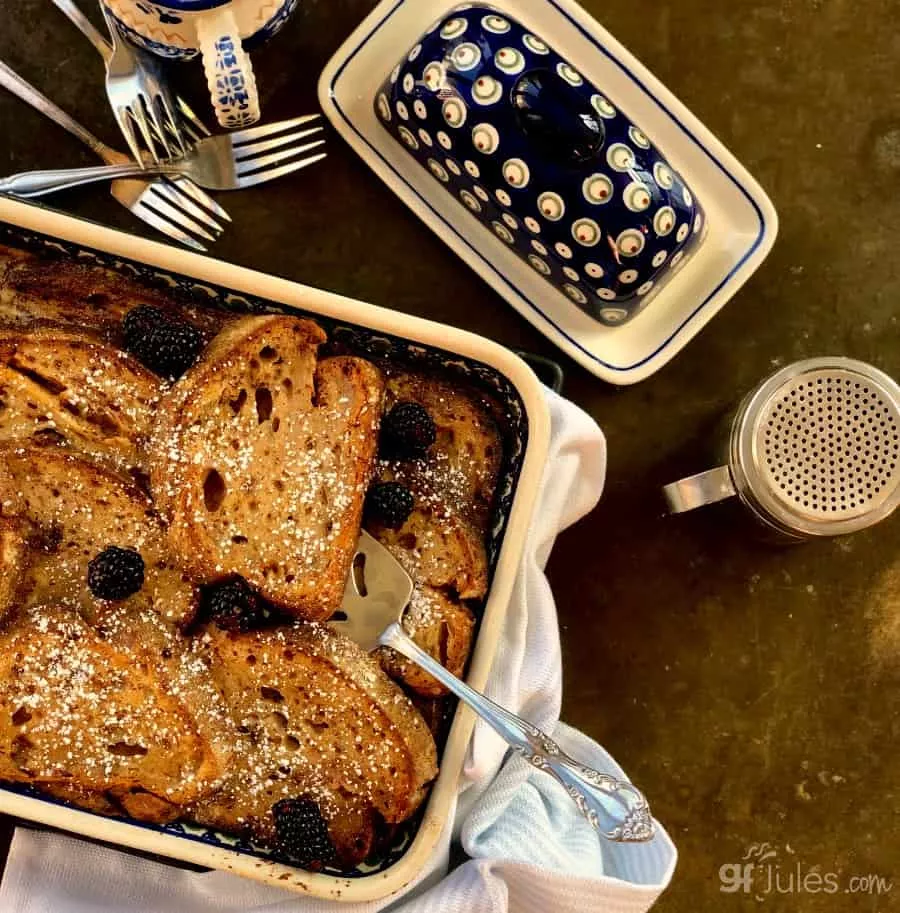
(Side note: leftover sourdough makes an insane overnight gluten free French Toast Casserole!).
Note that this recipe is constantly evolving, the more loaves I bake, the more research I do, and the more feedback I get from you, my readers! What was great gets even better, so keep checking back in for updates to the recipe!
Gluten Free Sourdough Bread Recipe
Gluten Free Sourdough Bread Recipe
Equipment


Ingredients
Sourdough Loaf or Artisan Bread Dry Ingredients
OR from scratch:
- 3 (420) cups (grams) gfJules® Gluten Free All Purpose Flour OR gfJules Corn-Free Multigrain Flour (for this recipe measure each cup to 140 grams/cup)
- 1/2 (70) cup (grams) gfJules Corn-Free Multigrain Flour (OR mixture of buckwheat flour OR cassava flour OR almond meal OR millet flour OR sorghum flour OR coconut milk powder)**
- 2 (6) teaspoons (grams) kosher sea salt
- 1 teaspoon rapid rise yeast or active dry yeast (OPTIONAL, but recommended if using very young starter or less rise time)
PLUS These Other Ingredients
- 2 Tablespoons apple cider vinegar
- 1/4 (56) cup (grams) sugar
- 2 ½ (12) Tablespoons (grams) whole psyllium husks (DO NOT ADD if using gfJules Bread Mix) optional with scratch recipe, but highly recommended (without psyllium, liquid may need to be reduced by 2-4 Tbs. if dough is too loose and dough will not hold its shape as well)
- 3/4 (150) cup (grams) active gluten-free sourdough starter (feed 4-6 hours before)
- 1½ (12) cup (ounces) bubbly liquid like club soda, sparkling water, ginger ale OR naturally gluten-free beer
Instructions
- Bring all ingredients to room temperature.
- Preheat oven to 200°F if rising there.
- Stir the following ingredients together in a large mixing bowl: apple cider vinegar, sugar, psyllium husks, and GF sourdough starter. Mix until smooth and thickened, approximately 2 minutes. (If using gfJules Bread Mix, stir just until mixed, since you aren't adding psyllium.)
- In a separate bowl, whisk together remaining dry ingredients, then slowly add into the large mixing mixing bowl together with bubbly liquid. Use the paddle attachment on a stand mixer or a dough mixer hand tool. Mix until dough comes together. (If adding active dry yeast, proof yeast before adding.) Mix for two minutes with mixer, longer if by hand.
- Transfer dough to a clean counter or pastry mat dusted well with gfJules Flour. Turn dough several times in flour to smooth the dough and shape into a ball or a log for a loaf pan.
If Baking in Loaf Pan:
- Transfer dough to an oiled or parchment-lined Pullman Pan or 9x5 loaf pan, lightly dusted with gfJules Flour, or to floured parchment-lined pan or bowl for rising. Spritz with water, brush with olive oil, and dust the top of the dough with more gfJules Flour for best results.
- Cover with oiled plastic wrap or damp tea towel and set inside oven warmed to 200℉. Turn oven off and turn light on.
- Allow the dough to rise for at least 1½ hours, or up to 4 hours before baking. Alternatively, after 3 hours, remove to refrigerator for further overnight rise (wrap well to keep from drying out). If refrigerating overnight, bring the dough to room temperature before baking the next day.
- Preheat oven to 350° F or 325° F convection.
- Remove plastic wrap and slice across the top of the dough as pictured to direct the rise.

- If you prefer a very crunchy crust, fill a spray bottle with water and spritz the dough again before baking, and again every 15-20 minutes while baking.
- Bake loaf in the pan for 75 minutes and test with a bread thermometer. The internal temperature should reach at least 205° F before removing to cool. If the bread is browning too much, cover with foil in order to keep baking.
- Once bread is fully cooked, remove to cool on a wire rack for 15 minutes before removing from the pan. Allow to fully cool before slicing.
If Baking Artisan Bread:
- Transfer to a proofing basket or oiled parchment-lined glass bowl.
- Cover loosely with a warm, damp tea towel or oiled cling wrap and place in a warm spot to rise at least 1½ hours, or up to 4 hours before baking. Alternatively, after rising, remove to refrigerator for further overnight rise (wrap well to prevent drying out). If refrigerating overnight, bring the dough to room temperature before baking the next day.
- Invert gently onto a parchment lined baking sheet and remove basket or bowl. Cut a slice across the top at an angle with a lame or sharp knife before baking.
If Baking in Dutch Oven or Using Baking Shell:
- Place Dutch Oven inside oven and preheat oven to 500°F. If using a baking steel and shell method, place the baking steel on the oven rack to preheat (no need to preheat the baking shell).Once the Dutch Oven is preheated, remove lid and place parchment with dough boule inside, spritz with water, then replace the lid and put the Dutch Oven back inside the oven. If using baking shell, transfer loaf onto parchment and slide onto hot steel in the oven (using a dough or pizza peel helps here) then cover with baking steel.Bake for 20 minutes covered, then remove the lid and reduce the oven temperature to 450°F and bake for 25 more minutes. *To prevent the bottom of the loaf from burning, place an oven safe pan at least the diameter of your Dutch Oven or steel on the rack just below and fill with ice cubes. This will provide both steam and a buffer between the heating element and the bottom of the pan.*

If Baking On Baking Sheet:
- If baking without pan, place bread on parchment lined pan in 500°F preheated oven, then immediately reduce the temperature to 450°F and bake for 35 minutes, test internal temp and continue to bake if needed -- bake until bread is browned and internal temperature reaches at least 205°F. *To prevent the bottom of the loaf from burning, place an oven safe pan at least the diameter of your bread on the rack just below your baking pan and fill with ice cubes. This will provide both steam and a buffer between the heating element and the bottom of the pan.*
- Using either method, once the bread is baked, turn the oven off but leave the bread inside the oven with the oven door cracked for another 20 minutes before removing. Allow to fully cool before slicing to prevent any gumminess.
Video
Notes
- 56 grams sugar
- 2 Tbs. apple cider vinegar
- 3/4 cup active sourdough starter (fed ~6 hours earlier)
- 1 1/4 cup warm water
** Please keep in mind that nutrition information provided is per serving, which may vary. While we have taken care to provide you with the most accurate nutritional values possible, please note that this information may differ significantly depending on the exact ingredients and brands that you choose to use to make this recipe. Additionally, where options are given for ingredients, the resulting calculation may include all ingredient options instead of only one per line, skewing the totals significantly.
Recommended Products
Any links to Amazon may earn me a small amount from qualifying affiliate purchases; this amount goes to fund this blog and does not cost you anything additional.
Viva Naturals
Bragg Live Food Organic Apple Cider Vinegar 946ml/32fl oz
Regency Wraps RW450N, 9 Sq. ft, Natural
gfJules All Purpose Gluten Free Flour
Norpro NOR-3952 12" Bread PAN, Non-Stick, 12 inch
Empty Amber Glass Spray Bottles with Labels (2 Pack) - 16oz Refillable Container for Essential Oils, Cleaning Products, or Aromatherapy - Durable Black Trigger Sprayer w/Mist and Stream Settings
gfJules Gluten Free Sandwich Bread Mix
Can I Make GRAIN Free Sourdough?
I’ve been getting this question a lot lately. Grain-free blends are very different from gluten free flour blends, and they behave differently in yeast breads. BUT … I have developed a mostly GRAIN-FREE Sourdough variation that is quite lovely with my gfJules Nada Flour.

Of note: the starter I used was based on my gfJules Multigrain Flour, so it does contain grains, thus, this loaf is not entirely grain-free.
I have not yet had time to develop a grain-free starter. Alas, I am but one baker. Someday ….

Mostly GRAIN Free Sourdough Bread Recipe
Ingredients
Sourdough Loaf or Artisan Bread Dry Ingredients
PLUS These Other Ingredients
- 2 large eggs OR 2 Tbs. flaxseed meal steeped 10 minutes in 6 Tbs. warm water
- 2 Tbs. apple cider vinegar
- 1/4 cup olive oil
- 1/4 cup 56 grams sugar
- 1 cup gluten free sourdough starter
- 1 cup club soda sparkling water, ginger ale, 7-Up, naturally gluten free beer, OR still water
Instructions
- Bring all ingredients to room temperature.
- Preheat oven to 200°F.
- Beat the following ingredients together in a large mixing bowl: eggs (or substitute), apple cider vinegar, oil, sugar, and gluten free sourdough starter. Mix until smooth.
- Slowly stir in dry ingredients with liquid, beating with paddle attachment on a stand mixer or using a wooden spoon until the batter is smooth and all dry ingredients are completely integrated. Mix for two minutes with mixer, longer with spoon method.
If Baking in Loaf Pan:
- Transfer dough to an oiled Pullman Pan or 9x5 loaf pan, lightly dusted with gfJules Nada Flour. Dust the top of the dough with more gfJules Nada Flour.
- Spritz with water and cover with oiled plastic wrap and set inside oven. Turn oven off and turn light on.
- Allow the dough to rise for at least 1 1/2 hours, or up to 3 hours before baking. Alternatively, after 3 hours, remove to refrigerator for further overnight rise. If refrigerating overnight, bring the dough to room temperature before baking the next day.
- Preheat oven to 425° F.
- Remove plastic wrap and slice across the top of the dough to direct the rise.
- If you prefer a very crunchy crust, fill a spray bottle with water and spritz the dough before baking, and again every 15-20 minutes while baking.
- Place uncovered loaf pan in oven, then reduce temp to 350° F. Bake loaf in the pan for 75 minutes before testing with a bread thermometer. The internal temperature should reach at least 205° F before removing to cool. If the bread is browning too much, cover with foil in order to keep baking. Bake for full 75 minutes, even if bread has reached internal temp earlier.
- Once bread is fully cooked, remove to cool on a wire rack for 15 minutes before removing from the pan. Allow to fully cool before slicing.
** Please keep in mind that nutrition information provided is per serving, which may vary. While we have taken care to provide you with the most accurate nutritional values possible, please note that this information may differ significantly depending on the exact ingredients and brands that you choose to use to make this recipe. Additionally, where options are given for ingredients, the resulting calculation may include all ingredient options instead of only one per line, skewing the totals significantly.
Recommended Products
Any links to Amazon may earn me a small amount from qualifying affiliate purchases; this amount goes to fund this blog and does not cost you anything additional.
Viva Naturals
Bragg Live Food Organic Apple Cider Vinegar 946ml/32fl oz
Regency Wraps RW450N, 9 Sq. ft, Natural
gfJules All Purpose Gluten Free Flour
Norpro NOR-3952 12" Bread PAN, Non-Stick, 12 inch
Empty Amber Glass Spray Bottles with Labels (2 Pack) - 16oz Refillable Container for Essential Oils, Cleaning Products, or Aromatherapy - Durable Black Trigger Sprayer w/Mist and Stream Settings
gfJules Gluten Free Sandwich Bread Mix
Many thanks to the indomitable Chef Patrick Auger for his help in developing this original recipe years ago. His passion for baking allergen-friendly foods has helped many a baker achieve amazing gluten free results like these!
I can’t wait to hear about your gluten free sourdough bread baking!
Pin for later!


Hey Jules, thanks for this recipe – well all your recipes really.
I just wanted to check. When you feed the starter is it a cup of flour and a cup of water each time? Over 7 days that’s 21 cups of GF flour which is hella expensive.
My mix has activated in one day and is rising beautifully. I can’t wait to bake with it!
Cheers
Bron
Hi Bron, you are so very welcome for the recipes — I’m glad to hear you’re putting them to good use!
Regarding the starter, yay! that it’s already so vibrant! My first time making a gluten free starter I did use 1 cup of flour and 1 cup of water each time and it was obscenely expensive and voluminous, but I was following the guidelines I was given and didn’t want to mess anything up! Since then, I’ve experimented a bit more and also worked with other readers on their experiments and I think that the more important thing is proportion, not amount. SO … that being said, no, I don’t think you need to add 1 cup of each each time, but keep the proportions the same and keep the feeding times the same. And be sure to divide the starter as noted. Also read the comments for more tips if the starter seems to go dormant. Adding a bit of honey, apple cider vinegar or a high protein gluten free flour like quinoa or even sorghum or millet has seemed to help. Using water that is filtered and doesn’t have chlorine which can kill the starter, keeping it warm but not hot … these types of little things can pay big dividends in keeping the starter alive and happy. There will be days that it seems like it isn’t as active, but don’t give up — starters seem to go through cycles.
Best of luck and happy baking!
~jules
Hi Jules!
Thank you so much for sharing your Sourdough Starter! I have a successfully active starter after just 3 days! I will continue to feed it every 12 hours for the remainder of the week and keep it loosely covered with cheesecloth in a warm area. I found that putting it in the oven with the oven off, but the oven light on created the perfect warm environment.
My question is what do I do next? I’ve heard lots of stories of people keeping the Sourdough Starter for generations. Do I have to continue to feed it every 12 hours for the life of the starter? I could see that becoming a very expensive hobby!
I would appreciate and help and advice.
Thank you!
Hi Emi!
I’m so glad you have begun your starter! I hope you keep it for a long time and enjoy many, many lovely loaves!!
Once it is active, keep it in the refrigerator and try to remember to feed it once a week. Much less maintenance than a newborn or toddler! 🙂
Happy bread baking!
~jules
Can your starter become inactive or “die” if not fed twice daily? I work very long shifts at the hospital and on some days I’m only able to feed it once daily. My starter was doing awesome and then I worked a few days and now it seems to have “died” on me. I tried vinegar and yeast with no success. I was wondering if you had any ides?
Hi Connie, first off, thank you for your service at the hospital! Now, more than ever, your dedication to helping others by working at a hospital is so very appreciated!!!
Ok, back to the sourdough!!
So there can be many factors in play. Many people have experienced the same thing you have with this gluten free sourdough starter in that it has been very active at first and then appeared to have died down. Don’t despair though! It will come back to life.
These are the things to do:
–be patient and stick with the protocols exactly as written
–try adding 1-2 Tbs. apple cider vinegar (I know you said you did this)
–add 1-2 Tbs. honey
–make sure you’re actually dividing the starter and allowing it to “breathe” with a cloth on top
–make sure your room is warm enough
–add a couple tablespoons of a high protein GF flour like quinoa flour
It should come back to life!
If you’re on FB be sure to join the gfJules Gluten Free Recipe Share Group — there are lots of gluten free sourdough bakers there sharing their tips and questions and help!
Best of luck and enjoy the process!
~jules
Hello Jules! Thank you so much for this amazing gluten free sourdough recipe. I have been making a loaf weekly since last December using King Arthur’s all purpose gf mix (I would love to try your mix but cannot fit it into our already strapped food budget). My daughter and I have Celiac disease, she does fine with the dairy but now I have to give it up. What substitution can I use for the powdered milk? Thanks in advance!
Hi Bette, I’m so glad that you are enjoying this gluten free sourdough recipe so much! I do hope you get to try it with my gfJules Flour blend one day soon! We have some helpful options that I hope will make it more affordable for you — please email us at support@gfJules.com.
Regarding a dairy-free alternative, give dried mashed potato flakes a try (plain, unflavored). Hope that helps!!
~jules
Where can I buy your flour and are you selling your
sour dough starter?
I am not coeliac but bought a sourdough starter and have been making my own bread for several months
However my sister is coeliac and I would like to make it for her.
The pictures of your bread look amazing.
Hi Terri, here’s the link to our store on line where you can purchase my gfJules Flour (select international shipping). We are not selling the gluten-free sourdough starter at this time, but it is easy enough to make yourself with my recipe, just time consuming, of course. 🙂 It is so sweet of you to want to bake gluten free sourdough for your sister. I know she will love it!
One other option for you since I see you live in Australia, there is a store in Singapore which carries my products and ships to NZ and Australia less expensively. I’ve linked to it here for your convenience. Wishing you and your sister well!
~jules
You can purchase GF Sourdough starter on eBay.
Thank you for the detailed instructions and information, I made homemade gluten free sourdough bread last night for the first time (using your recipe) and it turned out AMAZING. I like the density (which of course gluten free tends to be more dense) and the texture is so good. It did not come out cakey in the middle and cooked right up to 205* in a pullman pan for 75 minutes (covered with tinfoil for about 45 minutes of the time.)
I don’t have the GF Jules gluten free bread mix so I used the other ingredients listed. The starter I used was given to me by my great aunt who has been making her own bread for years… looks like a winning combination.
I will definitely be using this recipe every time! Thanks so much!
Hi Nikki, I’m thrilled that you were able to bake amazing gluten free sourdough! Thanks so much for taking the time to leave a note and let me know. It’s wonderful to have great homemade bread, isn’t it? And how fun that your great aunt shared her starter with you!!! A winning combination, indeed!!!
~jules
Am I missing something? I don’t see the 7up/gf beer in the directions, but it is in the ingredients.
Hi Deanna, it’s called “bubbly liquid” in the instructions since I give several options for what to use.
Here’s where it is indicated to add it:
“Slowly stir in dry ingredients or gfJules Gluten Free Bread Mix with bubbly liquid, beating with paddle attachment on a stand mixer or using a wooden spoon until the batter is smooth and all dry ingredients are completely integrated.”
Hope that helps!
~jules
Do you know why my bread came out SO dense? the internal temp was 205 so i took it out at an hour but the inside was kind of gummy and dried really dense.
Hi Rachel, I can’t say for sure without lots more information. Did you follow my entire recipe (any ingredient substitutions)? Was this the first time you’d used your starter? Did it seem active? What pan did you use? Check out these gluten free bread baking tips and see if any apply to your method and help, as well.
~jules
hi jules! i didn’t do any substitutions, it was the first time using the starter but it was very active, and i did the free form on a baking sheet!
Did it spread out a lot or was it fairly thick and tall? Wondering if it looked like the photo of my artisan sourdough or the reader’s video of her artisan sourdough or if yours looked different? Was the whole thing gummy on the inside or was there a line at the bottom or the middle?
It was probably an inch or so shorter than your pictures! and whole thing
The dough is like cake batter, does not look how it’s pictured.
Do you use the yeast That comes with the bread flour in the mix sourdough recipe?
Hi Donna, great question! No, you do not! The sourdough does not need the yeast packet that comes with the gfJules Bread Mix. Just remove it from the mix and use it with another recipe. Sorry if that was unclear. Happy baking!
~jules
I attempted my first sourdough loaf, and it was successful! Mostly. I need some advice for my next loaf so it can be even better. I baked it at 350 for 75 minutes, then put the thermometer in as ordered. It said 200, so since the recipe said 205, I kept it going. I checked it every ten minutes, but 30 minutes later, it was still only at 202. I was getting worried about the loaf drying out or overcooking, but I left it ten more minutes. It was still at 202, so I just took it out. I thought the bread came out pretty good, though a bit denser than I like. I think it was fully cooked through, but I don’t really know what to compare it to. The outside was crusty and a bit too hard the first day, though plenty soft the next day after being in a ziploc. I’m wondering if I should have kept baking or if I should have raised the temp or what? The only thing I changed in the recipe was swapping 1/8 cup honey for the 1/4 cup sugar; I used GF Jules bread mix. I appreciate any tips!
Hi Stacie, I’m so glad your first gluten free sourdough was successful! That’s really saying something — you should feel proud! Regarding the fact that it took longer to cook, one factor was the addition of honey because that added more moisture to the bread. It sounds like you did the right thing to keep baking the loaf, though. Did you use a pan or bake it on a sheet, artisan style? Even the pan you use (size and material) make a difference in the time it will take for the loaf to cook, so you really just have to keep a close eye on it and take good notes for next time!
~jules
Would fresh milk work as well as the powdered milk? If not no worries, just thought I’d check and see! 🙂 So excited to try this recipe!!!!!!
Hi Ariana, the powdered milk ingredient is not to be reconstituted (it’s for structure) so it can’t be subbed for liquid milk, unfortunately. Great question, though!
Enjoy the recipe!
~jules
I’ve followed Jules’ recipes for the starter, and for the bread, have so far made 2 loaves, so I’m sharing what I did in case it helps anyone else with the process!
For the starter, I cut down on the quantities, keeping the proportion of flour and water the same. I started with 1/2 cup flour, then cut it to 1/4 cup, and then to 2 tablespoons. If the starter has appeared inactive I’ve added a tiny bit of honey, maybe only 1/4 teaspoon, and that has brought it back to life.
For the bread, I haven’t found psyllium husk, so I substituted 3/4 tablespoonful xanthan gum. For the first loaf I used almond flour as a substitute for the buckwheat flour. I proofed it in the preheated oven for 3 hours, then overnight in the fridge. For the second loaf I used gluten free beer as the sparkling liquid and omitted the sugar. I used xanthan gum again, and this time tried quinoa flour in place of the buckwheat. Proofing was the same as the first loaf, but when I cooked the bread I used a Dutch oven with a lid, which I preheated, and cooked it a higher temperature for a shorter time. Both loaves had a good crust and a great texture. The first one was slightly sweet tasting, the second one was not sweet but didn’t have a sourdough taste, I’m hoping this will come as my starter ages. I’m loving this whole process, it’s very satisfying and fun to do. Good luck with your baking!
Thanks so much for sharing all your notes, Sue! So glad you’re having such fun baking the gluten free sourdough!!!
~jules
I’m on sourdough loaf #5 and still do not have the sour smell or taste. My starter in not very bubbly and doesn’t smell like sourdough. My bread comes our ok but a little on the sweet side. I was wondering if the 1/4 cup sugar can be decreased or even eliminated?
Thank you in advance for your help.
Hi Helen, the longer the starter is around, the more sour it will become, but you can always add more apple cider vinegar or lemon juice to amp up the sour, as well. Cutting back on the sugar will help; I find a little is needed to feed the starter but you can use honey instead for a rounder flavor that’s perhaps less over-the-top sugar/sweet? Be sure to read the comments and reviews for others’ tips and if you’re on Facebook, join our gfJules Gluten Free Recipe Share Group; there are a ton of gluten free sourdough bakers there who are always sharing their loaves, questions, tips, suggestions and help! Happy baking!
~jules
Hi there! I live in Brazil and can’t by your flour. I make a mix that contains rice flour, potato starch, cassava starch and xanthan gum. Do you think it can work?
Hi Beatriz, we do ship internationally (just go to the SHOP tab at the top of every page and click international shipping) but if you want to compare your blend with the flours I recommend in this article, take a look: https://gfjules.com/gluten-free-flour-comparison/
Depending on the percentages of the ingredients you’re using, it could work, although I’m not a huge fan of a lot of rice flour, as it can tend to be rather gritty. Is the cassava just the starch or the whole cassava flour? You’ll need some whole grains in there for support, rather than mostly starch, but again, it really depends on proportions. I hope this information is helpful and you’re able to bake a gluten free sourdough loaf soon!
~jules
Hi there!
You list the gf starter as ¾ cup… what might that be in grams? ¾ cup can be significantly different from time to time… Thanks!
I would also love to know this! I plan on using this recipe to experiment with different flour blends so I definitely want to know the gram measurement for the starter. Right now my plan is to measure it once and weigh it and just use that weight for each try.
Darn, this is EXACTLY what I need to know and it hasn’t been answered 😕
The recipe lists 1 1/4 c. club soda or alternatives, but in the verbiage of the recipe when it says to combine the eggs, vinegar etc. it never mentions the 1 1/4 club soda again. Does it get mixed with the liquid items? Also, can ground flaxseed be substituted for psyllium husk powder? Thank you.
Look for “bubbly liquid” in the 5th sentence… that’s when you mix it in
I was wondering about this as well. Do you add the wet ingredients in then? It’s a little unclear. I just mixed the dry with the bubble water, then realized there wasn’t a step to add the liquid. Should they all be added together?
Hi Kate, I’m sorry if there was anything unclear in the recipe; there are a lot of steps! As noted in the recipe: “Slowly stir in dry ingredients or gfJules Gluten Free Bread Mix with bubbly liquid”. I hope that helps! Enjoy the yummy gluten free sourdough!
~jules
wait, so if i do just the flour (not the mix), did i not need the club soda?
Hi Rachel, yes, you will add the bubbly water no matter whether using the from scratch recipe or the bread mix.
I have a question about the starter. When you start feeding and separating the Sourdough starter, do you feed it and then separate the starter or do you separate the starter and then feed it?
Great question, Connie! I feed it then separate it. 🙂 Happy gluten free sourdough baking!
~jules
I have a previously made gf starter. Will this bread recipe work with any starter, given that your gfjules flour is used in the recipe?
Hi Natalie, I hesitate to give you a blanket answer, given that I know nothing about the gluten free starter you’ve made, but there’s no real reason why it shouldn’t work, as long as your gluten free starter is active. So … I’d say, give it a go!!!! Nothing ventured, no great gluten free sourdough gained, right? 🙂 Let me know how it goes!
~jules
I’ve done this recipe several times and each time it comes out better and better. A note to others- make sure to keep checking your bread! Mine is done after 50 minutes at 300 degrees. My oven runs hot.
Also- for me- vegetable shortening works much better for greasing the pan.
Thank you so much for sharing your wonderful recipes. They are so great!
Hi Anna, I’m so happy to hear that you’re continuing to bake this gluten free sourdough recipe, and loving it more and more! Thanks so much for coming back to let me know! It brings a smile to my face whenever I hear back from readers enjoying my recipes, particularly ones that are so long and involved as sourdough. It’s an investment, both on my part and yours! So glad to know it’s been worth your time!!
Happy baking, Anna!
~jules