


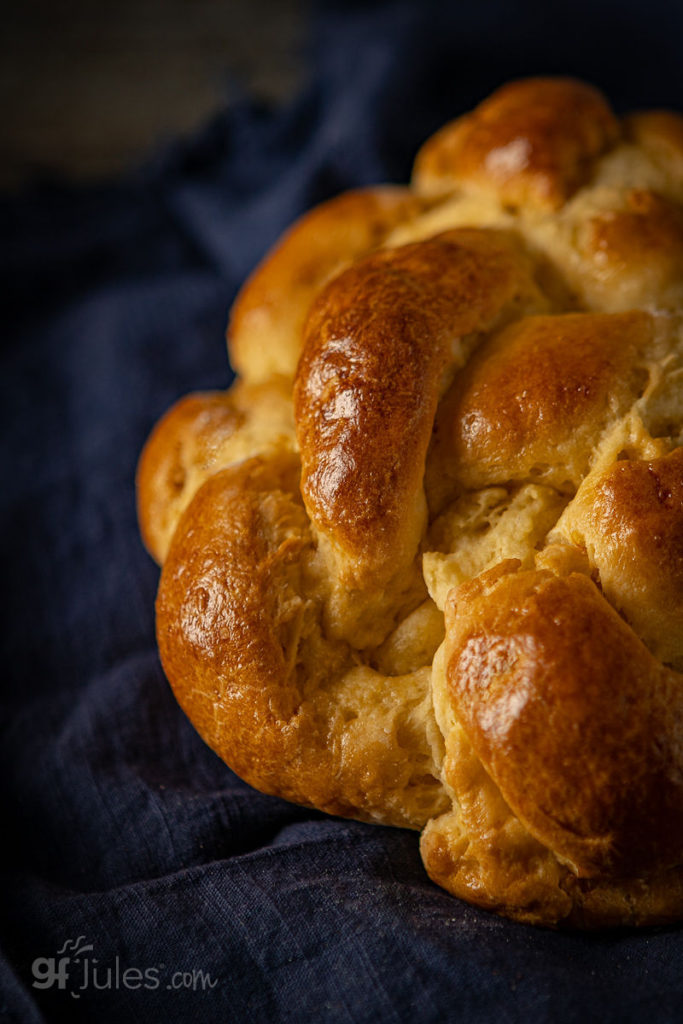
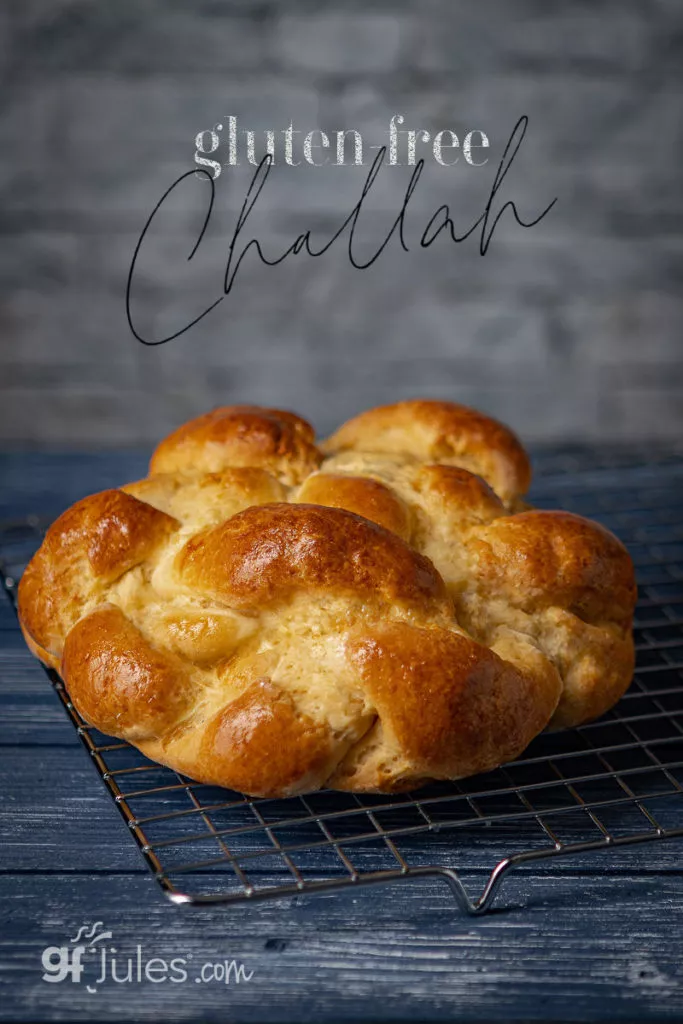
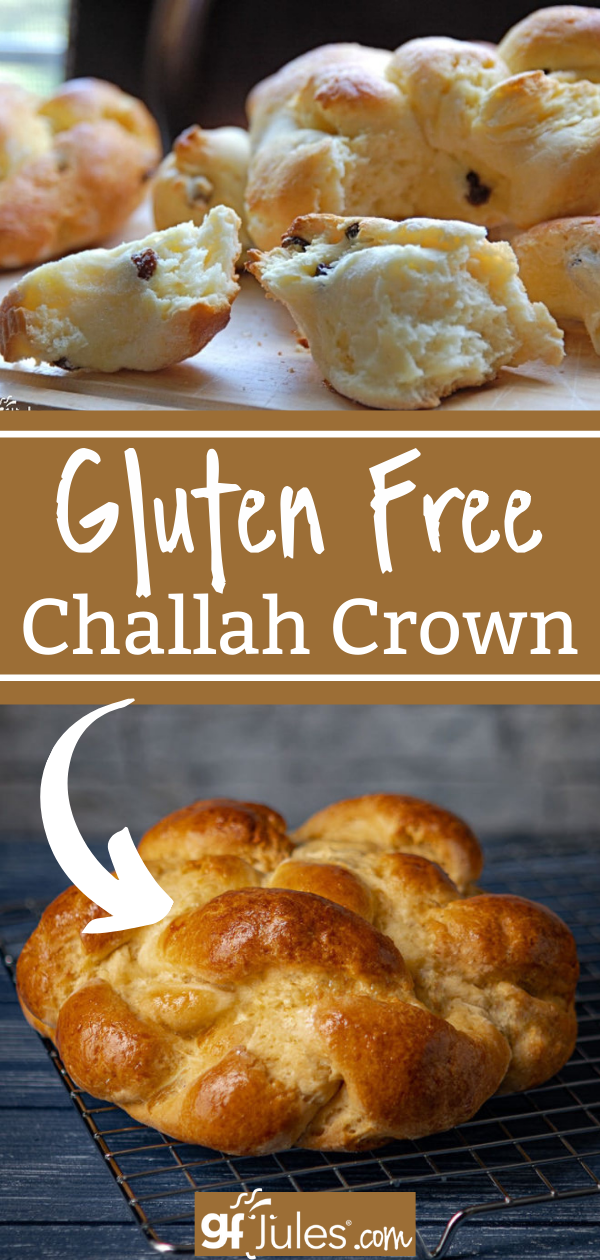
This gluten free Challah Crown is a true showstopper — beautifully golden, soft, moist, slightly sweet, and, yes, you can actually braid this gluten free bread dough! It makes an especially beautiful gluten free challah for Rosh Hashanah, when round challah symbolizes the cycle of the year and the hope for a sweet new year.
And the best part? This gluten free challah is much easier to make than you might think.
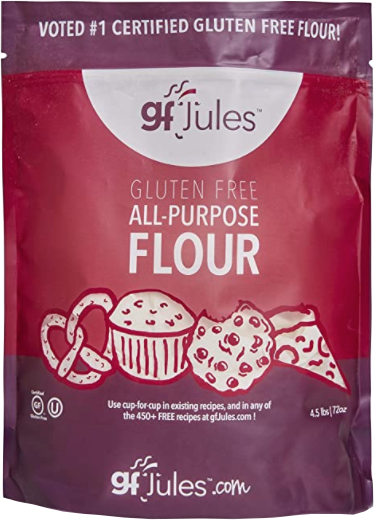
The secret is choosing the right gluten free flour for challah. A dry, gritty, rice-heavy flour simply won’t give you dough that’s easy to shape and braid. My award-winning gfJules Gluten Free All Purpose Flour is exceptionally fine and light, while also giving gluten free dough the stretch and flexibility it needs to be shaped into beautiful braided strands.
Yes, you read that right: YOU CAN BRAID THIS GLUTEN FREE CHALLAH!
It’s all about the gluten free flour.
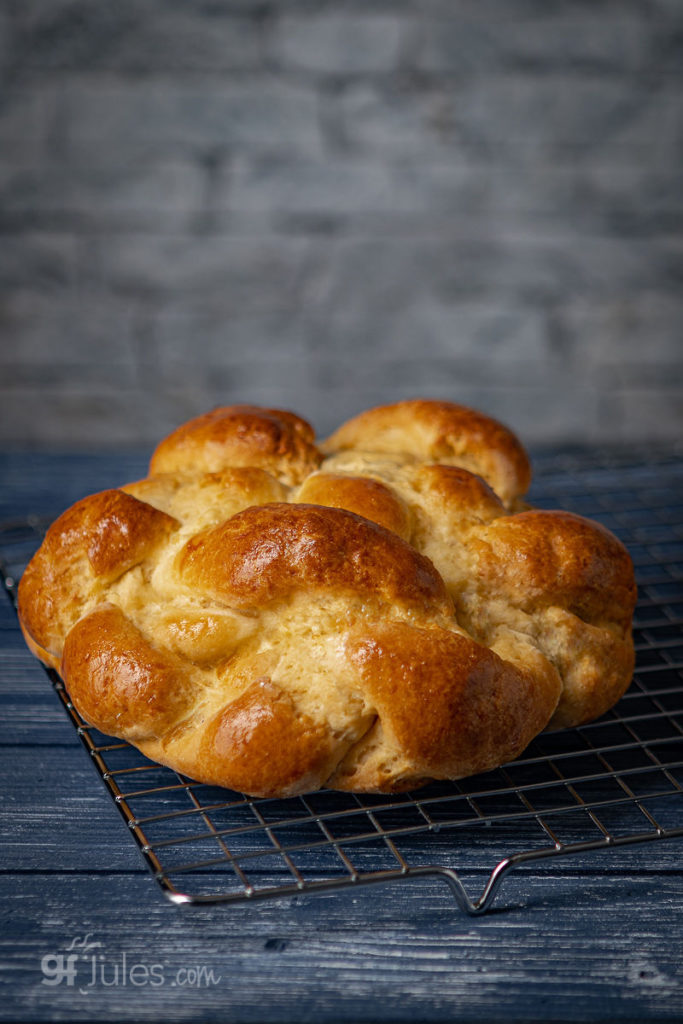
The Secret to Soft, Braided Gluten Free Challah
Traditional challah is made with wheat flour, which naturally provides the gluten network that makes yeast dough stretchy and easy to braid. Gluten free dough needs a little help.
That’s why the flour you choose makes such a dramatic difference.
gfJules Gluten Free All Purpose Flour is designed to behave more like traditional wheat flour in yeast breads. Its fine texture eliminates the gritty mouthfeel associated with many rice-based gluten free flours, while its unique formulation helps create dough that’s soft, flexible and workable.
That means you can make a gluten free braided challah, shape individual strands, and form them into the gorgeous round challah crown traditionally enjoyed at Rosh Hashanah.
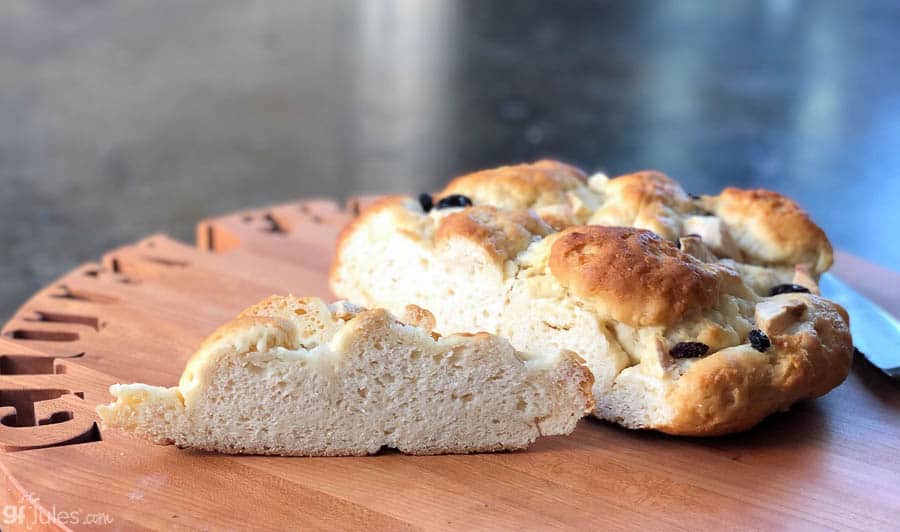
What Is Challah and Why Is It Served at Rosh Hashanah?
Challah is a traditional Jewish bread enjoyed on Shabbat and holidays, including Rosh Hashanah, Yom Kippur and Hanukkah. While challah is deeply connected to Jewish traditions and celebrations, its soft texture and lightly sweet flavor make it a wonderful bread to serve for special meals throughout the year.
At Rosh Hashanah, the Jewish New Year, challah takes on additional symbolism.
Instead of the elongated braided loaves often associated with Shabbat, challah is traditionally shaped into a round challah at Rosh Hashanah. The circular shape can represent the cycle of the year and the continuity of life, with no beginning or end.
Rosh Hashanah challah is also traditionally sweeter, representing the hope for a sweet new year. This gluten free challah recipe can be made with raisins for even more sweetness, and there’s nothing better than tearing off a piece of warm challah and dipping it into good-quality honey.
Why You’ll Love This Gluten Free Challah Recipe
If you’ve been searching for a gluten free challah recipe that can actually be braided, this is the one to try.
- Soft and moist, not dry or gritty
- Easy to shape and braid using gfJules Flour
- Perfect for making a gluten free challah crown
- Beautiful centerpiece for Rosh Hashanah
- Delicious enough to serve to gluten eaters, too
- Can be made with raisins for traditional holiday sweetness
- Works beautifully as a homemade gluten free Jewish bread
- Much quicker and easier than many traditional yeast breads
I had friends over recently and served these beautiful round challah loaves because they’re one of my family’s favorite breads — and it happened to be right before Rosh Hashanah.
My friends had made their own traditional gluten-containing challah the week before, and they weren’t particularly thrilled with the results. When they tasted my gluten free challah, they were blown away.
That’s one of my favorite things about gluten free baking: homemade gluten free bread can absolutely be as good as — and sometimes even better than — its gluten-containing counterpart.
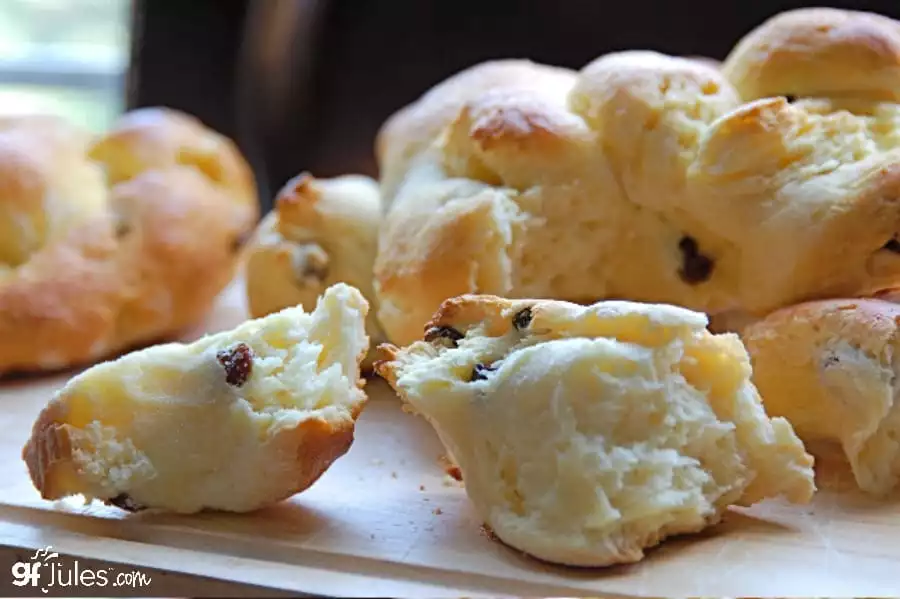
How to Braid Gluten Free Challah Dough
If you’ve ever tried to braid gluten free bread dough, you may already know the problem: many gluten free doughs are either too sticky, too crumbly or too fragile to form into strands.
This recipe is different.
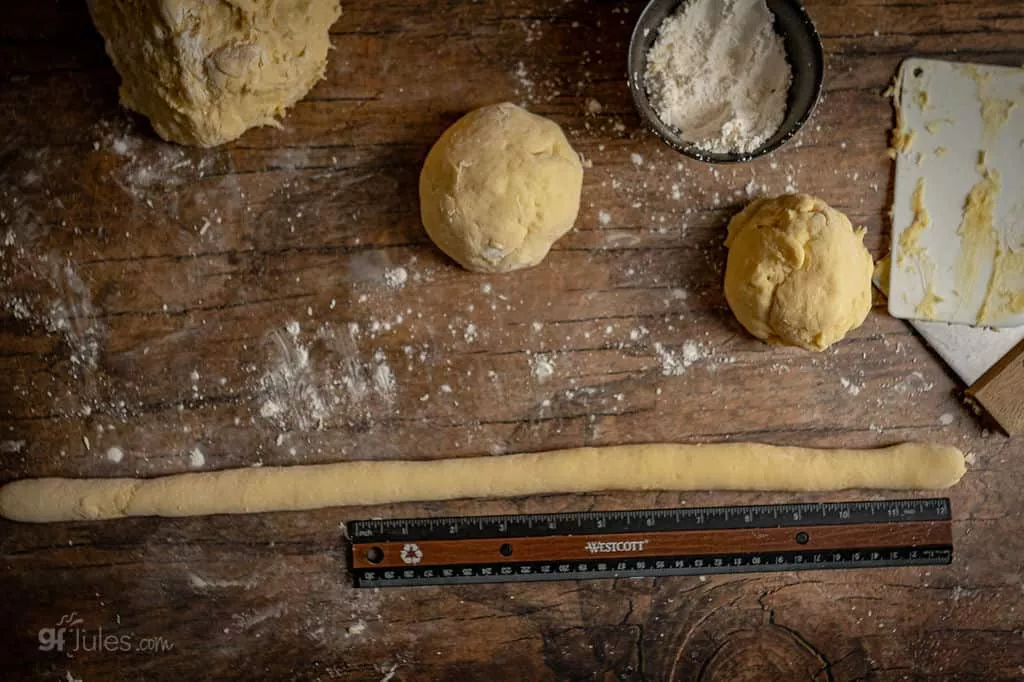
The dough will initially be thick and sticky, but once it’s lightly dusted with gfJules Flour, you can shape it into long strands that are flexible enough to braid.
That’s the magic of using a gluten free flour blend that has been formulated for yeast baking.
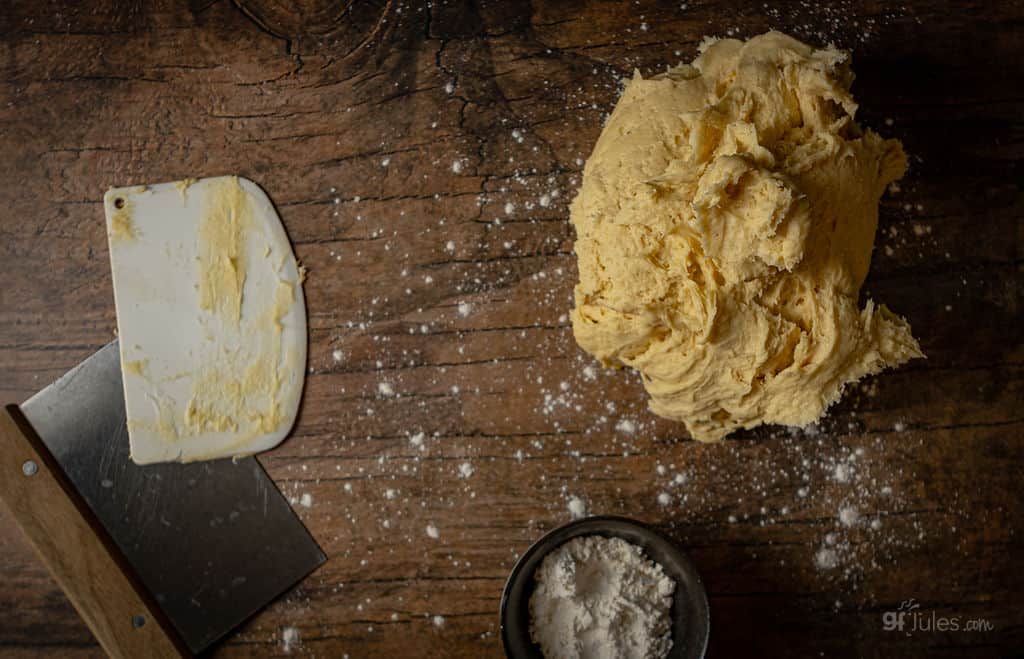
Once the strands are formed, follow the shaping instructions in the recipe to create the beautiful braided crown.
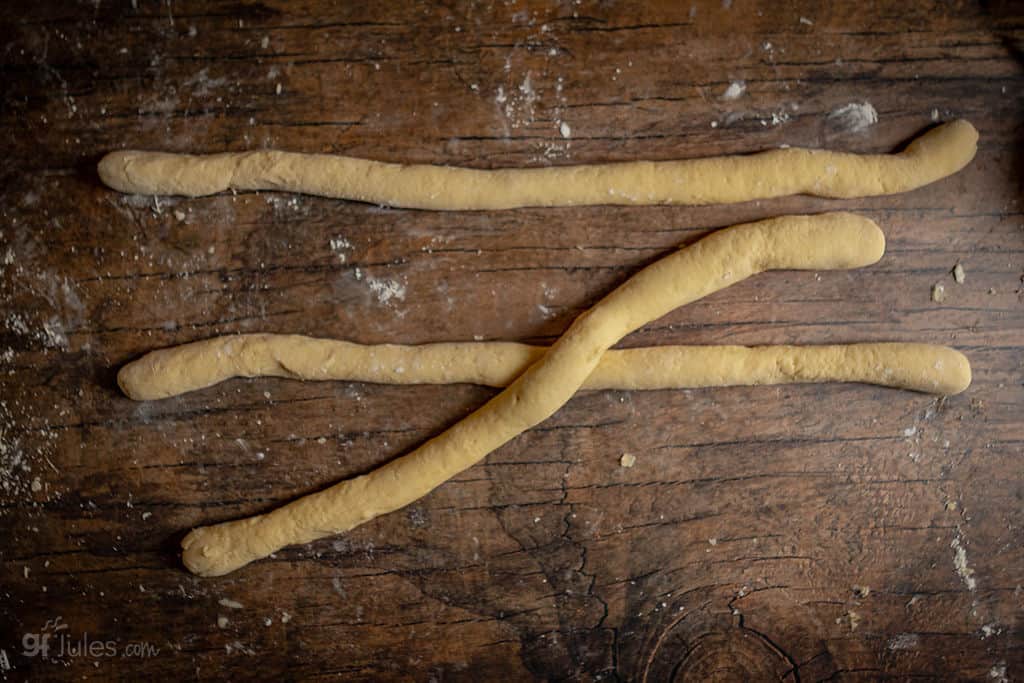
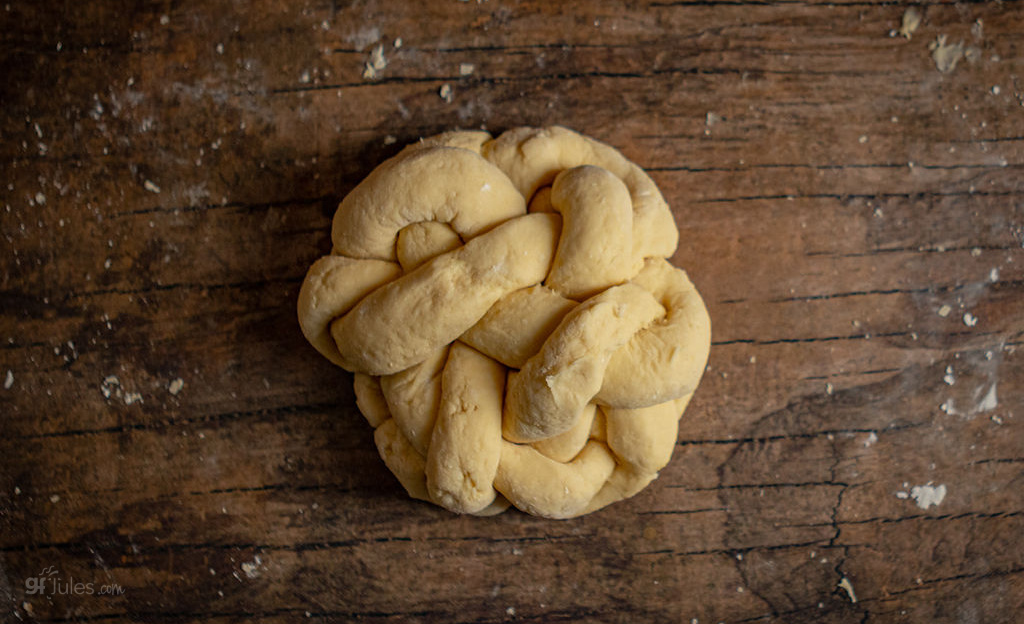
That final twist into a round challah crown is what makes this loaf such a spectacular centerpiece.
How to Get a Golden, Soft Gluten Free Challah
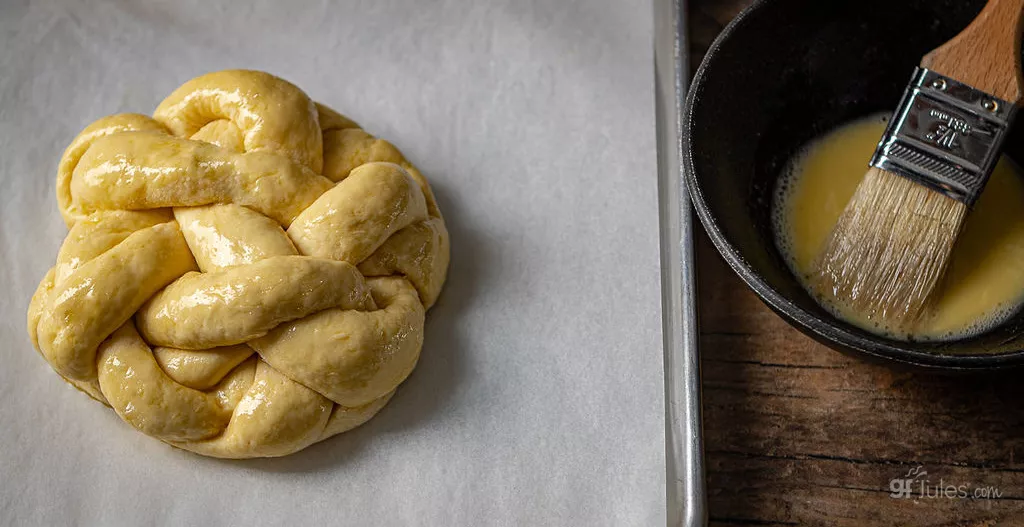
Before baking, brush the shaped challah with egg wash. This helps give the loaf its beautiful deep golden-brown crust while helping the finished bread stay soft and moist.
And once it’s baked?
Well, that’s when the real challenge begins: trying not to eat it immediately!
Gluten Free Challah for Rosh Hashanah: Honey, Raisins and a Sweet New Year
For Rosh Hashanah, challah is traditionally made sweeter to symbolize the wish for a sweet new year.
I love adding raisins to this gluten free challah, then serving it with honey for an extra-special holiday tradition. The combination of soft, slightly sweet bread, chewy raisins and golden honey makes this gluten free Rosh Hashanah challah especially memorable.
Whether you’re making challah for a Jewish holiday, accommodating someone with celiac disease, or simply looking for a beautiful homemade gluten free bread, this recipe gives everyone at the table something to celebrate.
Can Gluten Free Challah Be Used for Hamotzi?
If you are specifically looking for a gluten free challah that qualifies for Hamotzi, there is an important distinction to understand.
Traditional Jewish law identifies five species of grain associated with Hamotzi: wheat, barley, rye, spelt and oats. Of these, oats are the only naturally gluten free grain.
If you are making a challah containing 51% oat flour for this purpose, I recommend using a molded challah pan rather than attempting to braid the dough. The dough is more difficult to braid when a significant portion of the flour is oat flour rather than gfJules Flour.
That said, readers have told me they’ve successfully braided this dough using as little as 49% gfJules Flour. It simply isn’t quite as easy to work with.
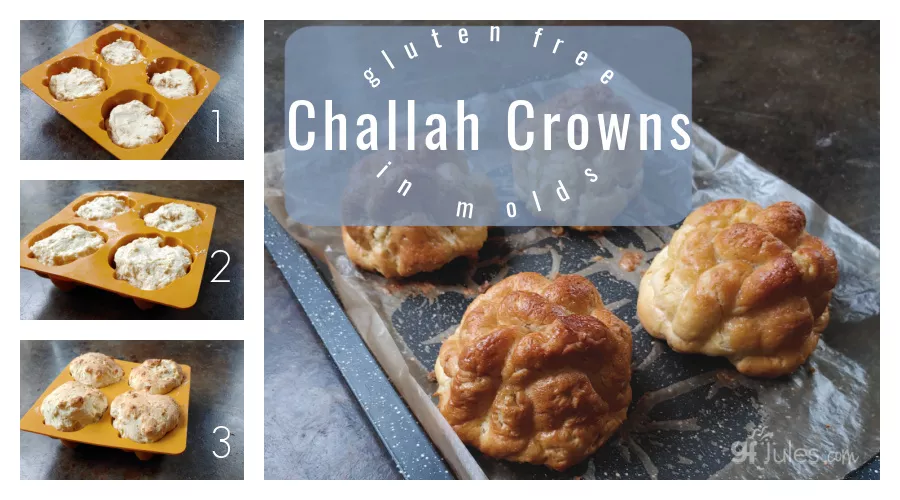
2) rise in pan
3) bake 15 minutes in pan then turn out to bake 5 minutes on baking sheet
Baking gluten free challah crowns in molded pans: fill the mold 1/2 to 2/3 full, allow the dough to rise in the pan, then bake before turning the challah out onto a baking sheet to finish baking.
If you use a molded challah pan, you may have more dough than the pan can hold. Simply put the extra dough into a loaf pan or muffin pan and make additional gluten free rolls.
Making Gluten Free Oat Flour
When I use oat flour, I prefer to make my own gluten free oat flour. It’s incredibly easy, and starting with whole purity protocol gluten free oats makes it easier to know exactly which oats you’re using.
Learn how to make your own gluten free oat flour.
You can also find purity protocol gluten free oats in my gfJules shop.
Want a Traditional Braided Gluten Free Challah Loaf?
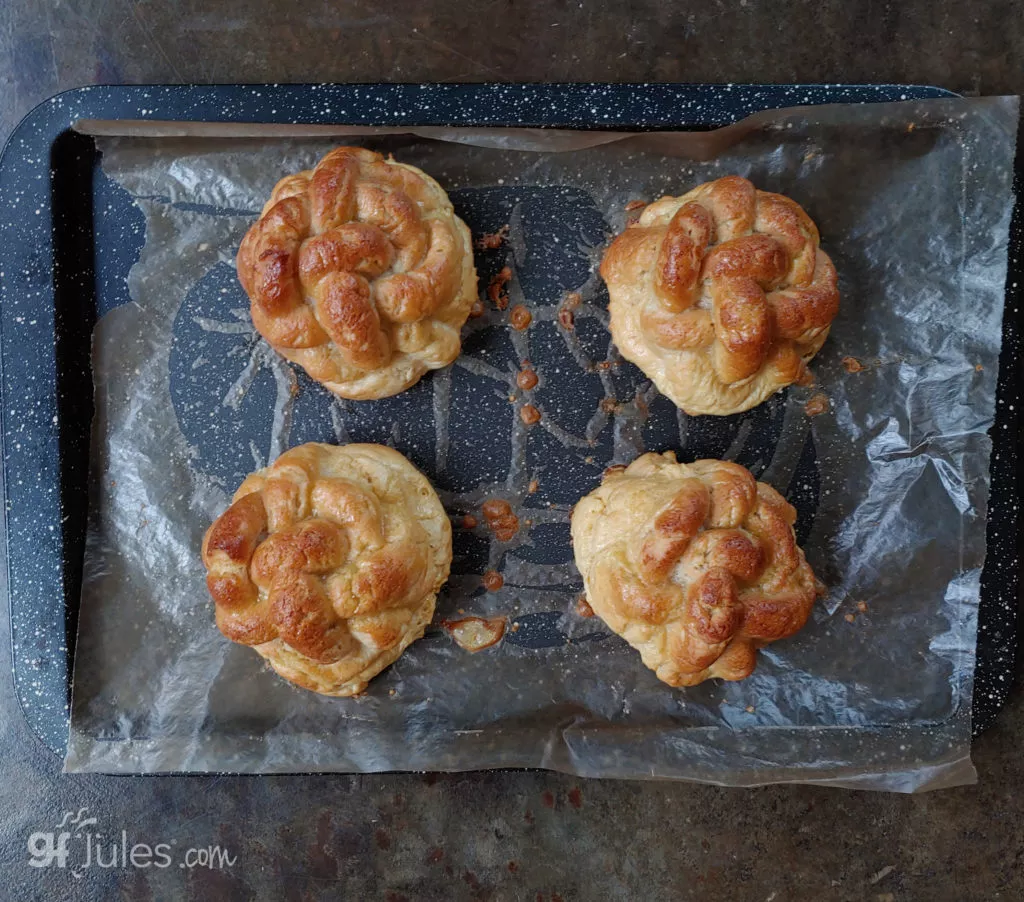
This recipe makes a beautiful round gluten free challah crown, but if you’d prefer the classic elongated braided shape, I’ve got you covered.
Try my Gluten Free Challah with Apples and Raisins for a gorgeous braided loaf with the same soft, tender texture.
The Secret to Easy Homemade Gluten Free Bread
Everyone who has watched me teach gluten free bread baking in cooking classes or demonstrations knows my favorite gluten free baking secret.
Shhh… don’t tell the gluten-eaters!
Homemade gluten free bread can be surprisingly easy — and often much faster than making traditional yeast bread.
Once you have the right gluten free flour, there’s no reason to settle for dry, crumbly or gritty bread. This challah is proof.
So whether you’re celebrating Rosh Hashanah, preparing a gluten free Shabbat meal, observing another Jewish holiday, or simply craving a beautiful loaf of homemade gluten free bread, this gluten free challah recipe is ready whenever you are.
It’s soft. It’s golden. It’s beautiful.
And most importantly, it’s gluten free bread you can actually braid.
Celebrate a sweeter day with this gorgeous gluten free challah crown!
Gluten Free Challah Crown Recipe
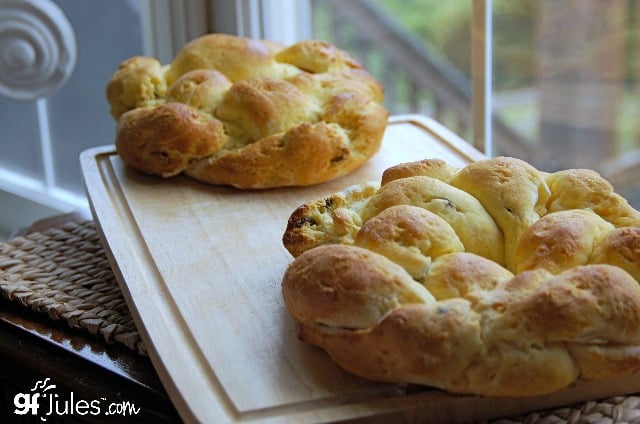
Gluten Free Challah Crown
Ingredients
Gluten Free Challah Bread Ingredients
- 1/2 cup + 2 Tbs. warm water
- 1 Tbs. gluten free yeast like Red Star -- not platinum! -- or Fleishmann's
- 1 tsp. granulated cane sugar
- 1 cup vanilla dairy or non-dairy yogurt at room temperature (So Delicious® Vanilla Coconut Yogurt)*
- 2 tsp. apple cider vinegar
- 5 large egg yolks at room temperature slightly mixed**
- 1/3 cup sunflower oil OR non-GMO canola oil OR extra virgin olive oil
- 4 Tbs. honey OR agave nectar OR maple syrup
- 4 cups (540 grams) gfJules™ All Purpose Flour
- 1 Tbs. psyllium husk powder (added for smoother texture, but if not using, reduce total water by 2 Tbs.)
- 3 Tbs. + 2 tsp. granulated cane sugar
- 1 1/4 tsp. kosher salt
Toppings
- 1 large egg mixed
- poppy seeds sesame seeds, raisins, diced apples or other toppings or mix-ins (optional)
Instructions
- Preheat your oven to 200º F, then turn it off; if you have a warming drawer, you may set that to low/moist setting instead. Prepare a baking sheet by lining it with parchment paper.
- In a small bowl, mix together ~1/3 cup (5 Tbs) warm water, yeast and 1 teaspoon of sugar to prove the yeast; set aside.
- In the bowl of your stand mixer, add the remaining wet ingredients (remaining 5 Tbs water, yogurt, cider vinegar, egg yolks, oil, honey) and mix until combined.
- Whisk together the dry ingredients in a separate bowl (gfJules Flour; psyllium, 3Tbs + 2 tsp. sugar; salt).
- After 5 minutes of proofing, stir in the bubbling yeast-water mixture into the wet ingredients (note: if your yeast isn’t bubbling at this point, throw it out and start again with fresh yeast).
- Gradually stir the dry ingredients into the wet until fully integrated, adding more warm water by the tablespoon only as needed to get the dough soft and so that the dough is not tight or stiff — you should be able to pull the dough gently without it feeling tight or like it would bounce back — if it’s stiff, add more warm water then mix 1-2 minutes more on medium speed to integrate the additional water. The dough should be workable; keep in mind you will be braiding it, so it can't be too loose or too tight (think of Goldilocks dough!)
- Once the dough is combined, divide it in half and divide each half into three equal-sized balls. The dough will be sticky, so use extra gfJules Flour on your hands and rolling surface (I like using a bench scraper like this one to help me cut and roll the sticky dough).
- Roll each ball out into an 18-inch coil or log on a clean, flat surface dusted lightly with gfJules Flour. If you have trouble rolling because you've used too much flour, dab a bit of water onto the counter or mat.
- Pinch together one end of each coil, wetting them slightly with water to help them join together at the top, then braid them, finishing by connecting them to the top of the other end in order to form a crown, or circular shape, or simply leave as a long braid.
- Gently transfer to the parchment-lined baking sheet. Repeat for the second set of three balls. In the alternative, you can simply divide the dough in half, roll out into a flattened coil, then twist the coil upon itself and join at the ends to form a circular loaf; repeat with the other half of the dough ball.
- In a small bowl, mix the extra egg (at room temperature) together and brush over each loaf, coating the entire surface. Sprinkle the seeds or any toppings at this point, then place the tray (covering the loaves with wax paper sprayed with cooking oil) in a warming drawer set to low heat, or into a warm location for 20 – 30 minutes. (Don’t expect the bread to rise much at this stage).
- Once risen slightly, place the uncovered tray in an oven preheated to 350º F (static) or 325º F (convection) for 20 minutes or until a toothpick inserted into the center of the bread comes out dry, or with some crumbs attached but no wet dough.
- Remove to cool on a wire rack.
Video
Notes
** Please keep in mind that nutrition information provided is per serving, which may vary. While we have taken care to provide you with the most accurate nutritional values possible, please note that this information may differ significantly depending on the exact ingredients and brands that you choose to use to make this recipe. Additionally, where options are given for ingredients, the resulting calculation may include all ingredient options instead of only one per line, skewing the totals significantly.
I hope you love this recipe as much as we do!
Pin it for later!













Everyone loves this bread, not just for shabbat. Thank you for making gluten free bread braidable with your gfJules Flour!
I’m so glad to hear that you’re loving and sharing this gluten free Challah, Cindi! Thanks for letting me know!!
~jules
Challah Crown recipe, Please let me know when you perfect the recipe with egg replacer .
Hi Susan, in the notes I have this information: one reader used 1 Tbs. Just Egg per yolk and her challah turned out beautifully!
I hope this helps!
~jules
Hi Jules
Can I freeze this a head of time?
What stage in this recipie is the best time…just before I bake it ? Or bake ,then freeze?
Hi Ann, I haven’t frozen this dough before, but there’s no reason you couldn’t. You could follow the instructions in my gluten free cinnamon rolls recipe for make-ahead doughs: I give a few options and the principles would be the same with this shaped dough as well.
~jules
Hi, gfjules!
I actually have a question- I have a recipe for your flour, that I found in a magazine. (I think it might have been from America’s Test Kitchen magazine, but I’m not positive.) Would that flour recipe work for this challah recipe?
Hi Gail, no telling where you found a knock-off recipe! LOL I’ve actually shared some modified blends myself before, in case folks couldn’t have some of the ingredients in my blend or lived far overseas where shipping my blend can get cost prohibitive. The important thing is that the ratios are similar in order to be able to exchange the blends for decent results, but the blends are not the same, since the ingredients in my blend aren’t available to consumers otherwise. Have a look at this article on gluten free flour blends and see if the recipe you’re looking at seems like it might work.
~jules
That looks amazing! I just wish your flour didn’t have corn starch! That’s why I had to stop using it. So many people with gluten sensitivity and celiac are sensitive to corn gluten.
Hi Sue, I’m sorry to hear that you have problems tolerating corn. I do have a phenomenal gluten free bread mix that is entirely corn-free that you should check out sometime!
~jules
I noticed that JF Jules make bread flour. Is it better to use that than their all purpose flour
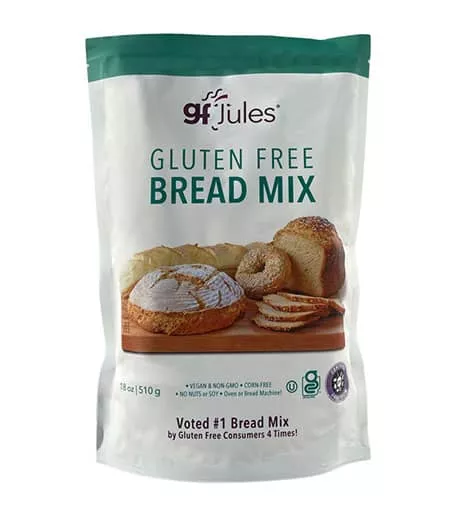
Hi Karin, in this particular recipe, the gfJules Gluten Free All Purpose Flour is the best one, since the recipe was developed using it. It’s possible to use my gfJules Bread Mix, but you’ll have to measure it out as flour and make a few other adjustments to the recipe. Others of my gluten free bread recipes give an option to use either one.
~jules
The challah turned out great and is very tasty, followed your recipe to a T and used your amazing flour!
That is so fantastic, Jenny! I’m thrilled that you made the challah crown and that this recipe turned out so well for you! Thanks so much for taking the time to let me know!
~jules
Good morning. I plan to try this recipe this weekend. The yeast in the recipe, I have quick-acting yeast, is that the wrong kind?
Thank you. Now that the weather is cooling off, I am eager to start baking!
Hi Beth, you actually can use either kind of yeast for this recipe! If you use the quick-acting yeast, there is no need to proof the yeast before hand, saving even more time. Here’s more information on yeast which might help for this or other recipes in the future. Hope you love this recipe (if you haven’t made it already!).
~jules
Super Delicious! I used coconut sugar and ghee for the oil. I don’t have a stand mixer so mixed by hand. Wondering if I should have kneaded the dough a bit as it did try to break apart a bit while rolling out the coils. It looked a wee bit denser on the inside than your pix so maybe mixing the dough more efficiently could help?
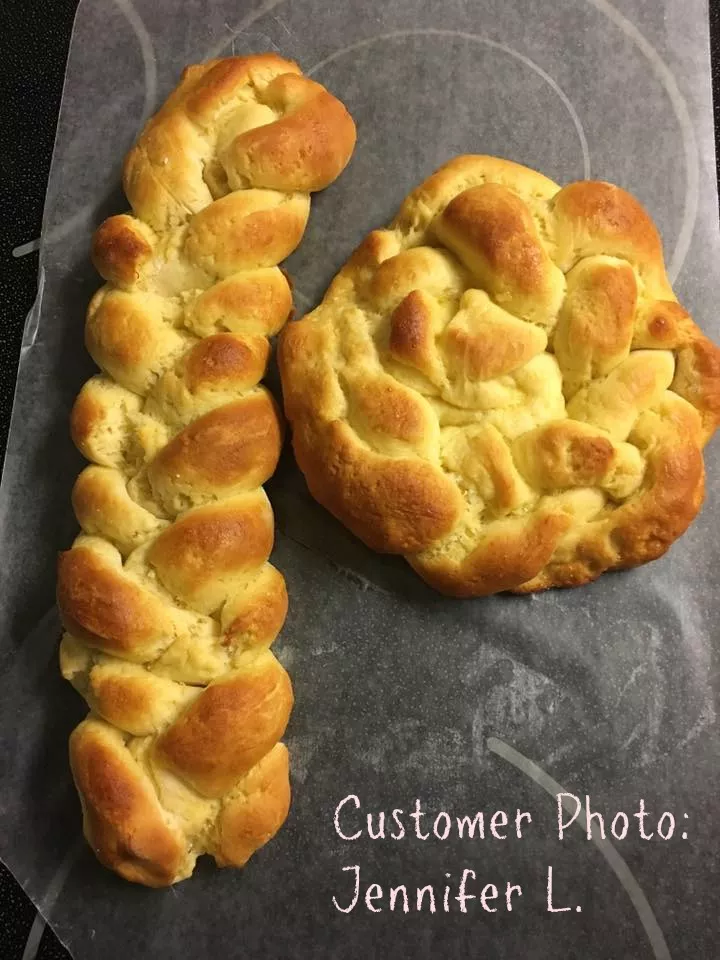
But, regardless, it was very tasty. We toasted it as well. They didn’t last long! As you can see from the pic, I didn’t quite get the correct twist after braiding, I just made a circle, not sure if that’s all it is or if the dough is twisted somehow. You can also see how the coils were cracking as I braided them. Maybe not quite the right dough consistency. My daughter said they look more like brains than crowns! Brains with Crowns is a good thing : )
I love the “brains with crowns” concept! And I’m down for anything that tastes great, no matter how it looks, but I’d definitely say that mixing better will help with any yeast doughs — perhaps a bit more liquid will help as well. So glad you were able to braid them and they still tasted so good — definitely worth making again and tweaking the technique a bit. Can’t wait to hear about the progress!!
~jules
Hi Jules,
Will coconut sugar work instead of cane sugar? Do you think melted ghee could be ok instead of the oil?
Cheers,
Anna
HI Anna, yes coconut sugar will work and melted ghee should also work but I haven’t tried that in this recipe myself — I just can’t think of a reason why it wouldn’t work! Let me know how it turns out with those modifications. I’m sure you’re not the first person to wonder!
~jules