
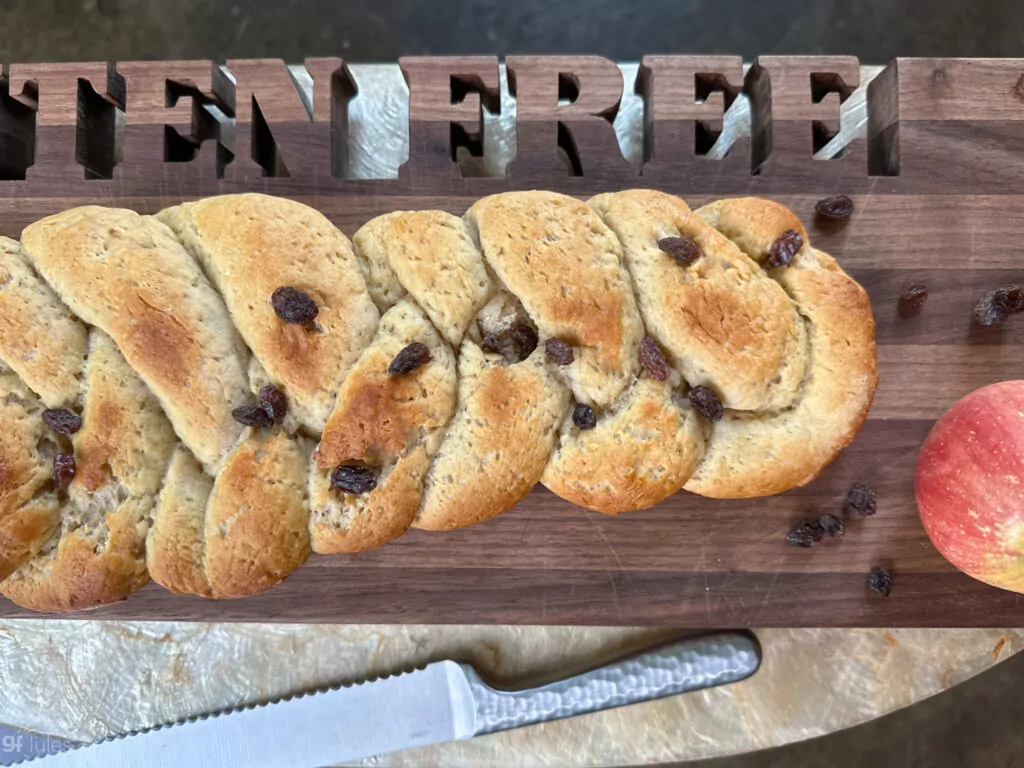
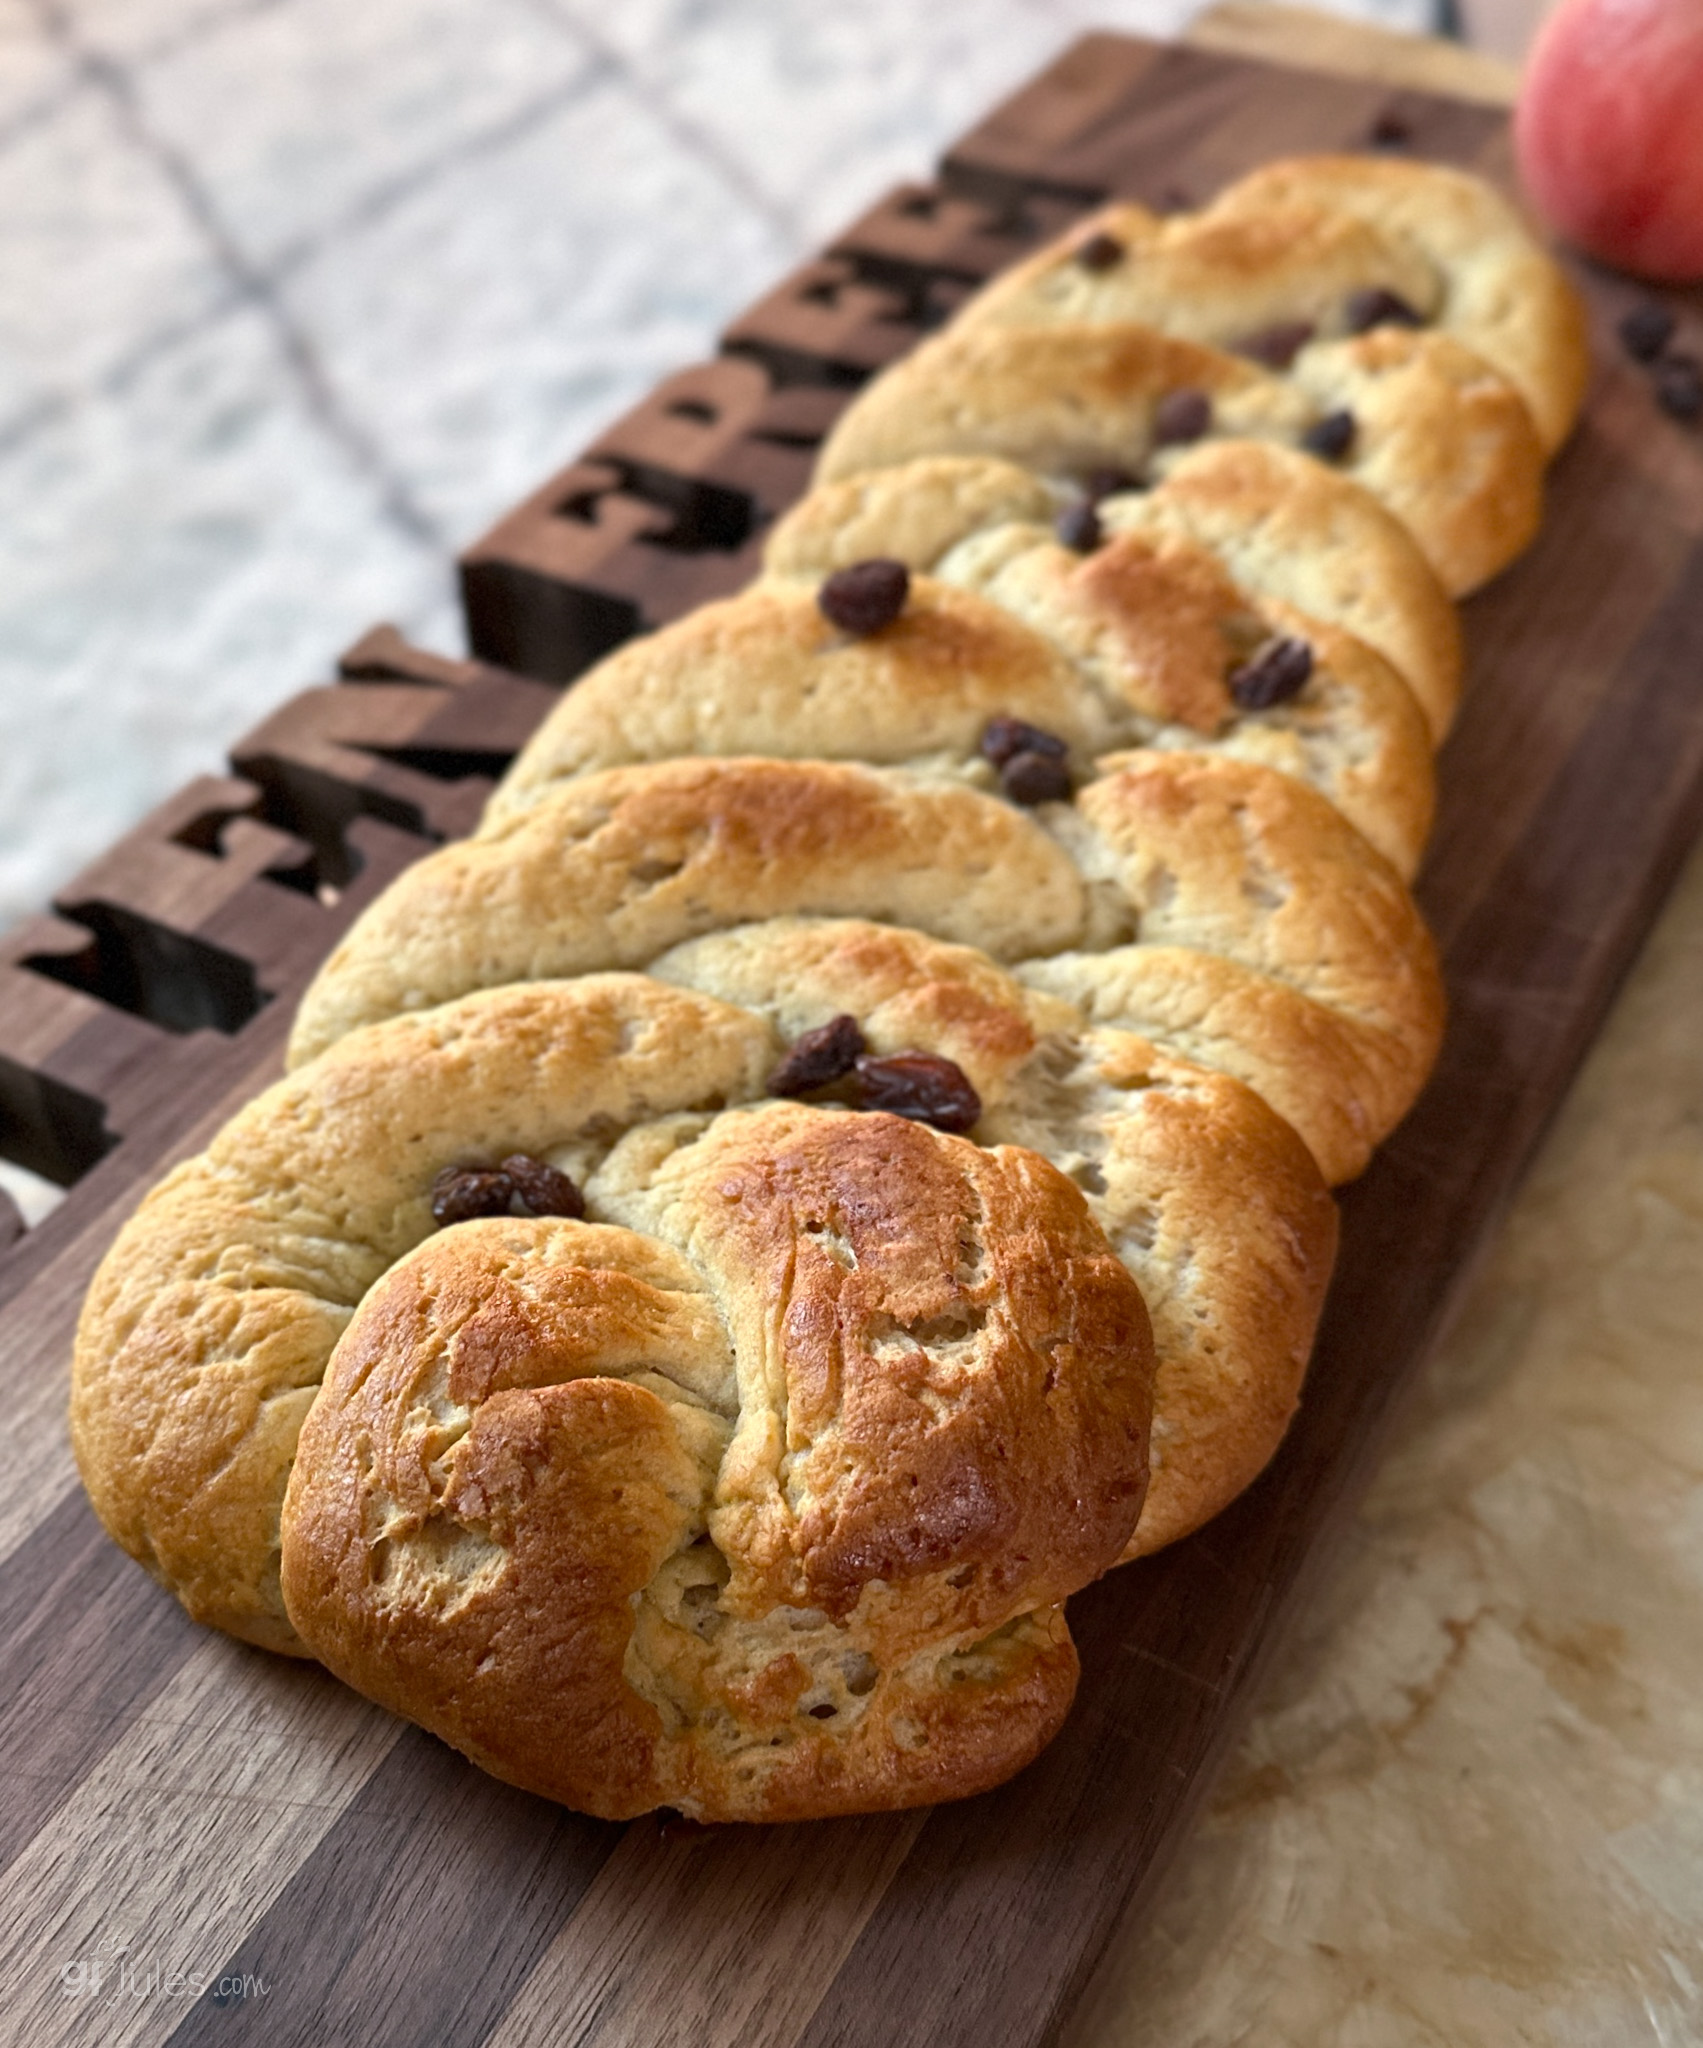
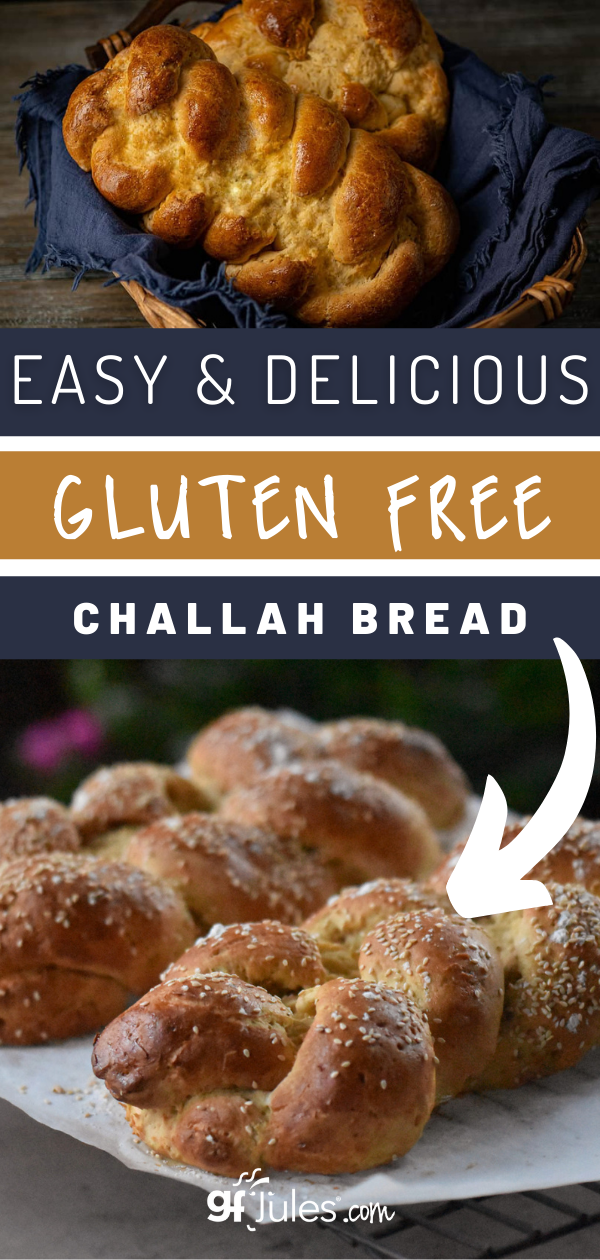
Gluten Free Challah, or the-most-beautiful-braided-bread-ever, or egg bread or Shabbat Bread, Bread for Hannukah or Rosh Hashanah or even Easter … whatever you call it and for whatever occasion you bake it, it’s a true treat, with or without apples and raisins.
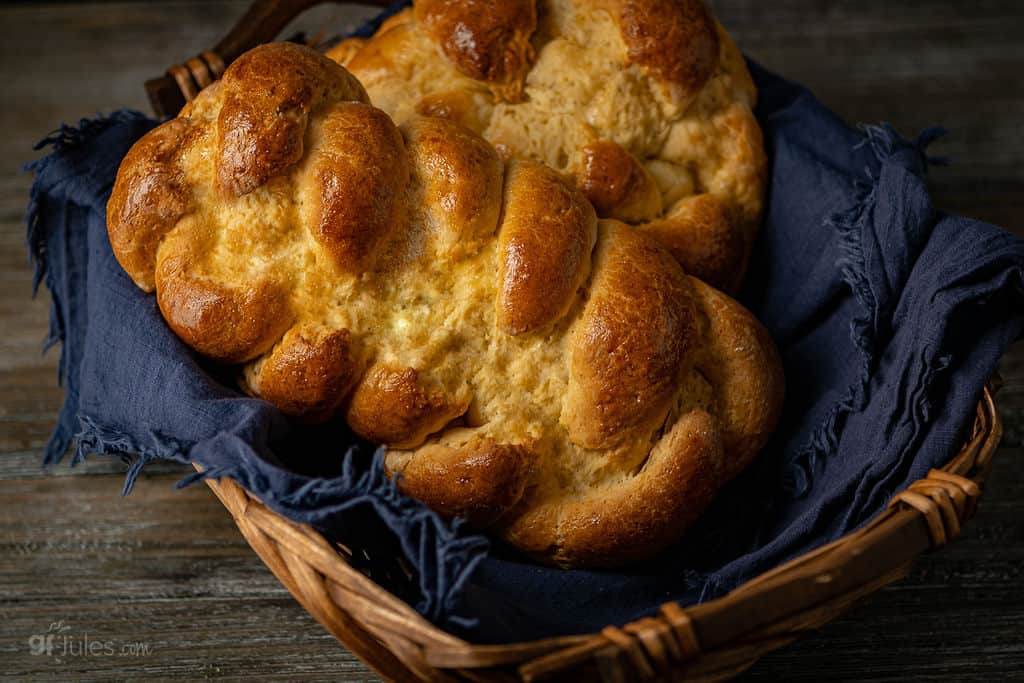
Even if you’ve never made homemade bread or if you’ve never braided bread dough, this recipe will make you look like a super star in the kitchen! The dough is soft and easy to work with when made with my gfJules Flour, and you can braid or shape it (or not!) however you like!
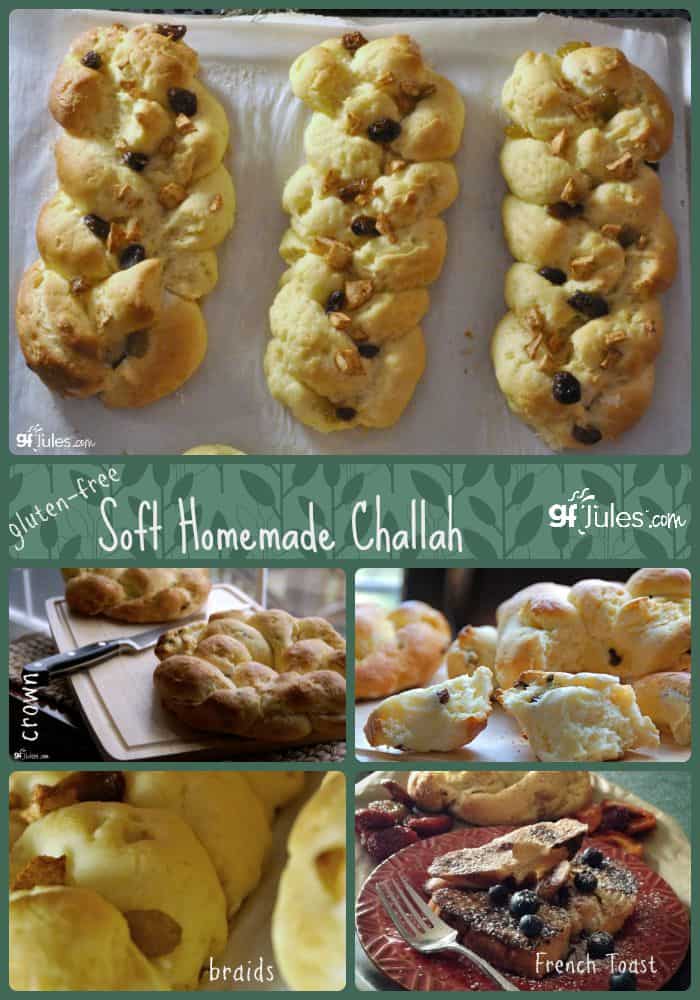
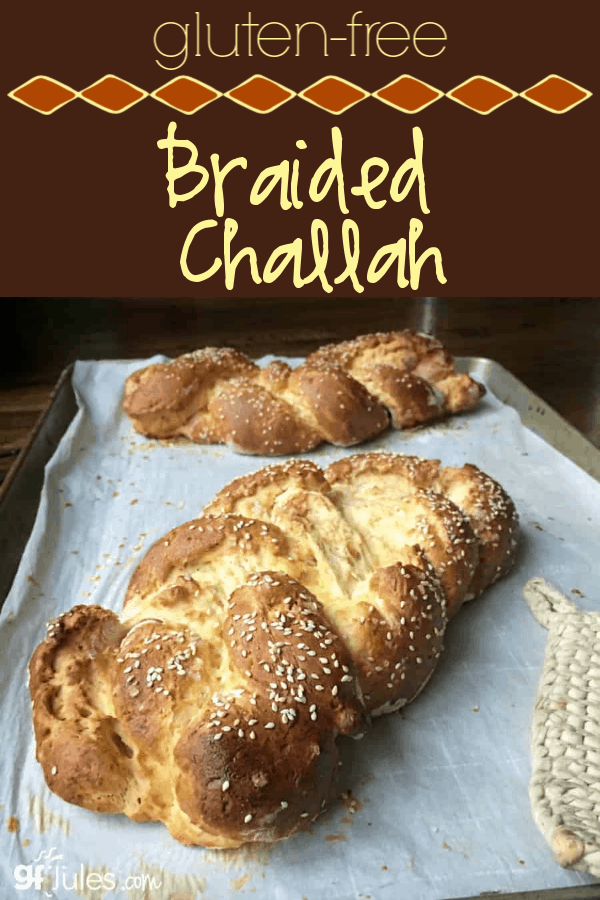
Some folks braid it like so …
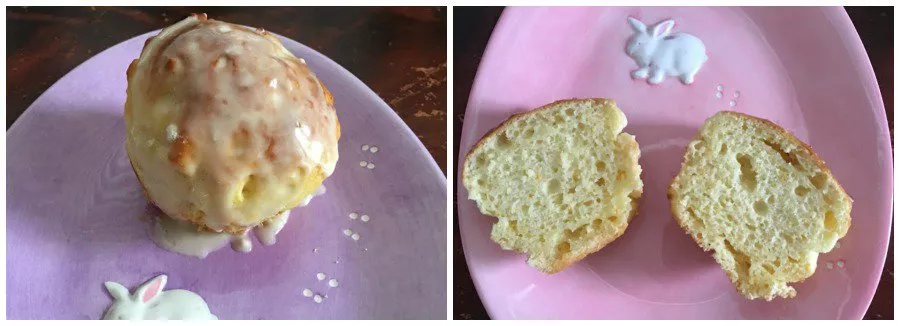
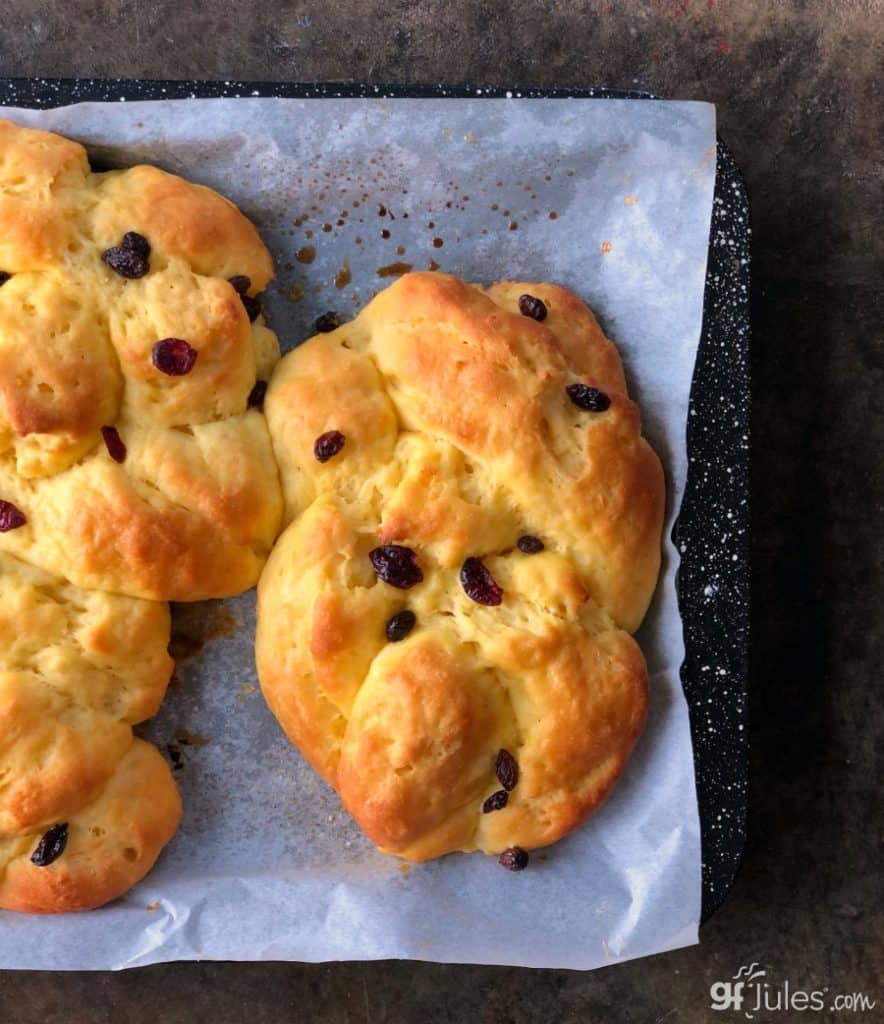
Others bake it into crown shapes or even bake off in muffin or popover tins for individual rolls.
Gluten free challah this good is great any time. Why wait for the next Jewish holiday or even for Friday? You can even prep this dough and refrigerate it overnight to bake the next day!
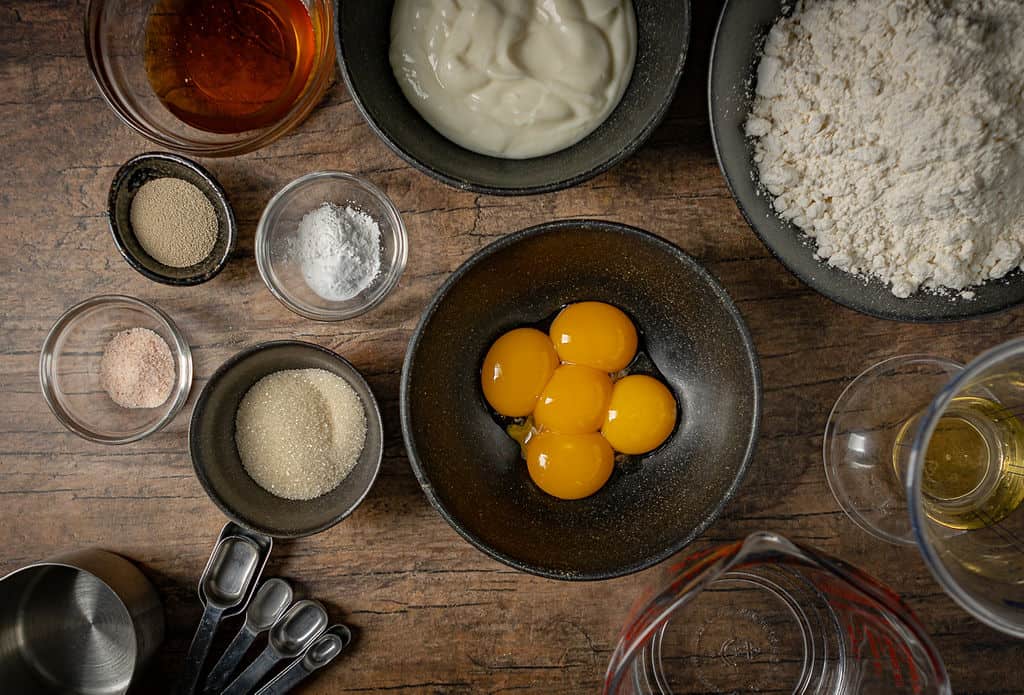
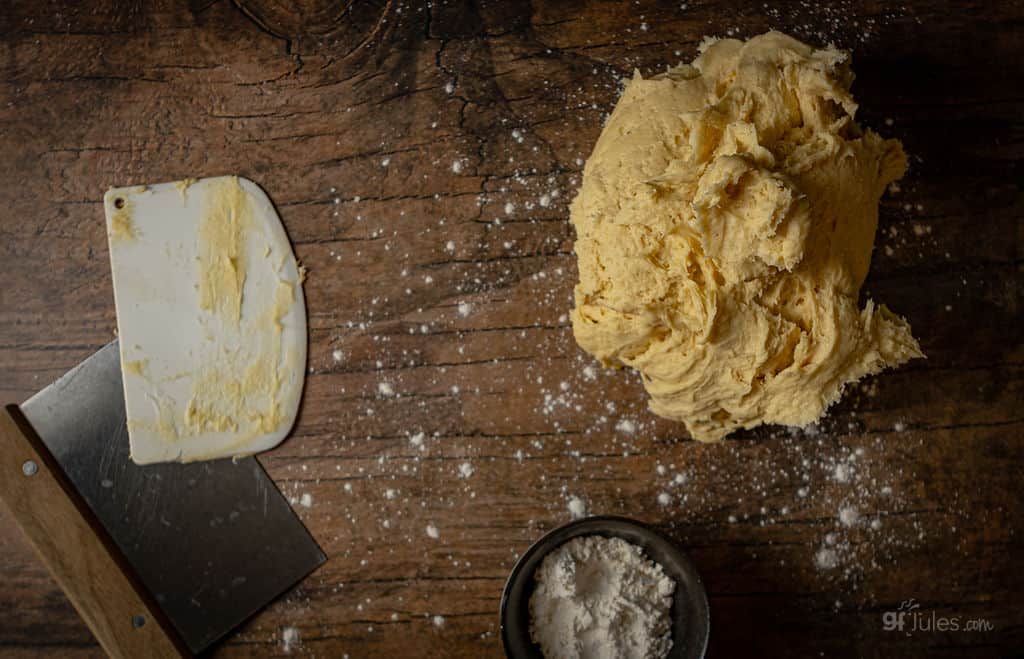
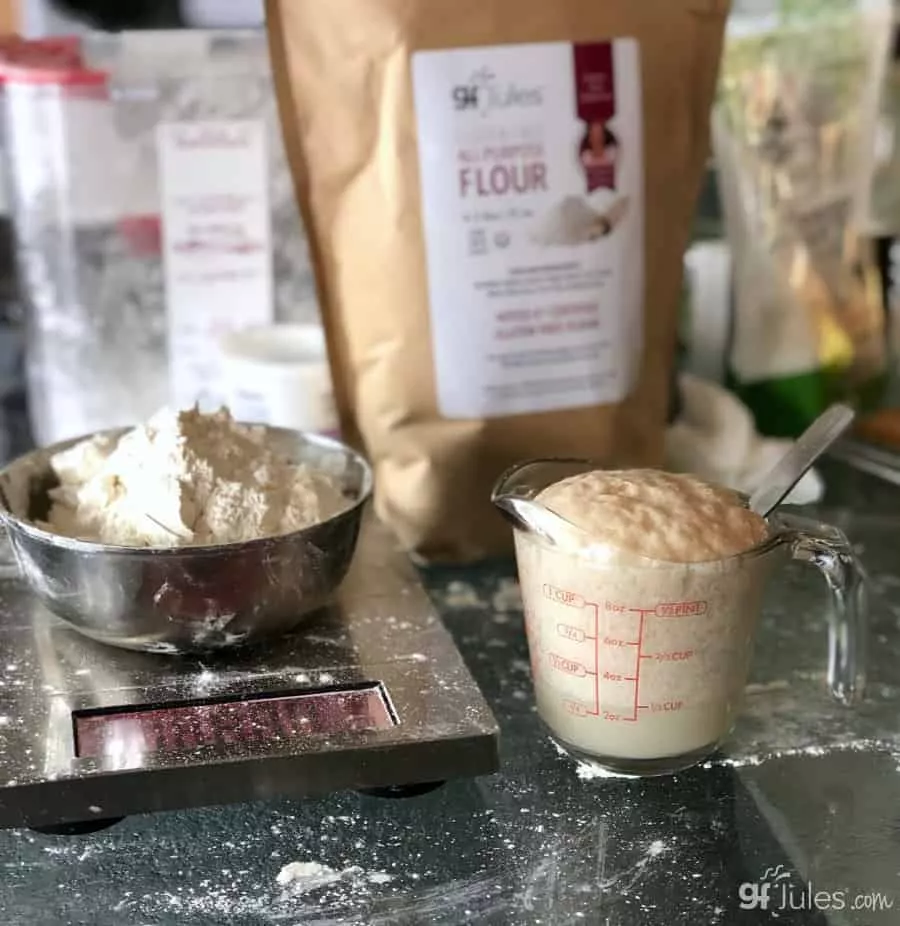
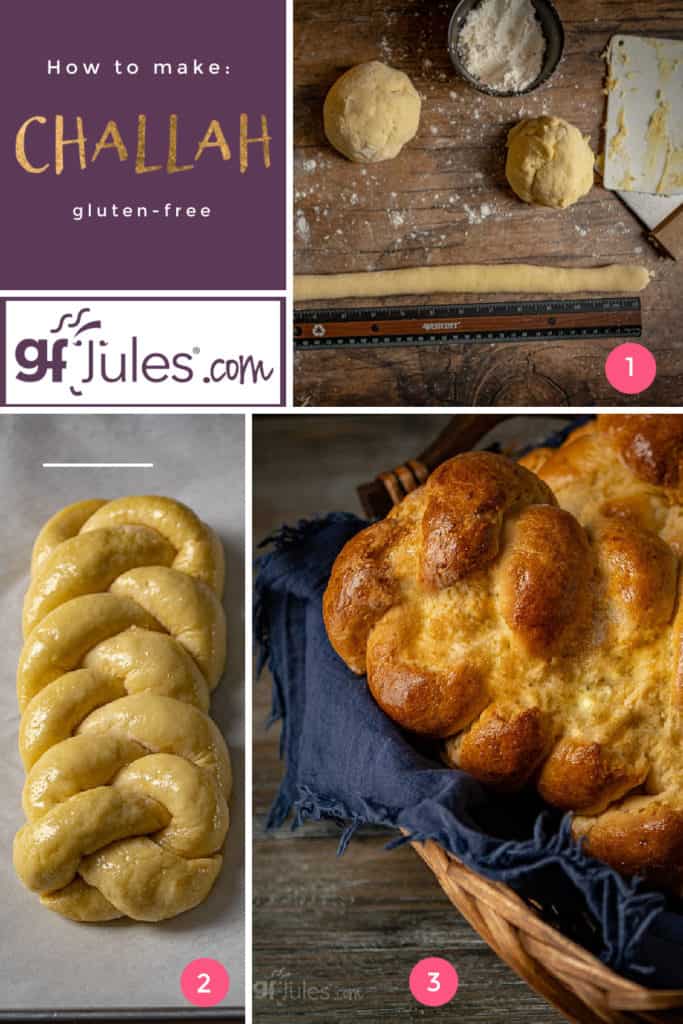
Just gather your ingredients … make sure the liquids are at room temperature.
Mix your dough then transfer it to your bench or clean counter dusted with gfJules gluten free flour to keep it from sticking.
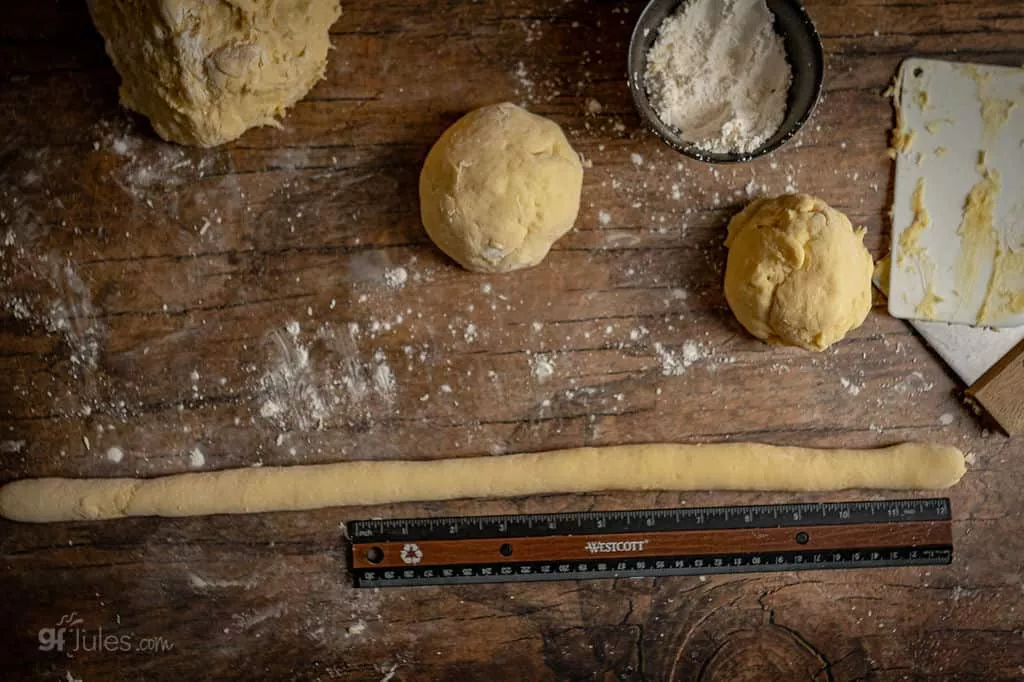
Then divide it into balls — 6 equal balls for 2 loaves with 3 strands each. Then channel your inner child and hearken back to your playdough days. This is where it gets fun! Start rolling, not pressing, but gently rolling out each ball into long strands of dough that can be braided. Watch my video below for more instructional detail.
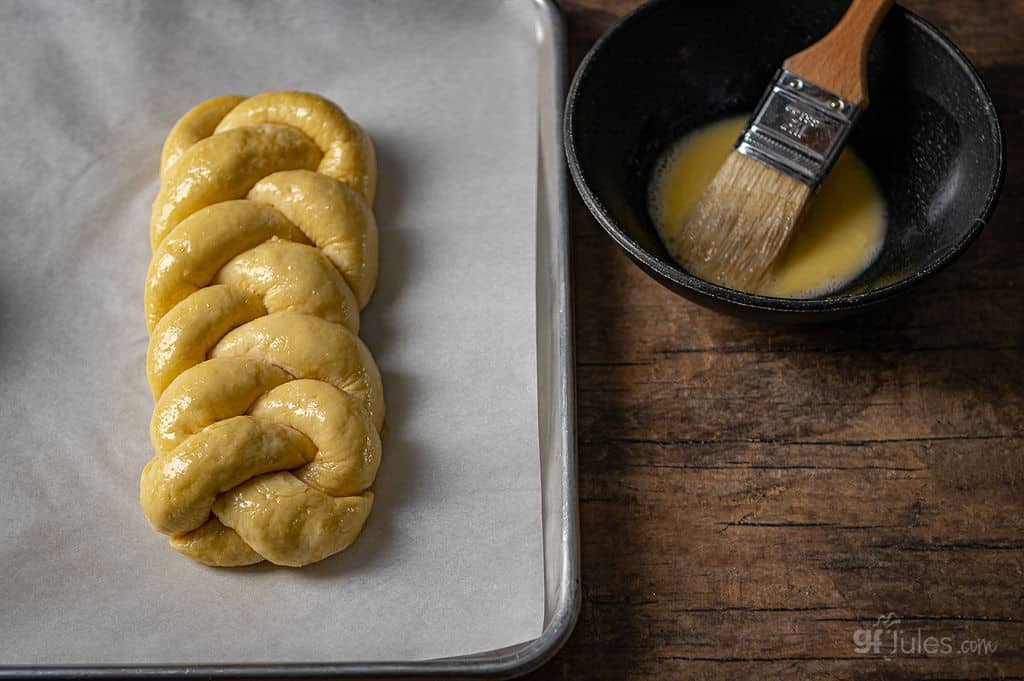
Each strand will then be braided and finished at each end by scoring with a fork, wetted with a finger dipped in water and then pressed gently to seal together and smoothed.

Brush with egg wash before rising and baking.
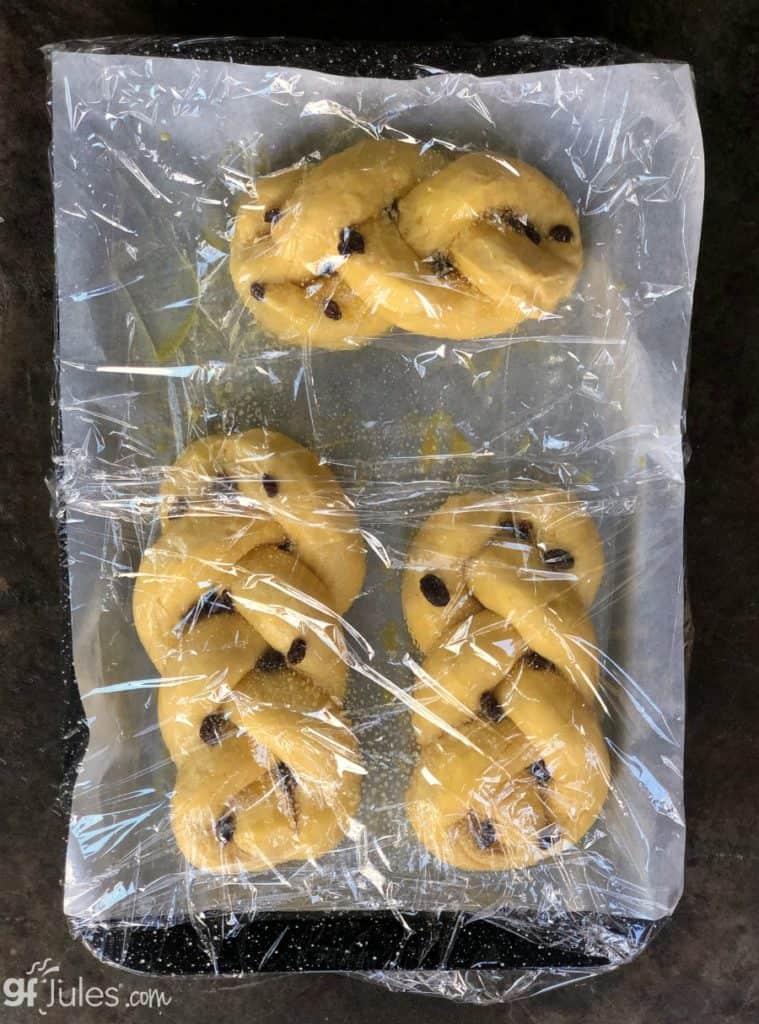
If you like, you can also add raisins and apples once the braid is finished and transferred to a parchment-lined baking sheet.
Allow the bread dough to rise for 20 minutes, brush with another egg wash or spritz lightly with water, then bake OR cover with plastic wrap and refrigerate to bake the next day.
The next day, remove the tray to the counter while you preheat your oven and then bake. Voila! Amazing bread!
NOTE: don’t allow the gluten free challah to rise even more the next day, or you’ll lose some of the definition in the braids. It still tastes delicious, of course, but wasn’t quite as pretty because it rose TOO much and actually ended up being flatter than if it had been popped into the oven with just the right amount of rise.
It’s a wonderful treat for anyone at any time of year, especially now that you have this wonderful gluten free version to make and enjoy!
In fact, it’s not only a truly delicious bread, it’s also one that will impress any guest or crowd. The braids merely look like it took a skillful baker to weave, but that can be our little secret.
When made with my gfJules Flour, these braids will be such a nice surprise to work with!
The dough will be unlike any gluten free dough you’ve worked with before — soft and pliable, not at all brittle. Make sure you follow my directions and ingredients exactly, so you can expect these same results.
The dough should not resist when you’re working with it, but it shouldn’t be super wet either. You’ll get the hang of it after working with it.
You’ll be making beautiful gluten- and dairy-free challah that will have everyone marveling at your baking prowess!
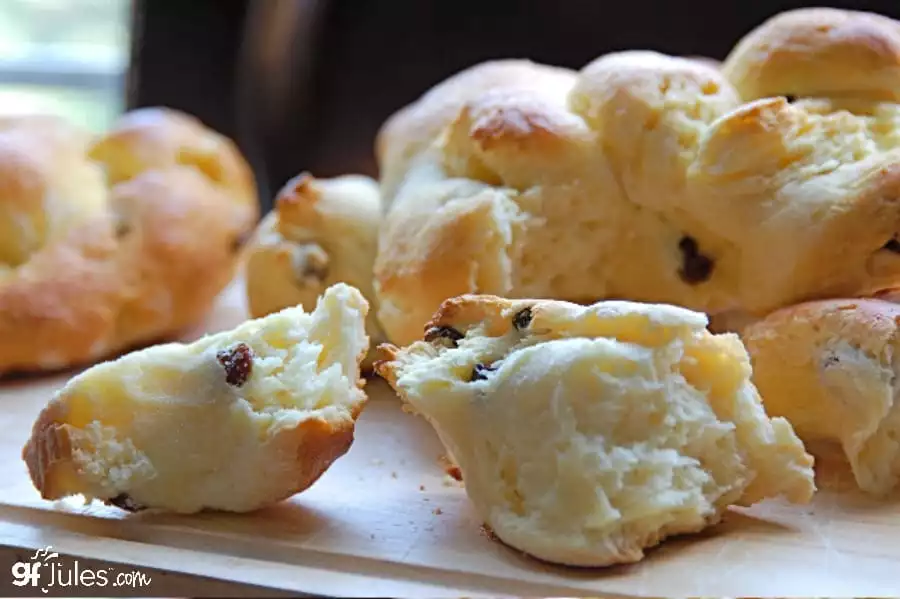
And it’s not just pretty to look at — it’s a wonderful bread to tear apart and enjoy in any setting and with any meal, or on its own.
See how flexible this dough is in this quick time lapse how-to video on braiding bread.
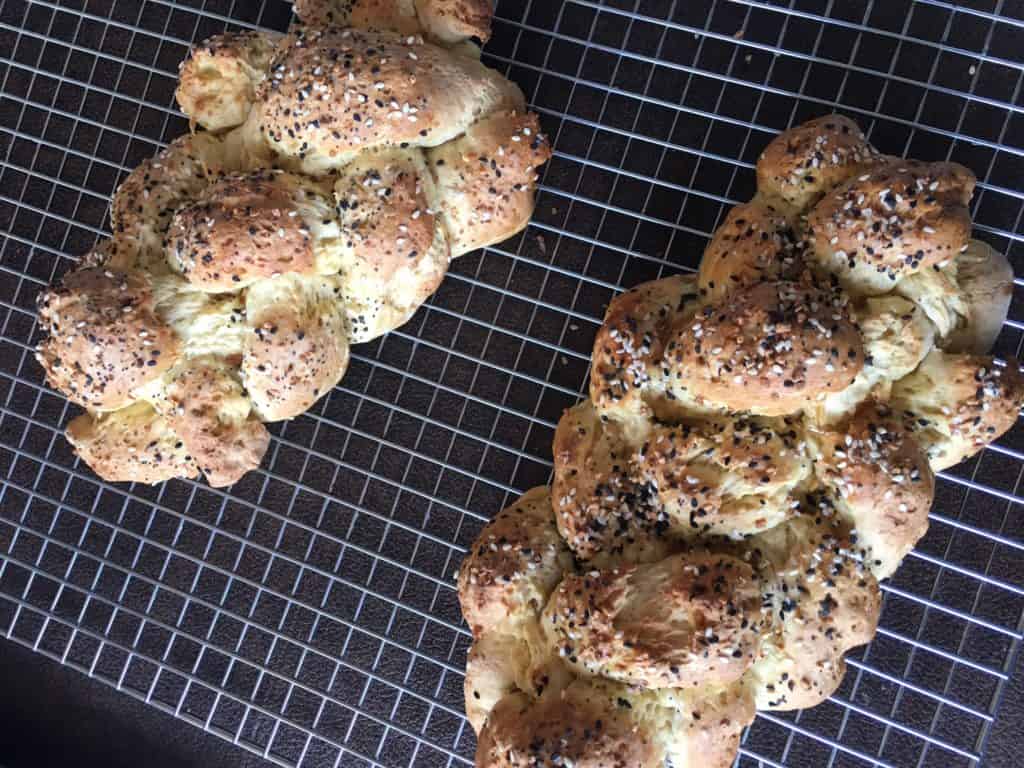
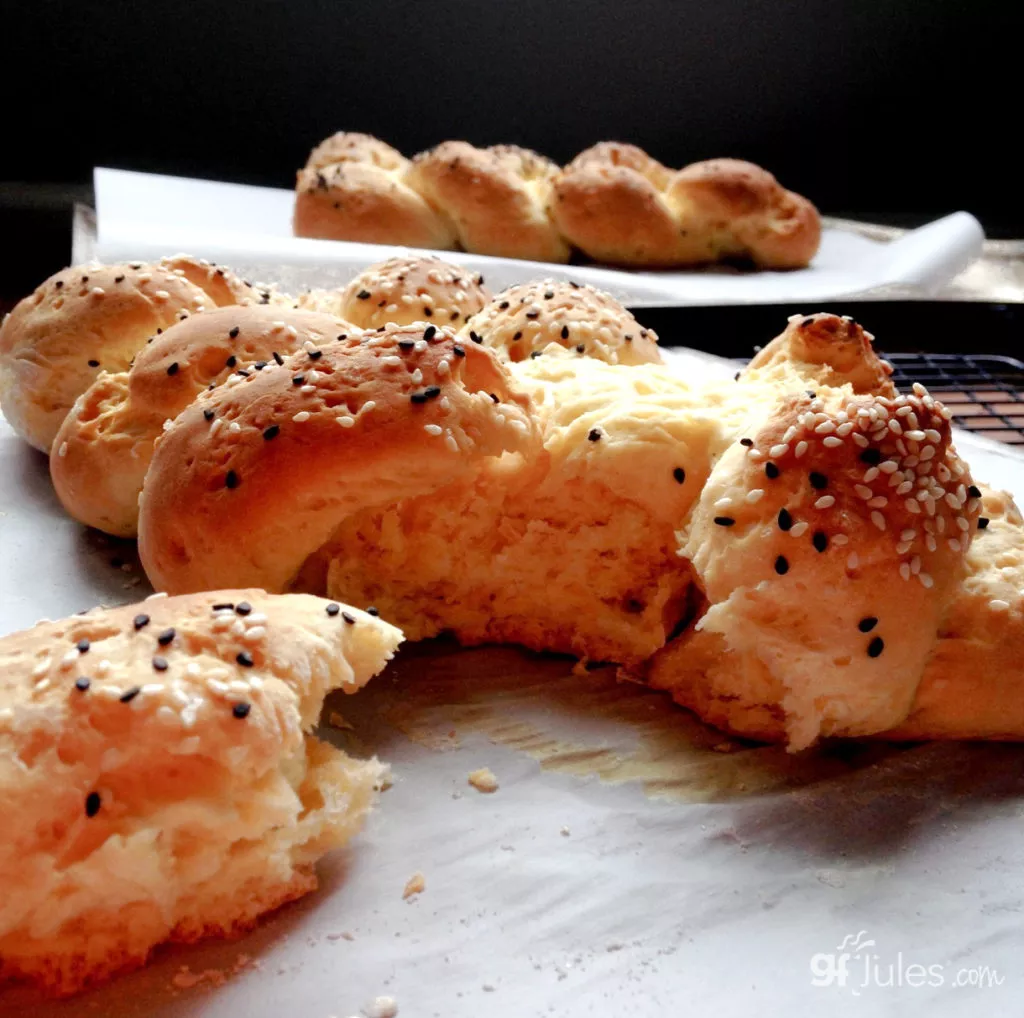
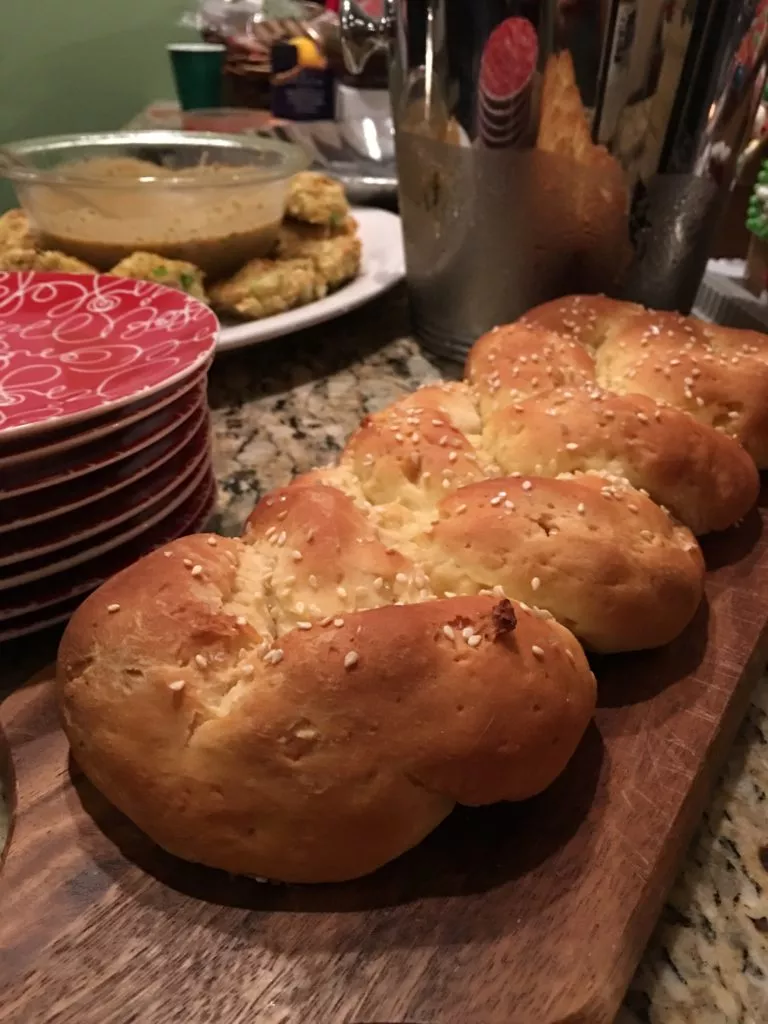
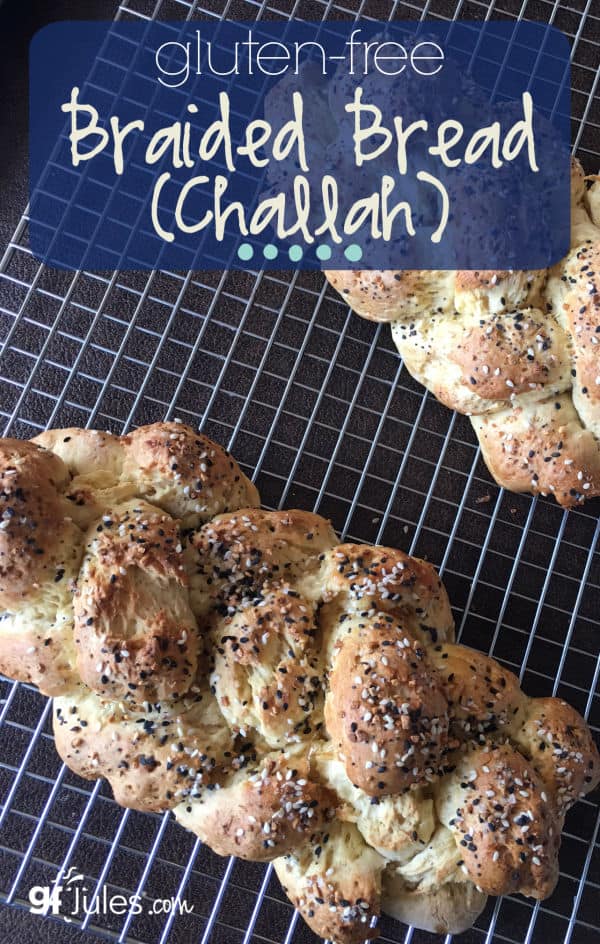
Feel free to skip the apples and raisins, or add your own toppings like sesame seeds and sea salt (as pictured below). Or braid into a crown!
To recap: just proof your yeast, measure your ingredients, make the dough, braid, rise and bake!
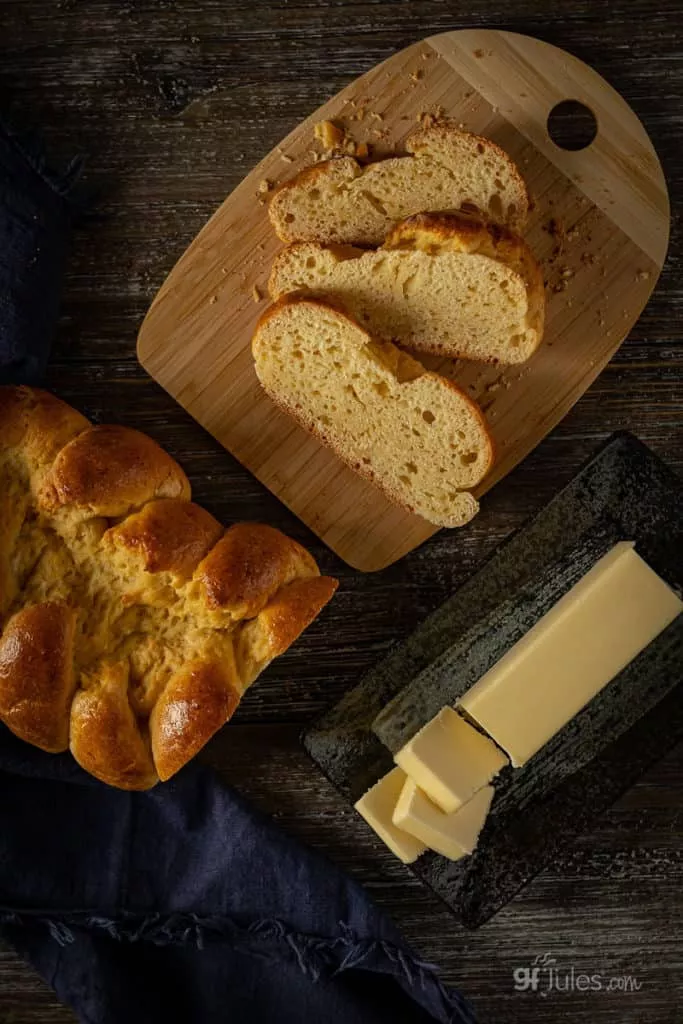
The eggs in this bread help to keep it moist and fresh for days, thus, on the off-chance there are any leftovers, enjoy it with hummus, peanut butter, high quality honey, or plain (or make French Toast or overnight gluten free French Toast Casserole!).

Fitting that it is the manna that just keeps giving! Enjoy this recipe for the gift that it is — there’s just nothing like soft, fresh baked bread, and it means so much to be able to enjoy the best bread, gluten free!
It is truly one of the most gorgeous and delicious breads you can make and bring to share for any occasion, so why wait?
A lot of readers ask if they can use my gfJules Gluten Free Bread Mix instead of my gfJules Flour to make this gluten free Challah recipe, so I’ve retooled the recipe to make it possible to make this recipe from the mix as well.
Just follow the recipe card below this one if you have my gfJules Gluten Free Bread Mix and want to make gluten free Challah with my gluten free bread mix instead!
Gluten Free Challah Braid
Gluten Free Challah Braid
Ingredients
Gluten Free Challah Ingredients
- 3/4 cup warm water
- 1 Tbs. gluten free active dry yeast (Fleishmann's® or Red Star® - NOT platinum)
- 1 tsp. granulated cane sugar
- 1 cup yogurt of choice (not Greek style), room temperature (I like vanilla flavor) (So Delicious® Vanilla Coconut Yogurt* - (I like vanilla flavor, but plain is fine)
- 1 tsp. apple cider vinegar
- 5 large egg yolks at room temperature (slightly mixed)**
- 1/3 cup safflower oil OR sunflower oil OR non-GMO canola oil OR other mild oil like avocado
- 4 Tbs. honey OR agave nectar OR maple syrup
- 4 cups (540 grams) gfJules® All-Purpose Gluten Free Flour
- 1 Tbs. psyllium husk powder (OPTIONAL) if using, add 2 Tbs water to dough
- 3 Tbs. + 2 tsp. granulated cane sugar
- 1 1/4 tsp. kosher salt
Toppings
- 1 large egg mixed with 1 Tbs. water
- poppy seeds sesame seeds, raisins, diced apples or other toppings (optional)
Instructions
- Preheat your oven to 200º F, then turn it off. Prepare a baking sheet by lining it with parchment paper.
- In a small bowl, divide out ~1/3 cup of the total 3/4 cup warm water. Add to it the yeast and 1 teaspoon of sugar to proof the yeast; set aside. (If using quick rise/rapid rise yeast, you may simply add to dry ingredients instead.)
- In the bowl of your stand mixer***, add the rest of the wet ingredients (remaining water, yogurt, cider vinegar, egg yolks, oil, honey) and mix until combined.
- Whisk together the dry ingredients in a separate bowl (gfJules Flour; remaining sugar; salt; and psyllium -- if using).
- If proofing yeast, after 5 minutes of proofing, stir in the bubbling yeast-water mixture into the wet ingredients (note: if your yeast isn’t bubbling at this point, throw it out and start again with fresh yeast).
- Gradually stir the dry ingredients into the wet until fully integrated, adding more warm water by the tablespoon if needed so that the dough is not tight or stiff — you should be able to pull the dough gently without it feeling tight or like it would bounce back — if it’s too stiff, add more warm water.
- Mix 1-2 minutes more on medium speed to integrate any additional water and ensure all ingredients are fully incorporated. The dough should be workable; keep in mind you will be braiding it, so it can't be too loose or too tight (think of Goldilocks dough!).
- Once the dough is combined, divide it in half and divide each half into three equal-sized balls (6 balls total for 2 loaves or 3 balls for one large braided loaf). Roll each ball out into an 18-inch coil or log on a clean, flat surface dusted very lightly with gfJules All Purpose Flour.
- Pinch together one end of each coil, scoring and wetting them slightly with water to help them join together at the top, then braid them, finishing by connecting them at the other end.
- Gently transfer braid to the parchment-lined baking sheet. Repeat for the second set of three balls. You may divide the dough into as many balls as you like, counting on at least 3 balls per loaf. Roll each to equal lengths of coil and braid into 1 or more loaves.
- In a small bowl, mix the extra egg together with a splash of water and brush over each loaf well, coating the entire top surface. Sprinkle the fruit or any toppings at this point, then place the tray (covering the loaves with wax paper or parchment sprayed with cooking oil) in a warm location for only 20 – 30 minutes.
- Once risen at least slightly, place the uncovered tray in an oven preheated to 350º F (static) or 325º F (convection) for 20 minutes (less time for smaller loaves). A toothpick inserted into the center of the bread should come out dry or with dry crumbs.
- (Optional: instead of baking right away after rising, brush again with egg wash or spritz with water and cover with plastic wrap. Refrigerate overnight. Remove to the counter while pre-heating your oven. Remove plastic wrap and bake as directed.)
- Remove to cool on a wire rack.
Video
Notes
** Please keep in mind that nutrition information provided is per serving, which may vary. While we have taken care to provide you with the most accurate nutritional values possible, please note that this information may differ significantly depending on the exact ingredients and brands that you choose to use to make this recipe. Additionally, where options are given for ingredients, the resulting calculation may include all ingredient options instead of only one per line, skewing the totals significantly.
Gluten Free Challah from gfJules Bread Mix
Gluten Free Challah from gfJules Bread Mix
Ingredients
- 1 gfJules Gluten Free Bread Mix
- 1 quick rise yeast packet
- 4 Tbs. 56 grams granulated sugar
- 3/4 cup water
- 3/4 cup yogurt of choice not Greek style, room temperature (I like vanilla flavor)
- 1 tsp. apple cider vinegar
- 4 large egg yolks slightly mixed*, room temperature
- 1/4 cup mild oil like sunflower safflower, non-GMO canola, avocado, etc.
- 4 Tbs. honey OR agave or maple syrup
Toppings
- 1 large egg mixed with 1 Tbs. water or milk
- poppy seeds sesame seeds, raisins, diced apples, etc. (optional)
Instructions
- Preheat your oven to 200º F, then turn it off. Prepare a baking sheet by lining it with parchment paper.
- Bring all ingredients to room temperature. In the bowl of a stand mixer (recommended)**, add the wet ingredients (water, yogurt, cider vinegar, egg yolks, oil, honey) and mix until combined.
- Gradually stir the gfJules Bread MIx + yeast packet into the wet until fully integrated.
- Mix 1-2 minutes more on medium speed to ensure all ingredients are fully incorporated.
- Once the dough is combined, divide it in half and divide each half into three equal-sized balls (6 balls total). Roll each ball out into an 18-inch coil or log on a clean, flat surface dusted very lightly with gfJules All Purpose Flour.
- Pinch together one end of each coil, scoring and wetting them slightly with water to help them join together at the top, then braid them, finishing by connecting them at the other end.
- Gently transfer braid to the parchment-lined baking sheet. Repeat for the second set of three balls. You may divide the dough into as many balls as you like, counting on at least 3 balls per loaf. Roll each to equal lengths of coil and braid into 1 or more loaves.
- In a small bowl, mix the extra egg together with a tablespoon of water or milk and brush over each loaf well, coating the entire top surface. Sprinkle the fruit or any toppings at this point, then place the tray (covering the loaves with wax paper or parchment sprayed with cooking oil) in a warm location for 30 minutes.
- Once risen at least slightly, place the uncovered tray in an oven preheated to 350º F (static) or 325º F (convection) for 20 minutes (less time for smaller loaves). A toothpick inserted into the center of the bread should come out dry or with dry crumbs when done.
- (Optional: instead of baking right away after rising, brush again with egg wash or spritz with water and cover loosely with plastic wrap. Refrigerate overnight. Remove to the counter while pre-heating your oven. Remove plastic wrap and bake as directed.)
- Remove to cool on a wire rack.
Notes
** Please keep in mind that nutrition information provided is per serving, which may vary. While we have taken care to provide you with the most accurate nutritional values possible, please note that this information may differ significantly depending on the exact ingredients and brands that you choose to use to make this recipe. Additionally, where options are given for ingredients, the resulting calculation may include all ingredient options instead of only one per line, skewing the totals significantly.
Don’t wait for the next special occasion to bake this incredible gluten free challah bread!
I hope you love this recipe as much as we do!
Pin for later!


Do you perhaps have a substitute for your flour? I live in South Africa and it’s not available here. My daughter would love this for Rosh Hashana
Hi Hayley, have a look at this article on gluten free flours and a homemade flour blend recipe. It’s not the same as my gfJules Flour and won’t be as easy to braid, but it should work for the recipe. Best of luck!
~jules
I recently made this bread and while it tasted great, it did not rise. I live at a higher altitude (5400 feet) so I’m guessing that’s part of the problem. I used the rapid rise yeast, but cut down a tiny bit on the baking soda and baking powder, as I have been told is necessary to do here. I plan to try this again. Do you know of any other reason this did to rise? Any suggestions?
Hi Judy, check my gluten free baking at high altitude post just for some good baking tips, in general, but it sounds like maybe your yeast was bad if it didn’t rise at all. Did you proof it? Next time, proof the yeast by adding it plus 1 teaspoon sugar to the warm water ingredient and see what happens. If it bubbles up and proves it’s active within 5 minutes, then you should be good to go, but try not adjusting the chemical leaveners and see if that helps, too. Lastly, I’d recommend adding more liquid — between 2-4 tablespoons, at least. If the dough is too tight and dry (and it’s drier at altitude), it can’t rise because the dough is taffy-like and tight. More liquid will help to give the dough the stretch it needs to rise.
Let me know how it goes!
~jules
I had the same problem with Bob’s as I couldn’t find your brand on the shelf locally. I also added more flour & then in desperation 1 tsp of xanthan gum. That did the trick to make it more dough like. I used sorghum flour on the board for rolling the ropes & braided them on the baking sheet. My granddaughter (6yo) and I used everything bagel seasoning on 3/4 of our two loaves & colored sprinkles on the remainder for fun. Wonderful recipe! Thank you!
Thanks for including what you did to make the recipe work with another flour, Linda. I can’t wait to hear what you and your granddaughter think when you get to make it with my gfJules Flour! Order on line and we deliver right to your door so you know you’ve got what you need to make great challah anytime you like (and anything else you might want to bake, too!). It makes all the difference in the world!
~jules
I tried making this with the only GF flour I could find which is Bob’s and it is super runny. No way I can braid this. Is it just about the flour? I added more and it started smelling like glue…
I would love to make this (I have your flour at home already!) but I am vegan. Do you have any suggestions? Your product is great but it ain’t cheap, so I don’t want to waste it on guessing. Thank you 🙂
Wow this bread has a wonderful sweat taste, comes out nice and airy for a gluten free bread. After reading some of the comments I think I will try making the braids looser when braiding to allow it to rise more before baking. All in all best gluten free challa bread recipe!
Hi Ernie, so glad you loved it!! Loosely braiding will definitely help it to have more room to rise. I tried to show it in the video, but it’s something that becomes more of an ah-ha moment I think after the first time you make it. May all your bread baking be happy, from here on out!
~jules
Hi Jules, I have made this challah many times and the taste is incredible. My issue is that it is very dense and not light and airy like regular challah. I followed the directions exactly and used your flour. What am I doing wrong?
Hi Maureen, I’m glad you’ve enjoyed the challah for its taste. I’m wondering maybe about the yogurt? What kind are you using? The bread is heavy because of the eggs and yogurt, but it should still be soft and not too dense like the pictures. Does yours look like that when you break it open?
~jules
Hi Jules,
It is soft, but not as fluffy as the pictures. I have tried a few different yogurts, but could you suggest the best one to use? Is So Delicious® Vanilla Coconut Yogurt the best one?
Thanks,
Maureen
Hi Maureen, I’ve used the So Delicious yogurt as well, so I doubt that’s the issue. I wonder if maybe it was braided too tightly? I’ve found that leaving extra space between the braids to give the dough more room to rise does allow it to become softer and rise even more. Maybe that’s it? Let me know next time!
~jules
Absolutely amazing! I found this recipe a few days ago, and made this for the first time today for Rosh Hashanah, and I am so beyond excited and grateful.. This recipe makes a challah that is springy and light and moist- something I had given up on finding after making so many over the past 7 years that just turned out so dense. I made a “taster” challah to test before the holiday and my whole family loved it and could not believe that it was gluten free. They asked me to make this every week- even though they can eat regular gluteny challah.. Thank you so so much!!
I’m thrilled to hear that, Rachel!!! There’s nothing like having a recipe as important as challah turn out so well that the gluten eaters are loving it too. I wish you the sweetest of holidays!
~jules
The Hamotzi blessing for Shabbat challah requires more than half the flour to be one of the 5 grains. For gluten free challah, only oat flour fits that definition. The challah is upposed to be a showbread. So a braided challah is a challenge. Needing one, I created a braided gluten free challah recipe,
but it is not fluffy enough yet. Today I thought of trying soda water, and dairy free buttermilk, and beating eggs and whites separately.
Can you make the blessing on the challah like any other challah (Motsi) for Shabbat
This didn’t work for me. It was so wet, I couldn’t mold it into anything. Can you please share (i) what attachment you use in the stand mixer, (ii) how long you mix the ingredients.
A video of how you make this would be super helpful.
Hi Kate – my first question is whether or not you used my gfJules Flour. It works so differently than other gluten free flour blends that I wouldn’t be surprised if the results were off using another blend. One of the main differences is that my gfJules Flour provides “stretch” to doughs like this, allowing it to be braided, where other gluten free flours would fall apart.
Otherwise, were any other ingredient substitutions made?
As for my stand mixer, I almost always use the paddle attachment. The dough hook doesn’t seem to work well with gluten free doughs because we just want to get it thoroughly mixed and don’t want to “knead” the dough for too long (no gluten in the dough to “exercise” by kneading).
This dough should be somewhat sticky, but not too wet that you can’t knead it and if rolled lightly in more of my gfJules Flour, it won’t be too sticky to work with.
Let me know a bit more information and we’ll go from there. I want to help you get this recipe right – it’s so delicious!
~jules
You’re awesome! Thank you!
Absolutely happy to help, Kate!
~jules
I have tried this recipe twice. Both times I was able to braid it, but the braids came apart at the ends and cracked in other places. I did not make any substitutions. Any ideas of why this is happening?
Hi Lisa, I would add a bit more liquid next time you make them, so that the dough is less tight and will allow for more rising without cracking. Also, wet the ends really well when you press them together; if they have a lot of flour on the ends, they won’t still together. One other thing: make sure you’re not setting it somewhere too warm for it to rise — that can make the dough rise too quickly which can cause some cracks, too.
Let me know how that goes!
~jules
This is a great recipe. When my 3rd graders class studied the old testament they would do Friday shabat and the gluten free students would follow me around asking if i made the gf challah!
Could you give some advice as to the best way to store this and GF baked goods in general? I know the shelf life is limited, but curious if there are any good tricks to keeping stuff fresh.
Hi Laurie, I’m so glad you’re loving this recipe! When made with my gfJules Flour, baked goods like this stay fresh longer. I find that keeping the loaf intact (not slicing it unless serving) and putting it in a zip-top bag with the air squeezed out, the challah stays fresh for several days. If we have any left over after about 4 days, I usually make the best French Toast you’ve ever tasted with it! Be sure not to refrigerate any baked goods, as that will make them dry. Happy baking!
~jules
I have been making this every week for the past few weeks and it is fantastic. My family love it more than gluten-full challah! A couple of questions. Firstly how do you recommend storing leftovers? Also would a fridge rise work for this, and or could the rough be frozen? If so at what stage? I use active yeast instead of instant.
Thank you!
Hi DT – so happy to hear your family is loving this recipe!!! I never recommend storing leftover baked goods in the fridge, as it just dries them out. I keep challah on the counter in a sealed bag and reheat gently in a microwave or wrapped in the oven, as needed. You can also freeze it after baking. If you want to braid the dough and cover it super well, you can store in the fridge to bake later. Bring to room temp (still covered) and then follow the directions to rise and bake (uncovered). Hope that helps!
~jules
Hi Jules,
I am curious, do you cook these to temperature like a regular gluten free loaf?
Hi Debbie – I don’t take the temperature of these loaves — I just stick a toothpick in to make sure it’s not wet. Hope that helps!
~jules
Thanks. I made them and went by temp. so they were a little overcooked but still delicious!!!!
You’re my kinda gal, Debbie – you always dive right in and get baking when you see a recipe you like! Way to go!
~jules
Can I use your bread mix to make the Challah bread?
Hi Jenny, another reader asked me this same question recently! Lucky you, I shared my best guess as to how to make this work and she told me it came out great! So here’s what I recommended (mind you, the results are different because the recipe for challah dough is very different from my bread mix, but it worked!).
Use the bread mix and follow the challah directions but DO NOT ADD 1/3 cup water. Just add the yeast to the dough once all the other ingredients are integrated, and beat another 1-2 minutes until the yeast is fully mixed.
Here’s what you should be adding in terms of liquids:
2 Tbs. Agave or honey
1 1/4 cups yogurt
1 tsp. apple cider vinegar
1/3 cup oil
5 egg yolks
Also add these dry ingredients:
1/4 tsp. kosher salt
1/4 cup sugar
Follow the shaping directions, although I think you’ll do better with one crown or one longer loaf than 2 smaller loaves. Just see how the dough is handling and what seems easiest.
If you have some of my gfJules Flour on hand, you could also follow the challah recipe exactly, but add 1/2 cup of my flour to my bread mix and the extra dry ingredients (salt and sugar) listed above (but use the recipe’s challah ingredients for the liquids as written on-line).
Let me know how it turns out, Jenny!
~jules
I tried making this and it did not rise. I used active dry instead of rapid rising yeast. Do you think it makes a difference? It tasted great and my husband loved it!
Hi Hannah – I’m so glad it tasted great and your hubbie loved it! About the rising, the active dry would just take longer to rise, but it should eventually rise if you let it wait long enough. Do you know if your yeast was still good? You could proof it next time by adding to warm water and sugar and see if it’s still good before using another packet or more from the same jar. One more question: did you make any other ingredient or method changes? Sometimes those can affect rise as well.
At least you know it’s worth trying again, since it was good even without rising!!! 🙂
~jules