
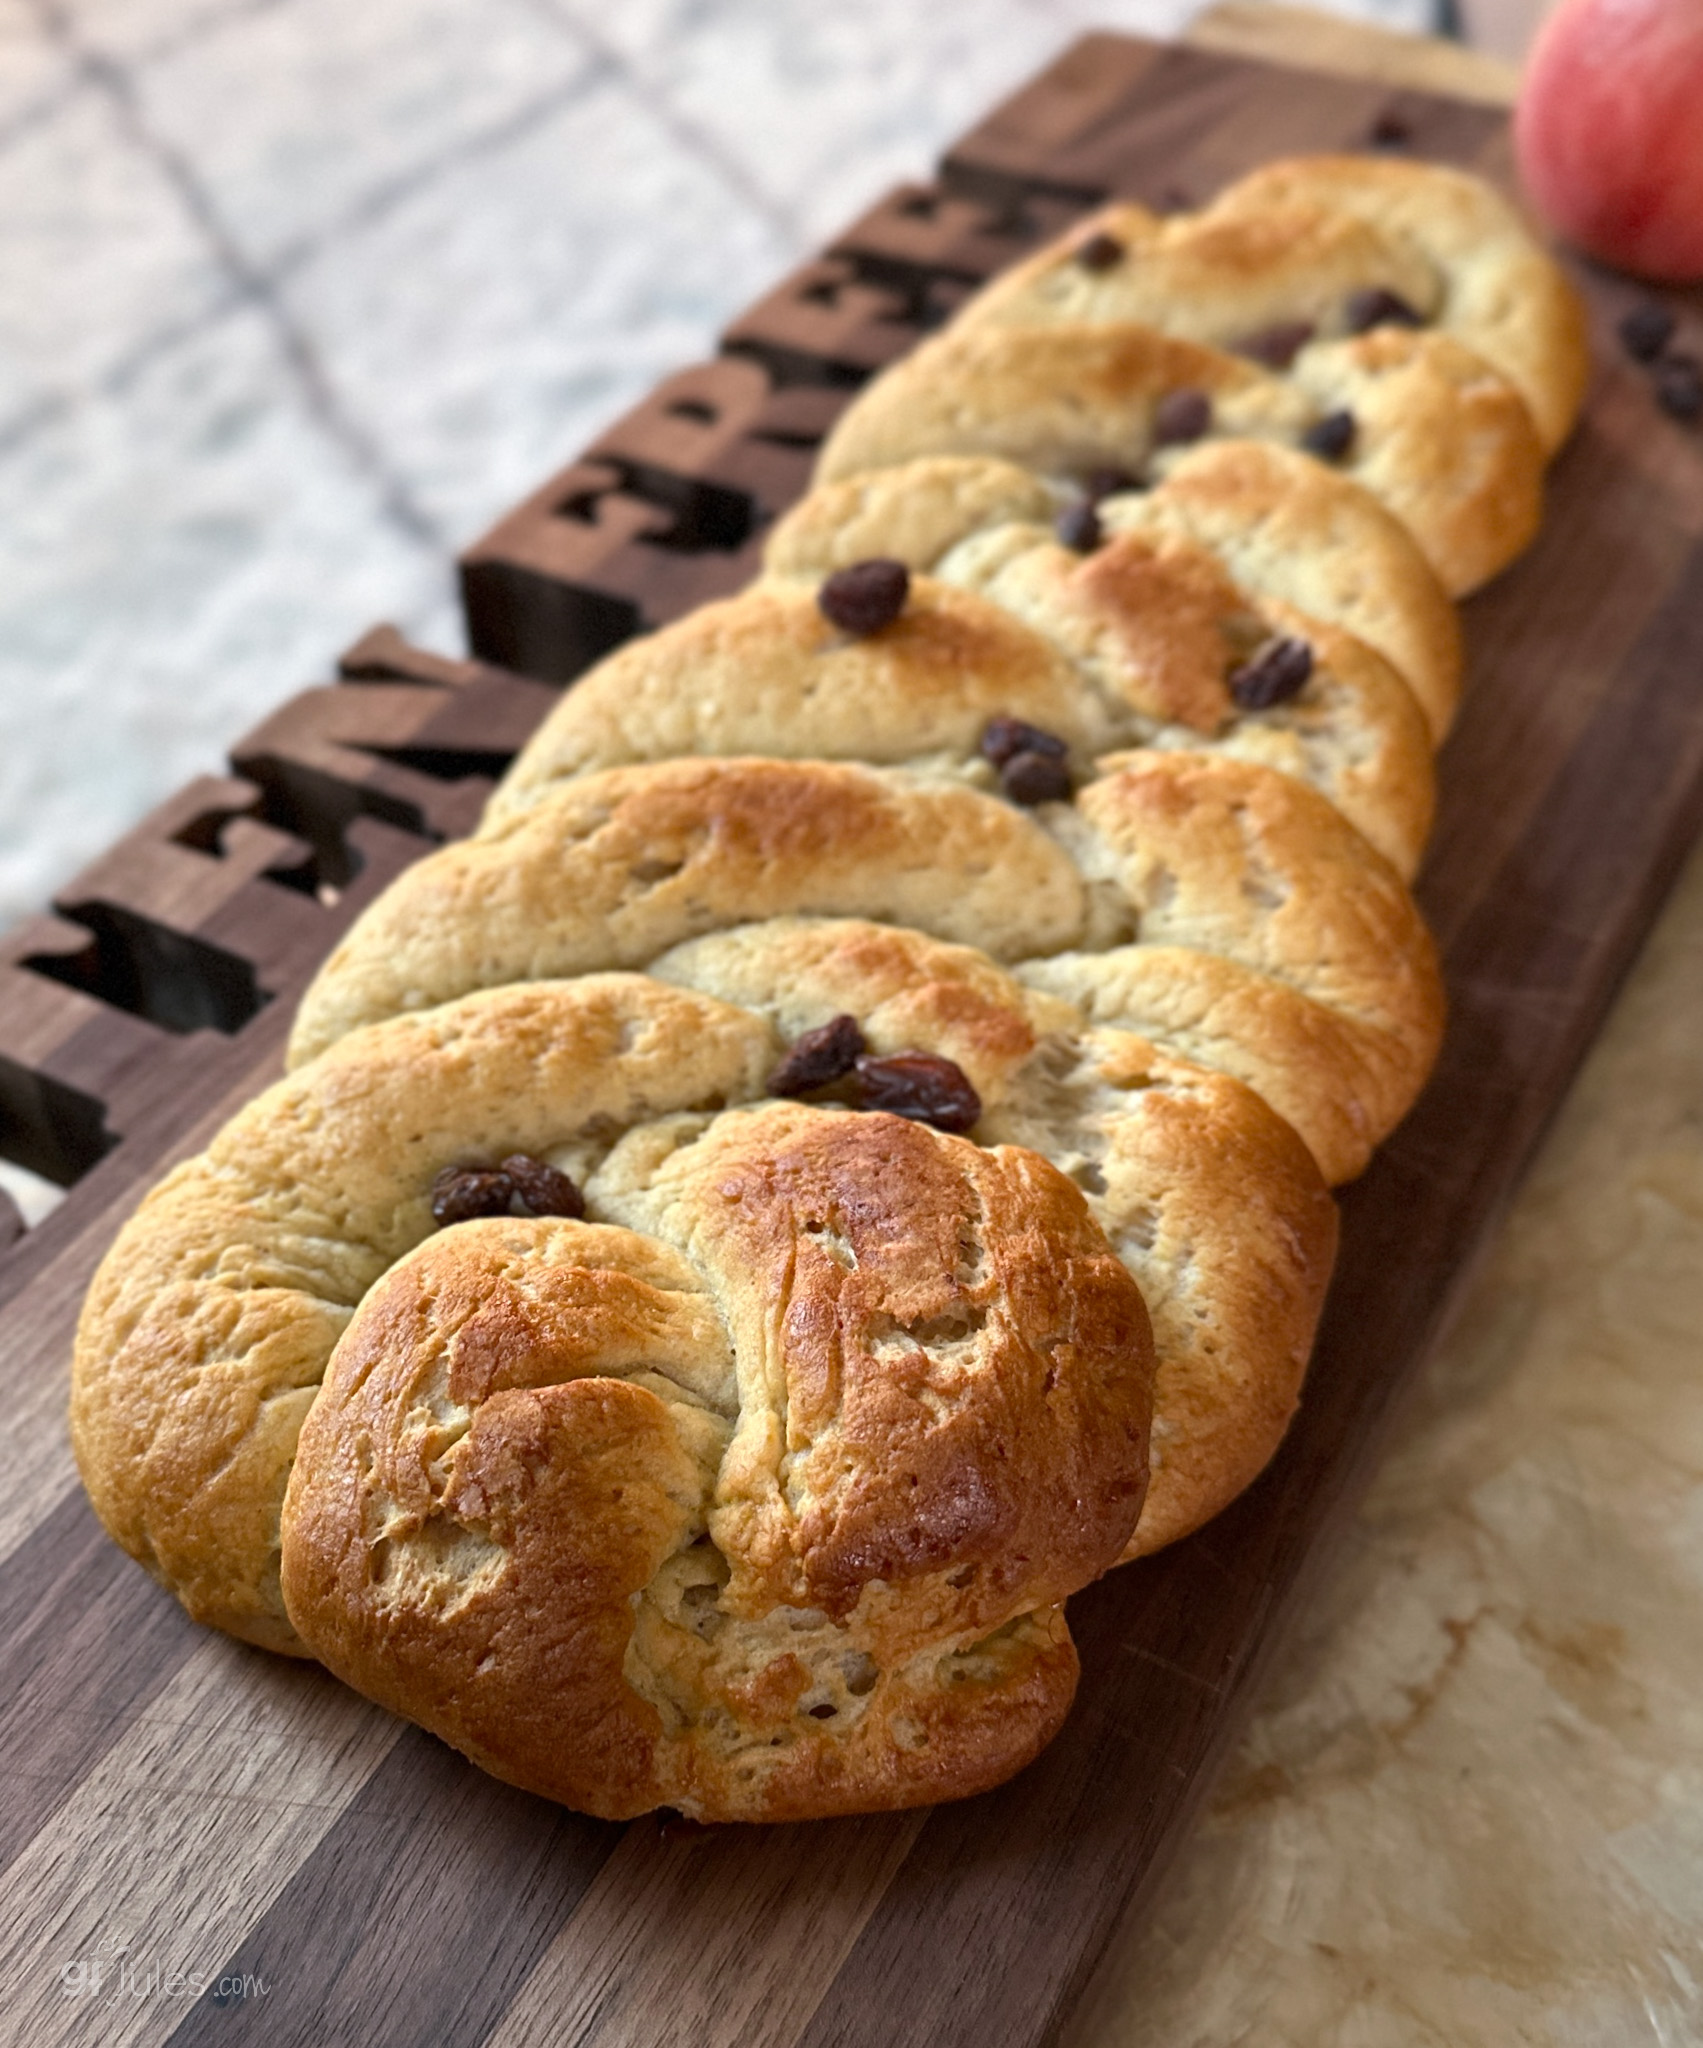
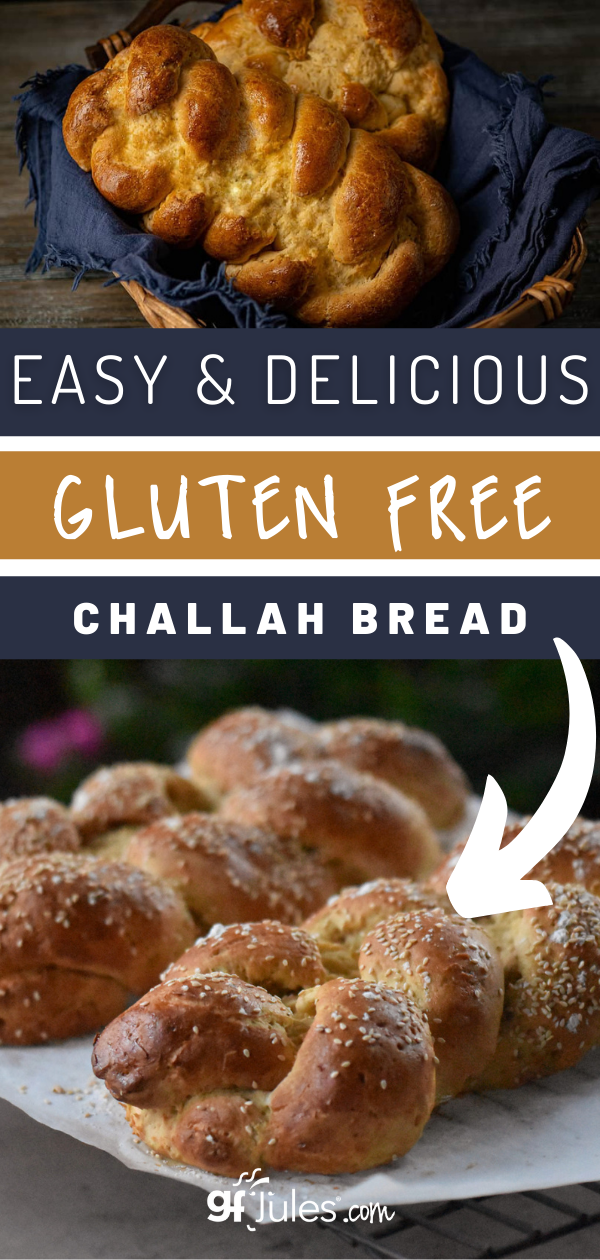
Gluten Free Challah, or the-most-beautiful-braided-bread-ever, or egg bread or Shabbat Bread, Bread for Hannukah or Rosh Hashanah or even Easter … whatever you call it and for whatever occasion you bake it, it’s a true treat, with or without apples and raisins.
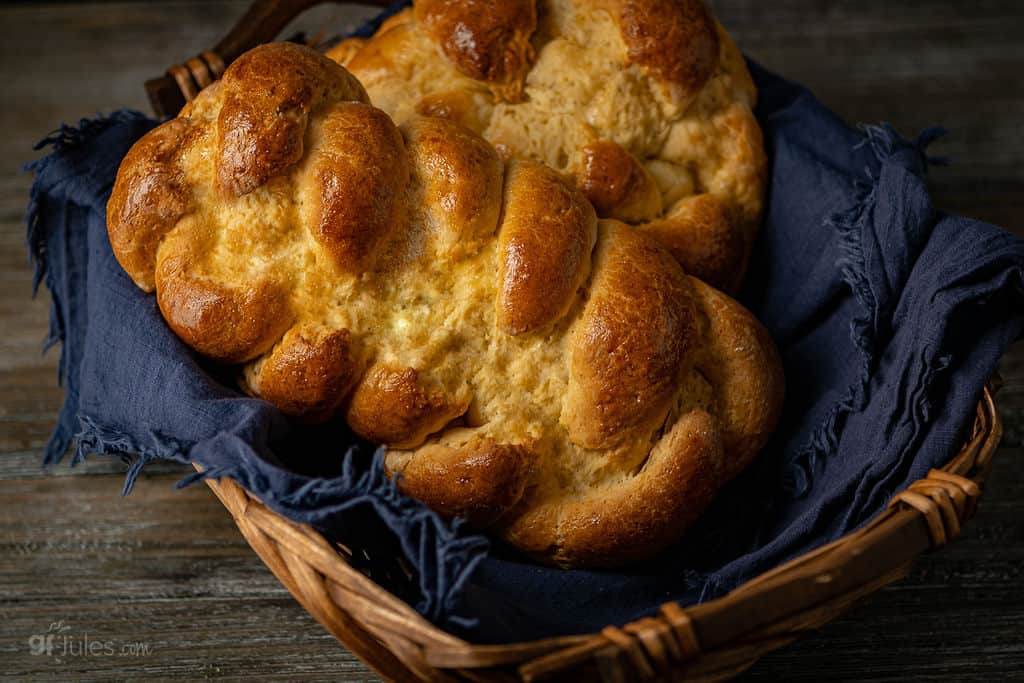
Even if you’ve never made homemade bread or if you’ve never braided bread dough, this recipe will make you look like a super star in the kitchen! The dough is soft and easy to work with when made with my gfJules Flour, and you can braid or shape it (or not!) however you like!
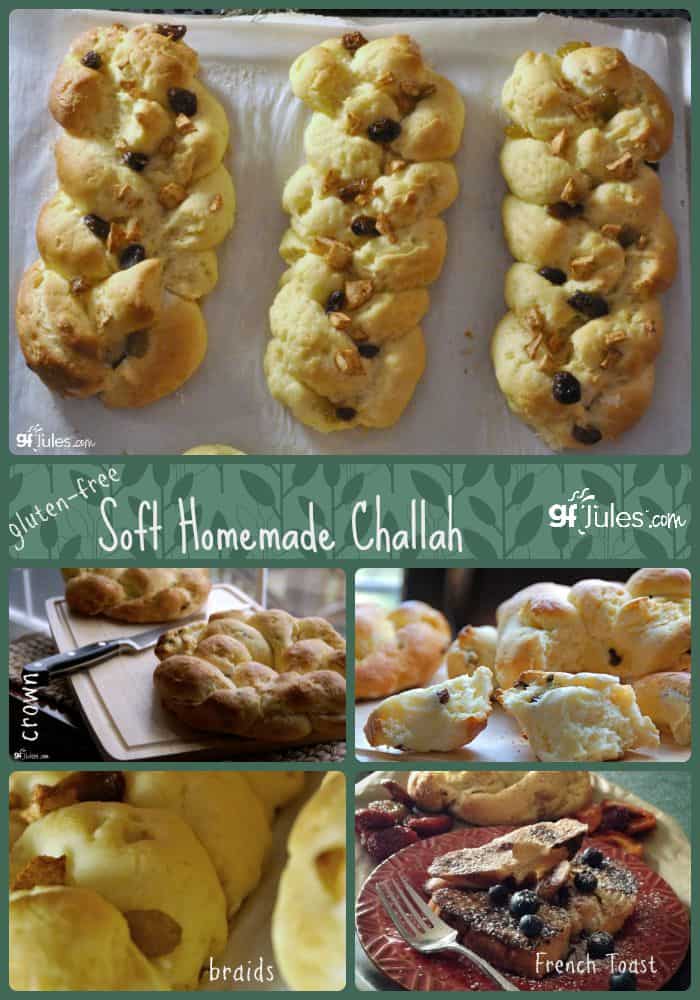
Some folks braid it like so …
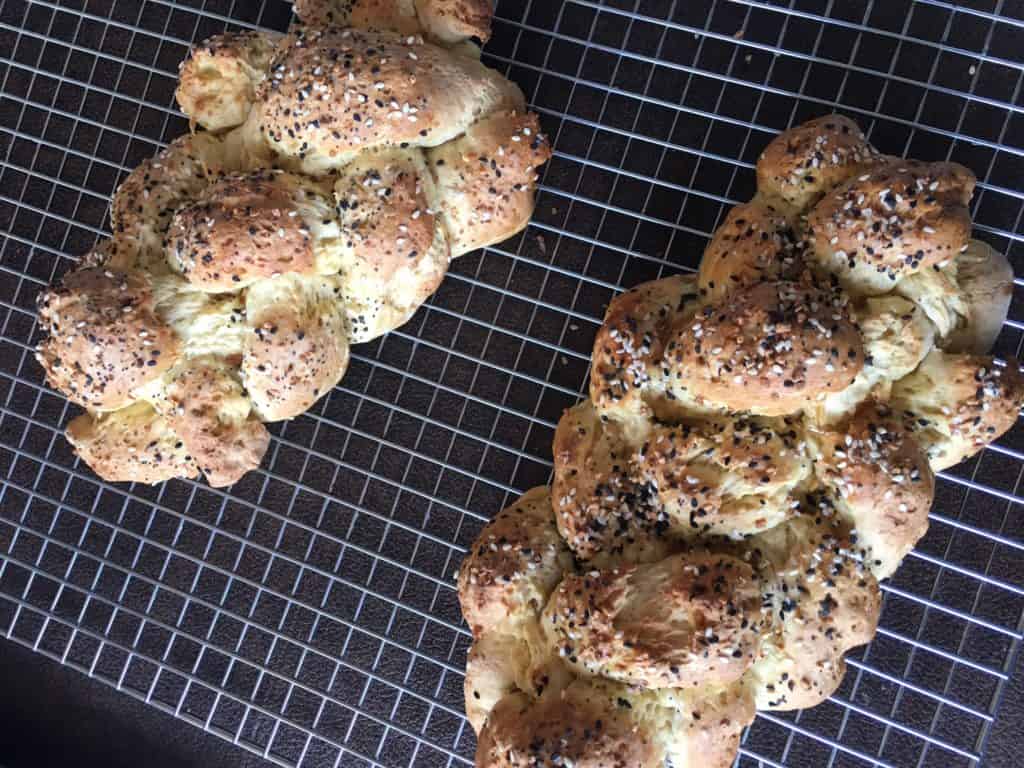
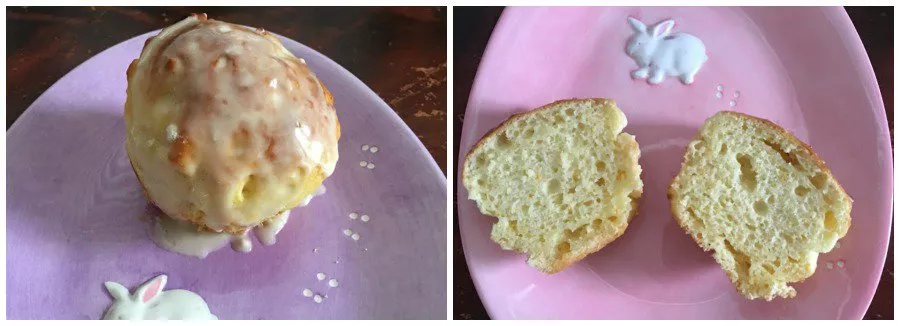
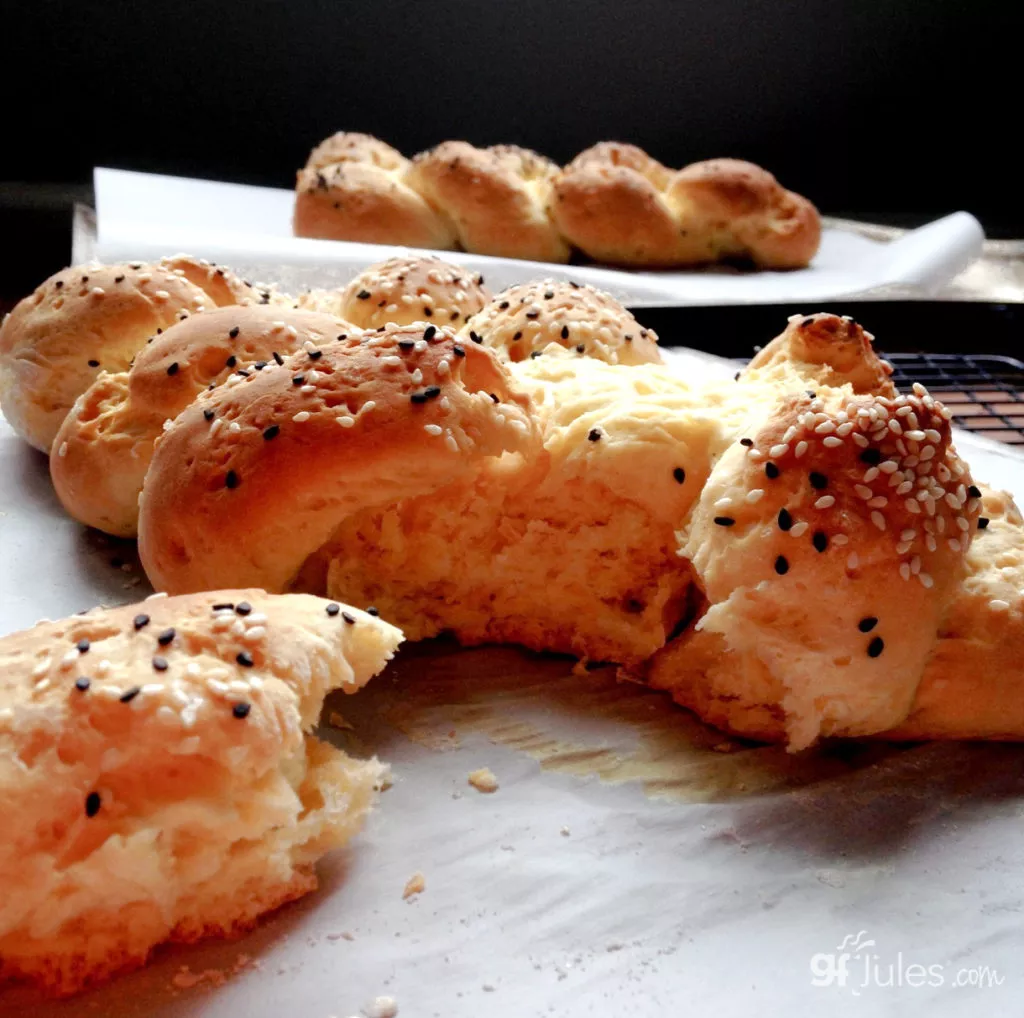
Others bake it into crown shapes or even bake off in muffin or popover tins for individual rolls.
Gluten free challah this good is great any time. Why wait for the next Jewish holiday or even for Friday? You can even prep this dough and refrigerate it overnight to bake the next day!
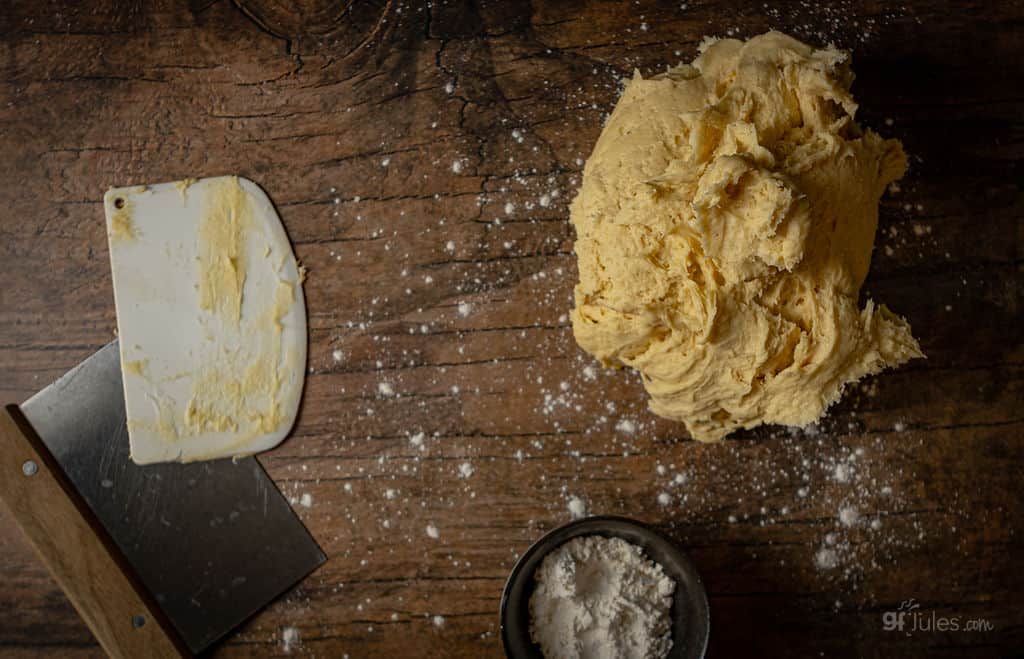
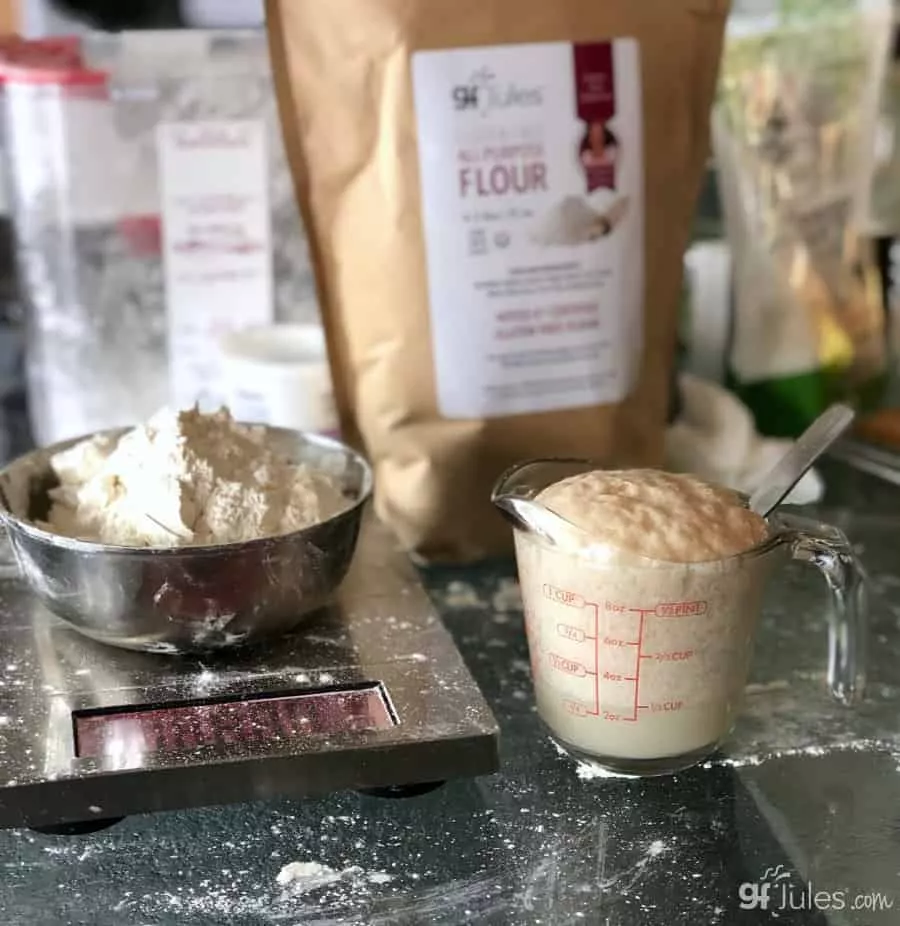
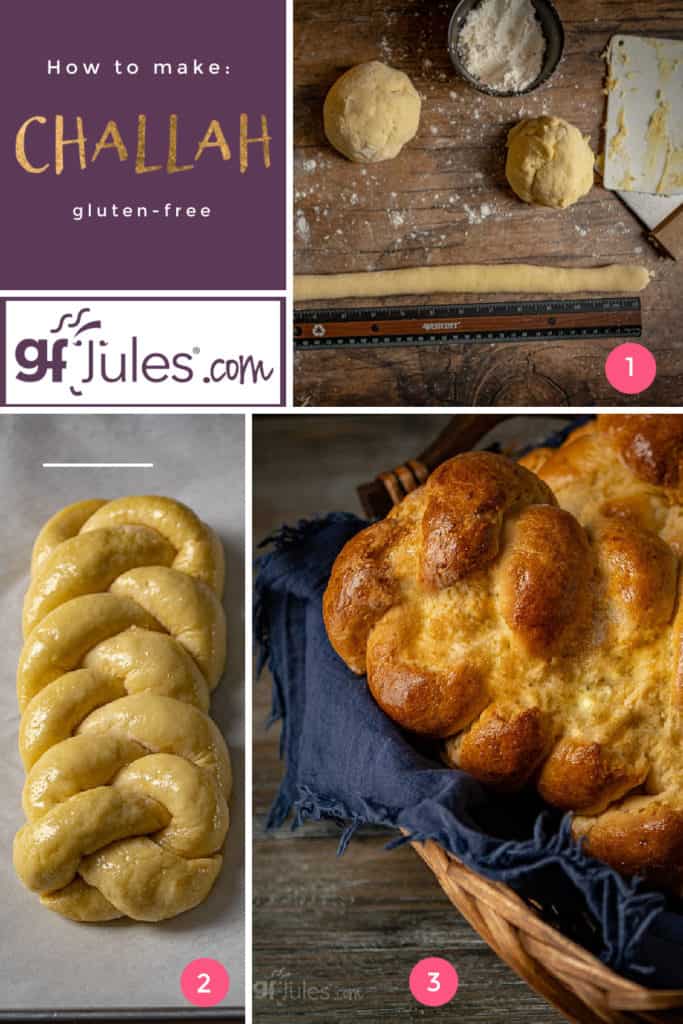
Just gather your ingredients … make sure the liquids are at room temperature.
Mix your dough then transfer it to your bench or clean counter dusted with gfJules gluten free flour to keep it from sticking.
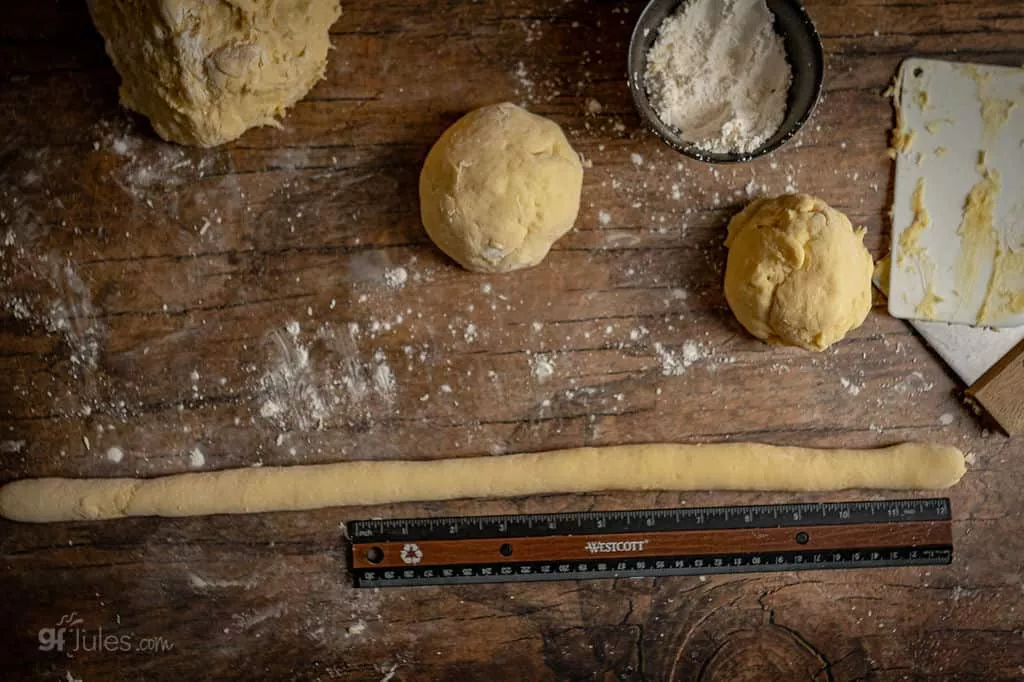
Then divide it into balls — 6 equal balls for 2 loaves with 3 strands each. Then channel your inner child and hearken back to your playdough days. This is where it gets fun! Start rolling, not pressing, but gently rolling out each ball into long strands of dough that can be braided. Watch my video below for more instructional detail.
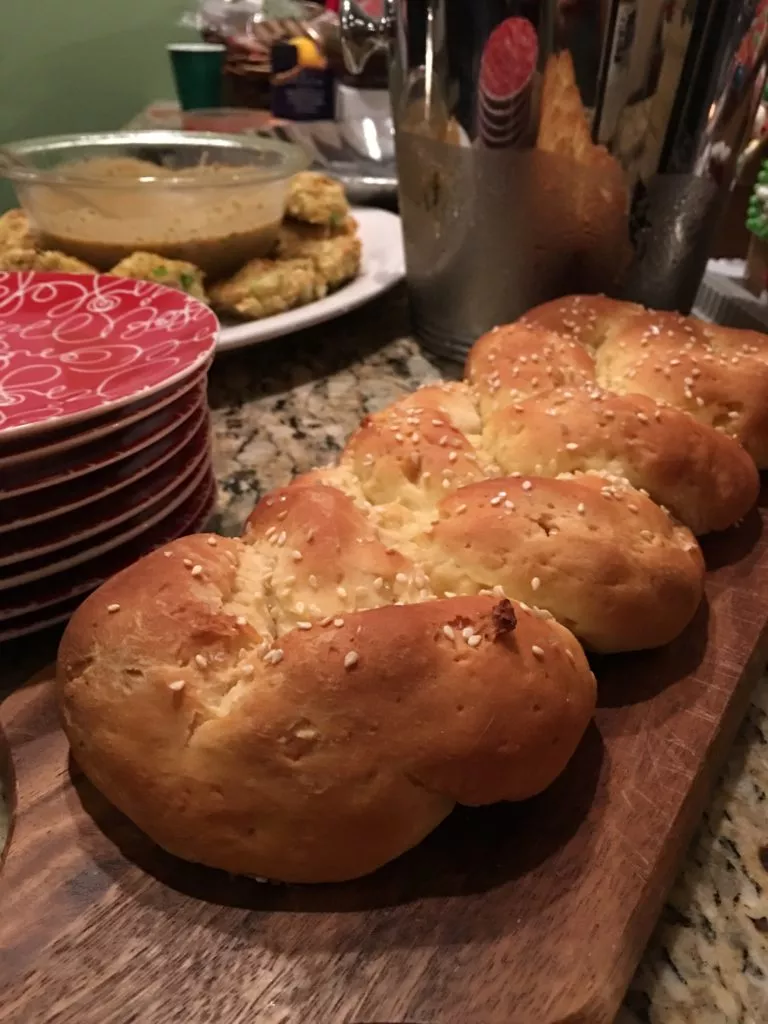
Each strand will then be braided and finished at each end by scoring with a fork, wetted with a finger dipped in water and then pressed gently to seal together and smoothed.

Brush with egg wash before rising and baking.
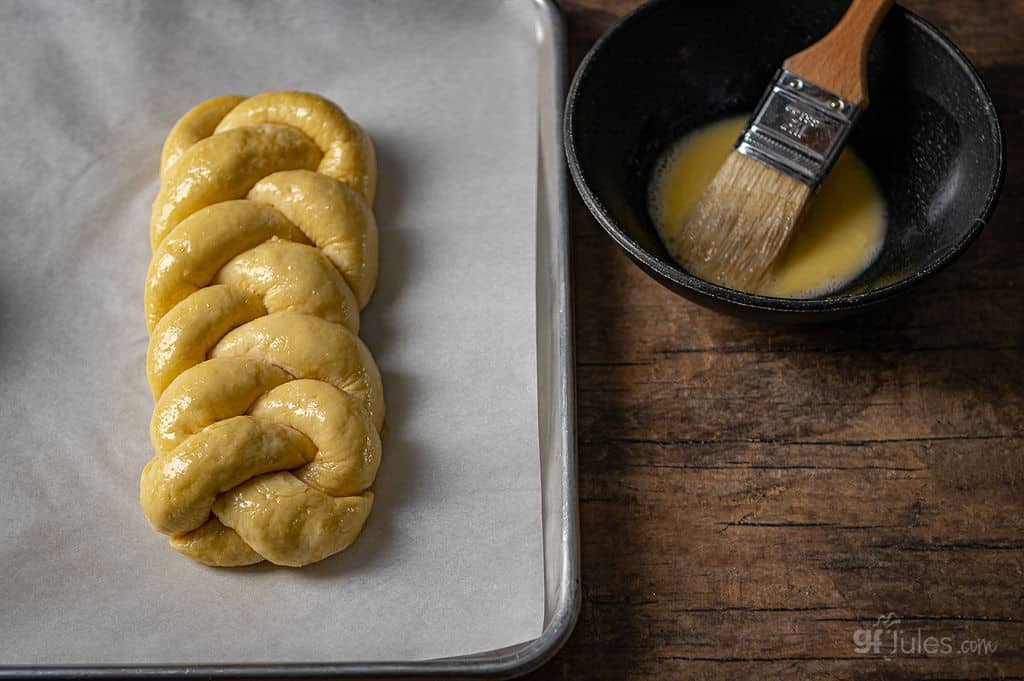
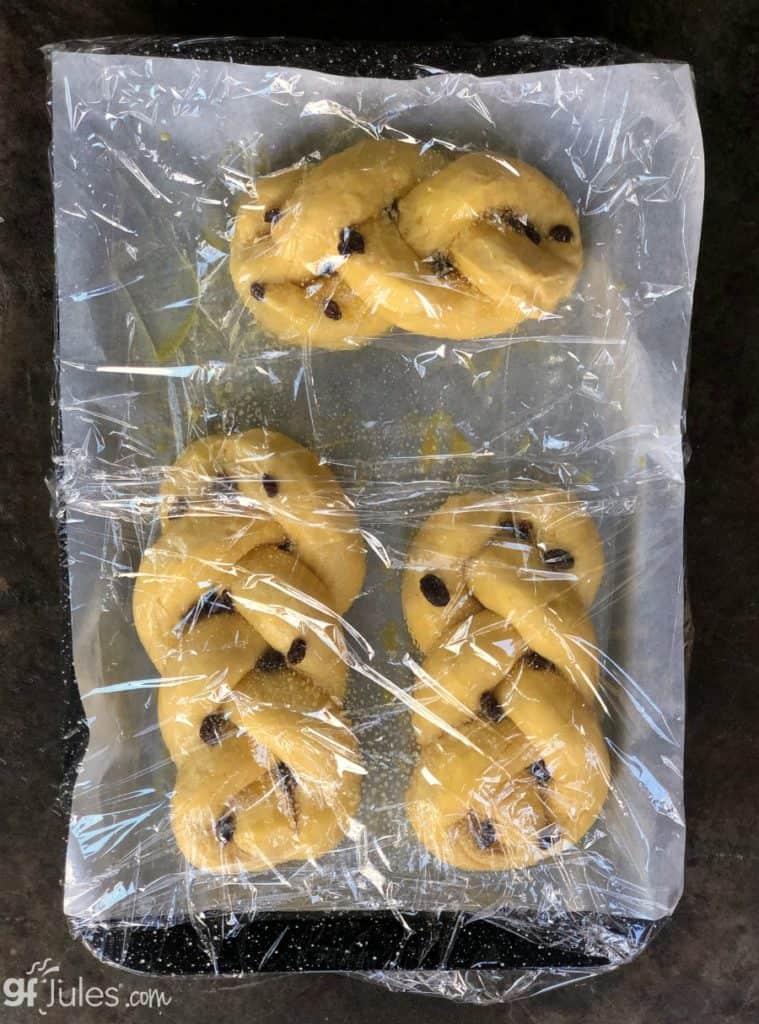
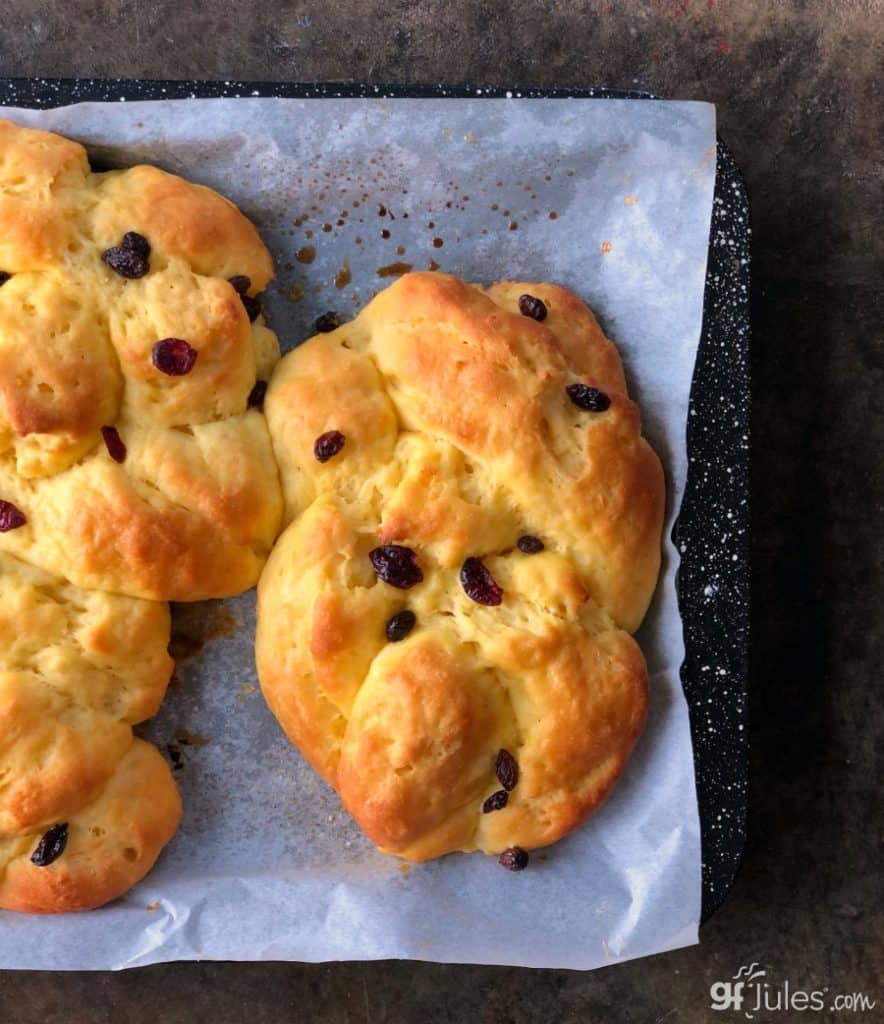
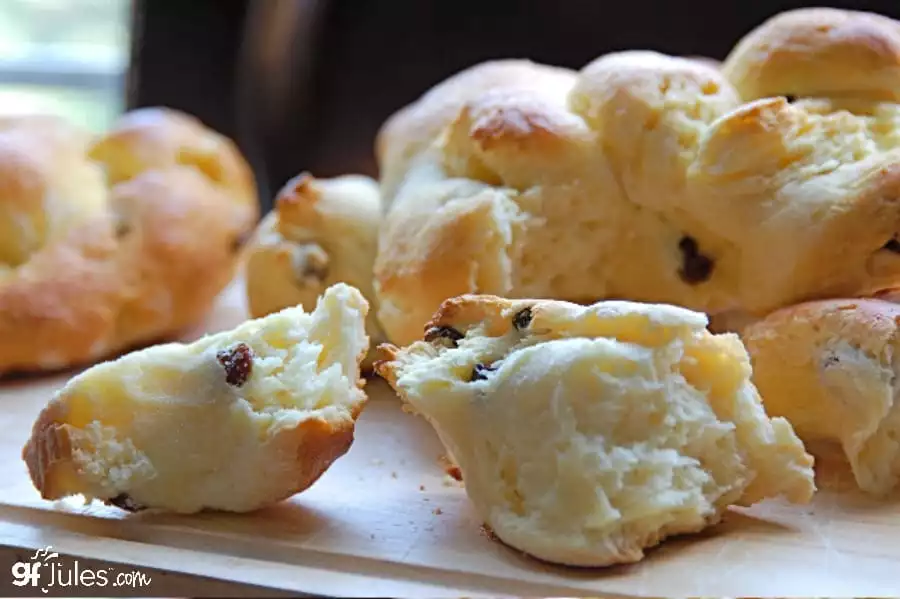
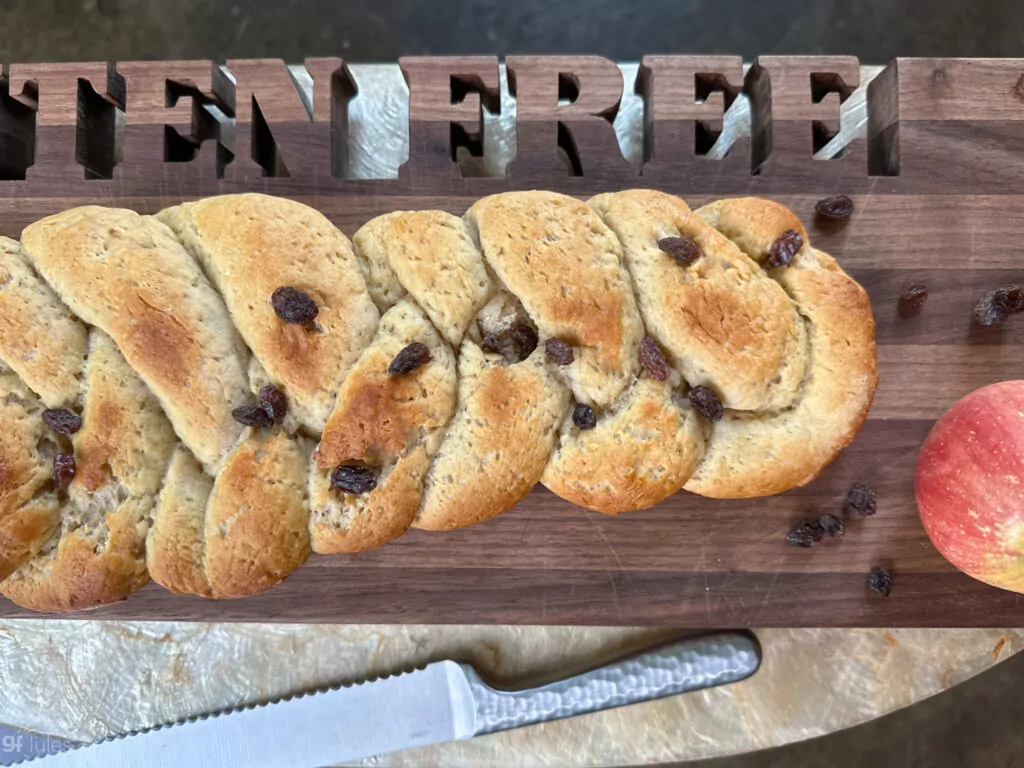
If you like, you can also add raisins and apples once the braid is finished and transferred to a parchment-lined baking sheet.
Allow the bread dough to rise for 20 minutes, brush with another egg wash or spritz lightly with water, then bake OR cover with plastic wrap and refrigerate to bake the next day.
The next day, remove the tray to the counter while you preheat your oven and then bake. Voila! Amazing bread!
NOTE: don’t allow the gluten free challah to rise even more the next day, or you’ll lose some of the definition in the braids. It still tastes delicious, of course, but wasn’t quite as pretty because it rose TOO much and actually ended up being flatter than if it had been popped into the oven with just the right amount of rise.
It’s a wonderful treat for anyone at any time of year, especially now that you have this wonderful gluten free version to make and enjoy!
In fact, it’s not only a truly delicious bread, it’s also one that will impress any guest or crowd. The braids merely look like it took a skillful baker to weave, but that can be our little secret.
When made with my gfJules Flour, these braids will be such a nice surprise to work with!
The dough will be unlike any gluten free dough you’ve worked with before — soft and pliable, not at all brittle. Make sure you follow my directions and ingredients exactly, so you can expect these same results.
The dough should not resist when you’re working with it, but it shouldn’t be super wet either. You’ll get the hang of it after working with it.
You’ll be making beautiful gluten- and dairy-free challah that will have everyone marveling at your baking prowess!
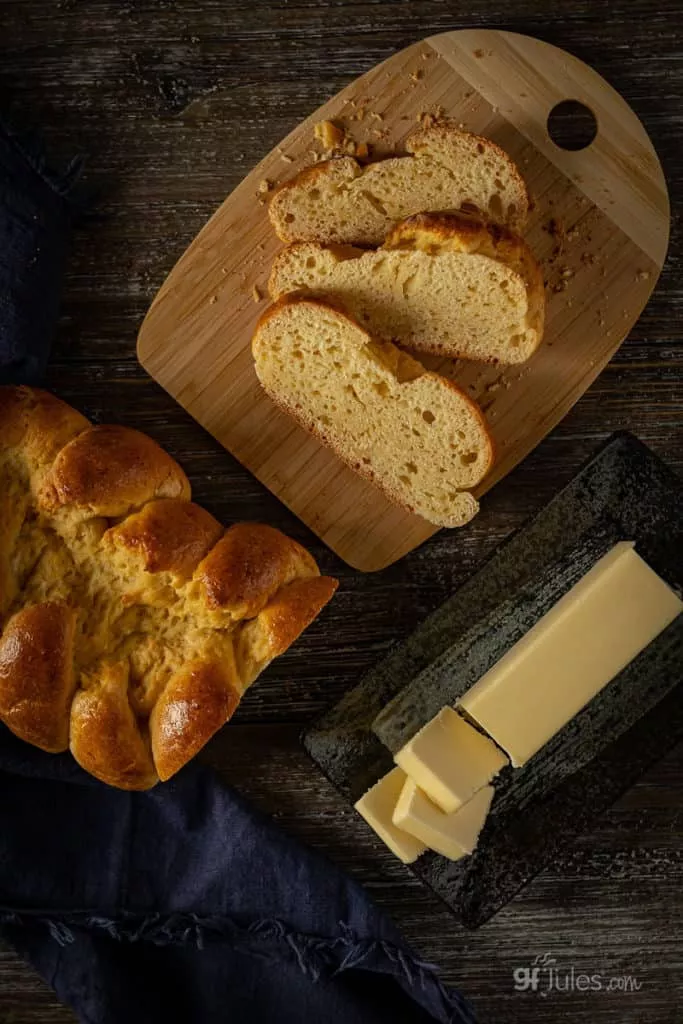
And it’s not just pretty to look at — it’s a wonderful bread to tear apart and enjoy in any setting and with any meal, or on its own.
See how flexible this dough is in this quick time lapse how-to video on braiding bread.
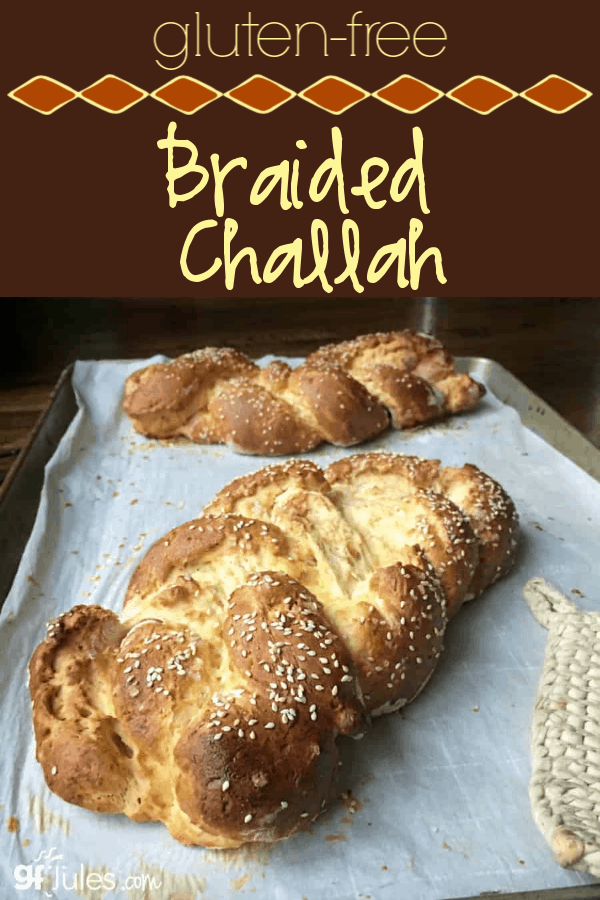
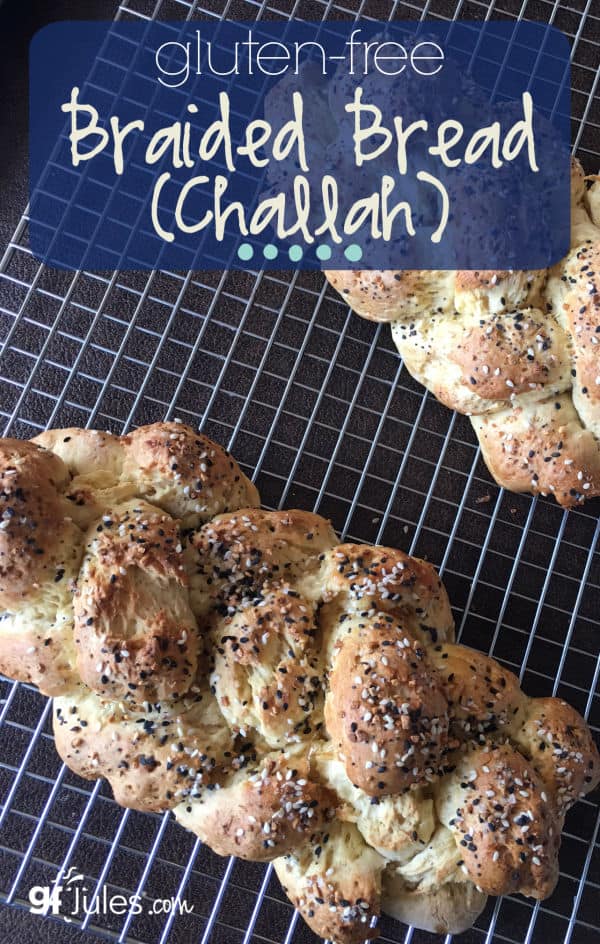
Feel free to skip the apples and raisins, or add your own toppings like sesame seeds and sea salt (as pictured below). Or braid into a crown!
To recap: just proof your yeast, measure your ingredients, make the dough, braid, rise and bake!
The eggs in this bread help to keep it moist and fresh for days, thus, on the off-chance there are any leftovers, enjoy it with hummus, peanut butter, high quality honey, or plain (or make French Toast or overnight gluten free French Toast Casserole!).

Fitting that it is the manna that just keeps giving! Enjoy this recipe for the gift that it is — there’s just nothing like soft, fresh baked bread, and it means so much to be able to enjoy the best bread, gluten free!
It is truly one of the most gorgeous and delicious breads you can make and bring to share for any occasion, so why wait?
A lot of readers ask if they can use my gfJules Gluten Free Bread Mix instead of my gfJules Flour to make this gluten free Challah recipe, so I’ve retooled the recipe to make it possible to make this recipe from the mix as well.
Just follow the recipe card below this one if you have my gfJules Gluten Free Bread Mix and want to make gluten free Challah with my gluten free bread mix instead!
Gluten Free Challah Braid
Gluten Free Challah Braid
Ingredients
Gluten Free Challah Ingredients
- 3/4 cup warm water
- 1 Tbs. gluten free active dry yeast (Fleishmann's® or Red Star® - NOT platinum)
- 1 tsp. granulated cane sugar
- 1 cup yogurt of choice (not Greek style), room temperature (I like vanilla flavor) (So Delicious® Vanilla Coconut Yogurt* - (I like vanilla flavor, but plain is fine)
- 1 tsp. apple cider vinegar
- 5 large egg yolks at room temperature (slightly mixed)**
- 1/3 cup safflower oil OR sunflower oil OR non-GMO canola oil OR other mild oil like avocado
- 4 Tbs. honey OR agave nectar OR maple syrup
- 4 cups (540 grams) gfJules® All-Purpose Gluten Free Flour
- 1 Tbs. psyllium husk powder (OPTIONAL) if using, add 2 Tbs water to dough
- 3 Tbs. + 2 tsp. granulated cane sugar
- 1 1/4 tsp. kosher salt
Toppings
- 1 large egg mixed with 1 Tbs. water
- poppy seeds sesame seeds, raisins, diced apples or other toppings (optional)
Instructions
- Preheat your oven to 200º F, then turn it off. Prepare a baking sheet by lining it with parchment paper.
- In a small bowl, divide out ~1/3 cup of the total 3/4 cup warm water. Add to it the yeast and 1 teaspoon of sugar to proof the yeast; set aside. (If using quick rise/rapid rise yeast, you may simply add to dry ingredients instead.)
- In the bowl of your stand mixer***, add the rest of the wet ingredients (remaining water, yogurt, cider vinegar, egg yolks, oil, honey) and mix until combined.
- Whisk together the dry ingredients in a separate bowl (gfJules Flour; remaining sugar; salt; and psyllium -- if using).
- If proofing yeast, after 5 minutes of proofing, stir in the bubbling yeast-water mixture into the wet ingredients (note: if your yeast isn’t bubbling at this point, throw it out and start again with fresh yeast).
- Gradually stir the dry ingredients into the wet until fully integrated, adding more warm water by the tablespoon if needed so that the dough is not tight or stiff — you should be able to pull the dough gently without it feeling tight or like it would bounce back — if it’s too stiff, add more warm water.
- Mix 1-2 minutes more on medium speed to integrate any additional water and ensure all ingredients are fully incorporated. The dough should be workable; keep in mind you will be braiding it, so it can't be too loose or too tight (think of Goldilocks dough!).
- Once the dough is combined, divide it in half and divide each half into three equal-sized balls (6 balls total for 2 loaves or 3 balls for one large braided loaf). Roll each ball out into an 18-inch coil or log on a clean, flat surface dusted very lightly with gfJules All Purpose Flour.
- Pinch together one end of each coil, scoring and wetting them slightly with water to help them join together at the top, then braid them, finishing by connecting them at the other end.
- Gently transfer braid to the parchment-lined baking sheet. Repeat for the second set of three balls. You may divide the dough into as many balls as you like, counting on at least 3 balls per loaf. Roll each to equal lengths of coil and braid into 1 or more loaves.
- In a small bowl, mix the extra egg together with a splash of water and brush over each loaf well, coating the entire top surface. Sprinkle the fruit or any toppings at this point, then place the tray (covering the loaves with wax paper or parchment sprayed with cooking oil) in a warm location for only 20 – 30 minutes.
- Once risen at least slightly, place the uncovered tray in an oven preheated to 350º F (static) or 325º F (convection) for 20 minutes (less time for smaller loaves). A toothpick inserted into the center of the bread should come out dry or with dry crumbs.
- (Optional: instead of baking right away after rising, brush again with egg wash or spritz with water and cover with plastic wrap. Refrigerate overnight. Remove to the counter while pre-heating your oven. Remove plastic wrap and bake as directed.)
- Remove to cool on a wire rack.
Video
Notes
** Please keep in mind that nutrition information provided is per serving, which may vary. While we have taken care to provide you with the most accurate nutritional values possible, please note that this information may differ significantly depending on the exact ingredients and brands that you choose to use to make this recipe. Additionally, where options are given for ingredients, the resulting calculation may include all ingredient options instead of only one per line, skewing the totals significantly.
Gluten Free Challah from gfJules Bread Mix
Gluten Free Challah from gfJules Bread Mix
Ingredients
- 1 gfJules Gluten Free Bread Mix
- 1 quick rise yeast packet
- 4 Tbs. 56 grams granulated sugar
- 3/4 cup water
- 3/4 cup yogurt of choice not Greek style, room temperature (I like vanilla flavor)
- 1 tsp. apple cider vinegar
- 4 large egg yolks slightly mixed*, room temperature
- 1/4 cup mild oil like sunflower safflower, non-GMO canola, avocado, etc.
- 4 Tbs. honey OR agave or maple syrup
Toppings
- 1 large egg mixed with 1 Tbs. water or milk
- poppy seeds sesame seeds, raisins, diced apples, etc. (optional)
Instructions
- Preheat your oven to 200º F, then turn it off. Prepare a baking sheet by lining it with parchment paper.
- Bring all ingredients to room temperature. In the bowl of a stand mixer (recommended)**, add the wet ingredients (water, yogurt, cider vinegar, egg yolks, oil, honey) and mix until combined.
- Gradually stir the gfJules Bread MIx + yeast packet into the wet until fully integrated.
- Mix 1-2 minutes more on medium speed to ensure all ingredients are fully incorporated.
- Once the dough is combined, divide it in half and divide each half into three equal-sized balls (6 balls total). Roll each ball out into an 18-inch coil or log on a clean, flat surface dusted very lightly with gfJules All Purpose Flour.
- Pinch together one end of each coil, scoring and wetting them slightly with water to help them join together at the top, then braid them, finishing by connecting them at the other end.
- Gently transfer braid to the parchment-lined baking sheet. Repeat for the second set of three balls. You may divide the dough into as many balls as you like, counting on at least 3 balls per loaf. Roll each to equal lengths of coil and braid into 1 or more loaves.
- In a small bowl, mix the extra egg together with a tablespoon of water or milk and brush over each loaf well, coating the entire top surface. Sprinkle the fruit or any toppings at this point, then place the tray (covering the loaves with wax paper or parchment sprayed with cooking oil) in a warm location for 30 minutes.
- Once risen at least slightly, place the uncovered tray in an oven preheated to 350º F (static) or 325º F (convection) for 20 minutes (less time for smaller loaves). A toothpick inserted into the center of the bread should come out dry or with dry crumbs when done.
- (Optional: instead of baking right away after rising, brush again with egg wash or spritz with water and cover loosely with plastic wrap. Refrigerate overnight. Remove to the counter while pre-heating your oven. Remove plastic wrap and bake as directed.)
- Remove to cool on a wire rack.
Notes
** Please keep in mind that nutrition information provided is per serving, which may vary. While we have taken care to provide you with the most accurate nutritional values possible, please note that this information may differ significantly depending on the exact ingredients and brands that you choose to use to make this recipe. Additionally, where options are given for ingredients, the resulting calculation may include all ingredient options instead of only one per line, skewing the totals significantly.
Don’t wait for the next special occasion to bake this incredible gluten free challah bread!
I hope you love this recipe as much as we do!
Pin for later!


I made sandwich rolls by adapting your dinner roll recipe. I used a bread machine for mixing and one rise, and then instead of using the cupcake holders I used an ice cream scooper to place them on a baking sheet with parchment paper. Baked according to your recipe and they came out great!
How brilliant! So creative, and they look lovely! Thank you so much for sharing a photo and your method!
~jules
Challah is traditionally a Sabbath (Shabbat) bread. Calling it a “Hanukkah” bread is just wrong. You may want to correct that.
Hi Mimi, many thanks for pointing out my oversight in failing to add challah’s essential and most used purpose as Shabbat Bread! I’ll add that in the tags. I can’t believe I hadn’t included that to begin with, as Shabbat is most often when I share the recipe (including this week!). The inclusion of words like Hannukah + bread are for SEO purposes so that people searching for bread for Hannukah (i.e. Challah) will find it in google’s search engine. It seems weird sometimes the combination of words bloggers have to include in posts in order for different searches to pull recipes, but we have to cover all our bases in order for people to find our recipes! Again, many thanks for pointing out my Shabbat Bread oversight.
~jules
My Gluten Free Challah came out great and I used the bread machine for mixing! After getting all of my ingredients together, per the bread machine instructions, I added all of the liquids to the machine. I did NOT proof the yeast, so I added the amount of water for proofing the yeast into my liquids. I then added all the dry ingredients accept for the yeast, made a well in the dry stuff and added the yeast. I set the bread machine to the GF setting and as soon as the mixing was done and removed everything and continued per the rest of Jule’s recipe. I LOVED being able to braid the bread! This is the first GF Challah recipe that I have used that allows for the braiding. I like to add Zatar and sesame seeds on top. They came out great!
Oh Beth, these are beautiful gluten free challah loaves!!! So excited for you that you were able to let the bread machine do the mixing for you and yet you were still able to braid this dough into gorgeous loaves. I’m thrilled you have a great recipe that allows you to braid real challah again!! Thanks so much for taking the time to share your photo and your method!
~jules