I’ve been thinking about making gluten free Danish puff pastry a lot lately. I have no idea why exactly, but sometimes when a food memory bubbles up, I can’t stop thinking about it until I make a gluten free recipe for it.
And so it happened with gluten free puff pastry. Specifically, Danish.
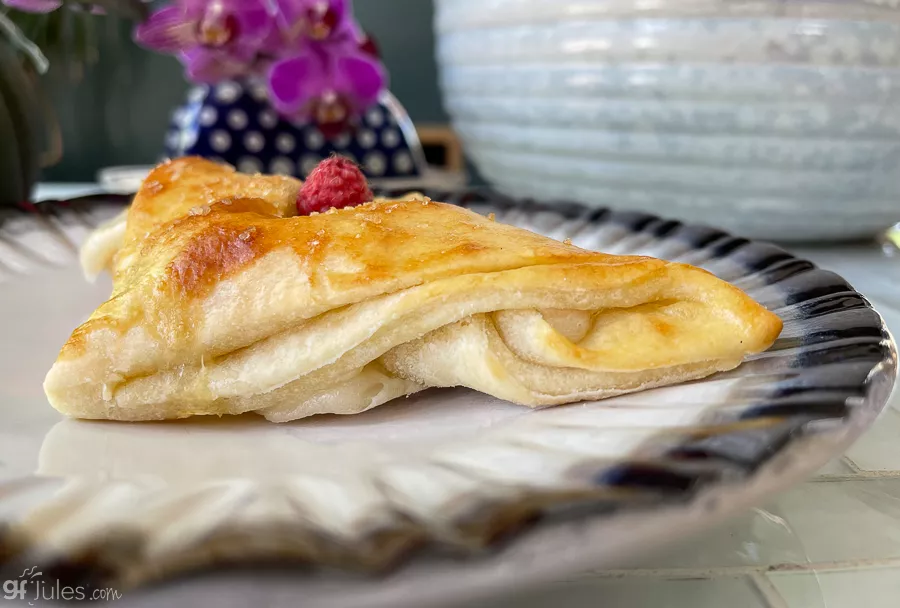
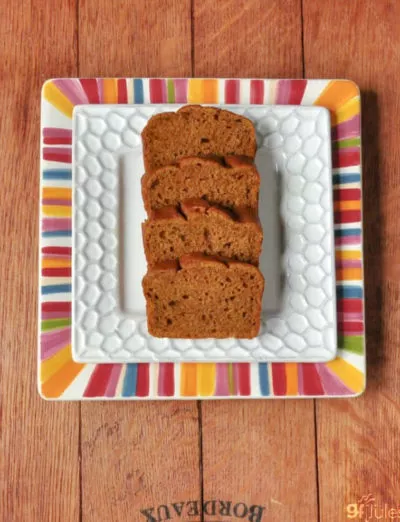
When I was young, my mom used to buy frozen Danish with cream cheese filling for special breakfasts. They must have been made with a puff pastry; they weren’t fancy, just incredibly delicious!
I bet I haven’t had one for at least 30 years — that’s really scary to put into writing — but I remember the taste vividly.
When I set about to create this gluten free Danish puff pastry recipe, I wanted to also recreate the decadent cream cheese filling as a vegan recipe, so I experimented with several dairy free cream cheese alternatives.
They all worked well, but some are more runny than others, which is easily fixed by adding a touch of my gfJules™ Gluten Free All Purpose Flour to thicken it up. Feel free to make the filling with regular dairy cream cheese instead, if you like.
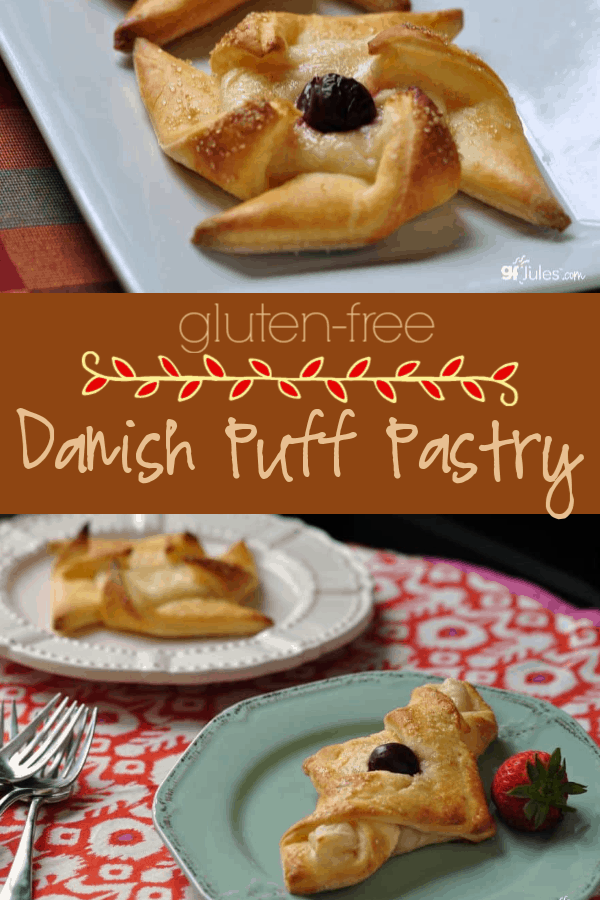
The results were not only pastries that tasted as good as I remember, but are even more beautiful! I had so much fun working with this pliable, soft dough. You read that right: I had fun working with this PLIABLE, SOFT GLUTEN FREE DOUGH.
That’s all because of my gfJules Flour. It adds subtle stretch to doughs like these (and gluten free pie crust, gluten free sugar cookies, gluten free crescent rolls, etc.) and makes it easy to roll out and fold over your fillings, plus it makes the baked gluten free Danish so light and fluffy.
Don’t try this recipe with an ordinary rice flour-based or bean flour blends, or you’ll wind up with dry, cracked and crumbly Danish that taste funky or gritty. No one wants that.
Definitely not worth your time or effort, so do it right the first time and follow my lead. Use the ingredients specified in my recipe and you can’t go wrong.
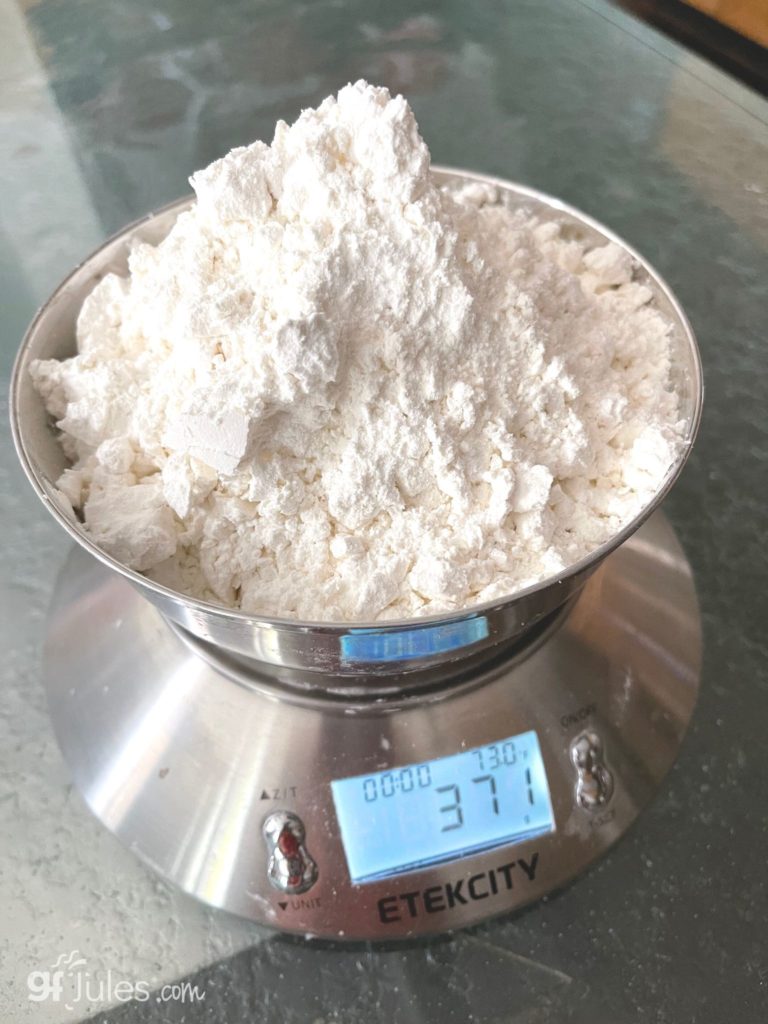
It’s particularly important not only to use my gfJules Flour blend, but also to measure it properly. If you haven’t read this article on how to measure gluten free flours the right way, it’s worth your time.
And if you’re still wondering the difference between one gluten free flour blend and another, this article comparing gluten free flours and what makes them different is worth 5 minutes of your time.
I stress this information because it really makes me feel bad when people come back and tell me my recipe didn’t work as pictured (invariably they used another gluten free flour blend). They really are very different, folks!
Again, check out this article on gluten free flours to find out why!
Since I first published this recipe, I’ve heard from so many readers that they’ve made it and loved the results with my award-winning gfJules Flour (that should encourage you to try it, too!).
The most fun part is that readers have shared with me ways that they’ve made the dough into other beautiful shapes.
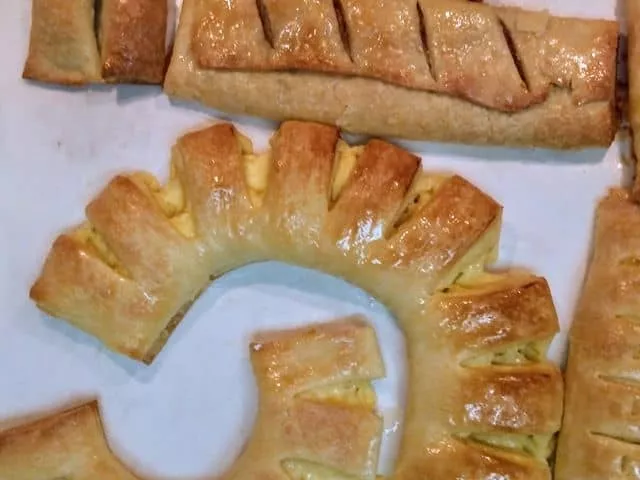
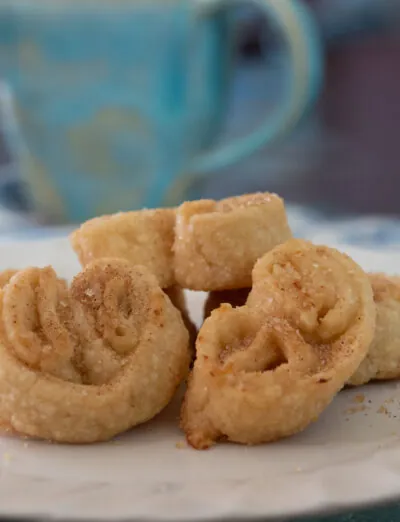
Here are Debbie Bernhardt’s gluten free Danish RINGS made with this recipe. She writes,
“Tonight’s Gluten Free (Jules of course) Danish’s from your recipes.
Fillings include: Cheesecake, Lemon Curd, Apples with Cinnamon Sugar, and Dark and White Chocolate. I baked them for 25 minutes. I had let them rise for more than a hour because I had started out with cold dough, so it took that long to get them to begin to rise. By that time they were room temp, so they baked fairly quickly.”
 Fillings include: Cheesecake, Lemon Curd, Apples with Cinnamon Sugar, and Dark and White Chocolate. I baked them for 25 minutes. I had let them rise for more than a hour because I had started out with cold dough, so it took that long to get them to begin to rise. By that time they were room temp, so they baked fairly quickly.”
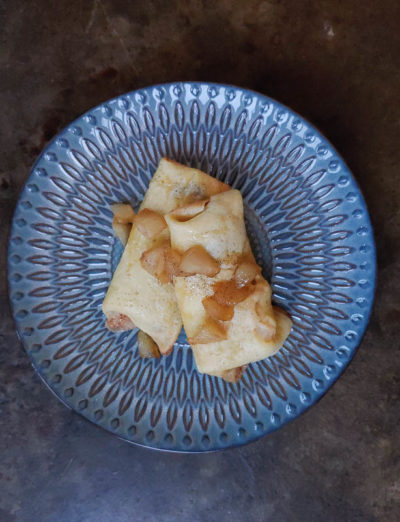
Others have made different fun fillings, too: chopped apples and cinnamon; pecans, sugar and butter; diced peaches; preserves … or use one of the two filling recipes I provide below.
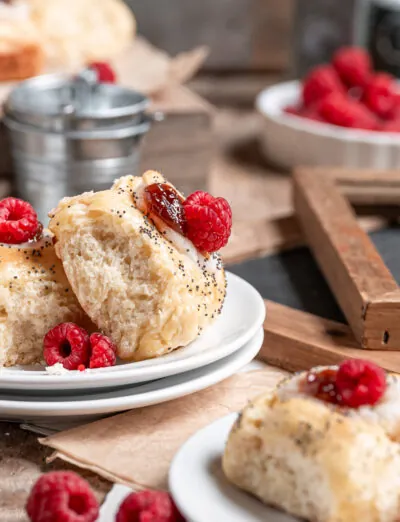
And this customer photo makes me drool every time!
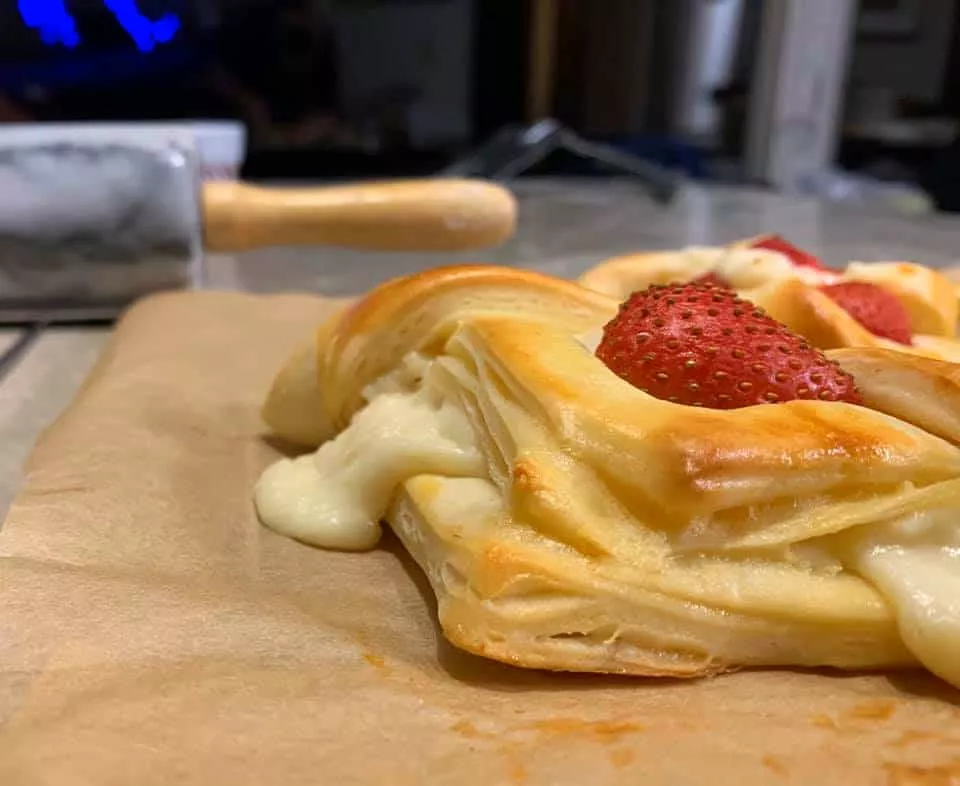
The point is, you can make these any shape you like and you know they’re going to be delicious made with my soft, light gfJules Flour, so go for it!
Make pockets, envelopes, braids, twists … get creative and enjoy delicious gluten free puff pastry again!
Now that gluten free Danish Puff Pastry is back on the menu, I’m starting to think of other delicious food memories I need to re-create gluten free.
Is there a food memory from your childhood you’d like to re-create gluten free? I’d love to hear about it!
Click here to see a my video showing the recipe in action!
How to Make Gluten Free Danish Pastries
Here is an overview of the steps after mixing the dough:
This is called the “rough pastry” method that makes the dough super flaky!

Once the layers are formed, you’ll roll the dough out again and cut into equal squares:

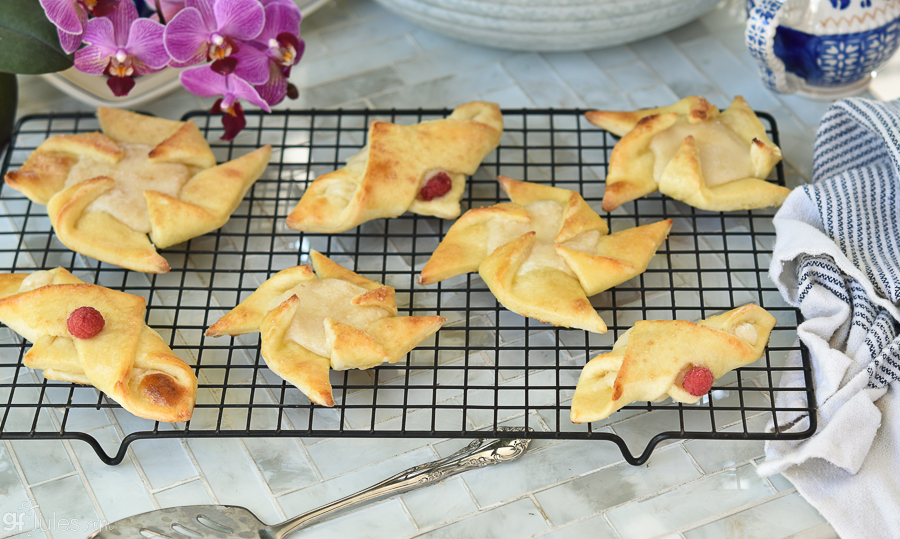
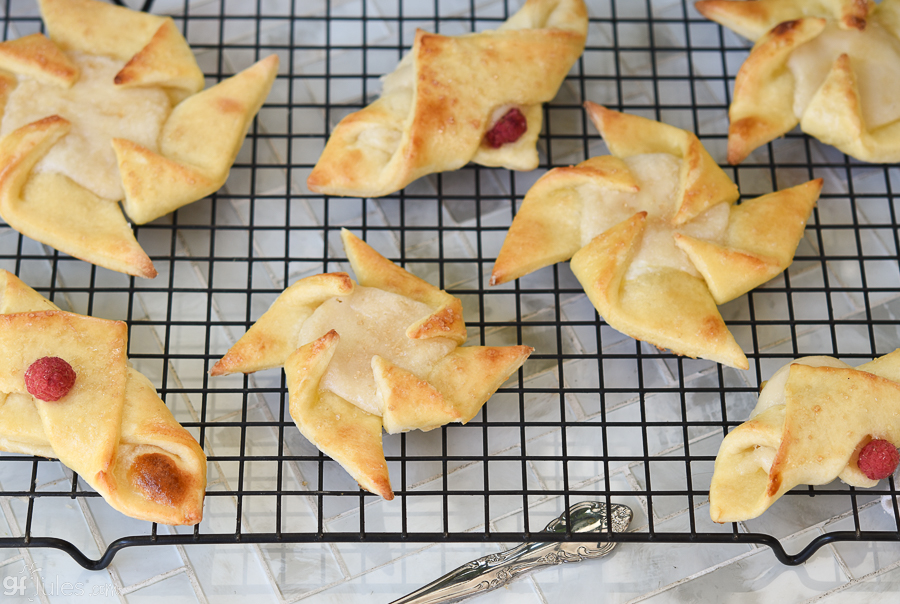
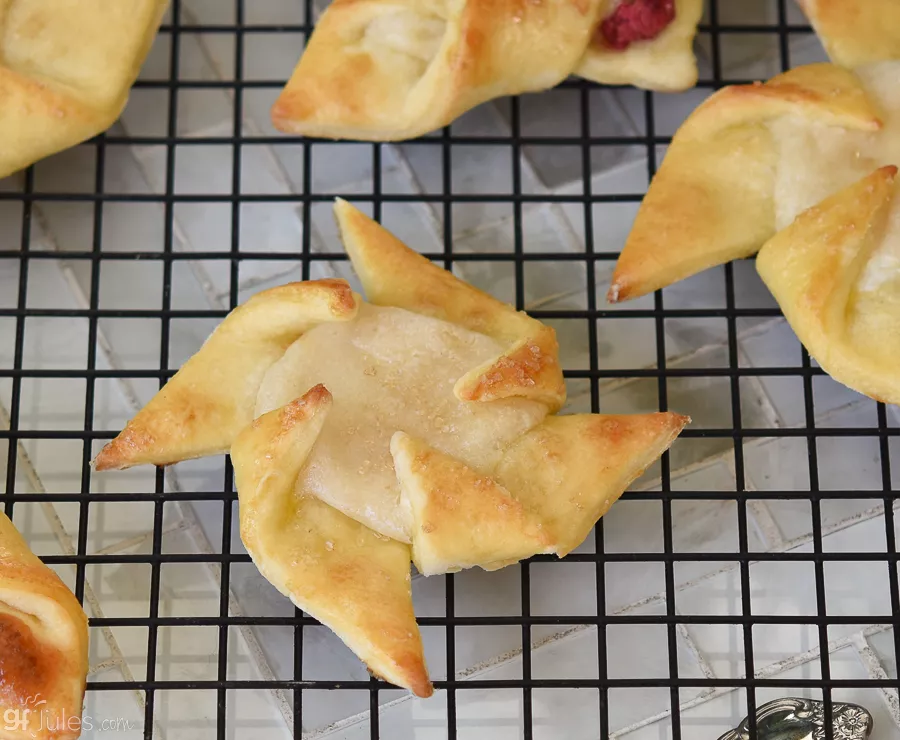
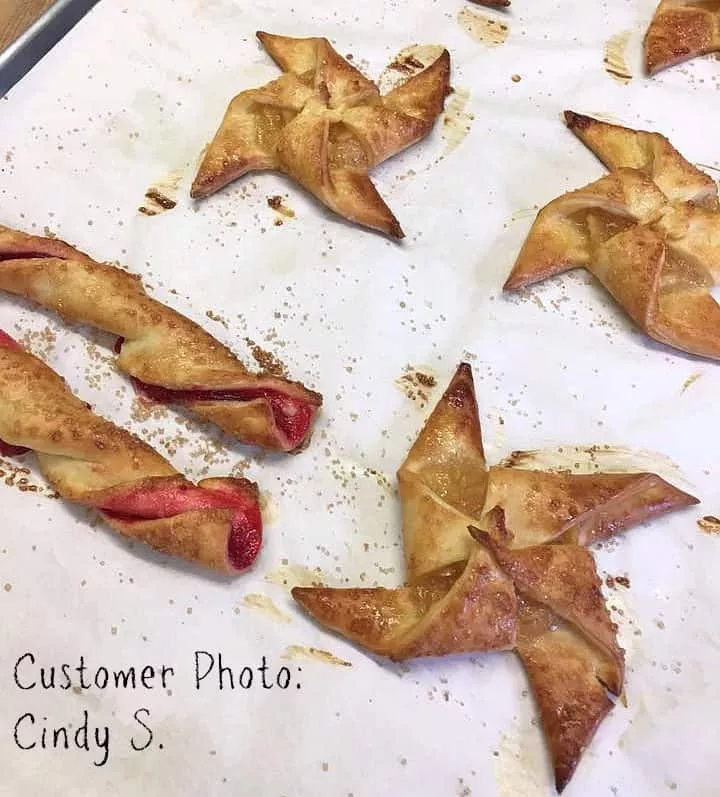
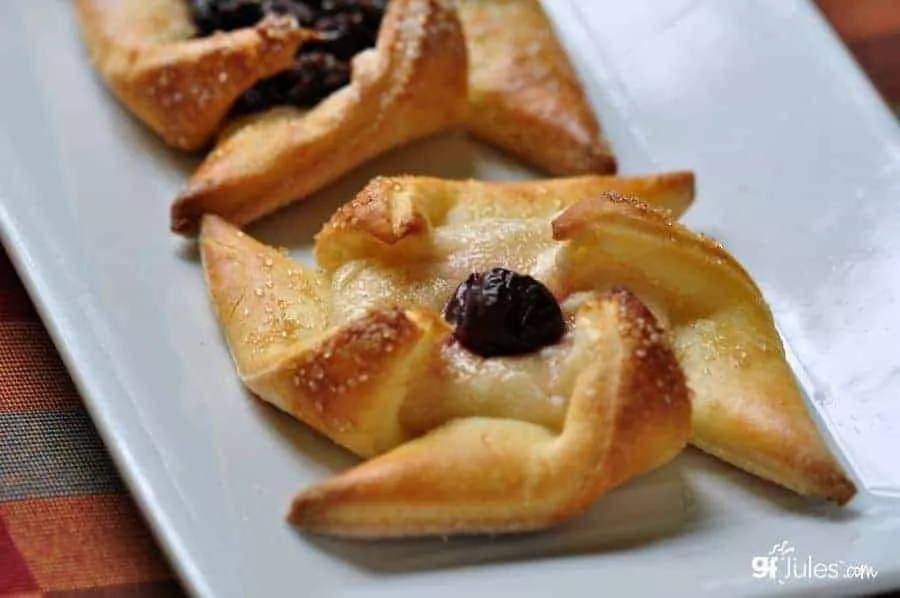
To make Gluten Free Danish Pinwheels:

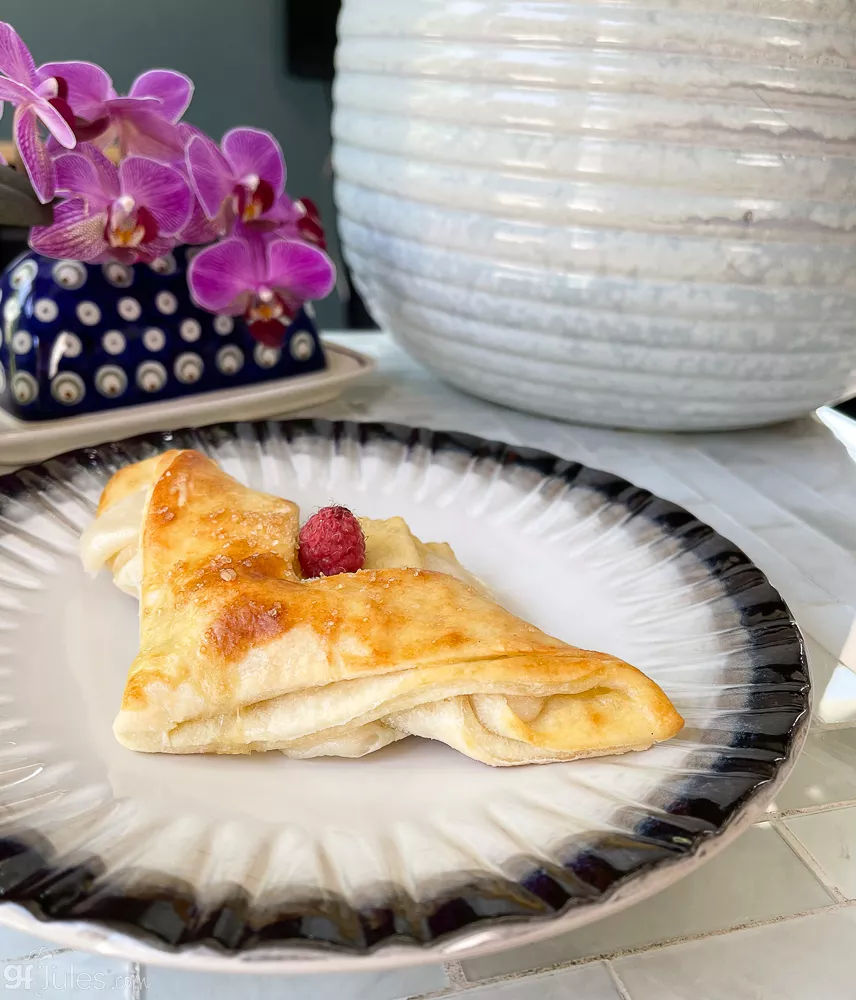
To make Gluten Free Dutchess Danish:

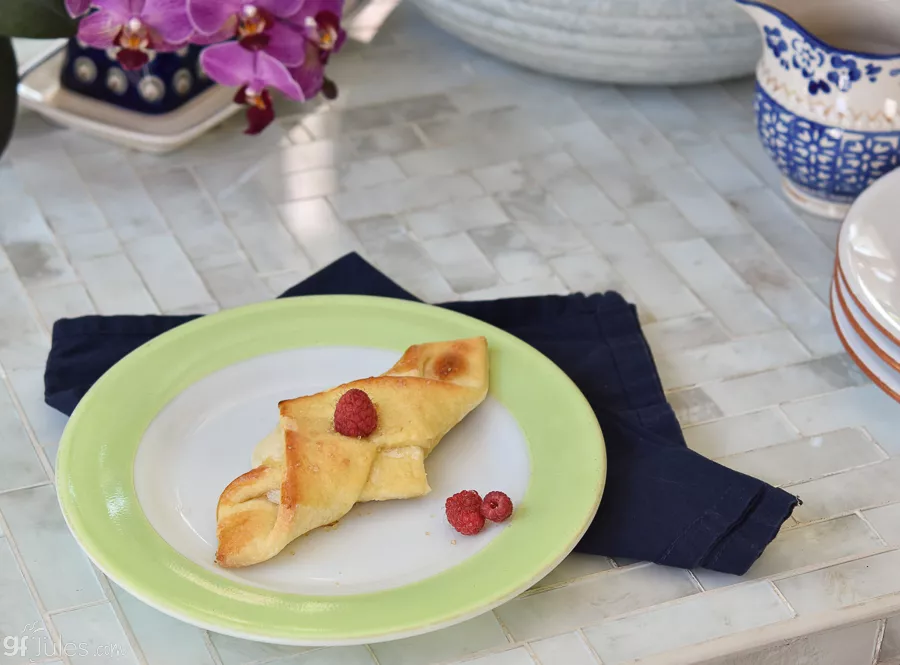
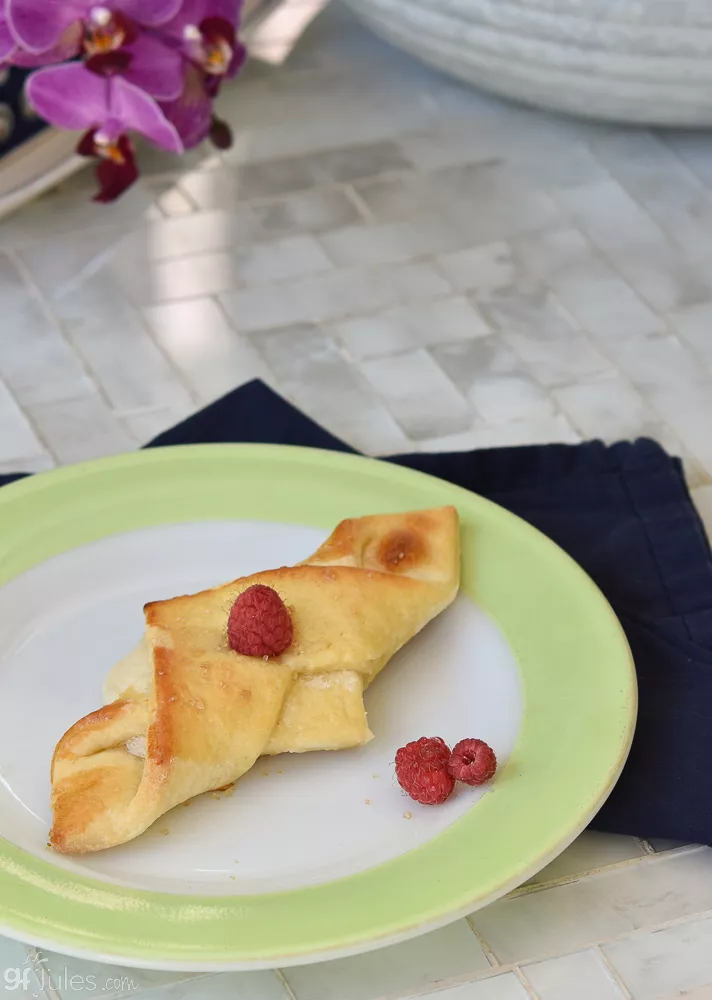
To make Gluten Free Swiss Roll Danish:

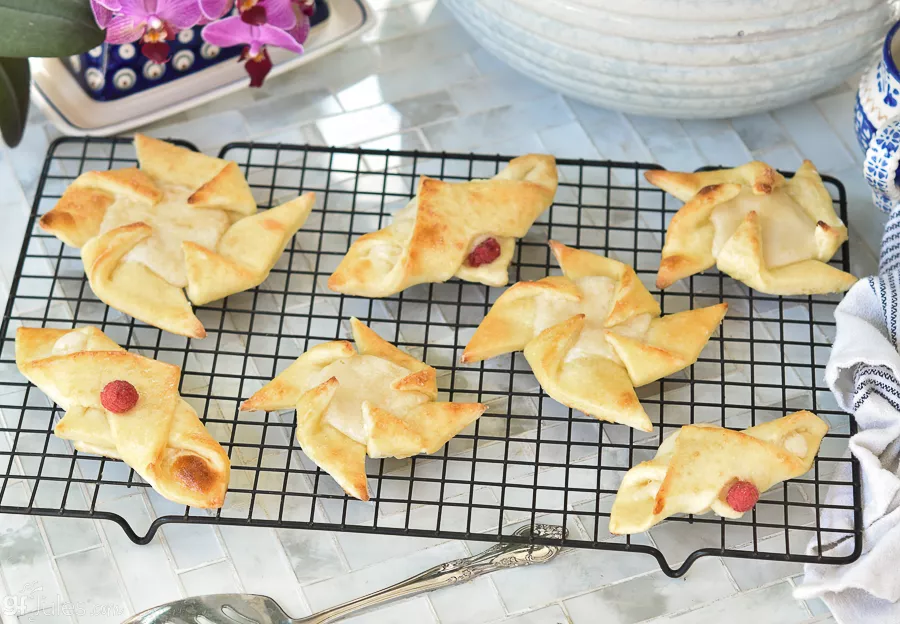
Which gluten free Danish shape do you prefer? Will you try them all?
Gluten Free Danish Puff Pastry Recipe
Equipment

Ingredients
Gluten Free Puff Pastry Dough
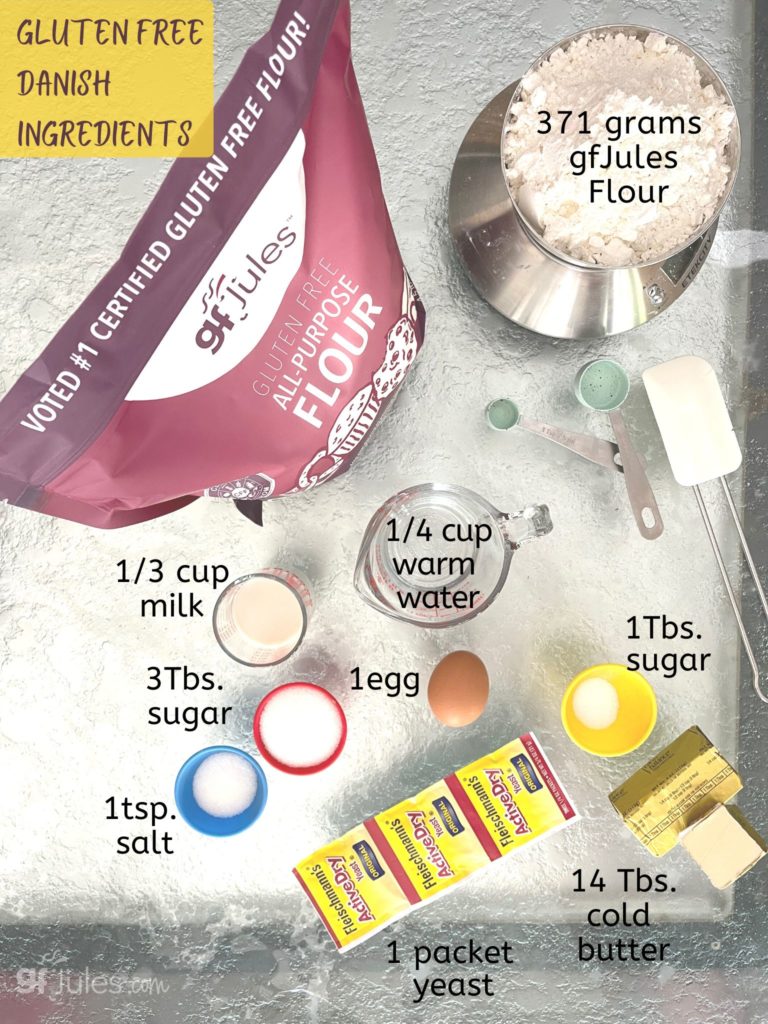
- ¼ cup warm water
- 1 Tbs. granulated sugar
- 2 ¼ tsp. dry yeast (Red Star or Fleishmann's) – 1 packet
- 1/3 cup milk dairy or non-dairy, room temperature
- 1 egg room temperature or 1 Tbs. flaxseed meal steeped in 3 Tbs. warm water until thick
- 2 ¾ cup (371 gr) gfJules™ Gluten Free All Purpose Flour
- 3 Tbs. granulated sugar
- 1 tsp. sea salt
- 14 Tbs. cold butter or non-dairy substitute (e.g. Earth Balance® Buttery Sticks
Cream Cheese Filling
- 8 oz. cream cheese (dairy or non-dairy like Go Veggie® Violife or Kite Hill™ vegan cream cheese alternatives
- 1/3 cup + 1 Tbs. granulated sugar
- 2 tsp. lemon juice
- 1 tsp. pure vanilla extract
- 1 tsp. sour cream (dairy or non-dairy like Follow Your Heart® Vegan Gourmet® Forager, Tofutti or other vegan sour cream alternatives OR vanilla yogurt of choice
- 1 Tbs. gfJules™ Gluten Free All Purpose Flour
Raisin Filling
- ½ cup raisins
- 1/8 cup granulated sugar
- ½ tsp. cinnamon
- 2 Tbs. softened butter or non-dairy alternative (like Earth Balance® Buttery Sticks)
Other Toppings
- 1 egg for egg wash or mild flavored oil for vegan alternative
- demerara sugar
- confectioner’s sugar
- berrries
Instructions
Gluten Free Puff Pastry:
- In a small bowl, whisk together warm water, 1 tablespoon sugar and yeast. Set aside.
- Once the mixture becomes foamy, add 1 egg/sub and milk.
- In a separate bowl, whisk together the gfJules™ flour, 3 tablespoons sugar and salt.
- Cut cold butter into ½ tablespoon-sized pieces and toss with flour mixture. Using a paddle attachment on a stand mixer or a blender, food processor or two knives, cut the butter into the flour mixture until it resembles small pebbles. Do not over-process; it should still be a powdery mixture with small pieces of butter throughout.
- Slowly pour the yeast mixture into the dry mixture and mix just until dough has formed. The dough will be sticky but will hold together.
- Wrap dough in plastic wrap and refrigerate for at least 1 hour or freeze for 30 minutes.
- Once dough is cold again, place on a clean counter or pastry mat liberally dusted with more gfJules™ flour or gluten free starch.
- Roll gently in all directions until you have a rectangle of dough that is between 16-17 inches by approximately 14 inches. Add more flour as you roll to prevent the dough from sticking.
- Fold opposing ends in to the middle, as you would fold a letter in one direction, and then in another. You will be left with a square of folded dough. If it is very sticky, wrap and refrigerate or freeze again; if you are still able to work with it, repeat the rolling and folding steps 3 more times, then wrap the dough and refrigerate for 3 hours or more (overnight is fine).
- This process of gently rolling cold dough with cold butter distributed throughout, layering with flour between folds and re-rolling, will help to form yummy flakey layers in the baked pastry dough, so for the flakiest pastry, don’t skip these steps!
- Prepare your fillings while the pastry is refrigerating.
Cream Cheese Filling:
- Whisk all ingredients together, adding more gfJules™ Flour if the mixture is runny; different brands of non-dairy cream cheese and sour cream can be thinner and may need more flour to give the filling body so it won’t run out of the pastries. Refrigerate until ready to use.
Raisin Filling:
- Combine raisins, sugar and cinnamon with soft butter in a small bowl, mixing with a fork until the raisins are evenly coated. Refrigerate until ready to use.
Making the Gluten Free Danish:
- Cut the refrigerated dough in half and re-wrap and cover one half of the dough, returning to the refrigerator as you work.
- Prepare two baking sheets by covering with parchment and setting aside. Prepare a clean counter or pastry mat by liberally dusting with gfJules™ Flour.
- Roll out half of the dough gently in all directions until the dough forms a square or rectangle between ¼ – ½ inch thick. Measure squares between 4 ½ – 5 inches on each side and cut with a pastry cutter, bench scraper or butter knife. The sides of the squares should be equal (they are squares, after all), but the size can vary depending on the amount of dough you have to work with.
- Gather up the dough cut off from the squares and re-roll, cutting squares from the remaining dough as well. Repeat with remaining refrigerated dough.
- Cut even squares of dough from the rolled out pastry dough.
Choose a shape below:
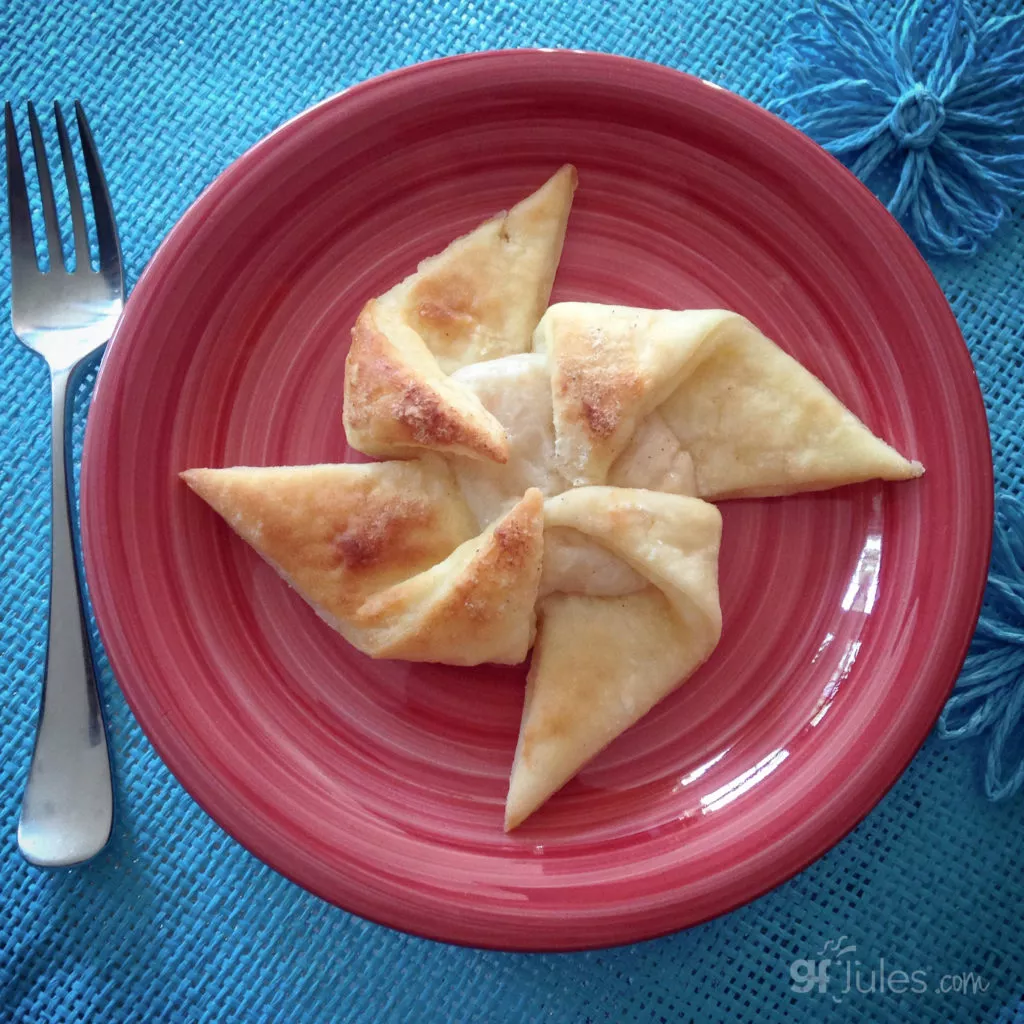
- To make pinwheel pastries, place a dollop of filling in the middle of each square, then cut in from the 4 corners just to the filling. Brush with egg wash.
- Pick up the left corner of one of the cut corners and fold into the middle of the filling; repeat with the same left corner of each of the cut corners.
- Wet the corners with more egg wash and gently press together in the center to help them stay together more during the rise. Place a berry in the center, if you wish. The dough will spread when they rise and bake – particularly if your dough is rolled thicker – but the twisted pinwheel shape is still pretty.
- Brush egg wash on the newly exposed sides of the pastry before setting aside to rise.
- Gently pick up the pastry with a spatula or bench scraper and transfer to the parchment lined baking sheet. Sprinkle with demerara sugar, if desired.
- To make Dutchess pastries, fold the square into a triangle by pulling one corner over to top the opposite corner. Cut into the triangle to almost form another smaller triangle in the middle, but don’t join the cuts, so they are still intact. The border outside of the smaller triangle should be about ¾ inch wide.
- Open the square back up and place a line of filling down the center. Fold one cut border over to the opposite side on top of the smaller interior square and filling. Repeat with the other side, folding overtop the opposite border, as pictured above. Brush with egg wash.
- Gently pick up the pastry with a spatula or bench scraper and transfer to the parchment lined baking sheet. Sprinkle with demerara sugar, if desired.
- To make Swiss roll-style pastries, roll the equivalent of two 5 inch squares of dough out to form a rectangle instead of a square, approximately 1/8 inch thick. Gently spread a thin layer of butter or non-dairy spread on top of the entire rectangle, then sprinkle with brown sugar, cinnamon, raisins, or any combination you desire.
- Starting at one long side of the rectangle, gently roll up the pastry into a long log. Twist the log around itself to form a bun, then press gently in the center to form a well. Place a dollop of filling into the well. Brush with egg wash.
- Gently pick up the pastry with a spatula or bench scraper and transfer to the parchment lined baking sheet. Sprinkle with demerara sugar, if desired.
Baking Pastries:
- Cover pastries and allow to rise for 15-30 minutes in a warm spot.
- Preheat oven to 400º F.
- Bake pastries in preheated oven for 9 minutes. Particularly with pastries like the pinwheel which have smaller points, do not over-cook or they will become crunchy and dry. Swiss rolls generally need a bit longer to cook. Because of the egg wash, the pastries will brown nicely, so watch to make sure they are not getting too dark before you remove from the oven.
- Remove to cool on a wire rack once baked.
- Sprinkle with confectioner’s sugar or a simple mixture of confectioner’s sugar and your milk of choice, drizzled as icing on top of the Danish, if desired.
- Makes 10-12 Danish pastries, depending on size.
Video
** Please keep in mind that nutrition information provided is per serving, which may vary. While we have taken care to provide you with the most accurate nutritional values possible, please note that this information may differ significantly depending on the exact ingredients and brands that you choose to use to make this recipe. Additionally, where options are given for ingredients, the resulting calculation may include all ingredient options instead of only one per line, skewing the totals significantly.
Recommended Products
Any links to Amazon may earn me a small amount from qualifying affiliate purchases; this amount goes to fund this blog and does not cost you anything additional.
I hope you love this recipe as much as we do!
Pin it to try later!


I really would love to try your recipes. I live on a limited budget so I blend my own flours to save money. I have a pantry full of flours and a scale I use to blend for each particular type of flour needed. Is there anywhere you have posted the measurements for blending your gf Jules flour? I learned 15 years ago that I needed to be gf. I miss pastry. Thank you.
Hi Sandy, I completely understand the need to save money, although in the end it can wind up being more expensive sometimes to experiment and endure flour failures. If you’d like to learn more about my gfJules Flour blend and why so many folks have given up on making their own flour in favor of this one-flour solution, check out some of the reviews. For tips on blending your own to use up the last of your cabinets full of odd gluten free flours though, check out this article on gluten free flours and blends. I hope that helps!
~jules
Nice recipe that I will try soon! Can you roll out the dough, cut into rectangles and then freeze them?
Thank you!
Hi Nancy, I haven’t tried freezing the rectangles before baking, so I would just be guessing. I don’t know why it wouldn’t work, but the trick would be in the thawing. You wouldn’t want the dough to thaw too much and the butter to melt. If you could nail that part … I think you could do it. Also, you would want to put parchment or wax paper between the rectangles to keep them from sticking. Let me know how it goes!
~jules
I purchased the gf Jules gluten free flour to use for this recipe. I used mostly all the listed ingredients. The only different ingredient I used was Fleischman’s Rapid Rise yeast with 1/4 cup of warm water & sugar instead of the Red Star brand. I followed every single step to the T, but it did not work out well for me. Everything went fine until it was time to roll the cold dough on top of the flour and shape them. It was very crumbly, hard to work with, and would not stay together. As said before, all listed ingredients were used (I am a vegan so I used the vegan options) and the only thing different that I used was the brand of the instant yeast. I also followed every single step in the recipe. I am saddened because I’m not sure what went wrong. Was it the brand of yeast that I used that caused the dough to be so crumbly when trying to roll it out and shape the danishes? Your recipe says to add the yeast to 1/4 cup of water, but Fleischman’s says that there is no need to add to water. But your recipe says to, so I did. I don’t want to give up on this recipe, especially since I’ve read other people’s reviews about how it worked out so well for them. I’m not sure what I did wrong. I need advice please!
Hi Kristina, I would say that more than the different brand of yeast, the egg sub and the moisture are the two variables that sound like they were at play here. Egg substitutes work well for many things, but less well for stretchiness in doughs. Luckily, there’s only one to replace in this recipe, and luckily my gfJules Flour adds some stretch to doughs on its own, so that shouldn’t have been the entire problem. Sometimes the amount of liquid added from the egg substitute isn’t enough, and that’s where you really need to just pay attention to the dough as you’re adding it together and forming what will be what will be rolled out later.
This step here is critical: “Slowly pour the yeast mixture into the dry mixture and mix just until dough has formed. The dough will be sticky but will hold together.” When you get to this step next time, add more liquid until the dough is sticky but will hold together. If your dough is crumbly, there is no way that it will be able to be rolled out. Mind you, don’t just start dumping water into the bowl or anything 🙂 , but add a bit of water at a time until your dough will hold together in a way that you could imagine it would hold together so you could roll it out. The liquid will be absorbed into the dough somewhat during the refrigeration step, so err on the side of wetter, but not super wet, and certainly not dry and crumbly!
I hope this helps for next time. Please keep me updated and don’t give up!!!
~jules
Awesome! Thank you so much for your reply. I’m going to try again. This recipe looks too yummy to give up on! Also, instead of using sugar, is there any way that I could use another sweetener, like agave? If so, at what point in the recipe would I add the agave in the dough? Thanks again!!
Hi Kristina, if possible, I would work with one variable at a time. Going from granulated to liquid sweeteners is another big variable and I’d hesitate to advise you on that until you get the rest of the recipe working to your liking first. I hope that makes sense! Keep me posted!
~jules
I am going to make this soon and am a bit fuzzy about the re-rolling. Are you just folding and rolling the pastry without adding more butter like I do in a standard puff pastry? It looks amazing
Hi Catherine, that’s right, no need to laminate but if you’re comfortable with that method and you’d like to add more butter, you certainly can. I’d recommend trying it this way first to see if you think you even need to, as there’s a lot of butter in the pastry dough already, but, as they say, there may never be enough butter in pastry! 🙂
~jules
Any advice on cook time when using this for a pie crust?
Hmmm good question. Not long, of course, so as not to overcook it. Consult with my gluten free pie crust recipe and start with something similar.
~jules
I’m excited to try this recipie! How far ahead could you make this? With christmas morning and inlaws comming to town it would be great if I could make it two or three days ahead.
Thanks!
Hi Kristin, with the dough well-wrapped in the fridge, it should last for a couple days ahead to help with holiday baking. Enjoy!
~jules
Have not tried this but it looks amazing. I have to be gluten free, dairy, and sugar free.
I have Hashimoto, asthma and Epstein Barr! I had a igg test and just cried for days. I love eggs but that had a very high rating for sensitivity.
I love good bread and that was the most painful thing to have to adjust to. I have tried at least 15-20 gluten free breads. All the fancy Cali bakeries too. Blah!
So I guess it’s baking time, Oh did I mention I hate to cook?
Hi Crystal, I’m sorry you’re feeling overwhelmed by these dietary restrictions. I can completely relate and that’s why I do what I do! I don’t want anyone to miss out. Check out this recipe for pull-apart dinner rolls for a great and easy bread recipe: https://gfjules.com/recipes/gluten-free-pull-apart-dinner-rolls/
It works great with flaxseed-water as an egg replacer, and sugar can be omitted; just add a tablespoon of honey, agave, coconut nectar or maple syrup — whichever you can tolerate. Also reference my article on gluten free egg replacements so you know which work best in which recipes.
All of my recipes are already gluten-free and dairy-free and most are egg-free or may be made with egg substitutes. Hang in there — baking is fun when you get to eat your experiments!
~jules
Thank you for responding! The sugar problem is a pre diabetic issue. Test came back very high?
I just made these and my family is hooked! I divided the dough in half to manage it easier. Also, I did not shape them this way because I wanted a different look. I cut circles of about 4 inches and placed cream cheese filling in the middle and added a triple berry jelly on top of the cream cheese filling. Then I folded the edges inside all around and baked. Amazing recipe! Thanks!
Oh Mildred, that sounds heavenly! I’m such a sucker for a cream cheese danish. I don’t know why I don’t make these more often! So happy your family loves this recipe, too!!
~jules
Great Recipe. Will try it soon. Thank You Very Much for sharing
Wonderful to hear, Denny!
~jules
These are just beautiful and sign me up for apple and cinnamon! The pinwheel shape is so pretty.
Thanks Amy! I’d never made them before and once I realized how easy it was to make them look impressive, I thought I just had to share!!!
~jules
I am making these tomorrow morning and cannot get your flour blend in time. Is it possible to make this successfully using cup4cup flour blend?
Hi Amelia, I’m sorry I’ve been out of town at a conference and I’m not sure if I’m responding in time. All gluten-free flour blends are quite different, so I can’t say exactly how that blend would behave in this recipe. Did you try it yet? Have a look at this article on gluten-free flours for more guidance (https://gfjules.com/gluten-free-flour-comparison/) and hopefully that will help as well!
~jules
Amazing recipe! My husband and kids devoured them. Thank you!
So happy to hear that, Jordan! Success with the whole family is a win, for sure!!!
~jules
Can you leave the dough in the fridge overnight before baking?
Hi Clare, yes, you absolutely can do that. Wrap it well so it doesn’t dry out, though.
~jules
Hello,Will palm shortening work as a substitute for butter?
Hi Jewel, it will, but you may need to add a bit more liquid in the recipe since shortening has no moisture, but butter is 80% moisture, so be aware of that if your dough seems dry.
~jules
ooooh my GOSH. pastries like this are one thing I miss so much… I really want to try this one soon…
I can’t wait to hear how you like it, Kristina!
~jules
This is so pretty and amazing that it’s gluten free. Well done!
Thanks Kelly! I love the recipe!
~jules
I love that you have developed a gf and df puff pastry. This is one thing that I know so many people must miss. I wonder if you could try making croissants with it.
Hi Kortney, I’m sure that you could. I just haven’t had the time to go through the process because it’s very time consuming and I’m impatient! Someday I would love to try it though!
~jules
Puff pastry is one of the things I’ve most missed. I can’t wait to try this. It would be so perfect to serve at a brunch, although I’ll probably freeze most of them and have them for a mommy treat!
I’m telling you, Amanda, these babies are great out of the freezer! I know you’ll love this recipe!
~jules
I love how simple you have made this. You are definitely an artist.
I have a question for you. Which puff pastry recipe would you recommend for me to make for gluten free apple roses (the danish one or the regular puff pastry recipe)? I am making both gluten free and non gluten free for a wedding.