
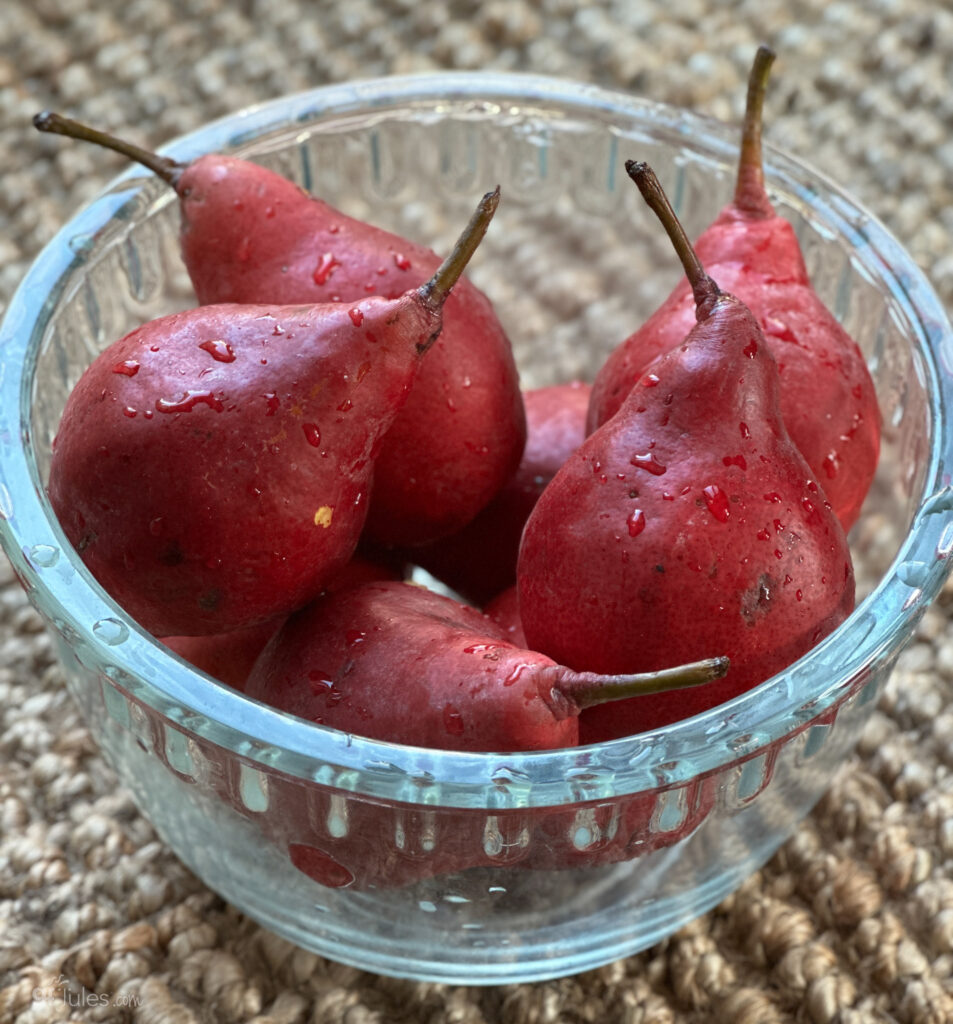
When revisiting all my favorite gluten free pie recipes this fall, I realized that I have five gluten free apple pie recipes! Not that there’s anything wrong with that, but when I found some gorgeous red pears, I knew it was time to bake a gluten free pear pie! And not just any pear pie — a grain-free pear pie with a soft and tender grain free pie crust!
This pear pie can of course be made with my gfJules Gluten Free All Purpose Flour and my famous Grandma’s Pie Crust recipe. But if you’re here for a grain free pie crust option, I’ve got you covered there, too!
 Grain Free Pie Crust
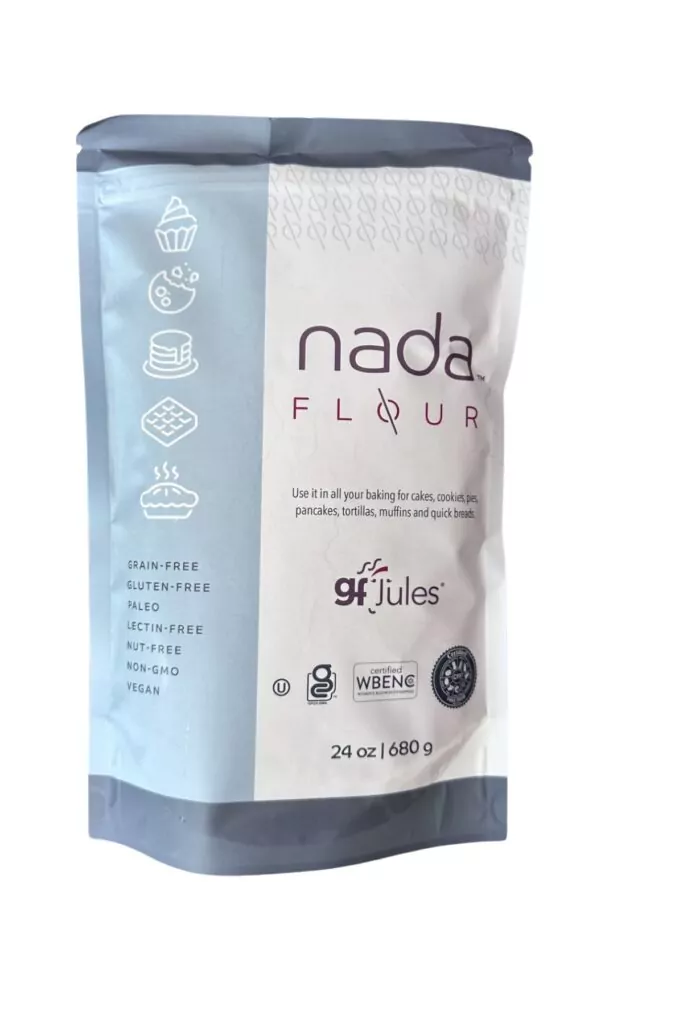
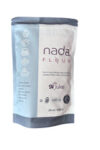
This is the grain-free cousin of that ever-popular gluten-free pie crust recipe, this one made with Nada Flour. I’m so excited about this new addition to the flour options I have for you, since it meets the needs of so many folks who can’t have my flagship gfJules Flour, or who are trying a grain-free diet.
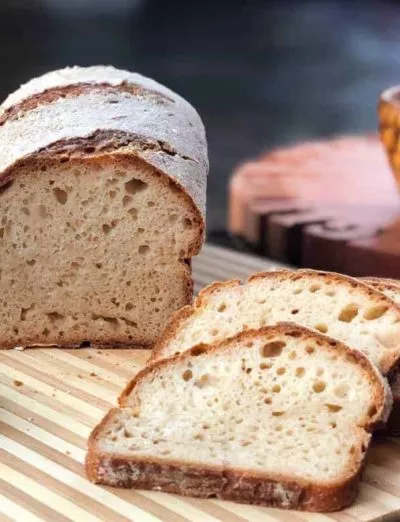
Nada Flour is totally grain-free, paleo and lectin-free, but also nut-free and virtually food allergen-free altogether. It’s also a 1:1 for flour in nearly any recipe like this one. Just look at this beautiful pie crust.
It’s soft, light and even has nice little air pockets in it, like a good crust should. It’s also not grainy or gritty at all. It’s basically the unicorn of all flours, enabling amazing bakes where there weren’t any before!
There are loads more recipes listed and linked on the product page for Nada Flour in my gfJules Shop, but feel free to just try it in your favorite recipes, too! One cup of Nada Flour weighs 110 grams, which is quite different from other flours, so be sure to note that if weighing your flours for recipes. Oh, and no need to add xanthan or other gums — like all my products, there’s no need to add anything to it!
For this grain-free pie crust, I like to use a pie bag as shown in the video, as it makes transferring the crust so much easier. But if there are any tears or rips when you transfer your crust, never fear! Just patch the holes and move on.
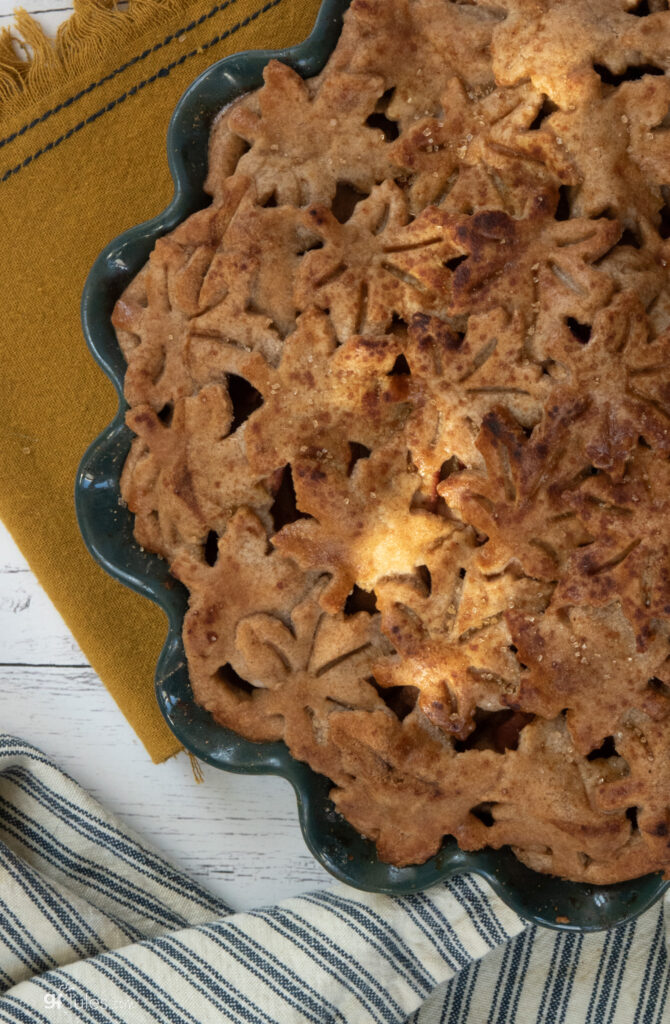
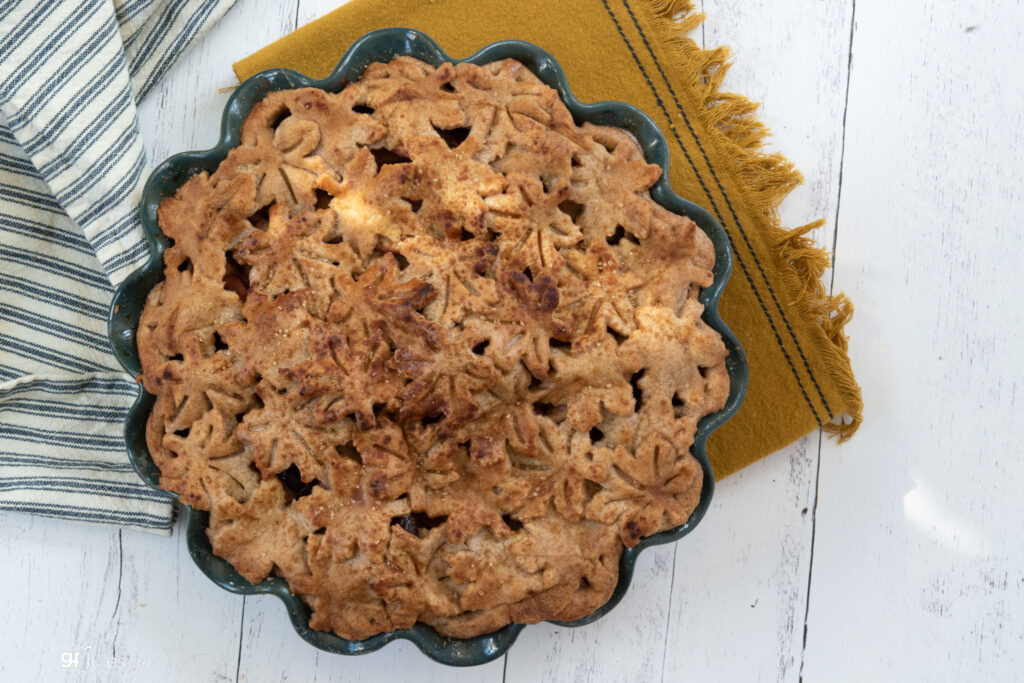
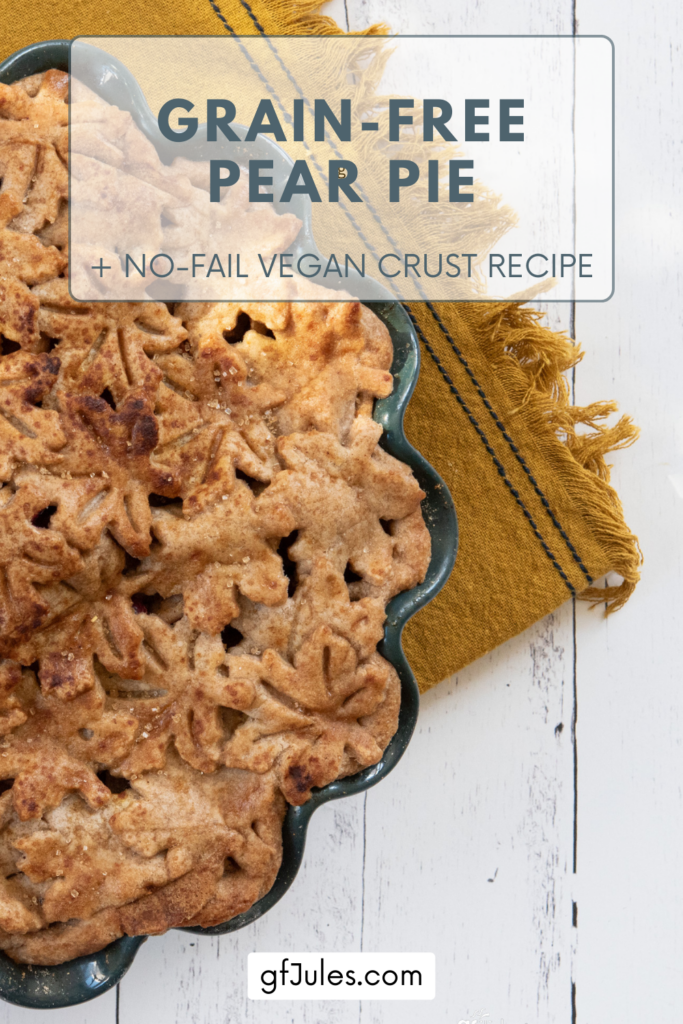
The top crust pictured here is made by simply using a decorative cookie cutter to cut dozens of decorative pieces of dough to arrange in a pattern on top of the pie. It’s really a stunning look, and so easy!
But feel free to just roll the crust out and transfer the top crust as you would with a typical pie, if you’d rather.
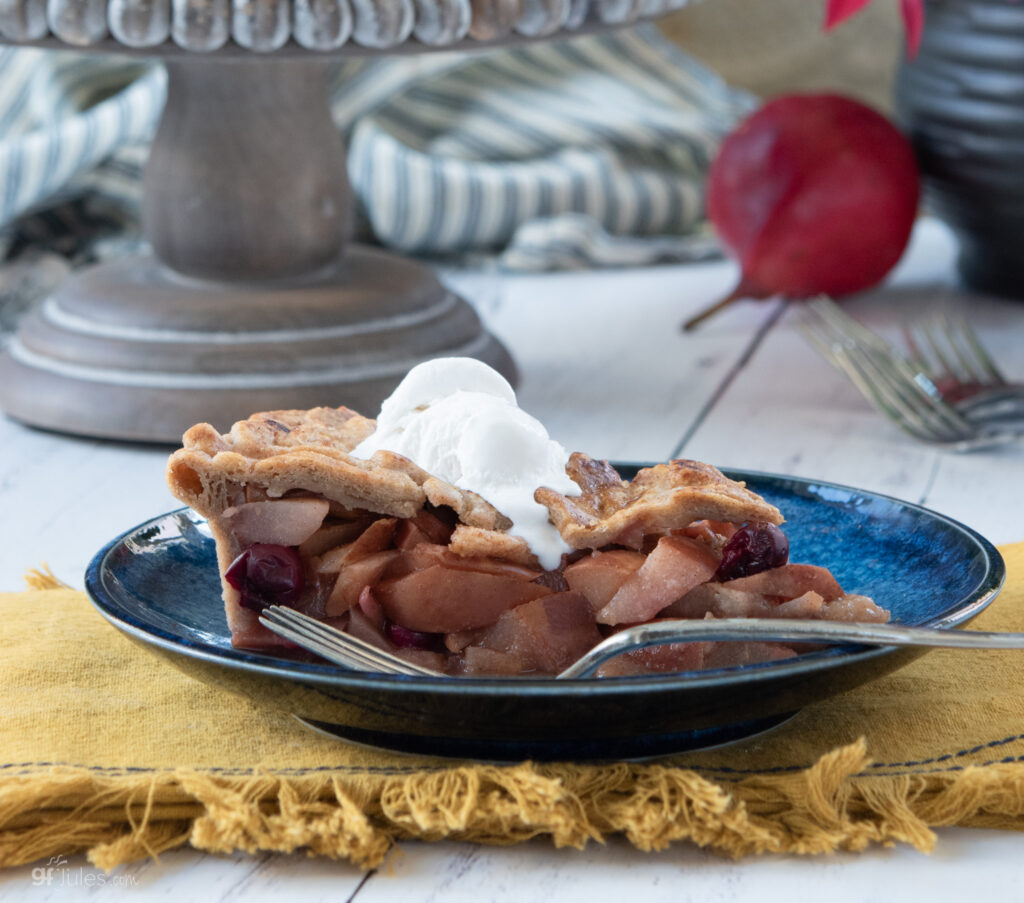
Enjoy this Grain-Free Pear Pie, or choose your own filling from the many on my site (just search “pie”) or use your own.
The nice thing about using pears is that you don’t need to peel them — I’ll take that extra time, especially when preparing my Thanksgiving pies!

This grain free pastry recipe will be delicious as a one-crust or two-crust pie for anything — even savory pies like quiche and pot pie!
Grain Free Pear Pie Recipe

Grain-Free Pear Pie Recipe
Equipment
Ingredients
2-Crust Pastry
- 2 (220) cups (grams) gfJules™ Nada Flour
- 1 teaspoon sea salt
- 4 Tbs vegetable OR palm shortening* OR lard OR cream cheese
- 6 Tbs COLD butter or ghee or non-dairy alternative (e.g. like Earth Balance® Buttery Sticks)
- 4 Tbs vodka** (OR white vinegar)
- 10 Tbs cold water (add more or less to get the dough to hold together but not be sticky)
- egg wash (1 egg + 1 Tbs. water) OR milk (dairy or non-dairy) for brushing on crust
- cinnamon-sugar to sprinkle on top optional
Pear Filling
- 7 + pears cored and sliced (at least 6 cups chopped or sliced – should be mounded high in the middle of the pie)
- 1/3 cup cranberries (optional)
- 1/3 cup granulated cane sugar more or less, depending on sweetness of pears
- 1/4 (28) cup (grams) Nada Flour
- 1 tsp. cinnamon
- 1/2 tsp grated nutmeg
- 1/4 tsp. salt (optional)
Instructions
To Make the Dough:
- In a large bowl, whisk together the dry ingredients.
- Cut in the shortening and cold (not frozen, but very cold) butter using a pastry cutter (or the flat paddle attachment on a stand mixer or a food processor). Add the vodka/water gradually to make the consistency you need to form a ball – err on the side of it being wetter rather than crumbly. Don’t over-work the dough, or it may become tough when baked. Form a disc with the dough, wrap in plastic and refrigerate for 30 minutes while you make your filling.
Rolling the Dough:
- After allowing the dough to rest, roll the pastry out onto a surface dusted well with more gfJules™ Nada Flour.
- Use a flexible pastry mat (e.g. Silpat or cloth mat) and rolling pin covers or a pie crust bag for rolling and transferring your gluten free crust easily.
- Gently roll in each direction — do not press down on the pin while rolling — to a circle with a diameter at least 1 inch larger than that of your pie pan.
To Transfer the Crust:
- 1- Gently lift an edge of the rolled out crust over your rolling pin. 2 -With one hand under the baking mat, use the pin in the other hand to lift the crust so that it is supported by the rolling pin as you pull the crust gently off of the baking mat. 3- Transfer gently over the pie plate to center. 4- Drop gently into the plate and press in with floured fingers. 5- Pat into your pan. (OR use pie crust bag. Simply press any rips back together again to fix blemishes in the pastry)
For a One Crust Pie:
- Cut the edges of the crust to an even length of approximately 1-inch larger than the diameter of your pie plate.
- Gently fold the edges under, then press with a fork or pinch into a fluted design between your fingers. Cover with plastic wrap and freeze while you make your fillings.
- Fill with your desired filling.
For a Two-Crust Pie:
- Double the ingredients and divide the doubled pie crust dough before setting aside. Shape each half into a disc and wrap each in plastic wrap. Repeat the rolling out steps for the first crust and cover with plastic wrap, then freeze for 30 minutes or while you prepare the fillings, if necessary. Fill the pie and lay the second crust gently onto the top of the filled pie pan.
- Cut off all but 1/2 – 1 inch of excess pie crust from around the edge of the pan. For fruit pies, cut small slits in the center of the top crust to allow the hot steam to escape. If using decorative cookie cutters, simply roll the crust and cut out dozens of shapes to lay on top of each other to form a top crust, as pictured. Brush the crust with egg wash or your milk of choice – this step helps it to brown nicely.
- If there are any tears in your crust, never fear! Simply take leftover crust and use decorative cookie cutters to cut out leaves, pumpkins, etc. Wet the backside of each cut-out with a dab of milk, then lay on top of any tears to cover the flaw.
- Use pie crust shields to prevent crust edges from over-cooking. Available in the gfJules.com store.
- Fold approximately 1/2 inch of excess pie crust over all around the edge to form the crust, then using your fingers, press a fluted design or use a fork to go around the crust to finish.
- Your pie is now ready to bake or to freeze for later baking. For directions on how to freeze the pie dough and bake later, hop to my post on that method. To bake now, follow the instructions below.
Single-Crust:
- Preheat oven to 400º F (static). Brush the crust with egg wash or milk, then cover edges with foil or pie crust shields to minimize burning. Bake for 15 minutes. Reduce heat to 375º F (static) and bake an additional 20 minutes, remove the pie crust shields, and bake an additional 10 minutes, or follow directions for your specific pie recipe.
Double-Crust Pie:
- Preheat oven to 400º F (static). Brush the crust with egg wash or milk, then cover edges with foil or pie crust shields and bake for 15 minutes.
- Reduce heat to 375º F (static), remove foil and brush again with egg wash or milk. Bake an additional 30-35 minutes, or until the juices are bubbling, or follow directions for your specific pie recipe. (Cover again with foil if the crust is browning too much during the bake).
Unfilled Pie Crust (Blind Bake):
- Cover crust in pie plate loosely with plastic wrap and refrigerate for 30 minutes. Preheat oven to 375º F (static).
- Prick the bottom of pastry all over with tines of a fork. Cover the pastry with parchment paper and pour pie weights, dry rice or dried beans on top to cover 1 inch. Brush the crust edges with egg wash or milk, then cover crust edges with foil or pie crust shields. Bake for 15 minutes or until the bottom of the crust no longer looks raw.
- Remove the parchment paper and weights. Return to bake for 6-8 minutes if filling with quiche, pumpkin or key lime type filling which will be baked further; for cream pies and refrigerated fillings, bake 10-15 minutes more. Don’t wait for the crust to turn brown before removing or it will have over-cooked. Cool completely on a wire rack before filling for refrigerated pies.
Video
Notes
** Please keep in mind that nutrition information provided is per serving, which may vary. While we have taken care to provide you with the most accurate nutritional values possible, please note that this information may differ significantly depending on the exact ingredients and brands that you choose to use to make this recipe. Additionally, where options are given for ingredients, the resulting calculation may include all ingredient options instead of only one per line, skewing the totals significantly.
Recommended Products
Any links to Amazon may earn me a small amount from qualifying affiliate purchases; this amount goes to fund this blog and does not cost you anything additional.
I hope you love this grain free pie crust recipe, with this pear-cranberry filling, or another filling of your choosing.
Pin for later!


Does this contain Xanthan Gum? My gut won’t tolerate that.
Hi Neil, my gfJules Nada Flour has no xanthan gum. You can find out more about Nada Flour here!
~jules