
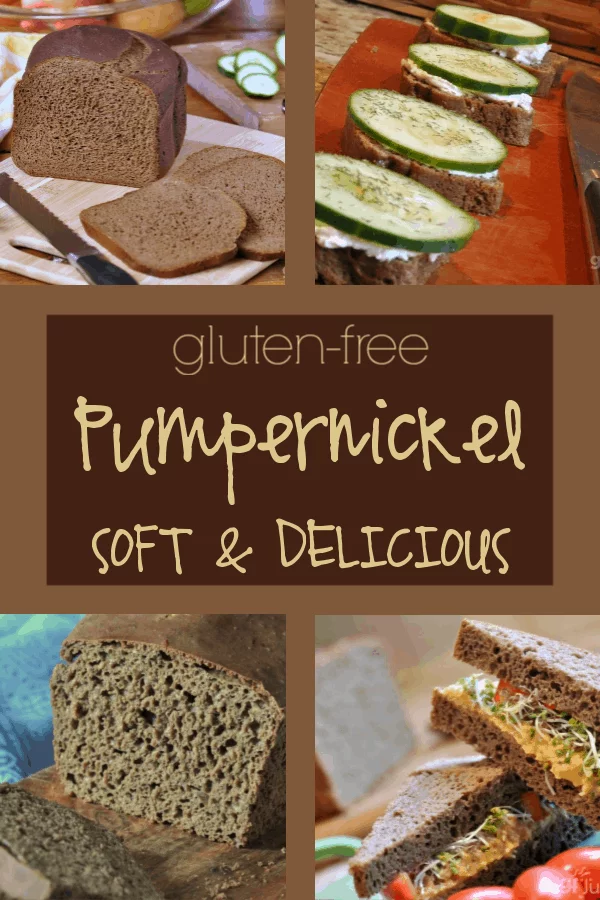
Craving pumpernickel? You’ve come to the right place. If you have a copy of my gfJules Bread Baking e-book, I hope you have already put this gluten free pumpernickel recipe to good use!
If you don’t have my e-book, welcome to a whole new world of gluten free bread baking with a sneak peak of one of the recipes you’ll find inside.
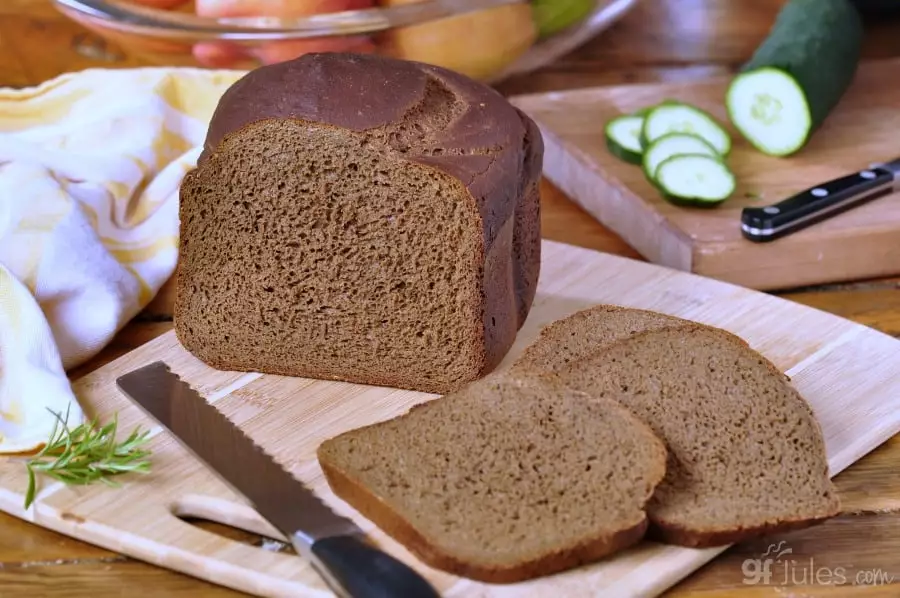
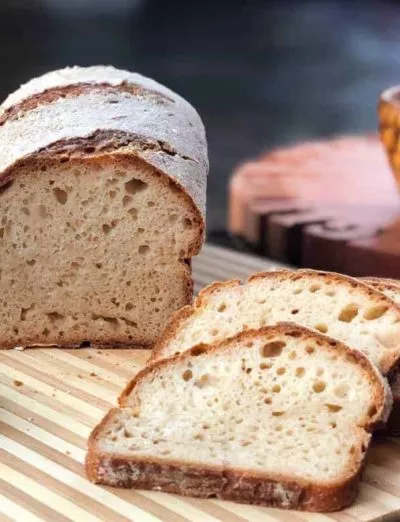
This gluten free pumpernickel recipe will turn everything you knew (or thought you knew) about gluten free bread on its head … in the best possible way.
The dough is as wet as cake batter; the ingredients are crazy; the loaf size is huge; the bread is moist enough to be sliced so thinly you can almost see through it; and the crumb is soft and pliable and it stays that way for days.
I also offer directions to bake in a bread machine or in an oven — your call.
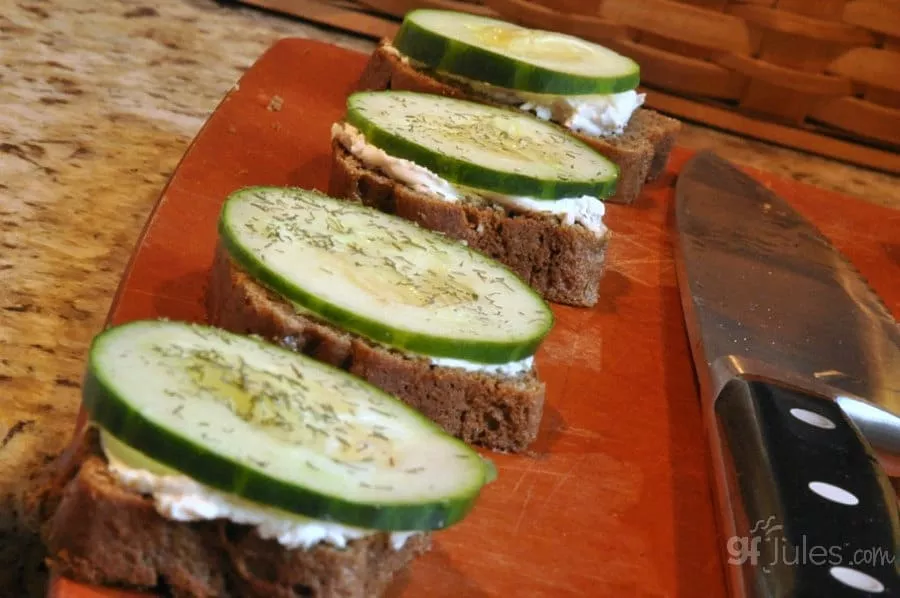
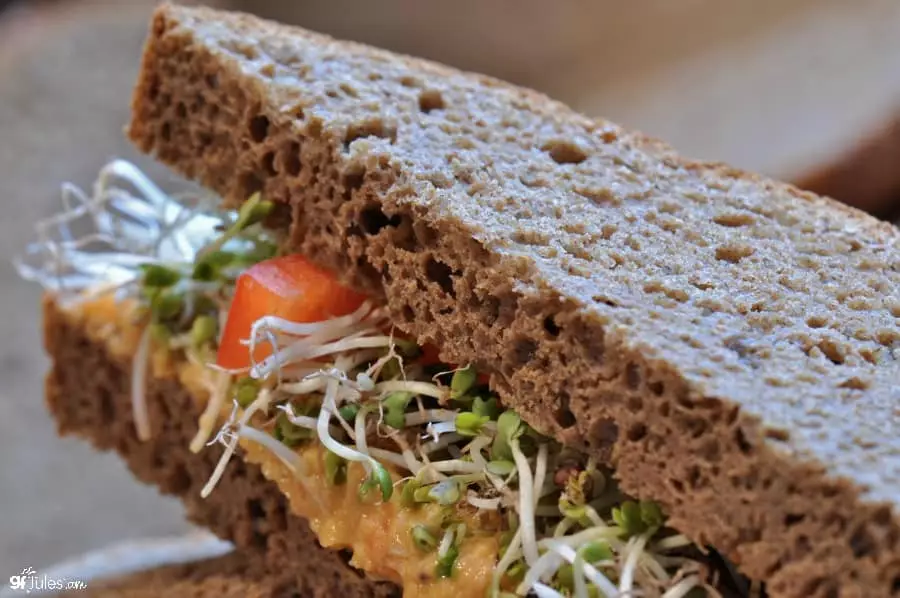
In other words, this gluten free pumpernickel just might become your new favorite gluten free bread for sandwiches or just for munching!
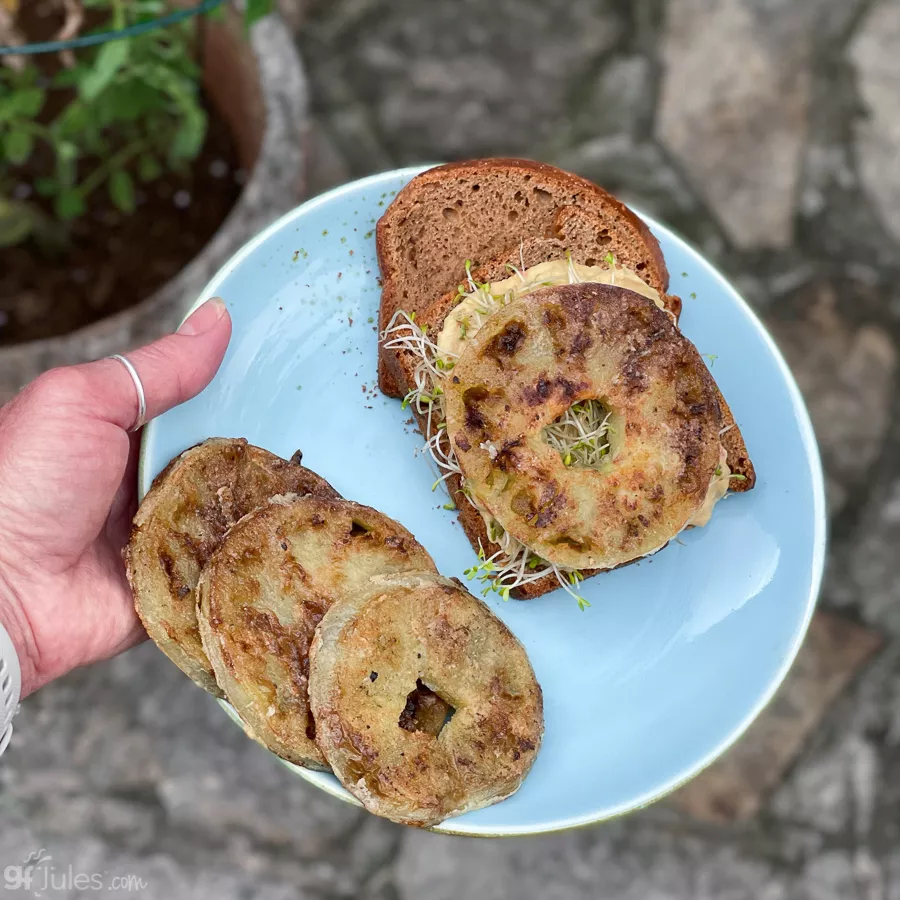
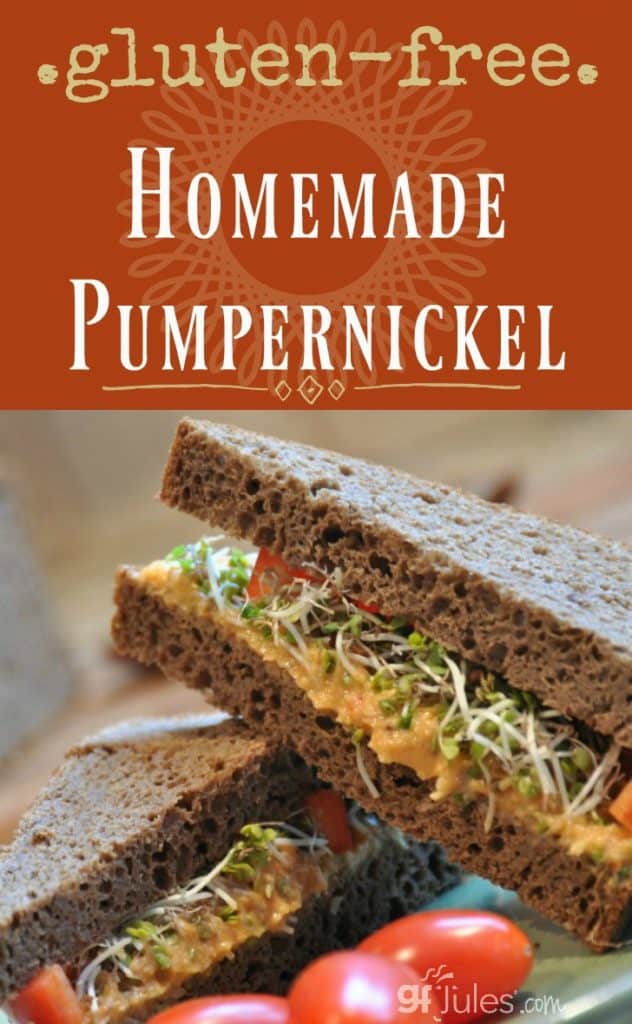
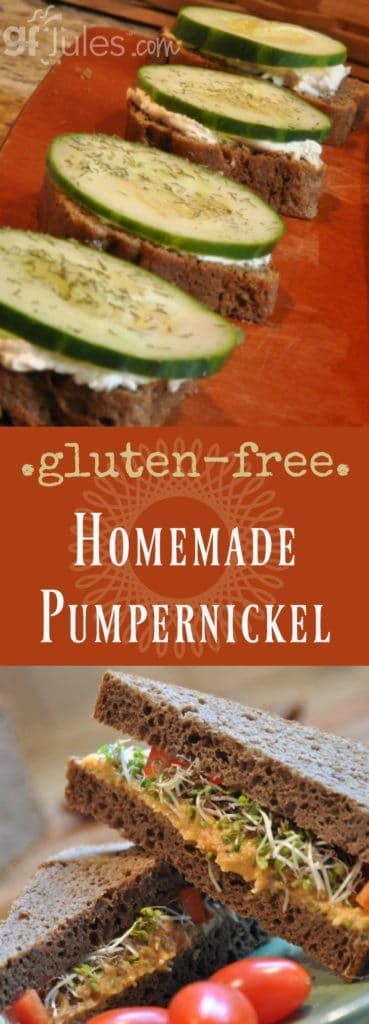
I feel a cucumber sandwich coming on!
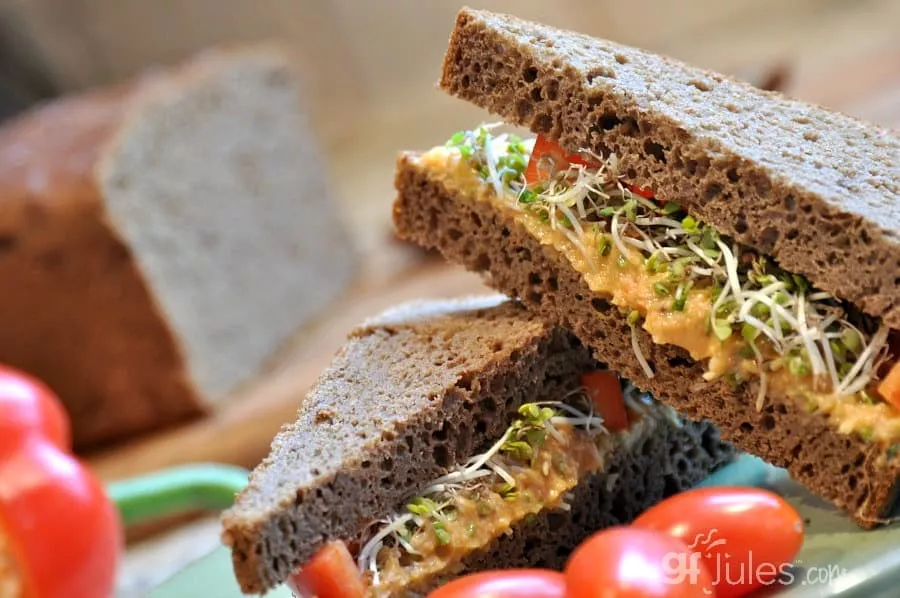
Or perhaps a gluten free fried green tomato sandwich is more your speed?
Lucky you! You have so many delicious options with this yummy gluten free pumpernickel recipe!
You could even modify this recipe to make it more of a deli rye variety like Nora did with these options:
Instead of water/yogurt and the cider, you can replace both with a gf dark stout (I use Steadfast oatmeal stout). Cut the molasses in half, skip the cocoa and orange peel. Use half of the caraway seed and also add a tsp of dry dill weed and 2 tsp dried minced onion.
Enjoy this aromatic homemade gluten free pumpernickel while its baking and for days of sandwiches thereafter!
Gluten Free Pumpernickel Bread

Positively Perfect Gluten Free Pumpernickel
Ingredients
- ½ cup water or plain yogurt
(using water the bread will rise higher)*
- ½ cup apple cider (or apple juice or gluten free beer)
- 2 large eggs + 2 egg whites
- 3 Tablespoons molasses (or dark agave nectar or pure maple syrup)
- 3 Tablespoons olive oil
- 3 Tablespoons apple cider VINEGAR
- 2 cups (270 grams) gfJules® All Purpose Flour
- 1 cup buckwheat or millet flour (certified gluten-free) or 1 cup/140 grams gfJules Corn-Free Multigrain Flour Blend
- ¼ cup milk powder dairy or non-dairy NOT reconstituted (Coconut Milk Powder) or almond meal
- 3 Tablespoons granulated sugar (or unrefined coconut palm sugar)
- 1 Tablespoons cocoa powder (unsweetened, not “Dutched”)
- 1 ¼ teaspoon sea salt
- 1 teaspoon baking soda
- 1 Tablespoon caraway seeds (optional)
- 1 -2 teaspoons orange peel grated (optional)
- 2 ¼ teaspoons rapid rise yeast (1 packet) (Red Star® Quick Rise)
Instructions
Mixer/Oven Method:
- Bring all wet ingredients to room temperature (including eggs). Mix eggs, molasses, oil and cider vinegar in a large mixing bowl. Combine dry ingredients, including yeast, in a separate bowl and whisk well.
- Slowly stir the dry ingredients into the wet, adding the water and apple cider last to help keep flour dust in the bowl while mixing. Continue to mix on medium speed until all lumps are smooth, approximately 2-3 minutes. The batter will be very wet like a cake batter, not like a typical bread dough.
- Meanwhile prepare one 9×5 inch bread pan and three mini loaf pans, or two 9×5 inch bread pans or one 12×4 1/2 inch Pullman bread pan by oiling well or lining with parchment.
- Pour batter into pans, but do not fill more than 2/3 full. Cover with oiled parchment paper and allow to rise for 45 minutes in a warm place like an oven set to 200°F then turned off. Watch to be sure the loaves do not rise above the top of the pans.
- Preheat oven to 350°F (static) or 325°F (convection) and bake mini loaves for 15-20 minutes, larger loaves for 35-40 minutes, removing only when internal temperature is at least 205°F and a toothpick or skewer inserted into the center of each loaf comes out clean.
- Allow to cool for 5-10 minutes in the pan before removing to finish cooling on a wire rack. Slice once cooled. Keep fully cooled loaves in a zip-top bag at room temperature.
- Bread machine method (3lb loaf):This recipe makes a large loaf, so set your bread machine to its largest loaf setting (3lbs if that's an option). Because of the size of the loaf, a typical bread machine cycle may not bake it all the way through. Be prepared to add time at the end of the bake cycle, either on the machine if it will allow it, or by preheating your oven to 350° F and moving the bread pan to the preheated oven to add bake time.
- The bread may sink in the middle somewhat (I've made several of these breads in various breadmakers, and they sometimes look a little funny on the top edge (a little like bat's ears - my kids love it, actually!), but the crumb is still gorgeous and the loaf should still cook all the way through, once it's reached an internal temperature of 205 - 210° F).
- Bring all wet ingredients to room temperature, whisk together, then pour into the bread pan. Whisk together dry ingredients (except for yeast) in a separate bowl, then pour on top of the wet ingredients in the pan. Make a well in the center with your finger, then pour in yeast.
- Set bread maker to gluten-free bread setting, OR, if your machine does not have a gluten-free setting, use “Dough” setting or a setting for mixing and rising only. Do not let the machine “punch-down” the bread or set for second rise. After rising, set machine to “Bake” for 60 minutes.
- Remove only when the bread has come to an internal temperature of 205-210°F. If necessary, add bake time to the bread machine or when finished the bread machine cycle, finish baking in an oven preheated to 350°F.
- Leave bread in the pan for 5-10 minutes before inverting gently to remove. Finish cooling on a wire rack and slice when cooled. Keep fully cooled loaves in a zip-top bag at room temperature.
Notes
** Please keep in mind that nutrition information provided is per serving, which may vary. While we have taken care to provide you with the most accurate nutritional values possible, please note that this information may differ significantly depending on the exact ingredients and brands that you choose to use to make this recipe. Additionally, where options are given for ingredients, the resulting calculation may include all ingredient options instead of only one per line, skewing the totals significantly.
Pin it for later!


Hi Jules,
I would like to make this recipe into rolls. I am going to try it in a muffin pan and see if it works. Also reduce the cooking time and use my trusty thermometer. Any pointers would be appreciated. I know it makes 2 loaves so the loaf will be for a cheese fondue and rolls for Thanksgiving dinner. I will let you know how it turns out.
I am a long time user of your flour. I saw you do a demo in East Greenwich, RI at Back to Basics Market at least 8 years ago and your flour has been a staple in my pantry since.
What a great idea, Debbie! I would say to put the dough about 2/3 full in the muffin cups, let it rise and then bake, starting to check after about 20 minutes. I wouldn’t think it would take long to bake in the muffin cups. I love you idea! And how great that you saw me in Rhode Island so many years ago! What fond memories I have of that trip. So glad you have been able to rely on my flour ever since. Have a wonderful Thanksgiving!!!
~jules
Happy Thanksgiving to you also!!
Update – I did make the rolls in a muffin tin and they came out great. They rose nicely and were done in about 15 minutes by temperature
That’s fantastic to hear, Debbie! Thanks so much for letting me know – I’m sure there are others who will want to try the recipe that way, as well! Happy baking!
~jules
Jules,
I have a quick question. Can this recipe be used to make rolls? Would it work if I used a muffin pan? How long would I need to bake? Since it make 2 loaves I thought rolls and one loaf would be nice for the holidays.
Thanks,
Debbie – a long time user of you flour probably 8 years.
I am new to being gluten free and miss bread. Just learning how to avoid wheat, corn, and yeast. I am allergic to yeast. What can I use in place of yeast?
Hi Kimberly, check out my no yeast bread recipe and you’ll see that the chemical leaveners (baking soda, baking powder …) plus using bubbly liquids like club soda can help to give your breads rise without yeast. Hope that helps!
~jules
I am new to gluten free so I am just finding you. The doctor just put me on a diet that is gluten free and dairy free. I do not understand how it can be whole grain and be gluten free. Another question is yeast gluten free?
Do you have recipes that are both gluten free and dairy free? I would like to make this recipe however I need the answers to these questions first.
Hi Sharon: Thanks for writing! ‘Whole grain’ describes the state of a given grain (not just wheat, but corn or rice or sorghum, etc.), so our gluten free Bread Mix can be ‘whole grain’ but on the ‘good’ (gluten-free) grains. Jules is dairy free, too, so you’re in luck, as all 400 or so recipes you’ll find on the gfJules site can be made dairy-free! I hope you’ll give our flour and/or mixes a shot, and certainly try out this wonderful recipe–it’s really awesome. Please let us know if there’s anything at all we can do to help you live gluten free, deliciously (and safely!).
Thank you however I still do not understand the yeast.
My family really enjoyed the pumpernickel you sent me home with! I can’t wait to make it for us to enjoy here at home.
And if you make it yourself Brianna, you won’t have to settle for 3 day old pumpernickel like I sent you home with! (guess it was good enough for the TSA agent, huh?! so funny!!!)
~jules
This looks delicious!
Thanks Amanda! I’m not a big fan of rye (guess my body knew it didn’t like me!) but I do love this yummy pumpernickel! Hope you get to try it sometime!
~jules
Would powdered buttermilk work for the powdered milk?
Hi Terri, yes, powdered buttermilk will work just fine. Enjoy!
~jules
Hi:
Do you have a Bread Machine Rye recipe?
The first three times I made this bread in my Cuisinart breadmaker it fell in the center creating a “bat ears” shaped slice after slicing. I made it twice at the elevation of Denver Colorado and once in Dallas with the same result. It always tasted great but as previously mentioned it fell in the center. After googling to find a solution to this problem I have made the following changes to the recipe:
I substituted 1/2 cup of plain yoghurt for the 3/4 cup water
I substituted 2 tbsp of baking Stevia (purchased at Kroger) for the 3 tbsp. of sugar
I reduced the yeast from 2 1/4 tsps. to 2 tsps.
The last two loaves made with these changes produced the proper shaped loaf that did not fall.
I hope you have success with this as well.
Happy baking!
Fantastic to hear, Rick! Thanks SO much for sharing your modifications!
~jules
Pumpernickel is on of my all-time favorite breads! I’ve never tried to make a gluten-free version, though. Thanks so much for sharing it at Savoring Saturdays, Jules! I’m going to feature it this weekend. 🙂
Wonderful, Raia! Thank you!
~jules
Is there a way to successfully make this without eggs? Or without a bread machine? I’m allergic to eggs and don’t have a machine. Thanks!!
Hi Ally, I give instructions for both oven method and bread machine — it’s no problem if you don’t have a machine. You can look at my egg substitution guide and give some of those a try with this recipe, I’d particularly look to the flaxseed meal + water sub. Let me know if you try it with egg subs and which you use. I just haven’t had time to experiment with them in this recipe yet!
OK just took mine out of the oven– it looks good. How can I make sure if it is cooked throughout- since I am not sure of the loaf size I baked it on…
Hi Rachelle, do you have an instant read thermometer? Those are worth their weight in gold when baking bread, so you’ll always know they’re cooked through. Should be 205F or so in the middle when it’s totally cooked.
I have this almost finished with the rising and I just realized I forgot the molasses. Wish me luck!!!
Oh dear, Susan! I hate when I forget ingredients! (Wishing you lots of luck~)
It didn’t rise very much but it tasted ok. Have a new loaf in oven now. With all the ingredients!
Good for you, Susan! Let me know how it goes!
What does the buckwheat flour do for this recipe? Is there something more common that I can substitue? Thanks.
Hi Jacque, you could use brown rice flour or another whole grain GF flour. The buckwheat aids in color but also in structure.
Thanks for notice on buckwheat substition- I celiac and my husband is deathly allergic to buckwheat- ? Can’t use you bread mix-
You are very welcome, Linda! I just tried it with millet yesterday and it was delicious!
~jules
Jules, you have apple cider listed twice. Is it supposed to be?
The second listing is for apple cider vinegar not apple cider.
Thanks, Barb!!
Barb’s right, there are two different ingredients, one is apple cider and one is apple cider VINEGAR. Hope that clears it up!
Jules, you have apple cider listed twice. Is it supposed to be?
I look forward to trying this, but before I do vinegar is listed twice. Is this accurate? Thanks for all your great recipes over the years. Been a long time since I took your class in Clarksville, but it was life changing.
Kathryn
Hi Kathryn, I’m so glad you were able to take a cooking class with me and that it helped you on your road to delicious GF baking!!!
Regarding this recipe, it’s somewhat confusing, granted, but one ingredient is Apple Cider, and one is Apple Cider VINEGAR. I hope that helps and that you make the recipe soon!
This is on the to do list in the AM, then skiing, then home to a warm loaf, fresh out of the oven.
Sounds perfect, Alissa!
Oh heavens, I can’t WAIT to test this one!!! I’ve missed Pumpernickle for 20 years so thank you!
You’re welcome, Lisa! I can’t wait to hear what you think!