
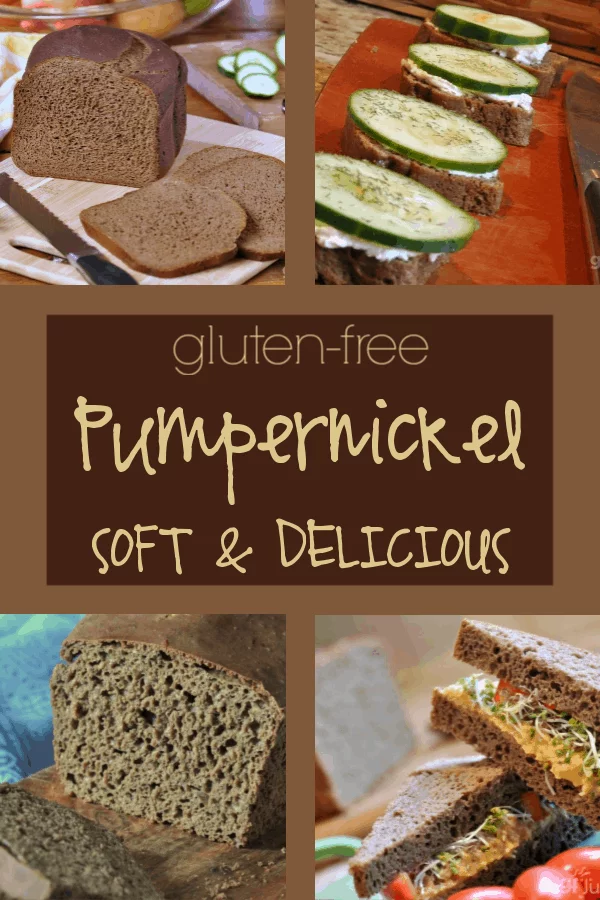
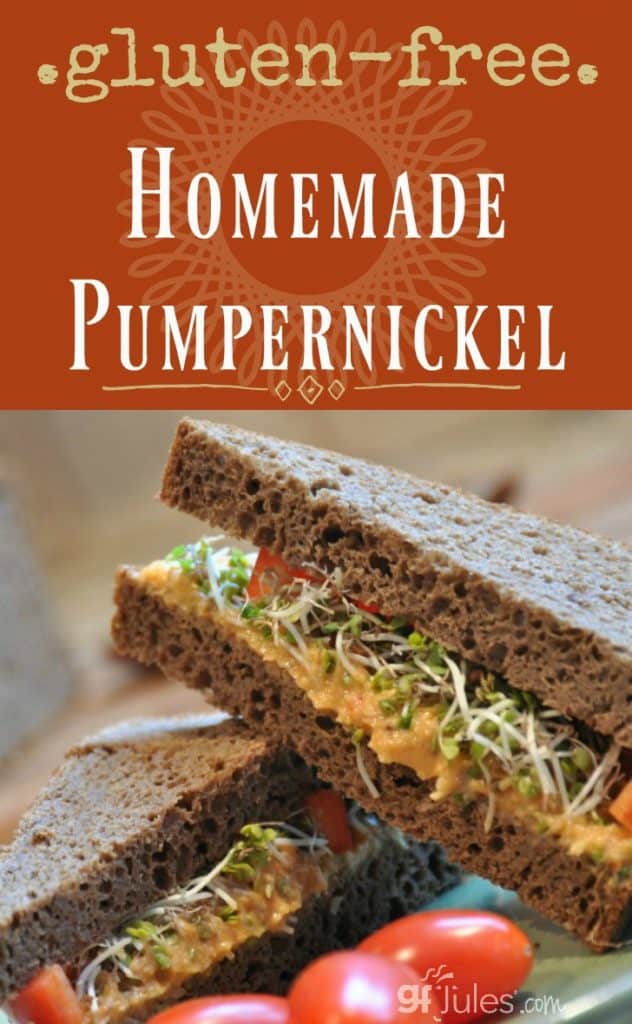
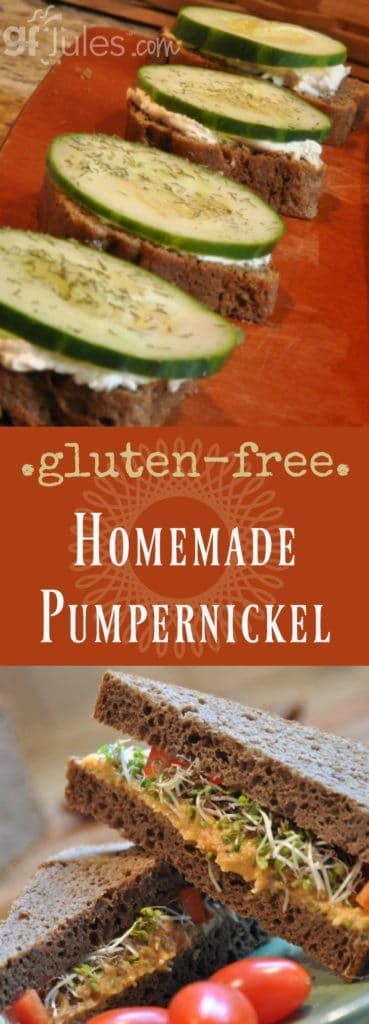
Craving pumpernickel? You’ve come to the right place. If you have a copy of my gfJules Bread Baking e-book, I hope you have already put this gluten free pumpernickel recipe to good use!
If you don’t have my e-book, welcome to a whole new world of gluten free bread baking with a sneak peak of one of the recipes you’ll find inside.
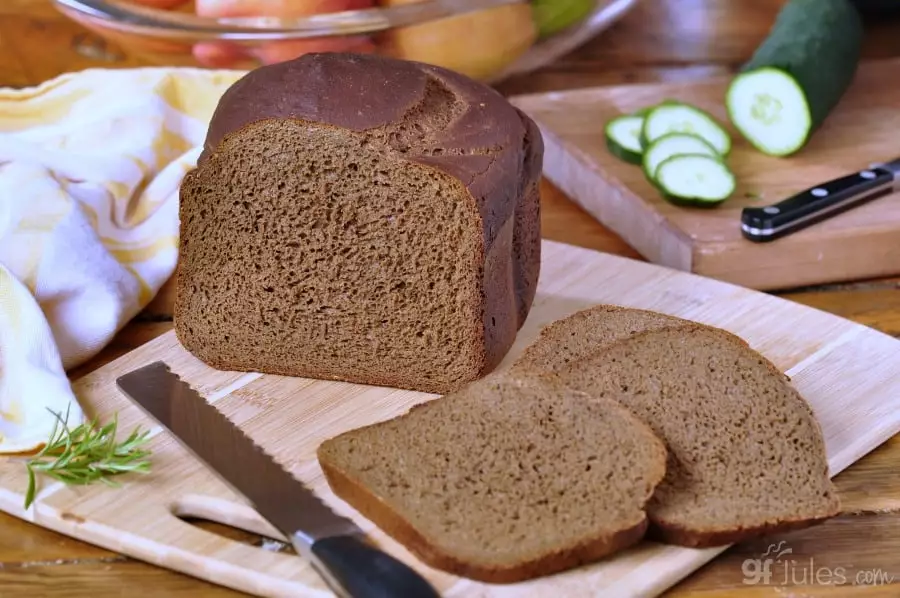
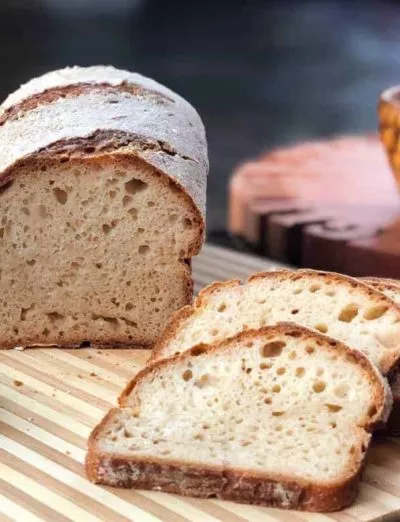
This gluten free pumpernickel recipe will turn everything you knew (or thought you knew) about gluten free bread on its head … in the best possible way.
The dough is as wet as cake batter; the ingredients are crazy; the loaf size is huge; the bread is moist enough to be sliced so thinly you can almost see through it; and the crumb is soft and pliable and it stays that way for days.
I also offer directions to bake in a bread machine or in an oven — your call.
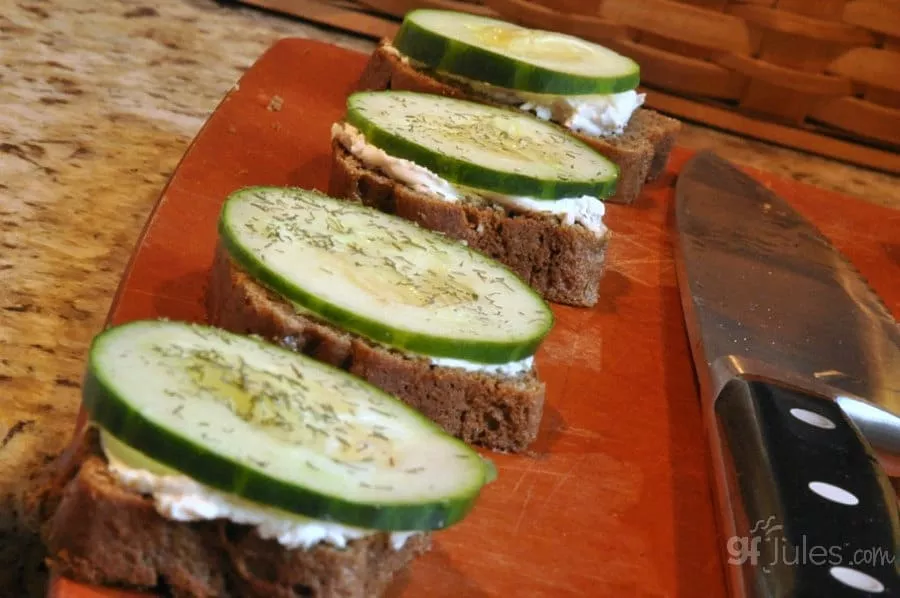
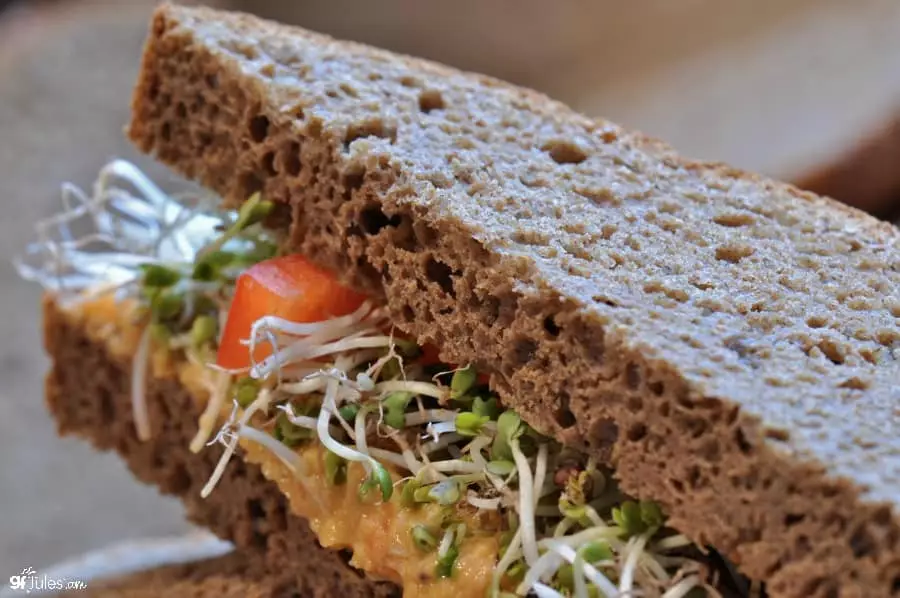
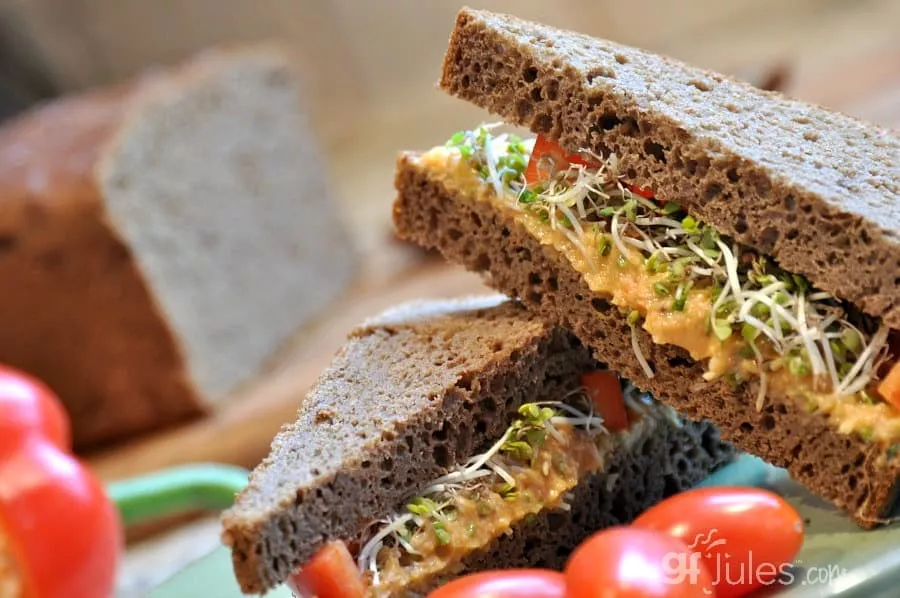
In other words, this gluten free pumpernickel just might become your new favorite gluten free bread for sandwiches or just for munching!
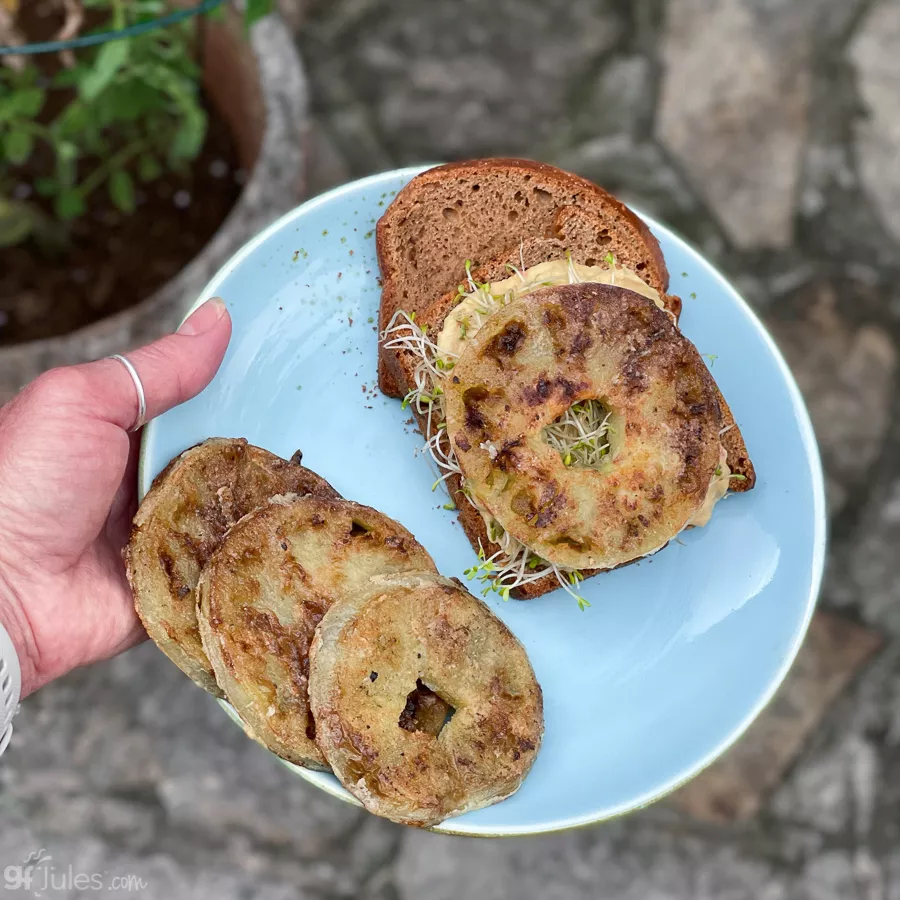
I feel a cucumber sandwich coming on!
Or perhaps a gluten free fried green tomato sandwich is more your speed?
Lucky you! You have so many delicious options with this yummy gluten free pumpernickel recipe!
You could even modify this recipe to make it more of a deli rye variety like Nora did with these options:
Instead of water/yogurt and the cider, you can replace both with a gf dark stout (I use Steadfast oatmeal stout). Cut the molasses in half, skip the cocoa and orange peel. Use half of the caraway seed and also add a tsp of dry dill weed and 2 tsp dried minced onion.
Enjoy this aromatic homemade gluten free pumpernickel while its baking and for days of sandwiches thereafter!
Gluten Free Pumpernickel Bread

Positively Perfect Gluten Free Pumpernickel
Ingredients
- ½ cup water or plain yogurt
(using water the bread will rise higher)*
- ½ cup apple cider (or apple juice or gluten free beer)
- 2 large eggs + 2 egg whites
- 3 Tablespoons molasses (or dark agave nectar or pure maple syrup)
- 3 Tablespoons olive oil
- 3 Tablespoons apple cider VINEGAR
- 2 cups (270 grams) gfJules® All Purpose Flour
- 1 cup buckwheat or millet flour (certified gluten-free) or 1 cup/140 grams gfJules Corn-Free Multigrain Flour Blend
- ¼ cup milk powder dairy or non-dairy NOT reconstituted (Coconut Milk Powder) or almond meal
- 3 Tablespoons granulated sugar (or unrefined coconut palm sugar)
- 1 Tablespoons cocoa powder (unsweetened, not “Dutched”)
- 1 ¼ teaspoon sea salt
- 1 teaspoon baking soda
- 1 Tablespoon caraway seeds (optional)
- 1 -2 teaspoons orange peel grated (optional)
- 2 ¼ teaspoons rapid rise yeast (1 packet) (Red Star® Quick Rise)
Instructions
Mixer/Oven Method:
- Bring all wet ingredients to room temperature (including eggs). Mix eggs, molasses, oil and cider vinegar in a large mixing bowl. Combine dry ingredients, including yeast, in a separate bowl and whisk well.
- Slowly stir the dry ingredients into the wet, adding the water and apple cider last to help keep flour dust in the bowl while mixing. Continue to mix on medium speed until all lumps are smooth, approximately 2-3 minutes. The batter will be very wet like a cake batter, not like a typical bread dough.
- Meanwhile prepare one 9×5 inch bread pan and three mini loaf pans, or two 9×5 inch bread pans or one 12×4 1/2 inch Pullman bread pan by oiling well or lining with parchment.
- Pour batter into pans, but do not fill more than 2/3 full. Cover with oiled parchment paper and allow to rise for 45 minutes in a warm place like an oven set to 200°F then turned off. Watch to be sure the loaves do not rise above the top of the pans.
- Preheat oven to 350°F (static) or 325°F (convection) and bake mini loaves for 15-20 minutes, larger loaves for 35-40 minutes, removing only when internal temperature is at least 205°F and a toothpick or skewer inserted into the center of each loaf comes out clean.
- Allow to cool for 5-10 minutes in the pan before removing to finish cooling on a wire rack. Slice once cooled. Keep fully cooled loaves in a zip-top bag at room temperature.
- Bread machine method (3lb loaf):This recipe makes a large loaf, so set your bread machine to its largest loaf setting (3lbs if that's an option). Because of the size of the loaf, a typical bread machine cycle may not bake it all the way through. Be prepared to add time at the end of the bake cycle, either on the machine if it will allow it, or by preheating your oven to 350° F and moving the bread pan to the preheated oven to add bake time.
- The bread may sink in the middle somewhat (I've made several of these breads in various breadmakers, and they sometimes look a little funny on the top edge (a little like bat's ears - my kids love it, actually!), but the crumb is still gorgeous and the loaf should still cook all the way through, once it's reached an internal temperature of 205 - 210° F).
- Bring all wet ingredients to room temperature, whisk together, then pour into the bread pan. Whisk together dry ingredients (except for yeast) in a separate bowl, then pour on top of the wet ingredients in the pan. Make a well in the center with your finger, then pour in yeast.
- Set bread maker to gluten-free bread setting, OR, if your machine does not have a gluten-free setting, use “Dough” setting or a setting for mixing and rising only. Do not let the machine “punch-down” the bread or set for second rise. After rising, set machine to “Bake” for 60 minutes.
- Remove only when the bread has come to an internal temperature of 205-210°F. If necessary, add bake time to the bread machine or when finished the bread machine cycle, finish baking in an oven preheated to 350°F.
- Leave bread in the pan for 5-10 minutes before inverting gently to remove. Finish cooling on a wire rack and slice when cooled. Keep fully cooled loaves in a zip-top bag at room temperature.
Notes
** Please keep in mind that nutrition information provided is per serving, which may vary. While we have taken care to provide you with the most accurate nutritional values possible, please note that this information may differ significantly depending on the exact ingredients and brands that you choose to use to make this recipe. Additionally, where options are given for ingredients, the resulting calculation may include all ingredient options instead of only one per line, skewing the totals significantly.
Pin it for later!


Just made this bread today and it is the best gf bread I have made. It is amazing! Thank you!
Wow, Kathy, that is so wonderful to hear!! Thank you so much for taking the time to let me know!!! I’m thrilled for you to have fantastic gluten free pumpernickel in your life!
~jules
Success with the subject recipe! Yay! Although it didn’t appear to rise before baking, it did rise while baking! Thank you for your recipes. I can now have some toast in the morning🥰!
Fantastic, Pam!! They look absolutely lovely! I can almost smell that pumpernickel from here!!
~jules
I have made this bread twice now. The bread does rise, but certainly not double the size. I used the recommended flour. Powdered coconut milk. Followed all instructions. Double checked my yeast, made another recipe of gf bread that always rises..and the yeast is fine. The pumpernickel tastes great, but not a traditional sized loaf.
Hi Cathy, what brand of coconut milk powder are you using? I’m assuming that you’re comparing your loaf to the photos of this pumpernickel and it doesn’t look like it has the same volume, and that’s why you’re concerned, since you said it does taste great.
~jules
can all of your gf breads be made in a bread machine?
Hi Sandra, yes they can, but note that shaped breads don’t work in a bread machine because everything comes out in the shape of a loaf, not like hamburger buns or braided challah 🙂
~jules
Hey Jules,
I just found your site while looking up recipes for my new in laws (one being strictly gluten free) for the holidays. I was wondering if you knew how much xanthum gum would be needed for this recipe? We sadly cannot use your flour blend as corn is an issue with other family members and we prefer to have all food available to everyone. The flour blend we use doesn’t contain any xanthum gum so it’s always a guessing game to figure out how much to add to new recipes.
Hi Genny, I’m so glad you are intending to bake for everyone! That’s the way to do it!!!
Check out these articles for more information on using different flour blends and on how much xanthan gum to use: https://gfjules.com/gluten-free-flour-comparison/
And this one: https://gfjules.com/gluten-free-baking-with-gums-and-more/
I hope that helps and happy holidays!
~jules
I made this recipe yesterday and while I love the test t did not rise and cannot be used for sandwiches. I followed the recipe including warming the oven at 200 (& then turning it off) but nothing. The yeast was recently bought. I used the plain yogurt instead of water, and the buckwheat flour.
What could have gone wrong. Cooked in 2 of the 9 x 5 bread pans.
Hi Sheila, thanks for sharing your recipe notes. Any other ingredient substitutions? Did you use my gfJules Flour? Egg substitutes? What kind of milk powder did you use? What was the consistency of the dough/batter before baking?
If the loaves didn’t rise at all, even though the yeast was recently bought, I would still look to the yeast as the problem. Check out this article on yeast and next time proof the yeast first to be sure it’s not an issue with inactive yeast.
~jules
I had the same problem. The first time I tried a half recipe to make one loaf and it did not rise. After seeing this comment, rather than dumping it I stirred in a fresh half pack of yeast. It never rose much at all and I just baked it anyway. It made a 2″ high loaf. I didn’t give up. Next time I made the full recipe. Followed directions to a t. I used my Oster bread machine on the gluten setting. When it was done I got a 3.5″ high loaf in a 2 lb 7×5″ pan. The bread tastes great but why am I not getting any volume? I had a half pack of yeast left from the first bake so I tested it and it is definitely alive.
Hi Carol, halving the recipe the first time was likely the problem there; the bread machine and the full recipe the next time might have been a problem with the second one because this recipe makes such a large loaf that it exceeds the capacity of most bread machines. Do you have an internal thermometer to test whether the bread was really done when baked in the bread machine? That would be my suspicion there — that it needed more time to bake because it’s so voluminous. I have not tried this recipe in the Oster to know if it needs more time or not.
Other recipe-specific considerations: were you using Dutch processed cocoa or natural cocoa? What kind of milk powder did you use? Let me know, and I’ll continue to try to help!
~jules
Here’s an idea to get more of a deli rye type of flavor. Instead of water/yogurt and the cider, you can replace both with a gf dark stout (I use Steadfast oatmeal stout). I would cut the molasses in half, skip the cocoa and orange peel. I would use half of the caraway seed and also add a tsp of dry dill weed and 2 tsp dried minced onion.
Thanks so much for your ideas for making a gluten free deli rye recipe, Nora!! I can’t wait to try it!
~jules
Looking for a gf bread machine to purchase. The T-fal looks right. . Can you help?
Hi Dale, yes I really do like the T-fal Bread Machine. I use it for most of my gluten free bread baking when I’m doing bread tests so that I have a constant I can test against. It’s a solid machine for a reasonable cost. Have you seen my review?
~jules
One of the best pumpernickel bread I have ever had, gluten free or not.
That’s a high complement, Janet!! Thank you so much, and congratulations on a wonderful loaf of gluten free bread!!!
~jules
Why don’t you use xanthum in this?
Hi Lucinda, my gfJules Flour already has just the right amount of xanthan gum inside, so you’ll never need or want to add any extra to recipes using my flour.
~jules
I’d love to try this recipe but when I checked out your flour blend it includes corn, which I can’t have. Would this work with another brand of GF flour blend?
Hi Terry, check this article on gluten free flours so you know what to look for. Also, I just wanted to make you aware that my gfJules Bread Mix is now corn-free!
~jules
My bread maker tops out at 2 lbs. Can I half your recipe with the same outcome?
Hi Wanda, what kind of machine do you have? Can you program it for a longer bake or can you add a just bake setting at the end? This does make a large loaf, and where the bread machines run into trouble isn’t so much in it spilling over as in not getting cooked all the way through. You can certainly halve it, but the loaf will be much smaller and the bake time on the machine will likely be too long unless you can set it for a 1 1/2 lb loaf.
~jules
I have a Hamilton Beach HomeBaker Breadmaker. I’ve checked the manual since I’m
a newbie. and I do have the option to bake. I also have an instant thermometer so I’m going to try the full recipe and bake more. Worst case scenario is that I’ll use the bread for a Reuben casserole 😊 thanks for the links/tips. My daughter has requested pumpernickel and I’m determined!
Good for you, Wanda! I’m so glad you’re going to make this recipe! If you have any troubles baking it in the bread machine (this recipe makes a large loaf!), you can always just bake in the oven. Here’s more information on my suggestions for using the Hamilton Beach machine. Best of luck!
~jules
Can I use buttermilk powder or does it need to be plain milk powder?
Buttermilk powder will work just fine, Danielle!
~jules
Thank you so much for this recipe! I tried another one that I found online and it was terrible. I threw it away (which is something I don’t do). I tried your recipe and was so happy! It actually tastes like real bread! Not cardboard! I need to try more of your recipes. Thank you SO much!!! NOTE: I was surprised that the yeast isn’t put into warm water first. So interesting but it worked!
So glad you didn’t give up, Christie!! And yay for great gluten free pumpernickel! Thanks so much for taking the time to let me know how much you liked this recipe!
~jules
Did you come up with the idea of doing the yeast this way? I’m just so curious why it works! I’ve done so much baking and have never seen this.
Can this bread be made into a round loaf so I can put spinach dip into the middle! Thanks
Hi Patricia, you should be able to make this recipe into a round loaf, although I’ve not tried it yet myself. The dough for this bread is very thin and wet — much more like a batter, so you want to make sure you don’t make the round size too small, requiring it to rise very tall without support. Another recipe to try is my gluten free Boule Bread!
Enjoy!
~jules
How can I make this one using your bread mix?
Hi Yvonne, I haven’t adapted the recipe for use with my bread mix yet, so as of now, no. I hope you have some of my gfJules Flour on hand so you can make it soon, though!
~jules
Would “flax eggs” yield the same result in the recipe?
Hi Robynn, because this recipe calls for more than 2 eggs, I would recommend mixing two or more different vegan egg replacers and trying that first, flax “egg” being one. Here’s my go-to list of vegan egg replacers and where they work best.
~jules
Hi Jules,
I did your pita bread recipe using your flour and substituting the eggs (Bob’s Egg Replacer) and the oil (apple sauce). The result was great, even without the course salt, which I cannot use. What a treat.
I plan to move on to try your other breads. I have no choice but to substitute the oil and egg. Will it also work with apple sauce (equivalent amount? Thank you so much.
Hi Ginette – I’m so happy you enjoyed success with my pita recipe, even with those substitutions. In this recipe there is not much oil, so that should be ok to use applesauce, but it’s important that the recipe not be too liquid-y, since it already is a very wet batter. I haven’t worked with that egg replacer before, but usually enjoy flaxseed meal + water as an egg replacer in my yeast breads. Please let me know how it goes so others who may need to avoid those ingredients will also learn what works best in this recipe. Good luck!
~jules
Just made this today. Oh. Boy. This. Bread. It is seriously delicious, even my picky hubby said so! He. Left to the vet, to pick up our ???? up, who had bad teeth, poor ????, when he came back, first words out of his mouth, any left? Hah! I cut the recipe in half, because it is only the 2 of us, he wants his share lololol!
Hahah – that’s great, Laura! It’s always a good sign when picky hubbys want more! Thanks for letting me know!
~jules
Does this taste like the bread at the Outback restaurant ?
Hi Lori, I have no idea! LOL I’ve been gluten free since 1999. I can tell you that it tastes like a lovely loaf of slightly sweet pumpernickel, though!
~jules
Thank you
of course!