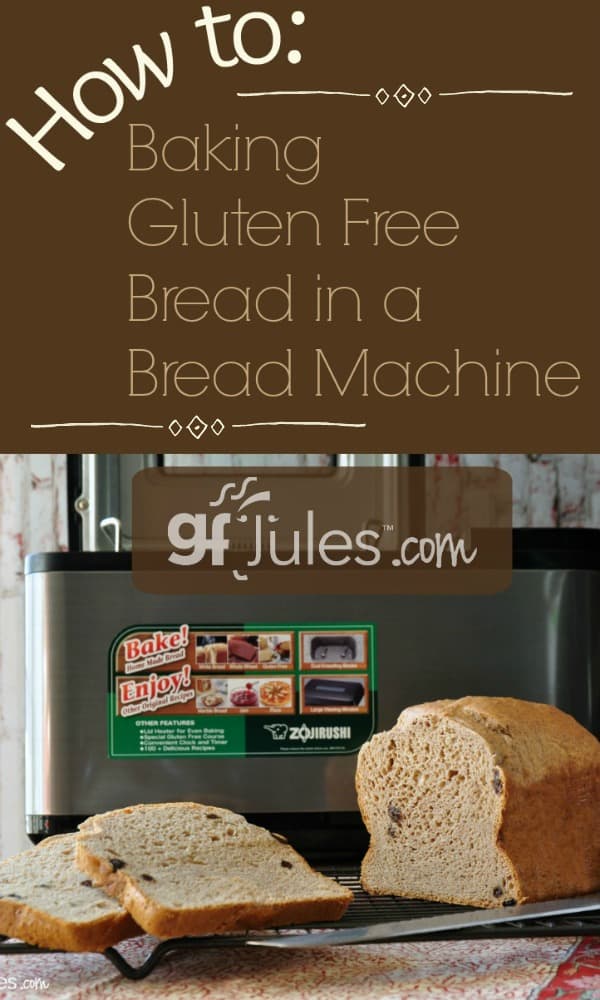
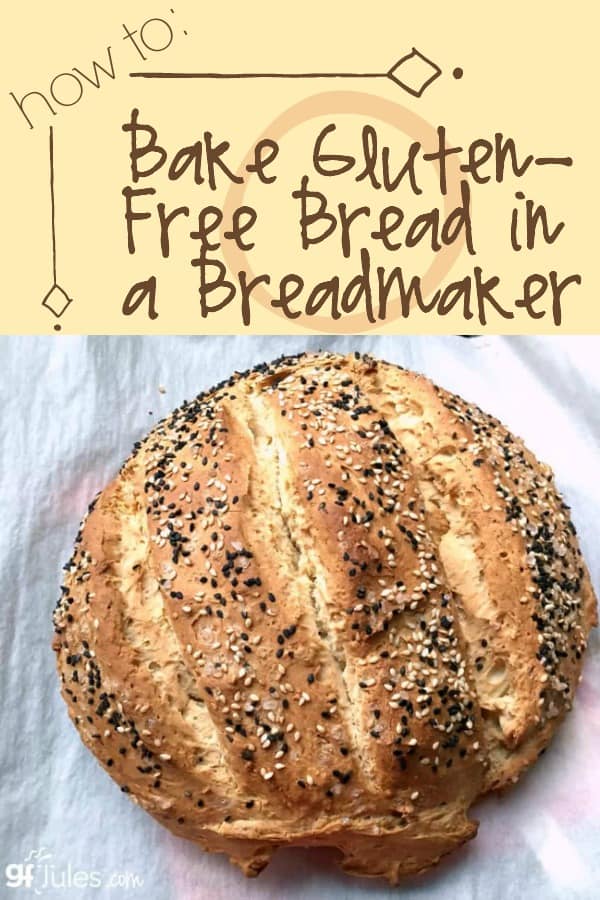
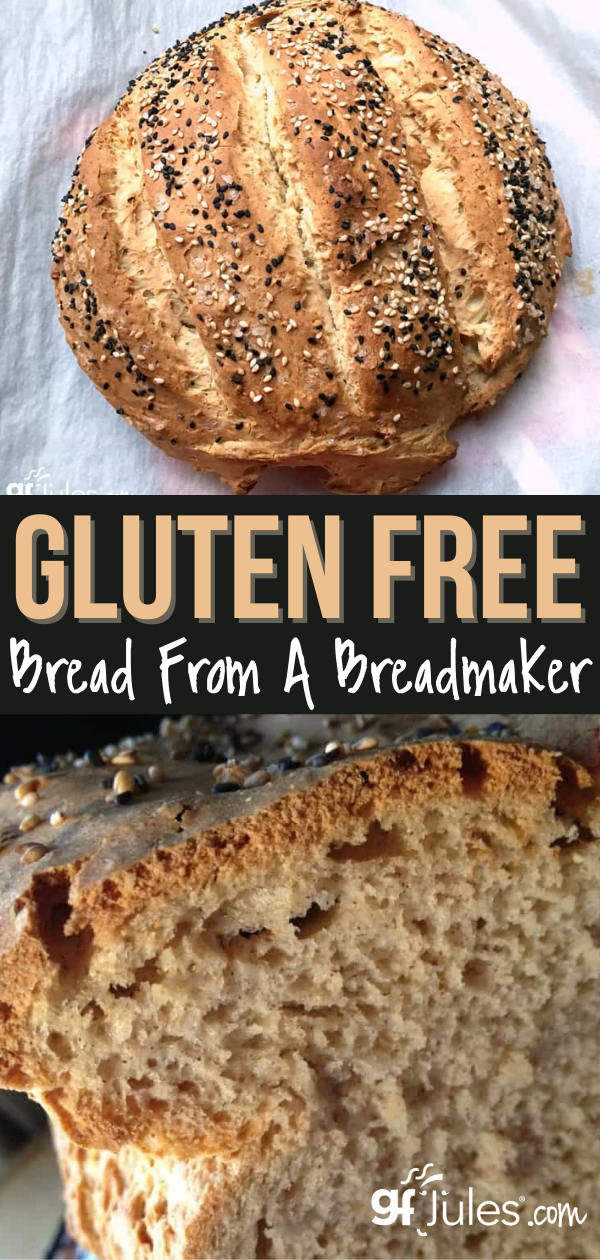
Baking Gluten Free Bread in a Breadmaker
Baking gluten free bread in a breadmaker can be an easy entree into baking gluten free bread from scratch. Add the ingredients, push the button and GO! Let the bread machine do the heavy lifting.
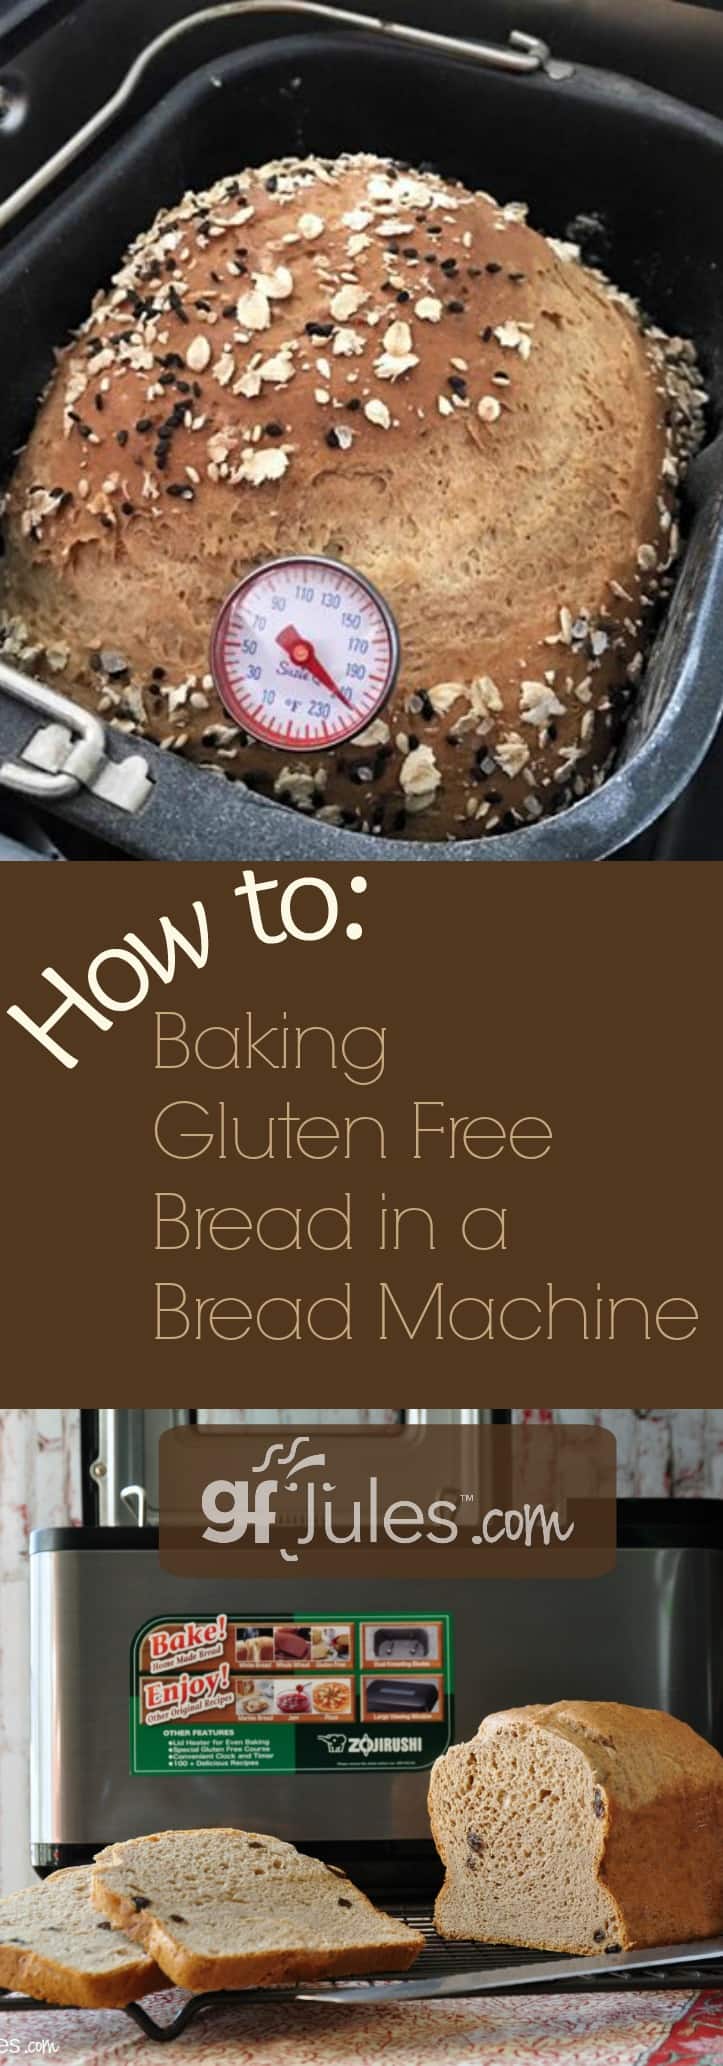
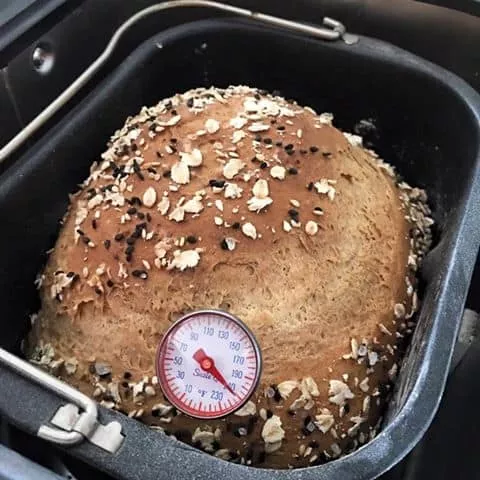
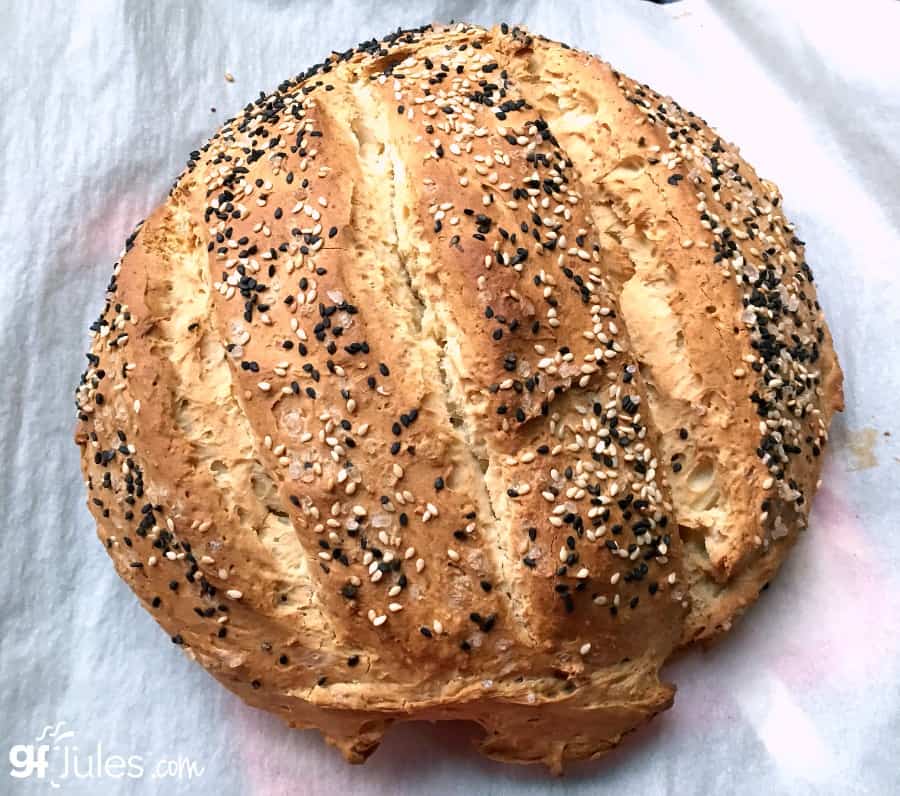
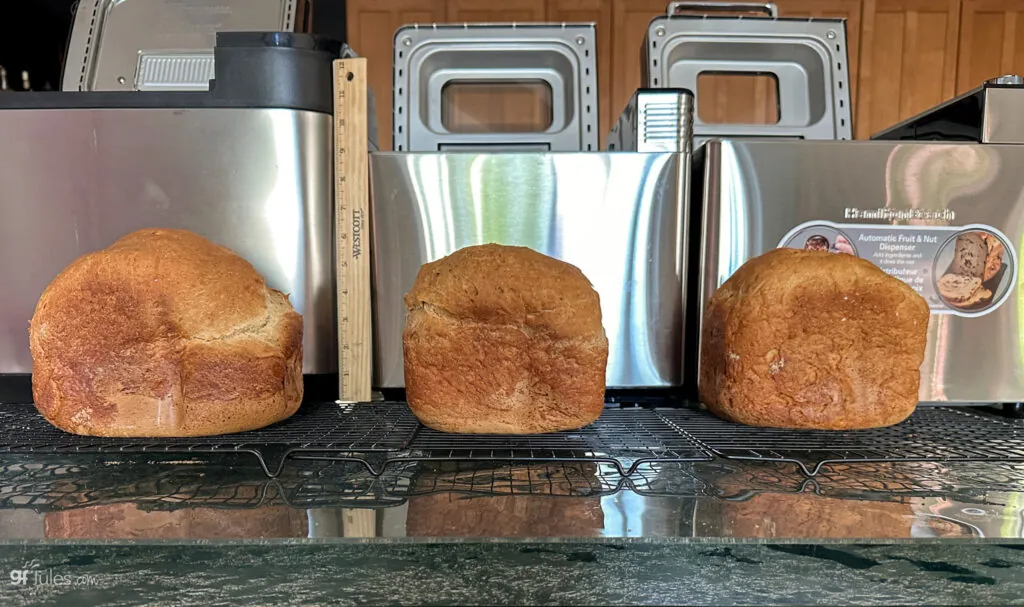
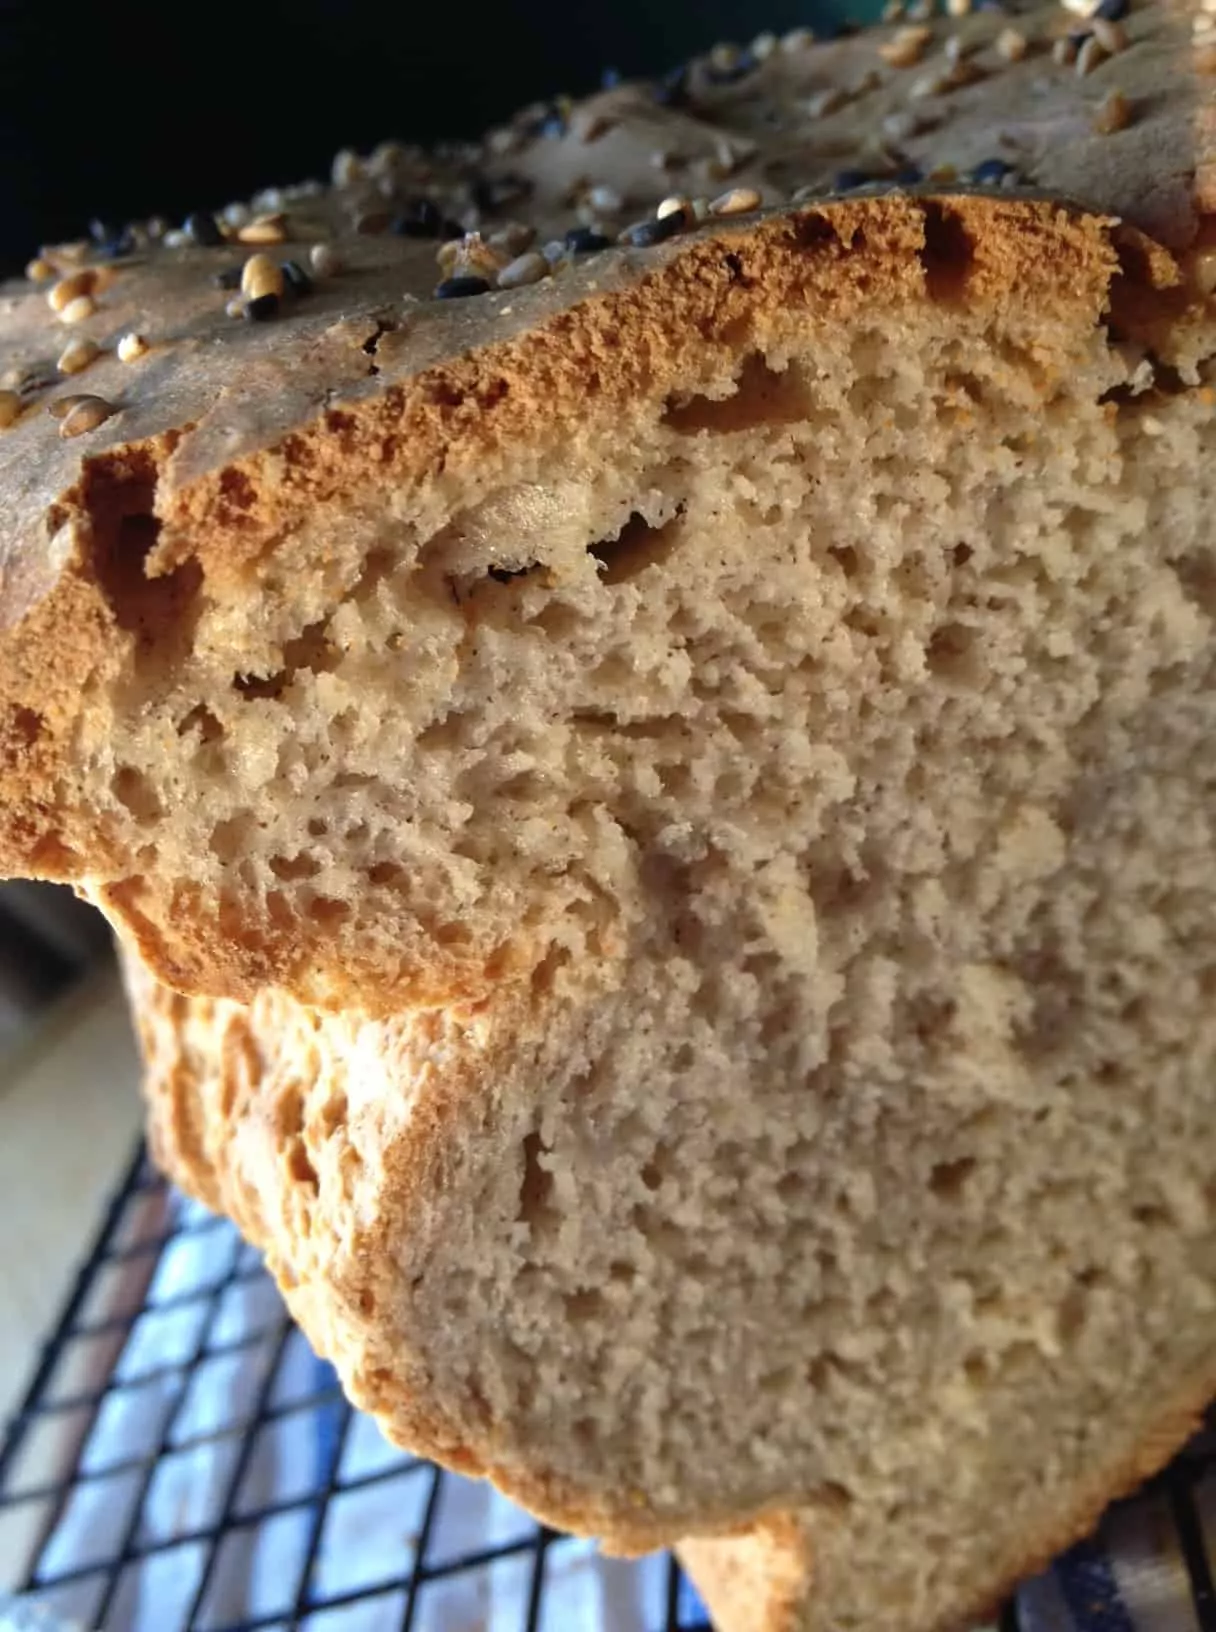
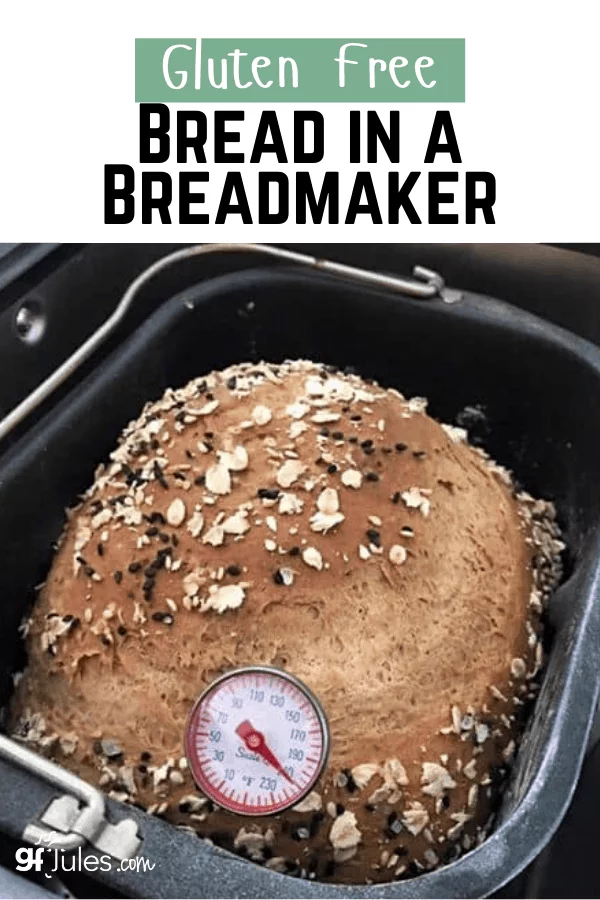
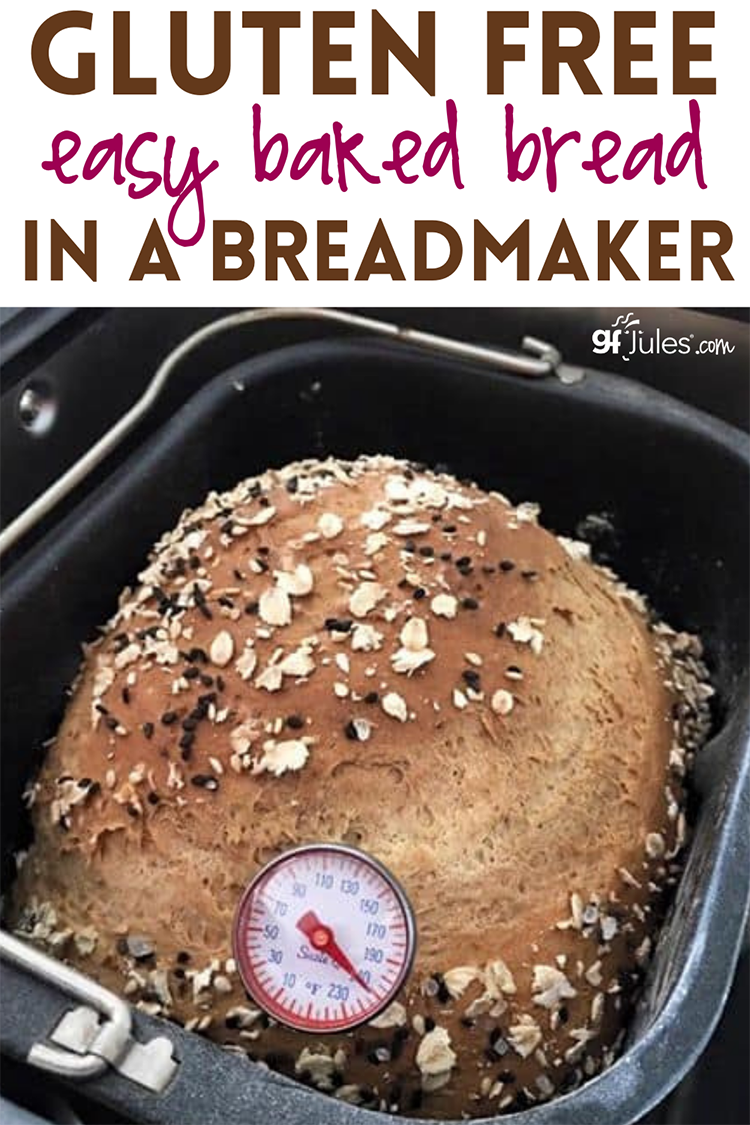
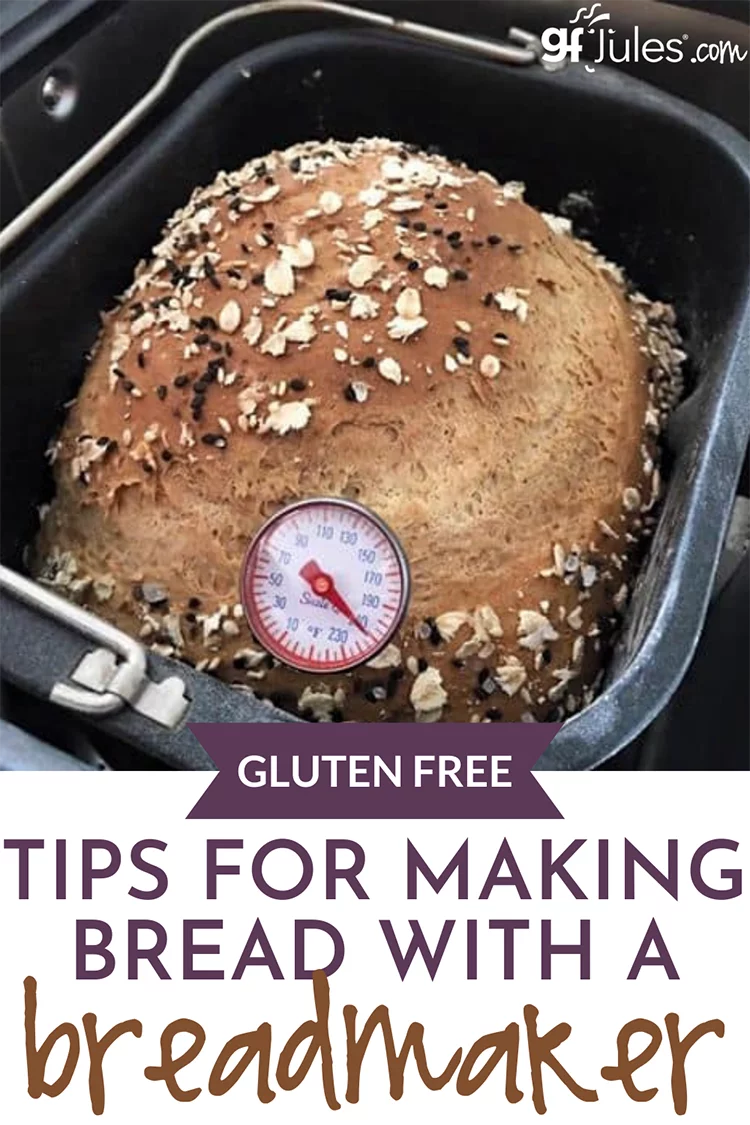
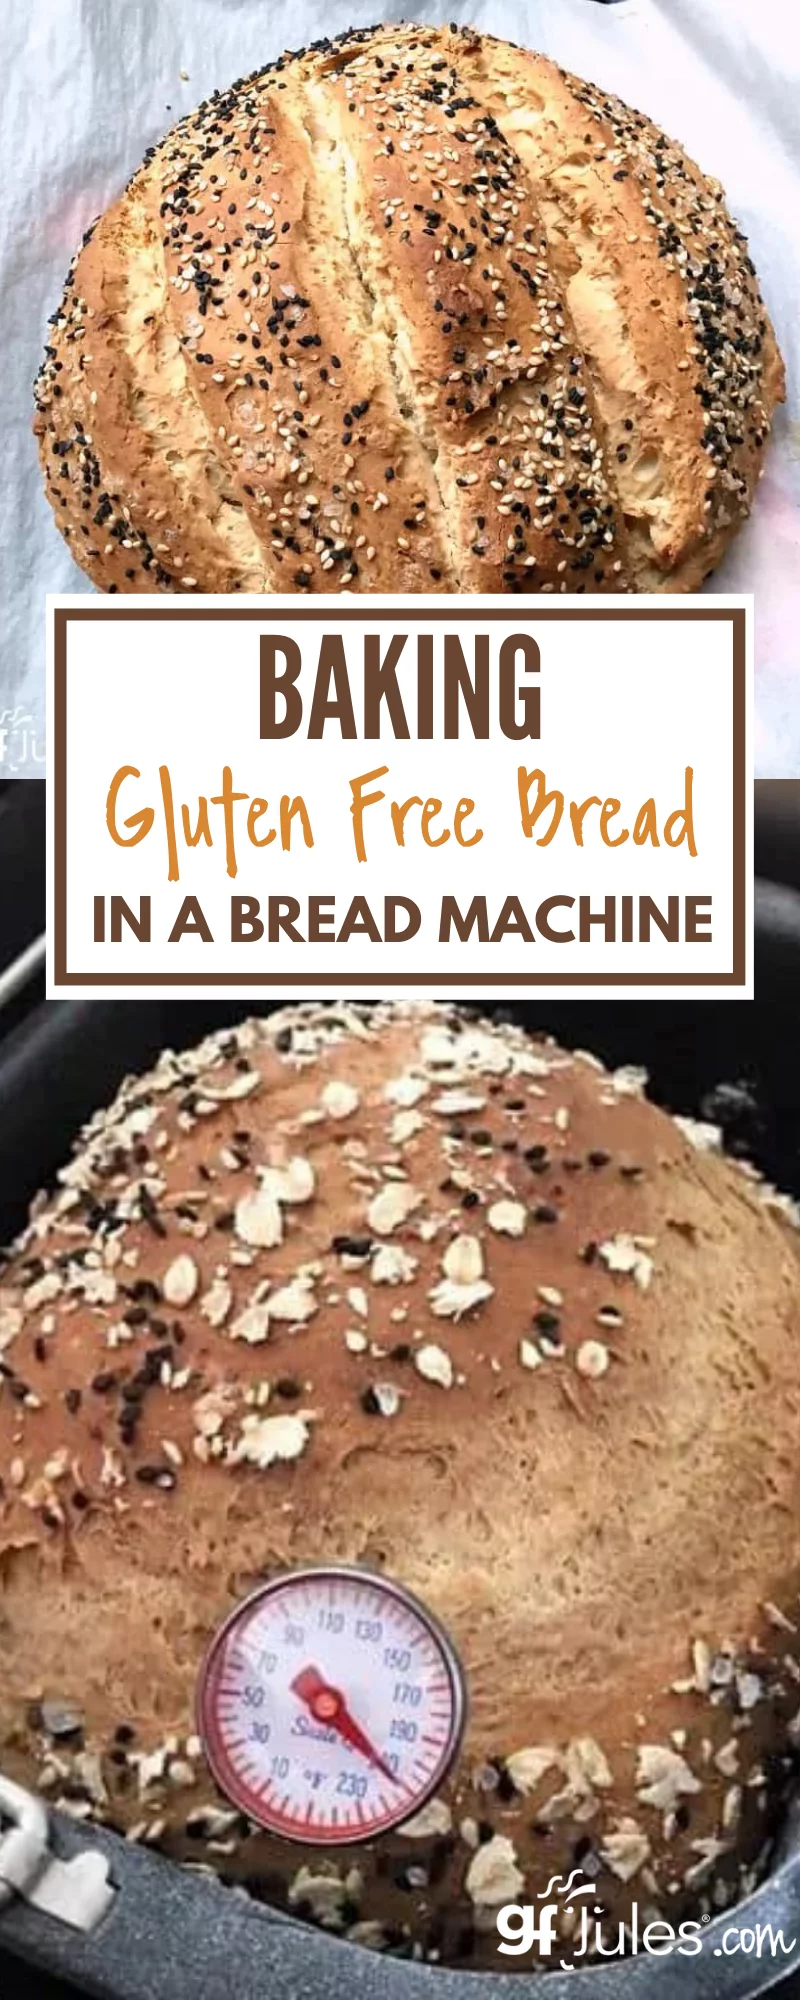
Using an easy gluten free bread mix makes things even more of a breeze. (The loaves pictured below are all made with my gfJules Bread Mix, which was just voted #1 Gluten Free Bread Mix again in the 2024 Gluten Free Awards – for the seventh time!)
 But which gluten free bread maker is best? Does it have to have a gluten free setting to bake gluten free bread? What gluten free bread recipes work best in bread machines? Read on for answers.
Hop to my Reviews of Best Bread Machines for Gluten Free Bread
All about Gluten Free Bread Machines
For anyone leery of baking gluten free bread from scratch, and for those who don’t have a stand mixer, a bread maker may be your new best friend.
Since the hardest part is often just finding the patience to wait for that yummy nirvana of heavenly yeasty bread aromas to permeate every room of your home, beckoning you to make a sandwich or slather a warm fresh-baked slice with butter … it’s easy to see why gluten free bread machines are so well-loved!
BUT … don’t hesitate to try baking gluten free bread from scratch if you don’t have or can’t afford to buy a gluten free bread machine. The homemade gluten free bread recipes on my site are all designed to be made without a bread machine, though many may be made in a bread machine, as well. And you don’t have to be a bread baking expert to bake them — I promise!
Some of my favorite gluten free loaves are baked in my oven, and some recipes don’t even require a bread pan! Gluten free sandwich bread, challah, gluten free bread sticks, 10 Minute Gluten Free Focaccia … are just some of the amazing homemade gluten free bread recipes on my site that can be made easily without a breadmaker.
Here are some great homemade gluten free bread recipes for bread machine:
- Easy Gluten Free Sandwich Bread or Beer Bread in Bread Machine
- Gluten Free Sandwich Bread in Bread Machine
- Gluten Free Cinnamon Raisin Bread in Bread Machine
- Gluten Free Pumpernickel Bread in Bread Machine
- Savory Gluten Free Italian Bread in Bread Machine
Tips for Making Gluten Free Bread in a Bread maker:
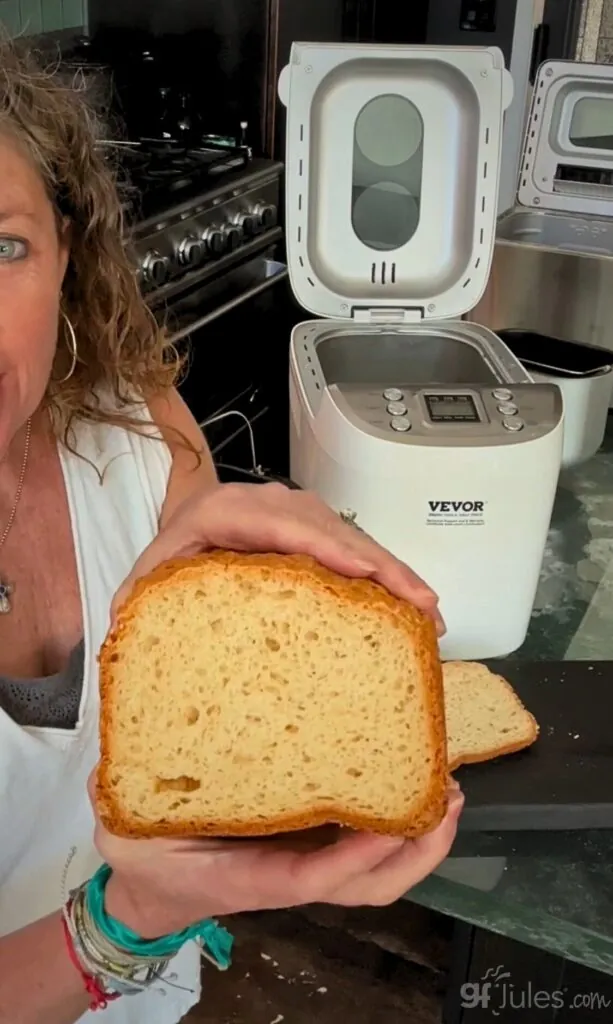
1- You don’t have to have the most expensive breadmachine to have the best bread. I travel with my bread makers for many cooking classes, and I won’t risk a big investment being in the hands of the TSA. So I tend to prefer mid-range bread makers like this Vevor for travel. You can usually find this machine for under $100.
HOWEVER … not all bread machines are created equal. Even those that have a gluten free setting. Check out this video to see if your bread machine is going to do a good job on baking your gluten free bread:
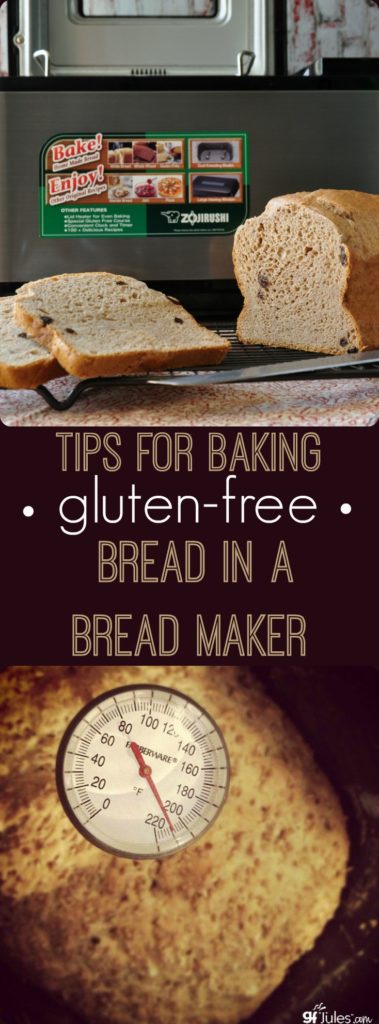
I truly love the loaves my reliable, two-paddled Zojirushi® turns out; I don’t risk traveling with it because it is a costlier machine. You can read about the Zojirushi as well as my preferred mid-range and travel machines in my gluten free bread machine reviews.
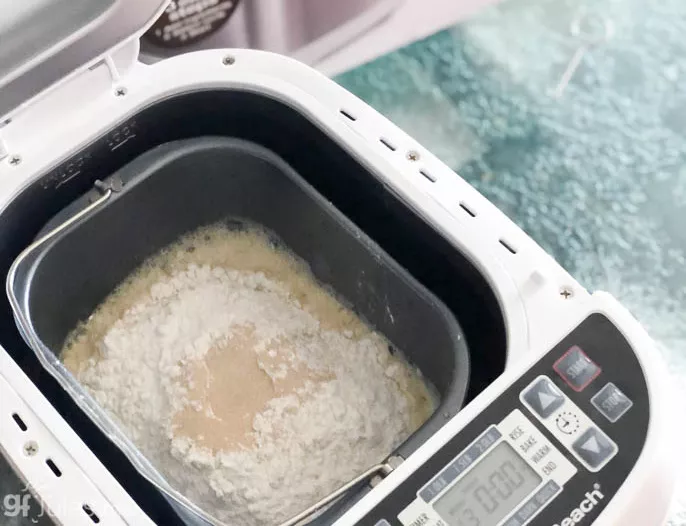
The process of baking gluten free bread in a bread machine is the same, no matter which model you use: liquids first, then dry ingredients, then yeast. Here’s a quick video showing you how:
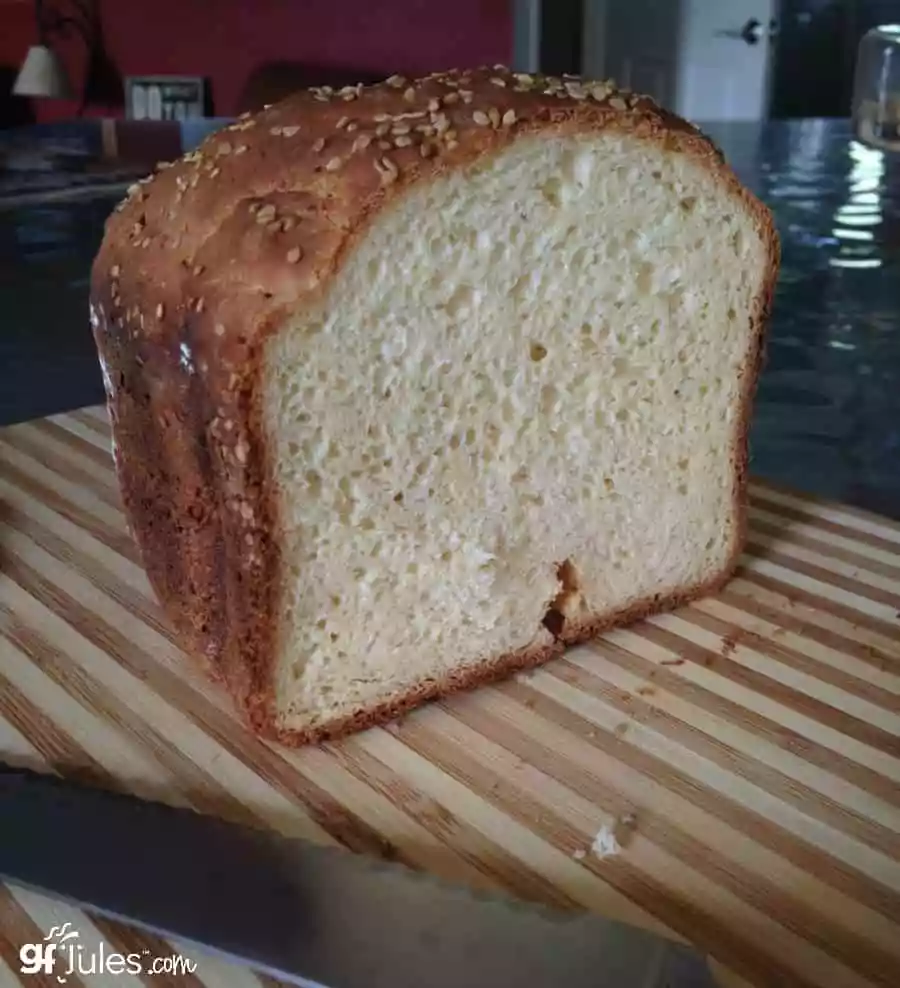
(The short video above shows bread being made with my gfJules Bread Mix; to make with a scratch recipe, simply use the ingredients in this Gluten Free Sandwich Bread or Dinner Rolls Recipe)
2- You don’t have to have a bread maker with a gluten free setting to bake gluten free bread. But it helps. If you have an older bread machine without a gluten free setting, make sure it’s totally clean from any gluten residue. If there are scratches on the pan or the paddle, buy new ones because they could house gluten left behind from the last loaf.
If you are in the market for a new bread maker, buy one with a gluten free setting. Check my review of gluten free bread machines though, as they are not all good for baking gluten free bread; just because a machine has a gluten free setting, does not necessarily mean it will produce a good loaf.
3- Using bread makers without a gluten-free setting. Read your manual to find out if it will allow you to, and how to override the pre-programmed settings.
How to Program Your Bread Machine for Gluten Free Bread:
1. a 20-minute mix cycle
2. a 40-minute rise cycle
3. a 1-hour bake cycle
Do not allow the machine to do a “punch down” or second rise! Those are settings specific to gluten breads, and they will damage your gluten free loaf.
4- Always bring ingredients to room temperature before mixing gluten free bread dough. For eggs, heat a bowl of water and put the un-cracked eggs in the bowl to bring them to room temperature.
5- Always put liquid ingredients into a bread maker pan first. Dry ingredients go on top. If you can whisk the dry ingredients together before pouring them into the pan, that is best.
6- Keep a rubber spatula handy and help the bread maker out a bit during the mix cycle. Go around the pan with the spatula to help the ingredients incorporate. Th mixing paddles on bread machines don’t always get the dry ingredients off the sides of the pan, so using a rubber spatula can help. You’ll know after first use if your machine needs a little help mixing or not.
If you don’t want holes from the paddles when you remove them after baking, once the bread is mixed and before the rise, reach into the dough and remove the paddles; use the rubber spatula to help clean them off and smooth the top of the bread before rising.
Note: it’s totally fine to leave the paddle inside the loaf as it bakes — it’s purely aesthetic whether you want a hole in the bottom of the loaf or not. With most machines, there is only one paddle, so only one small hole in the bottom center of the loaf.
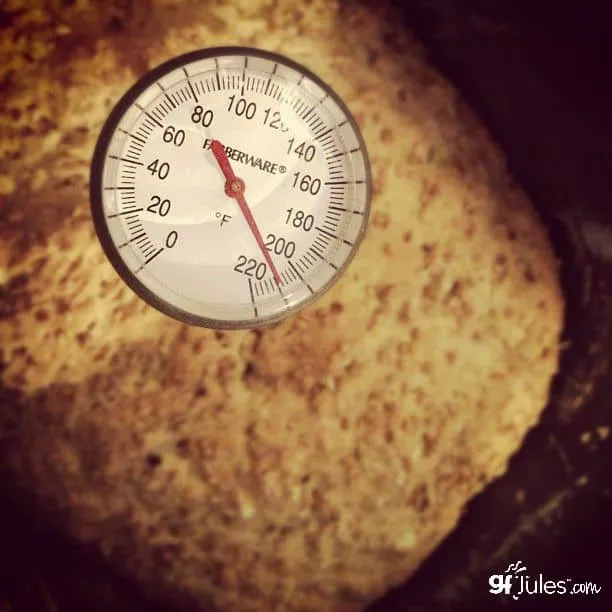
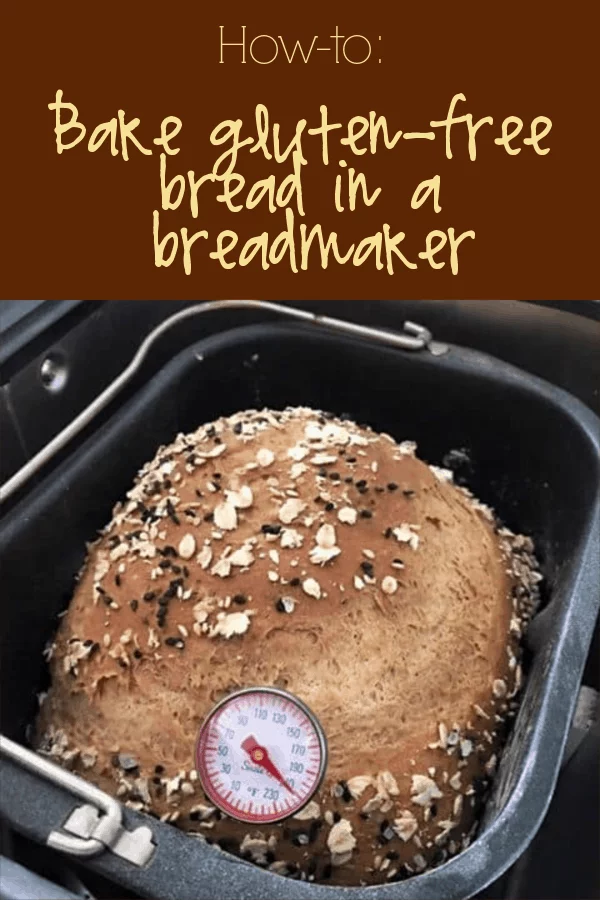
7- Buy an instant read thermometer. They’re not expensive but make all the difference in helping you decide if your gluten free bread is really fully cooked. Always take your bread’s temperature before you take it out of the oven or the bread maker. It might look and smell done, but if it’s not over 205° F, it’s not done in the middle. Add extra time to your bread maker or put the bread maker loaf pan into your oven on 350° F for another 5-10 minutes (keep taking its temperature).
8- Let your bread cool in the pan for about 5-10 minutes. Lay the pan on its side for a few minutes, then shift to the other side for a few minutes. Gently remove it from the pan after it has cooled a bit, then cool completely on a wire rack before cutting (if you can resist!).
9- Store fully cooled bread in a zip-top bag on your counter – Squeeze the air out of the bag first, then seal. Depending on the recipe and ingredients, it should stay fresh that way for a few days. Remember: this is homemade bread, not commercially-made, processed bread loaded with preservatives, so it will naturally be softest and taste freshest the first day or two. In France, people still buy fresh baguettes every day — there’s a reason!
10- Never refrigerate your breads or you will dry them out! If you can’t finish the whole loaf before it starts to get dry, you can slice the bread and freeze it in a zip-top freezer bag so you always have bread handy. Put parchment or wax paper between the slices to make separating the frozen slices easier. Then, just toast to enjoy! Or, use leftover bread that’s past its prime in homemade gluten free French Toast!
Bonus #11 – If you really want a tall, fluffy loaf of bread, use a carbonated beverage like gluten free beer, club soda or ginger ale! Check out the height of my gluten-free beer bread! This is my favorite, reliable from-scratch gluten free sandwich bread recipe which can also be made with carbonated liquids.
CLICK HERE TO GET A FREE COPY OF JULES’ “GLUTEN FREE BREAD BAKING” eBOOK (A $9.95 VALUE)
*Some links in this post may be referral links. If you do decide to purchase a product at a retailer after following my link, I may receive a small commission, at no additional cost to you, which I use to pay for web hosting and services for this blog. Read my disclosure policy here.


 (75 votes, average: 3.56 out of 5)


THanks Jules! Question about doneness at high altitude: I live at nearly 8200 feet. Is it still the same temperature when done? If not, then what should it be? Thanks!
Hi Pamela, it should be the same temperature, but will require less leavening (less baking soda, baking powder and/or yeast) to get there, and will take less time to rise. Hope that helps!
The thought of making bread with beer is intriguing but it is gluten free beer?
Some ingredients are gluten in regular beer.
Wheat, rye, barley all have gluten in them.
Hi Marina, yes, of course you must use gluten-free beer. I have a list of lots to choose from in this article.
Can I use gluten free flour instead of reg.bread flour @reg setting.
Hi Homer, you can use my Jules Gluten Free All Purpose Flour in place of regular flour in a bread machine, but as with any gluten-free yeast bread, you don’t want the punch down and second rise on the bread machine to activate, so either use a GF setting or manually program just a mix, rise and bake cycle.
Warning: the Hamilton Beach Home Baker “gluten free” setting has a punchdown and two additional rise cycles. It does have a manual cycle, so I let it mix, turned it off for 30 mins, then ran a 60 min “bake” cycle. Didn’t figure all that out until I opened the box and read the manual. My workaround worked, but I’d rather load it and forget it. Should have gone with one of your recommendations, I guess.
Oh good catch, Kate! Guess Hamilton Beach didn’t do their GF Bread Baking homework??! I’m glad you were able to do a manual work-around. Thanks for letting me know!
In order to do one raising cycle with my Zojirushi BB-CEC20 and your Bread Mix Packet, I need to program each cycle.
What length of time should I set my breadmaker to knead, rise and bake?
I like the adaptability of this machine but don’t want to experiment with the time and expense of several batches.
Any input would be appreciated! Thank you
Hi Denise, I don’t work with Zojirushi machines, but my best guess would be that the dough should be kneaded for only 10-15 minutes (Zos have 2 paddles and should have the dough well-mixed by this time, but check to be sure it is done at the end of the cycle). Rising should be at least 1 hour, if possible, and bake time will be 35 minutes – 1 hour, depending on the temperature and the size of the pan. The first time around, you’ll need to check it periodically and test with an internal read thermometer. The bread is cooked when it reaches 205-210F. Hope that helps!
OK been GF for 6 yrs. Limited menu I accept. Use language translations when away on business. Sick of paying $7 for a loaf of non tasty air. Used to doing without so I am not sick. Tried several bread maker recipes, not there. Still wet in my GF toaster side, fall apart in a sandwich. Any suggestions?
Hi H – I feel your frustration, and understand feeling like you have to compromise, but don’t give up on gluten-free bread just yet! Have you tried one of my sandwich bread recipes or my
bread mix? Take a minute to read some of the reviews — I think they’ll convince you that it’s worth trying again with the “right” ingredients and recipe!
This is a long shot, but does anyone have a Breadman model TR700c? I have the manual but can not find anything about overriding the preprogrammed settings to make a GF bread. I really, really appreciate this blog, what helpful info! Thank you!
Thank you! I have many clients that I have been advising to go gluten free and many love the convenience of their bread maker. I will now be very happy to share this blog post with them as you have covered the subject very well! I will also be sharing this on my facebook page with a link back to yours!
Thanks again,
Patricia Eales,
Registered Holistic Nutritionist
Glad the information will be useful for you and for your clients, Patricia!
Just made your gf bread in our bread machine. It was EXCELLENT!!!
Wonderful, Maurica!!!!! Enjoy the delicious fresh baked bread!
This gave me everything I needed to know all in one spot!! I had opened several tabs on the subject (luckily, this was the first I read), but now I can forget about reading through the rest :). I had NO idea there were machines with a GF setting, either. Thank you!!! I recently figured out evil gluten is responsible for a LOT of problems in my family (adhd symptoms in me and my oldest daughter, failure to thrive in my youngest daughter, irritibility, depression, brain fog, etc, etc). I’m so thankful and excited to get with it!
Rachel – I love your enthusiasm! I hope you enjoy baking homemade gluten-free bread for your family as much as I do! Glad you found my article helpful, as well!
I just bought a Oster Expressbake bread machine. You put the setting on express bake when making bread. Here are the stages; to begin: The ingredients are kneaded(15min)the dough begins to rise(8 min)the dough begins to bake(35 min), then the bread is finished Just right for gluten free bread.
Hi, I’m looking for a new bread machine and yours sounds easy! May I ask the cost please?
Thanks, Pam
Hi Pam, check out the links on my recommended products page – it should take you right to the bread machines I like, as well as current prices. Enjoy!
Thanks Susan – this is just the info I needed.
Hi. Thanks for the great tips. Would you happen to have any recipes for gluten free, dairy free bread?
Thank you.
I forgot to mention that I was looking for sandwich bread.
Yes! Search my blog anytime for recipes like this one! https://gfjules.com/recipes/
Thank you for the advice.
Made my first GF bread this week, using a mix. Success! Someday I may be ready to make bread from scratch, but for now I am happy to have mixes to use!
Thanks for all the tips. My hubby got me a Gluten-Free Breadmaker. So far, results have been disappointing at best. Off to try it again using these tips!
Thank you for all the tips!
Thank you for the tips. I am new to GF baking, and I appreciate all the help I can get. I followed all your tips for the bread machine, and my bread looks better; however, it dips in the middle while baking. I am also at high altitude, which is always challenging. Do you have any advice for me? Thank you!
Renee – Are you taking the temperature of the bread to make sure it’s fully cooked before removing it from the machine. The internal temperature should be 205-210F when it’s fully cooked. Next, I would reduce the liquids a bit to see if that helps. Also, email us at Support@JulesGlutenFree.com with follow-up questions and we can walk you through more ideas if you need them!
Thanks for everything you do!
Never thoutght of using a thermometer… Thanks
Wow. You just answered a question I have had the last few times I made homemade gluten free bread. I make a Sesame Gluten Free bread I incorporate Goat Milk Cheese in. I noticed the last couple times after baking time was up, when cooled and I cut it, it seems more moist in the center. I even flipped it over and baked it again thinking it was too moist. Made little difference.
My recipe calls to have a pan heating as the oven heats, then add a cup of hot water just before putting the bread in to bake for steam. I was thinking the steam was causing the extra moistness. Can this step be left out or is it absolutely necessary to void it from being too dry? I will keep my loaf baking a few more added minutes.
I love the idea of the thermometer, never thought to do that.
My husband is so addicted to this bread, he asks for it more then my regular bread machine breads.
I have not tried to use my bread machine to make gluten free breads. I do have a manual setting. Am I understanding correctly then, that I can make gluten free bread in the regular bread machine, if I take the dough out just before the second kneading, then just bake it in the oven?
Dee M – Recipes calling for water in the oven to create steam are usually bread recipes like baguettes, that are trying to encourage a really crunchy crust. You can cut that step out. The Goat Milk Cheese addition will cause it to be quite moist – maybe cut back on that a bit next time? As far as the manual settings, with many breadmakers, you can program it yourself. If you cannot, you could have the bread machine just do the mixing for you, then take the bread out to rise in a warm oven and bake in the oven. You just don’t want that punch-down and second rise!