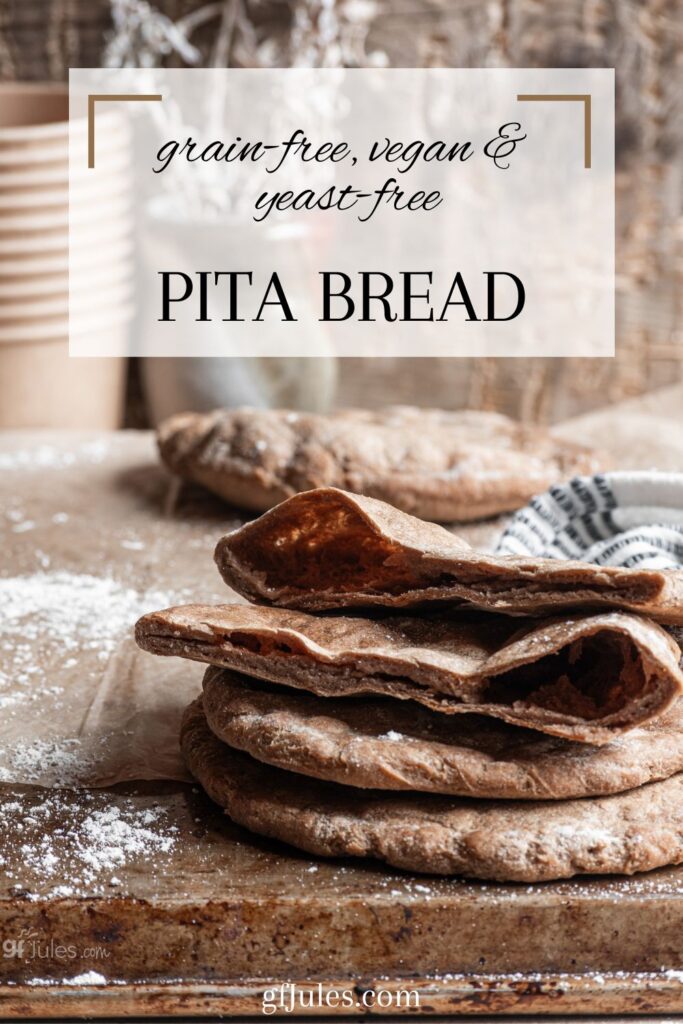
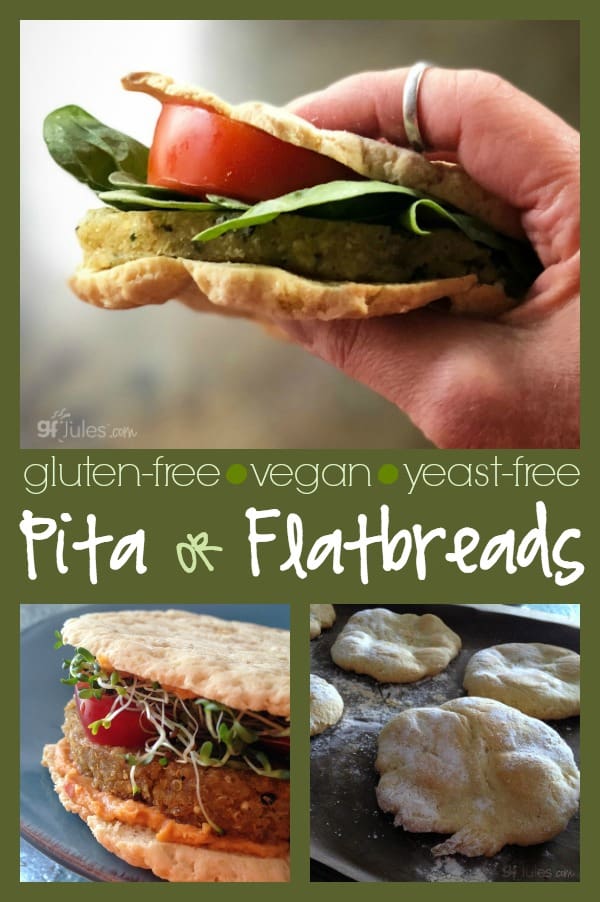
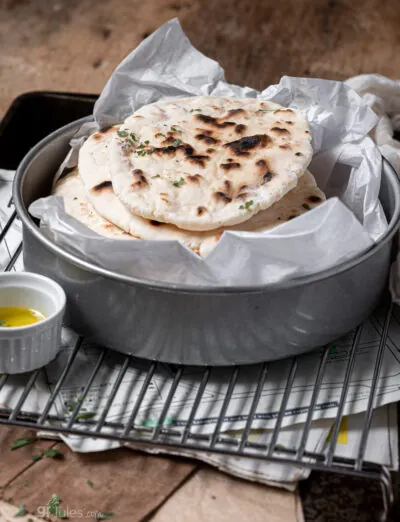
Gluten free pita or flatbreads are possible, scrumptious even, with my gfJules Gluten Free All Purpose Flour, I can assure you! You can even make these as beautiful grain-free pita breads with gfJules Nada Flour. Anything is possible with the right gluten free flour!
When it comes to grain-free or gluten free pita breads, this recipe is one you’re going to want to bookmark. It’s fast and easy and makes The. Best. Bread!
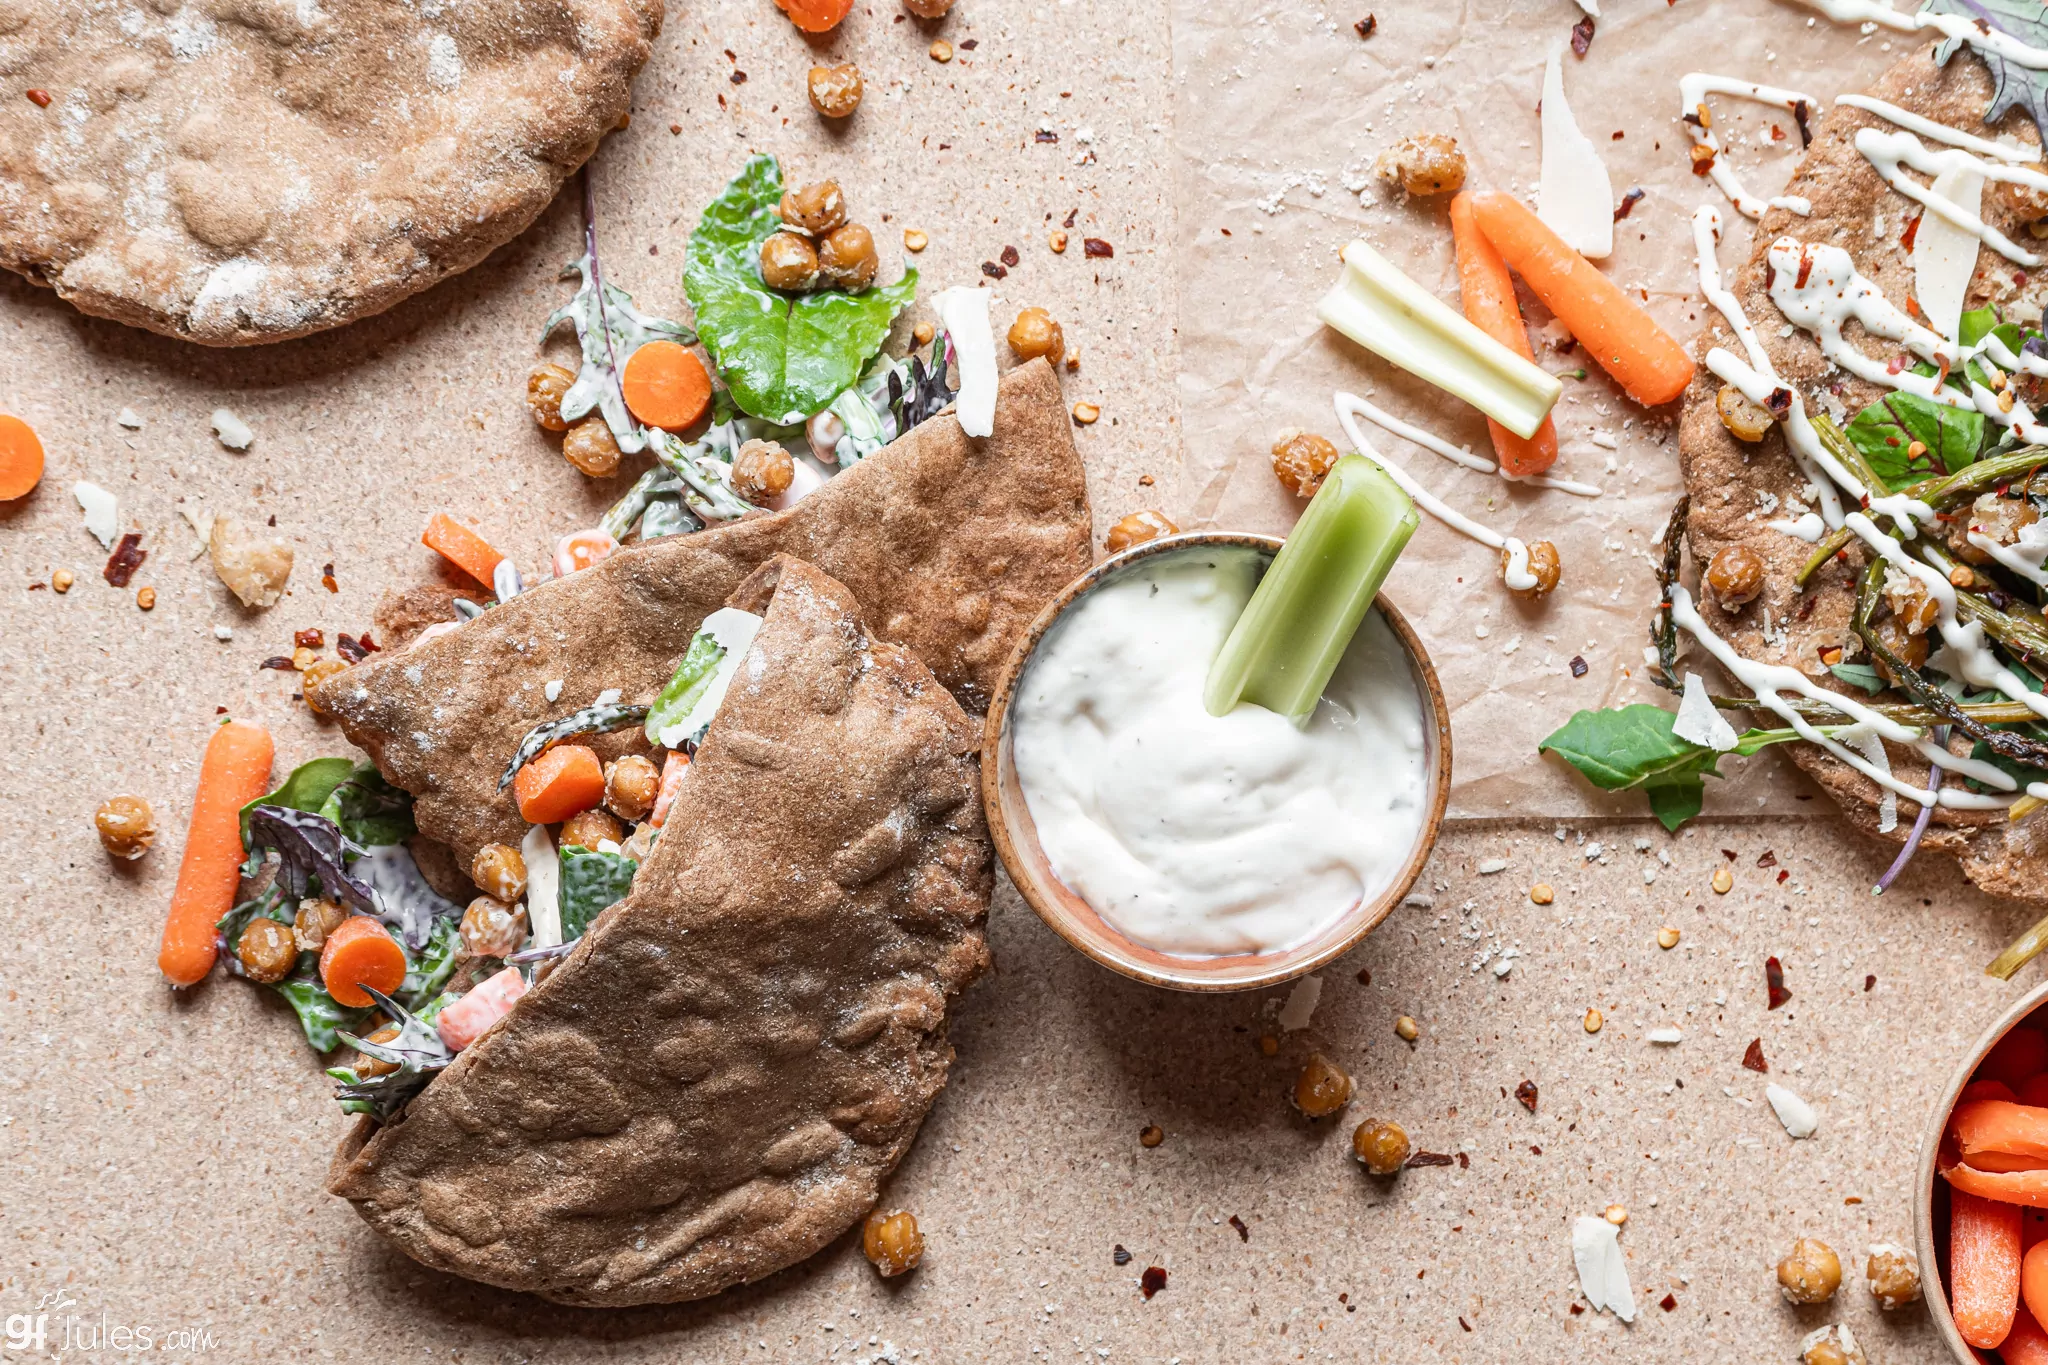
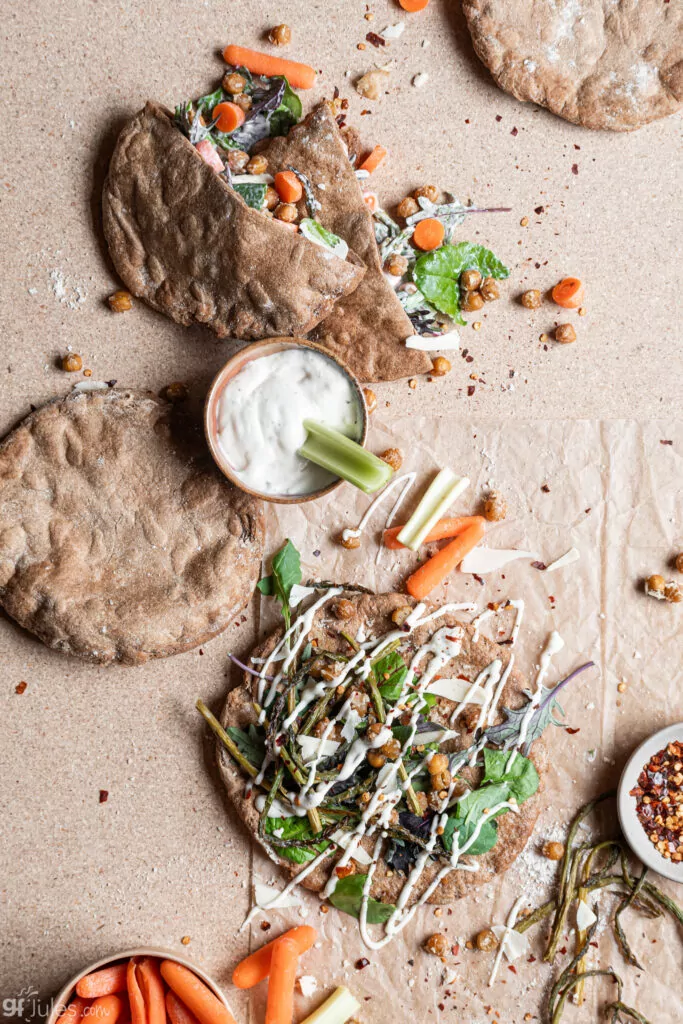
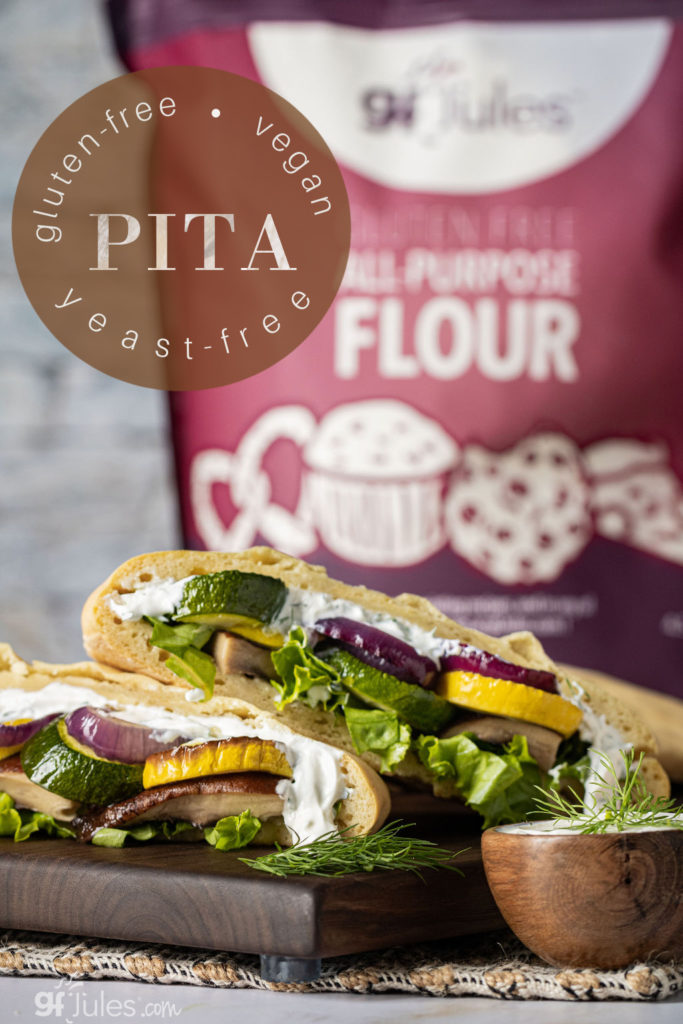
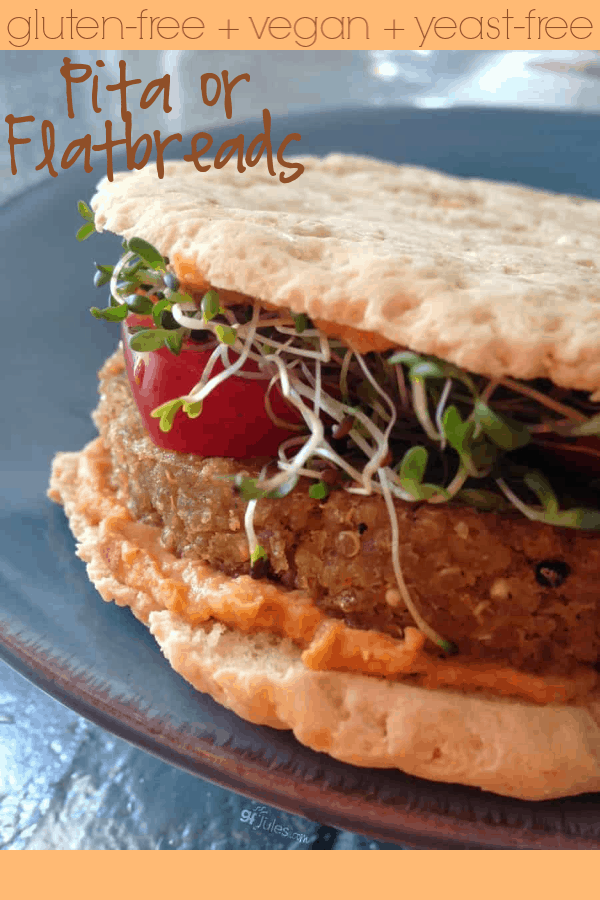
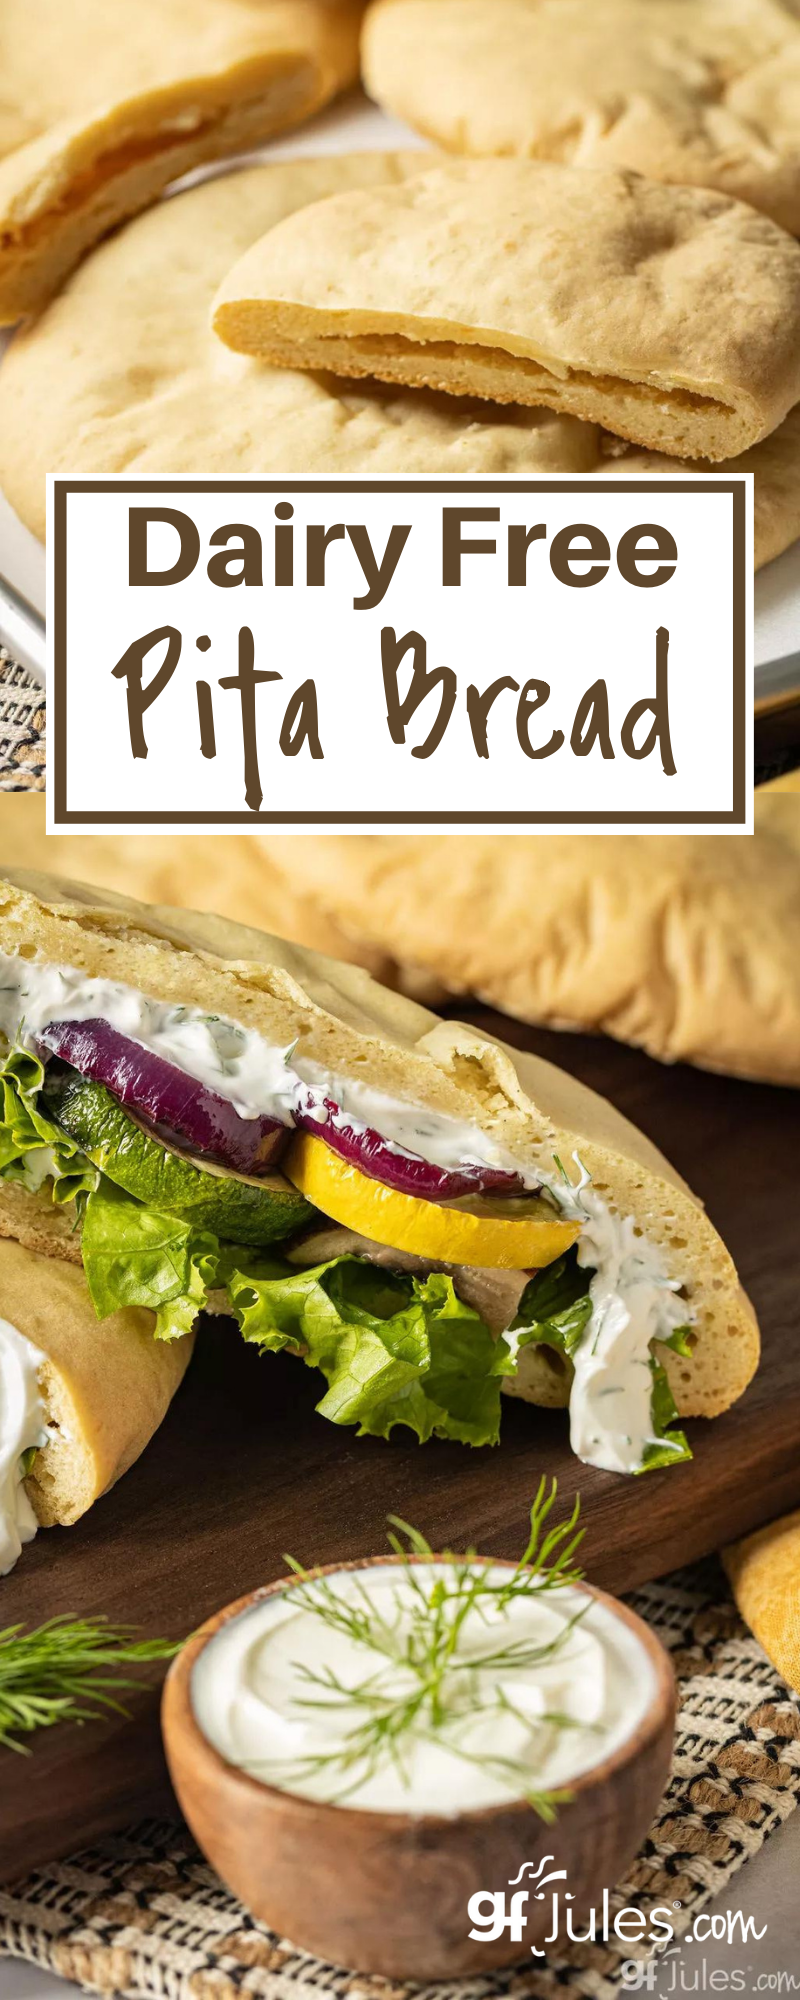
Yeast-free, dairy-free, egg-free / vegan, and yes, of course, gluten-free, but let’s not focus on what this recipe is missing, since this delicious and versatile bread is soon going to be full of all your favorite yummy fillings!

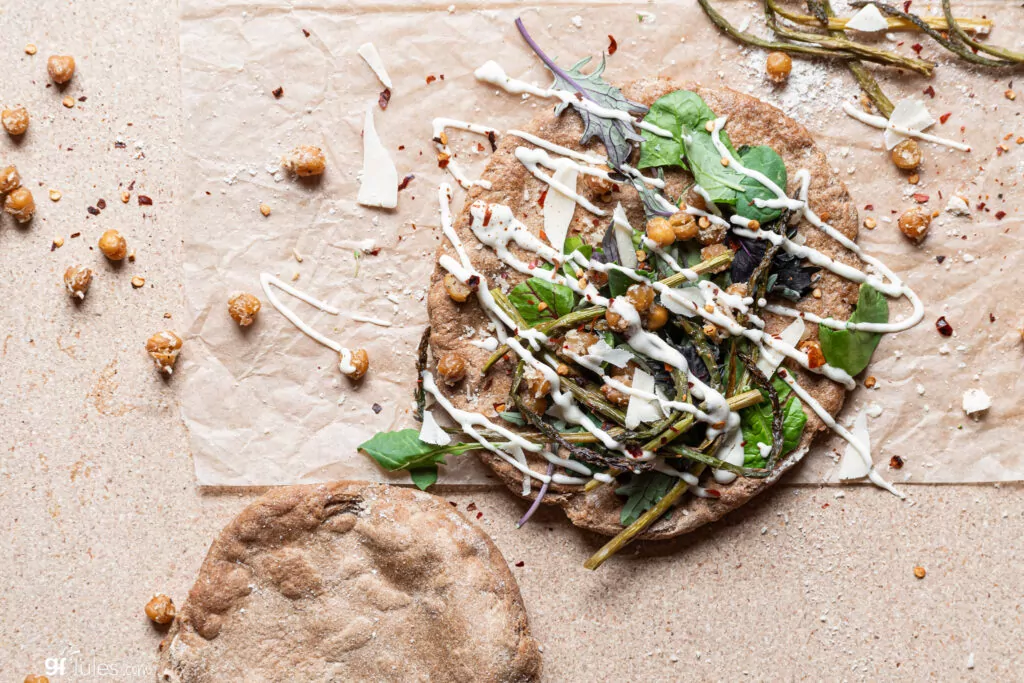
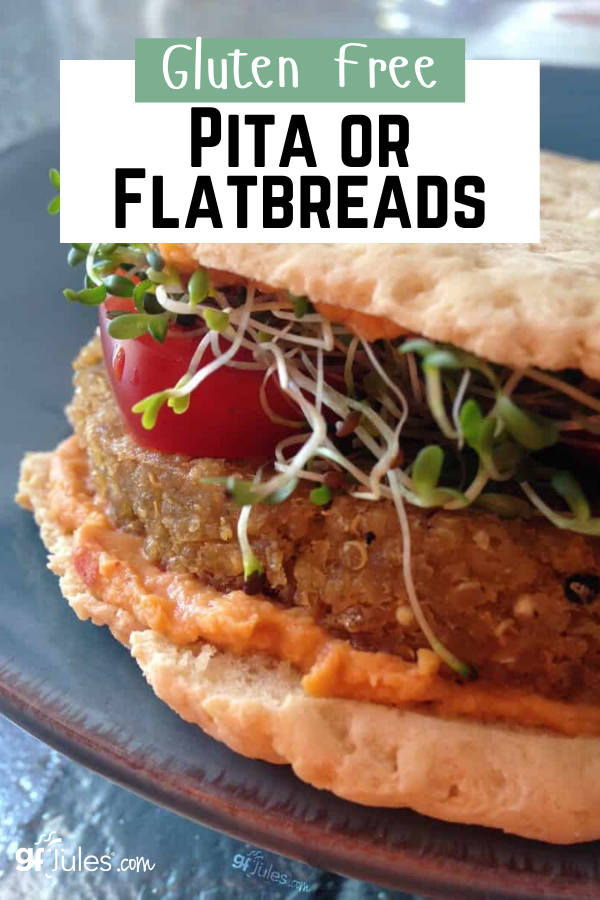
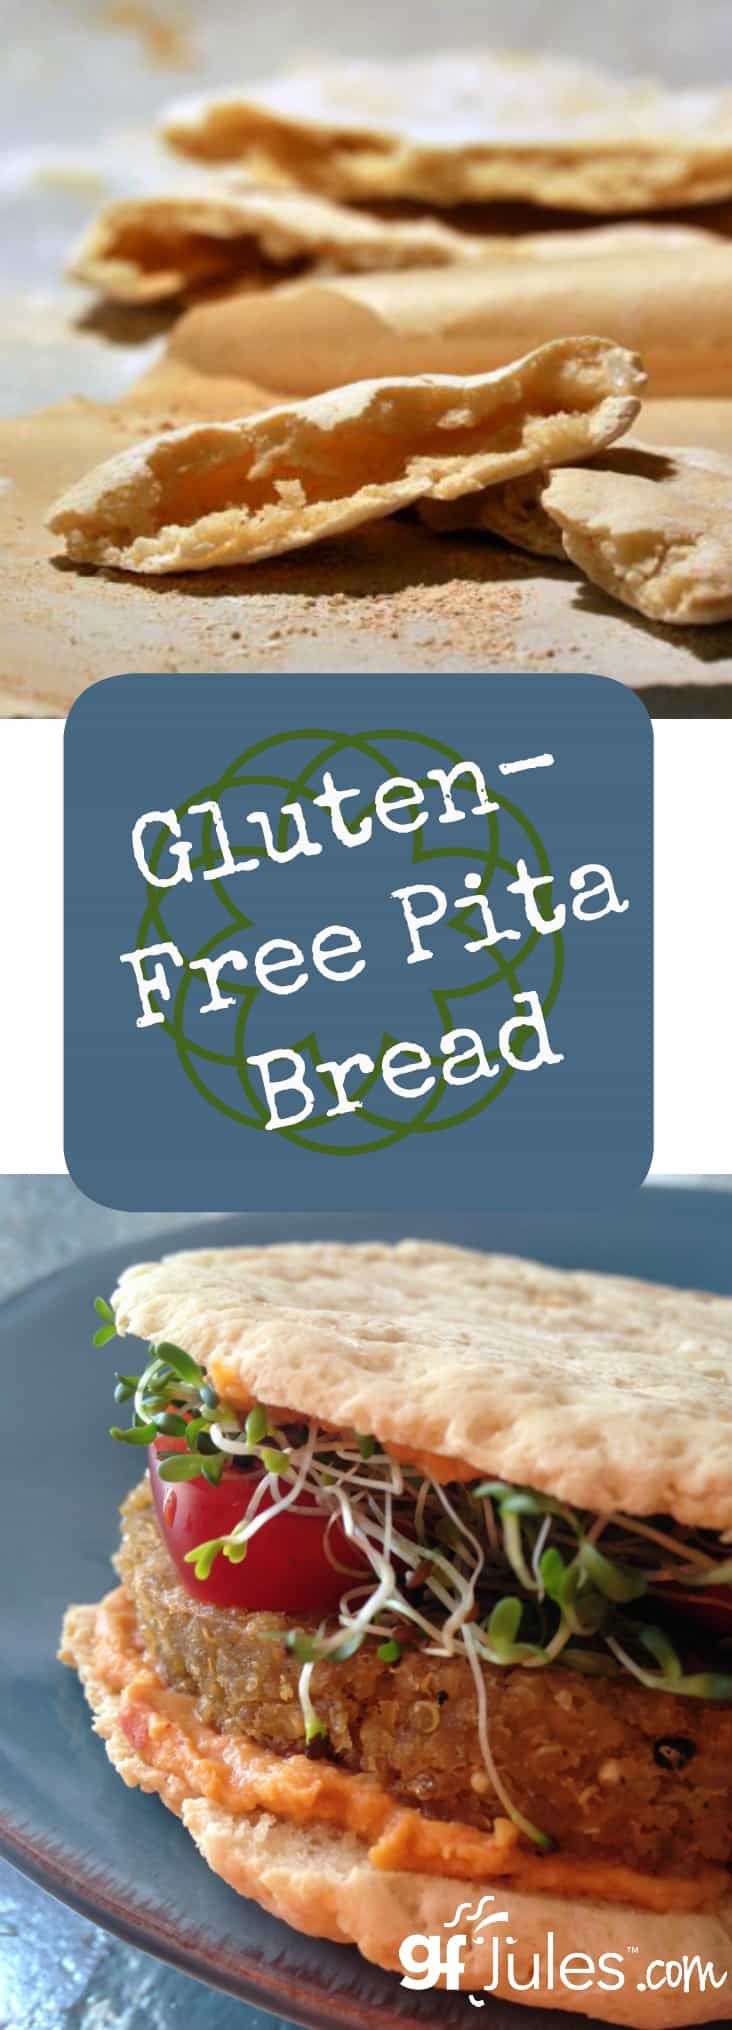
It holds up to whatever sandwich fixin’s you can throw into it or on it. Just like a good pita should. Or of course, you can use it for dipping.
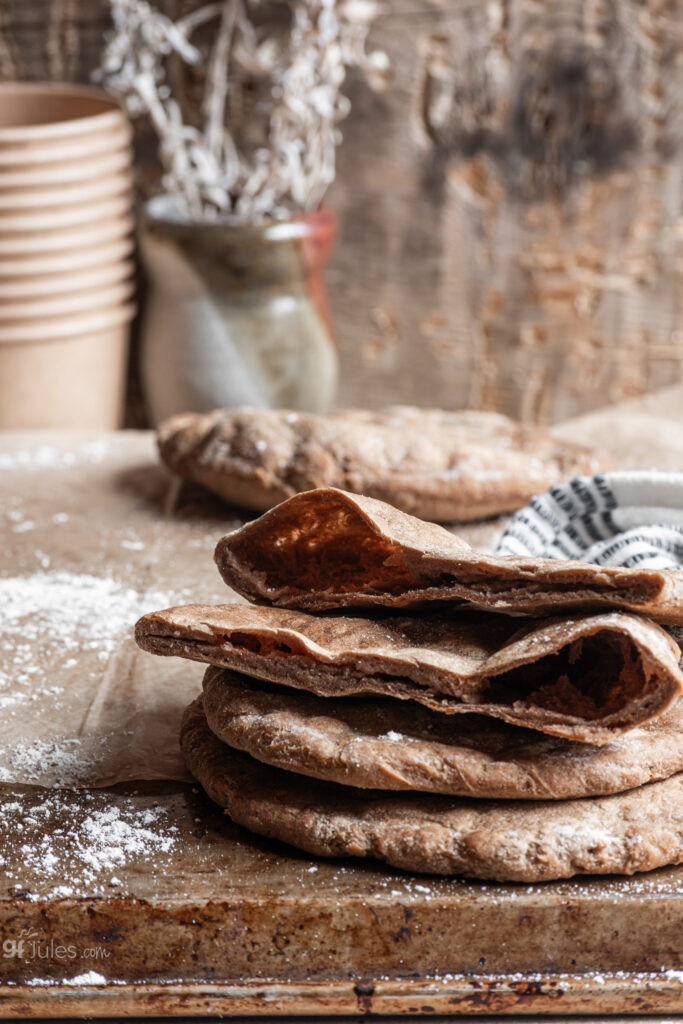
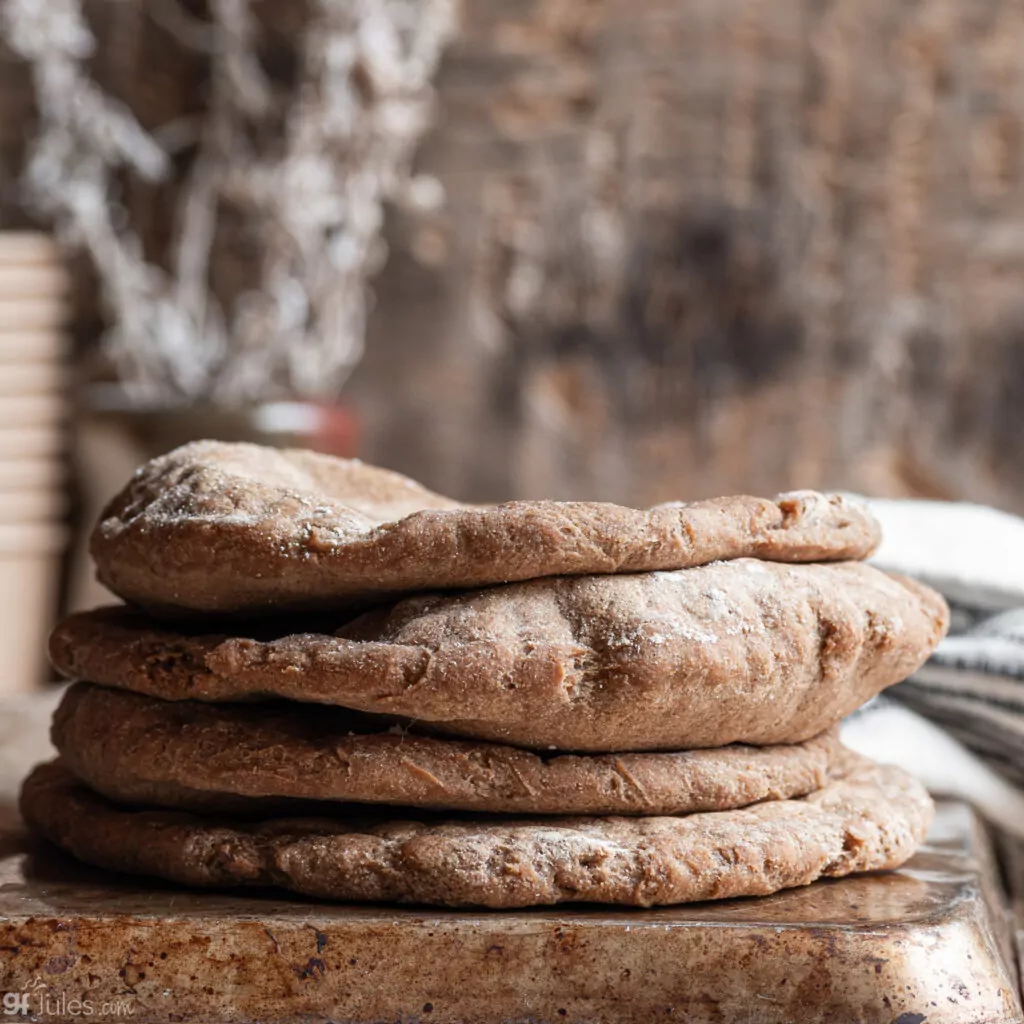
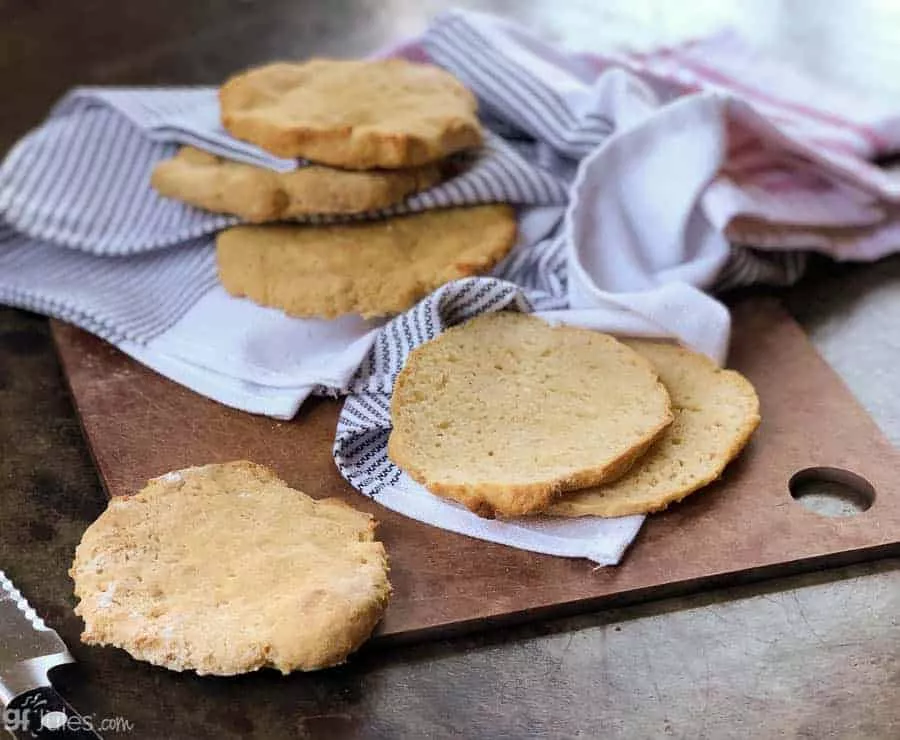
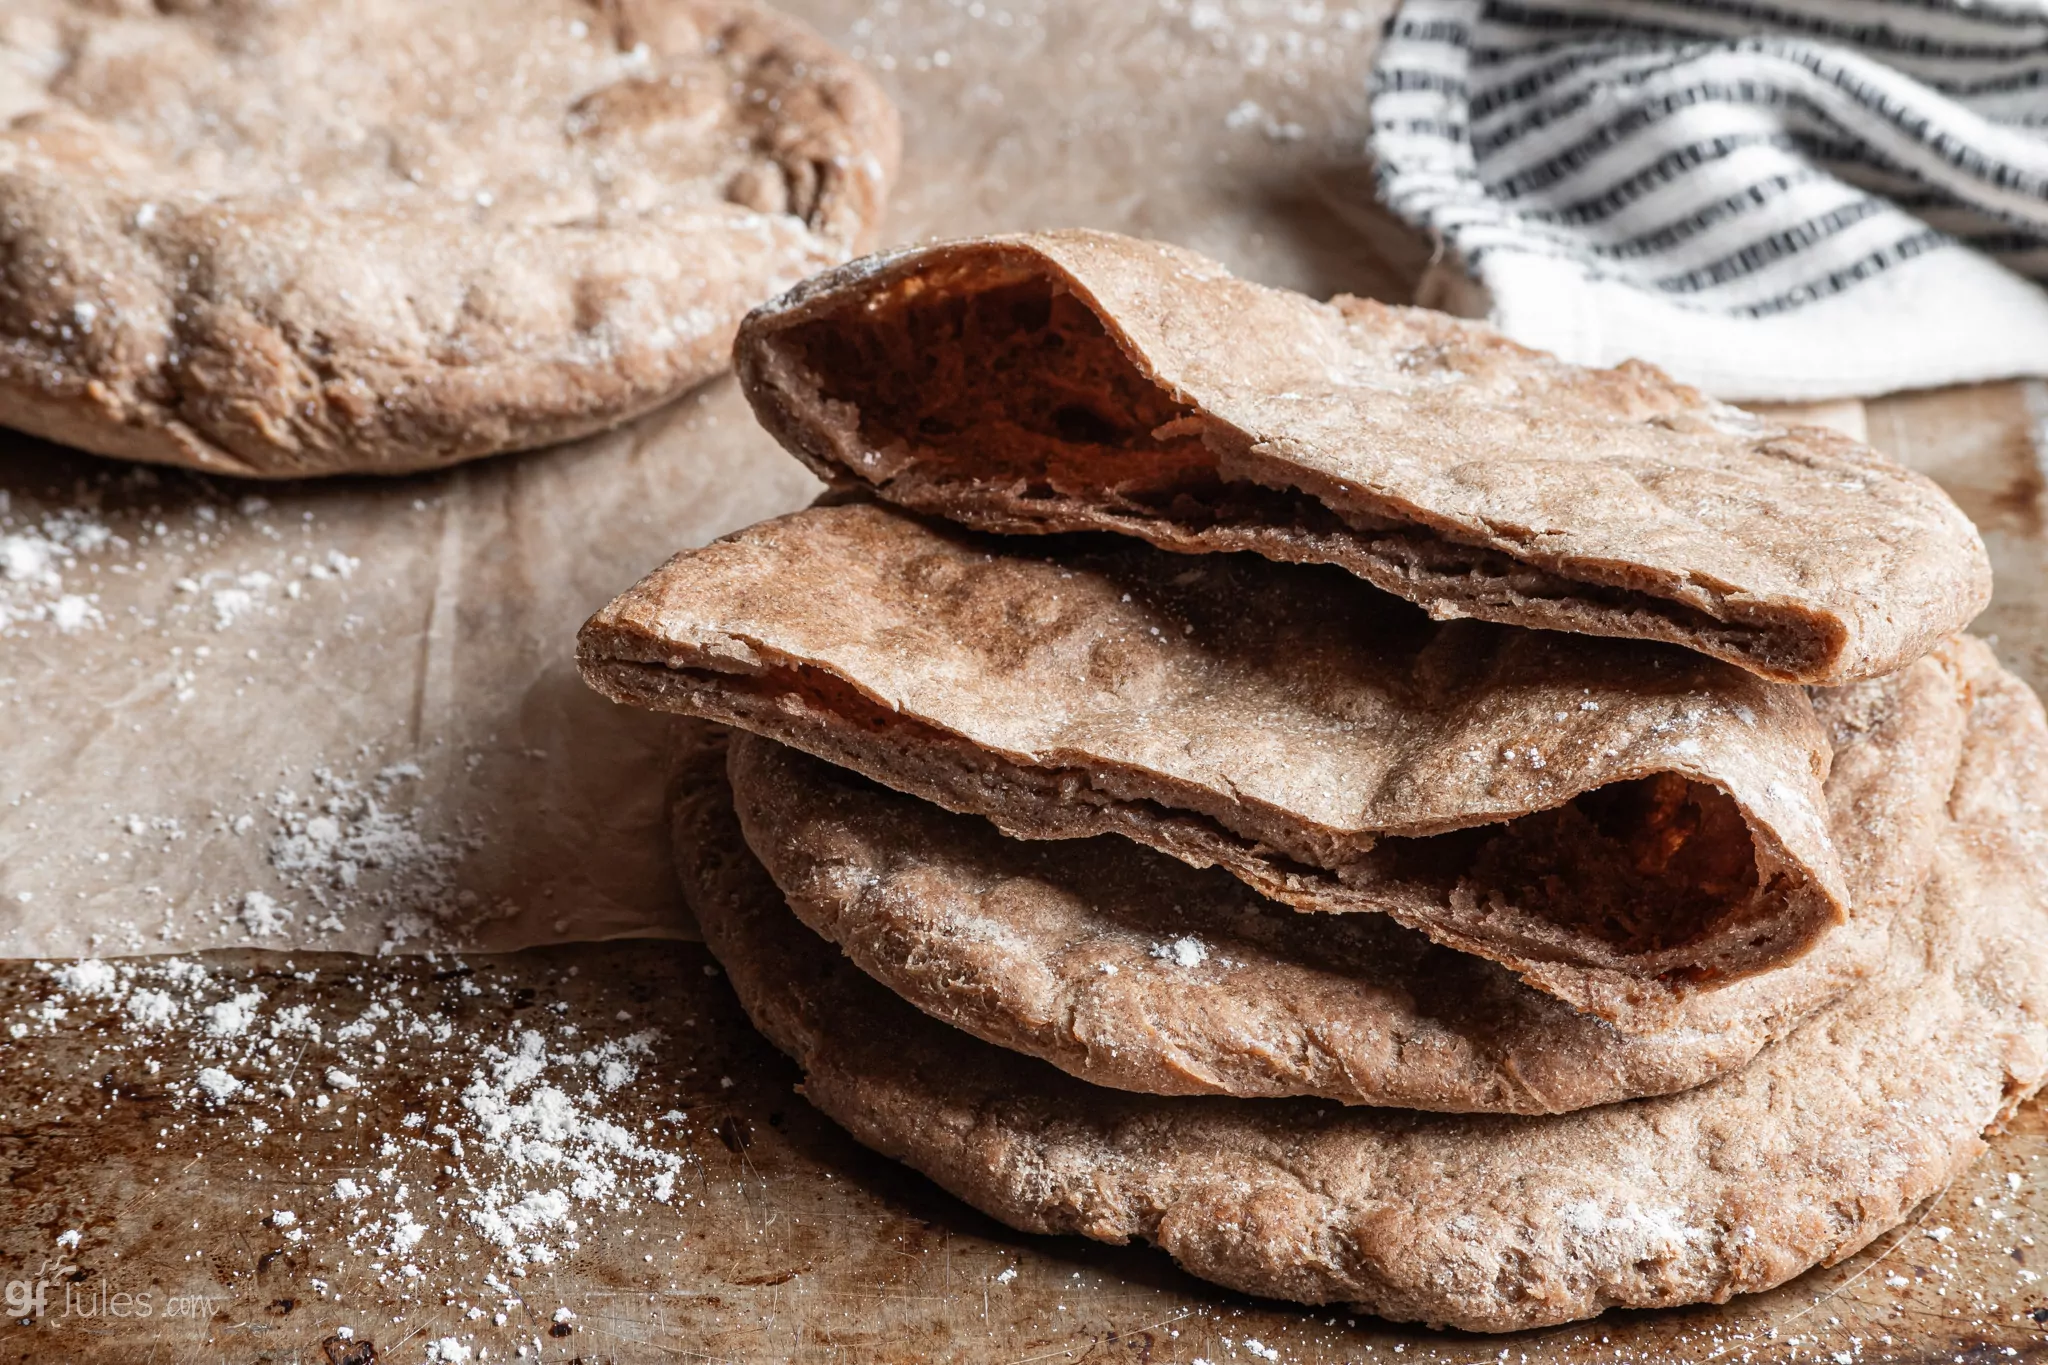
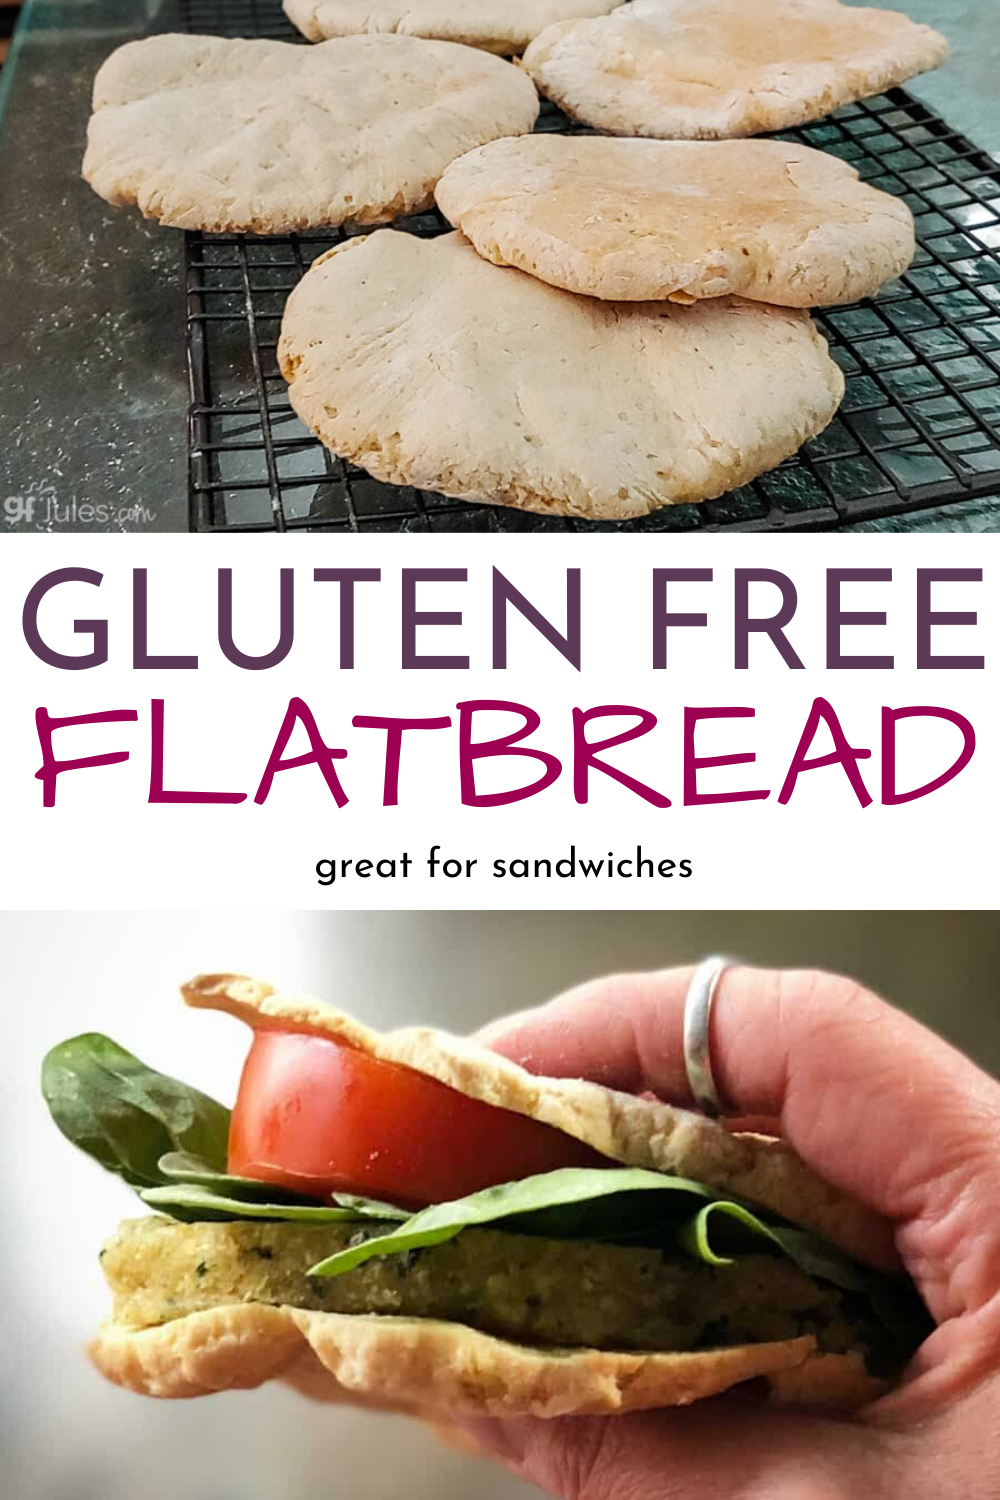
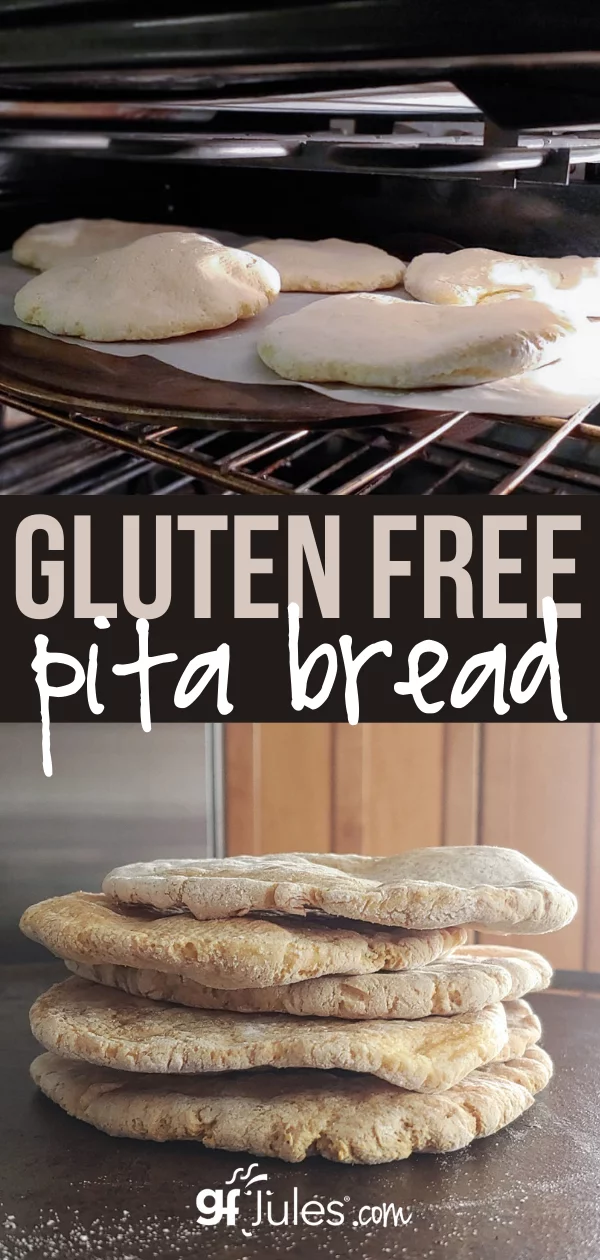
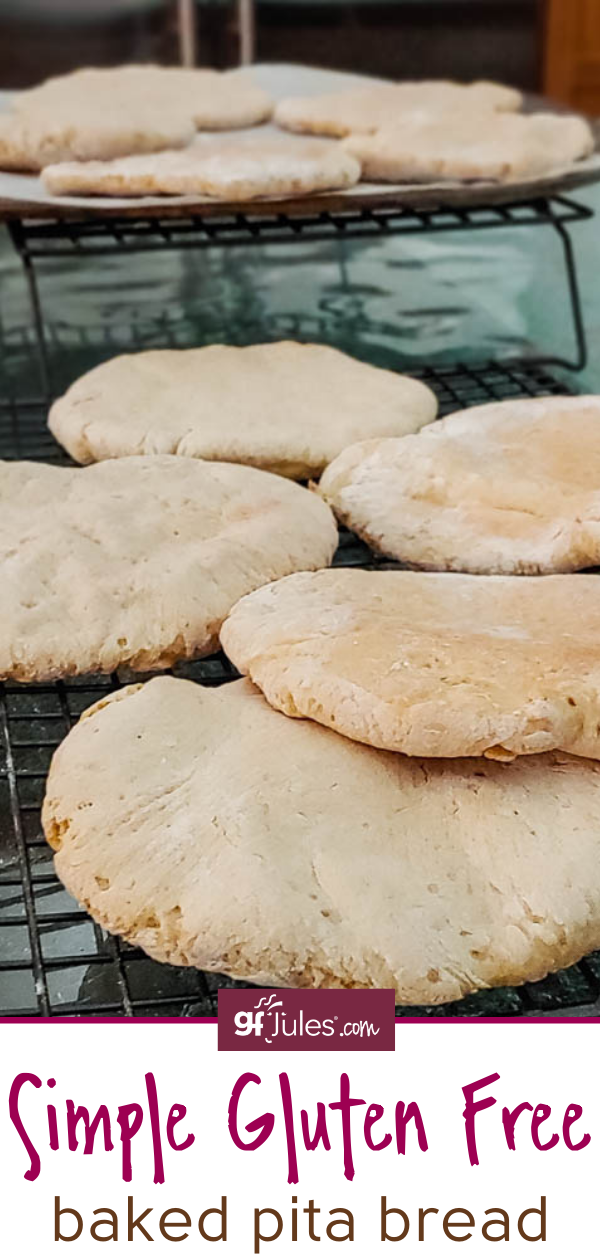
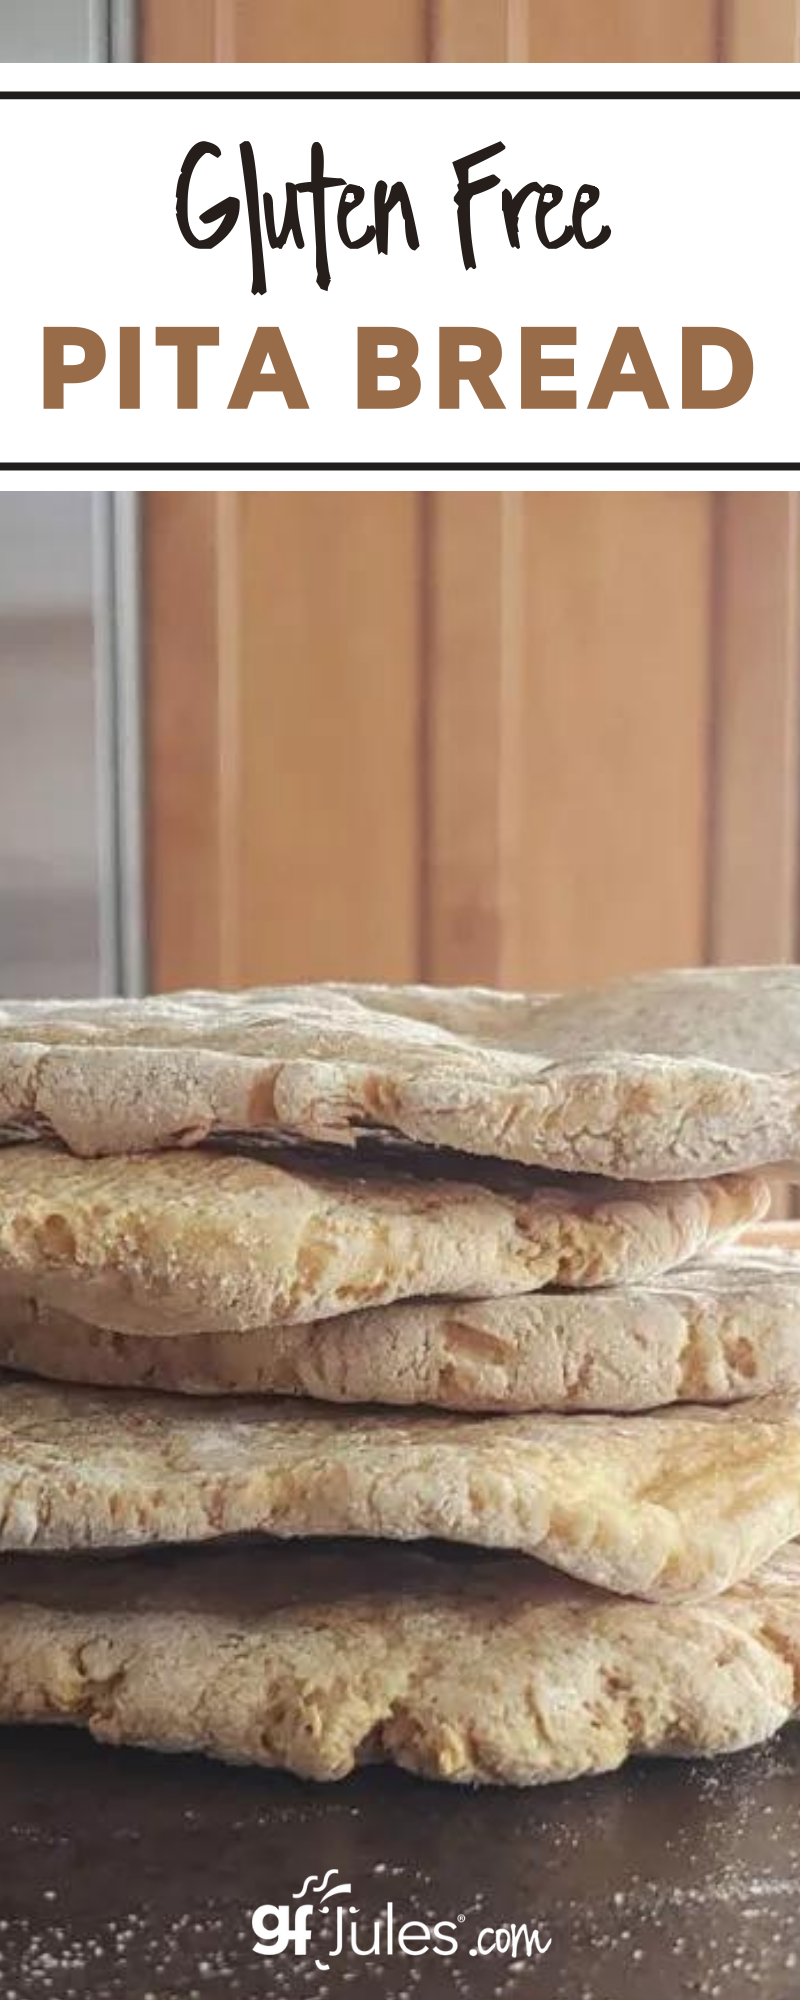
Just look at this beautiful stack. Ready in under 30 minutes — hard to beat that.
In fact, I always wonder why I don’t double the recipe because it’s so worth having these on hand in the freezer at all times for grab and go sandwiches of all kinds.
And speaking of sandwiches, remember those “sandwich thins” that used to be so great (back when we could eat wheat)?
Proportions are everything in a sandwich, and thin gluten free pita or flatbreads means more focus on the sandwich and all the goodies stuffed inside. Like fresh homegrown tomatoes … but I digress.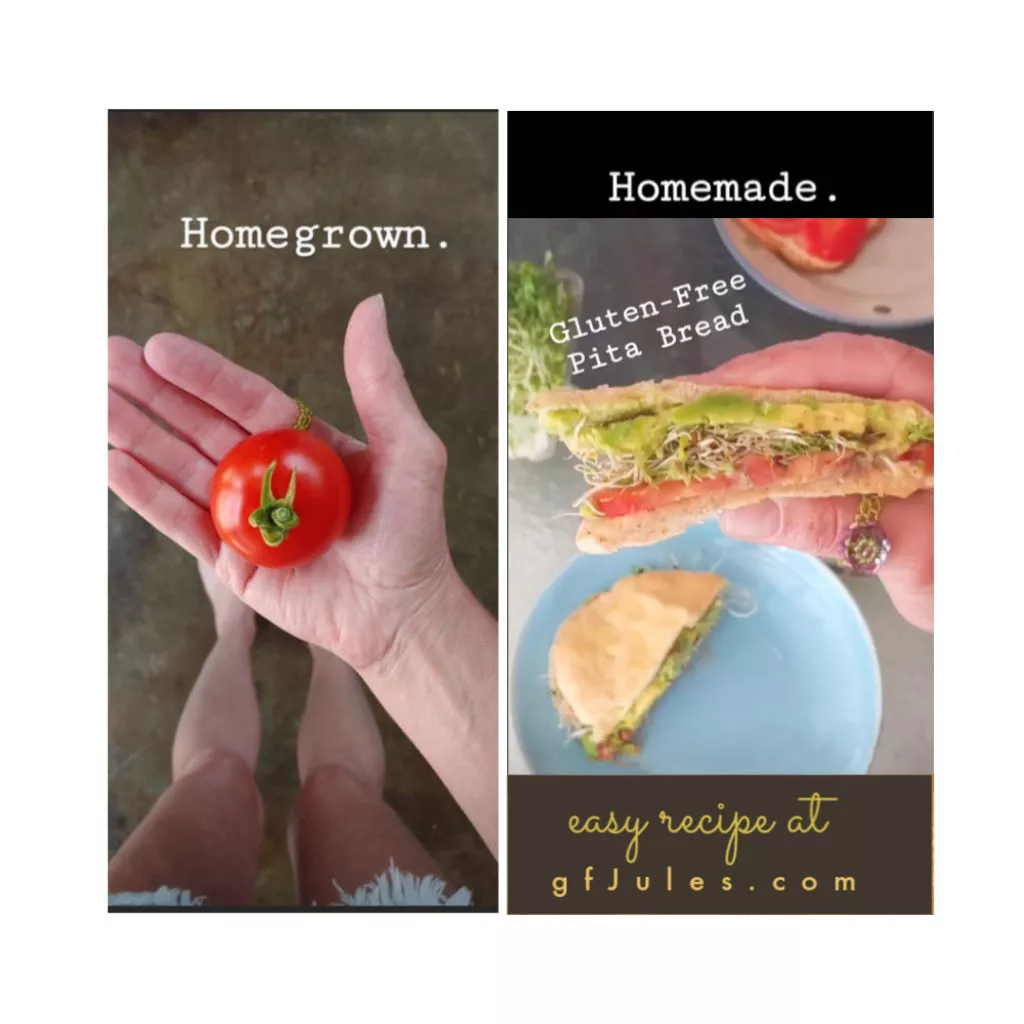
I actually developed this recipe when my oven was broken — a debilitating problem for any baker. I worked on this recipe for weeks, baking it so many times in so many different ways (and so many different ovens -thank you friends & neighbors!), that it has even occupied my dreams. (There’s hardly a dream worse for a baker than nightmares of burned bread!)
I’ve baked this gluten free pita or flatbreads recipe out at temperatures ranging from broiling to 300° F. I’ve tried it in commercial gas heat ovens, electric home ovens and even a gas grill.
Cast iron skillets are another method, believe it or not.

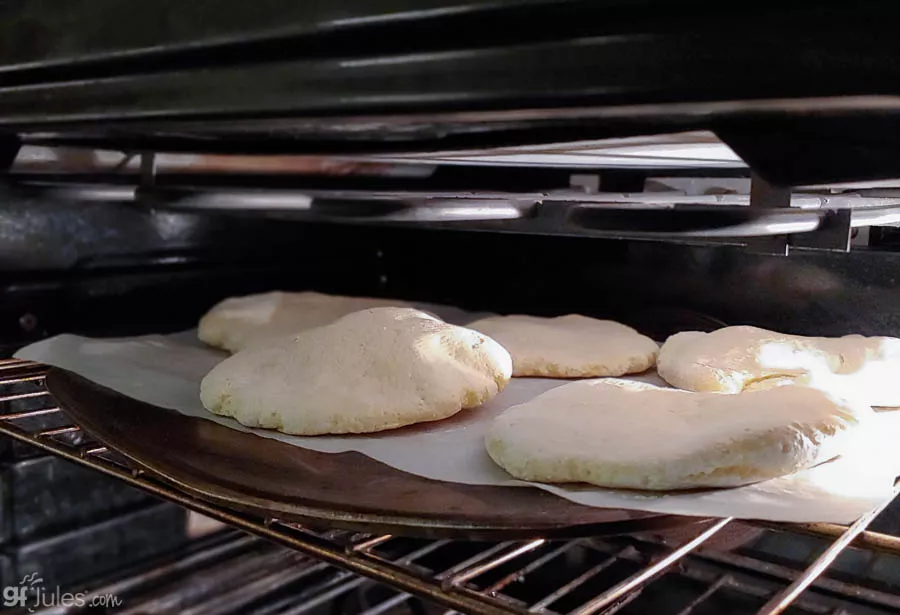
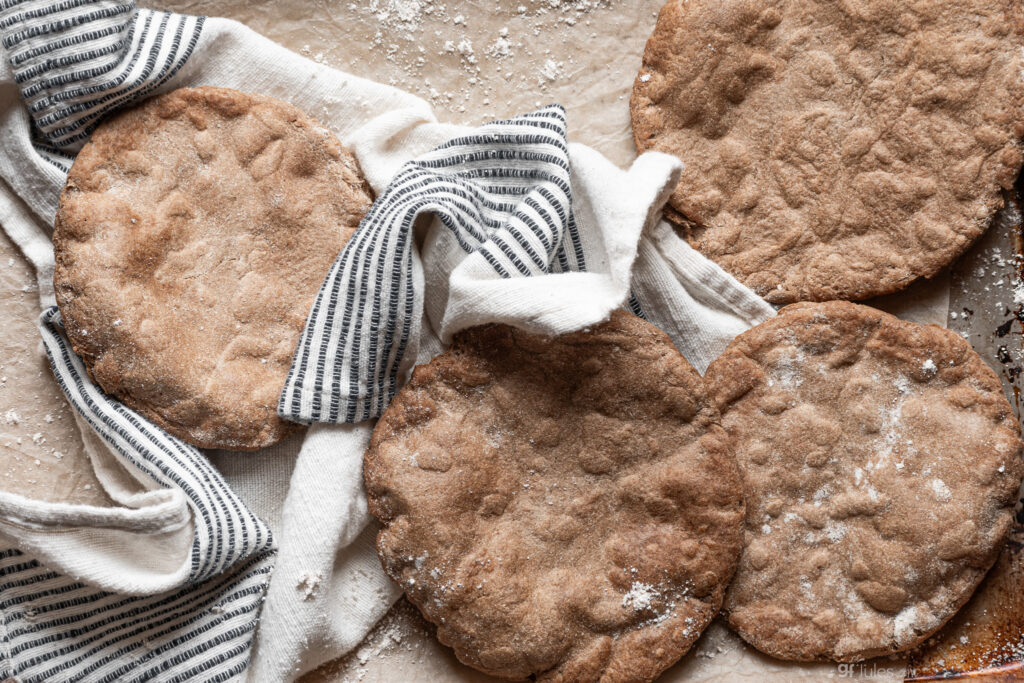
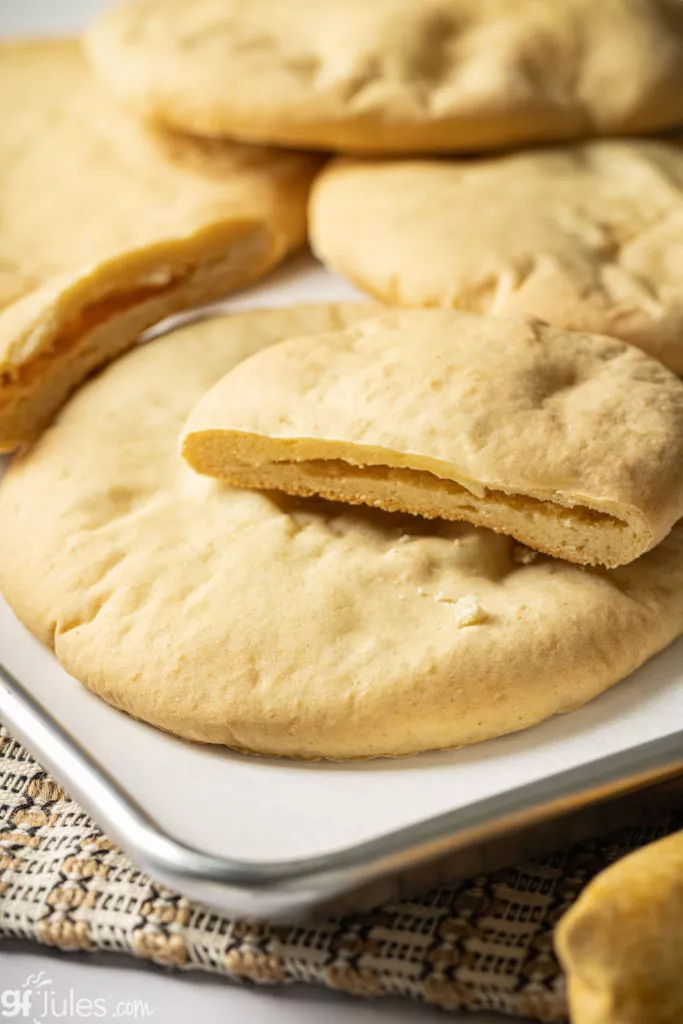
The net result is that, to get these beautiful breads to puff up enough to part the middles for soft pita bread to envelop your favorite sandwich filling, but crisp up enough on the outside to have a slight crunch and a gorgeous lightly browned hue, the dough needs to be mixed as little as possible. And the oven temperature needs to be just right — a perfect 425° F oven should do nicely.
And get those gluten free pitas close to the top heating element for maximum puffiness. I’ve learned that through many trials and errors (the error still taste yummy, too!).
Of course I must sheepishly admit that each time I baked this gluten free pita or flatbreads recipe while I was perfecting it for you, I and all others present ate every single batch, polishing off each one of these breads, regardless of whether we deemed the results “less than perfect.”
Even when these were cooked too long or not long enough or at a not-ideal temperature, they were still amazingly delicious!
That means that even if your oven isn’t cooperating or they don’t puff up in the middles for you or they’re a touch overcooked, they’ll still be yummy. But don’t wander away from the oven for long, because it is easy to cook them way too much!
Especially because there are so few ingredients in this recipe, it is critical that you use the right ones, namely the gluten free flour specified in this recipe. I hear from folks all the time who try my recipes and use different flour blends and combinations and wonder why they don’t turn out like pictured.
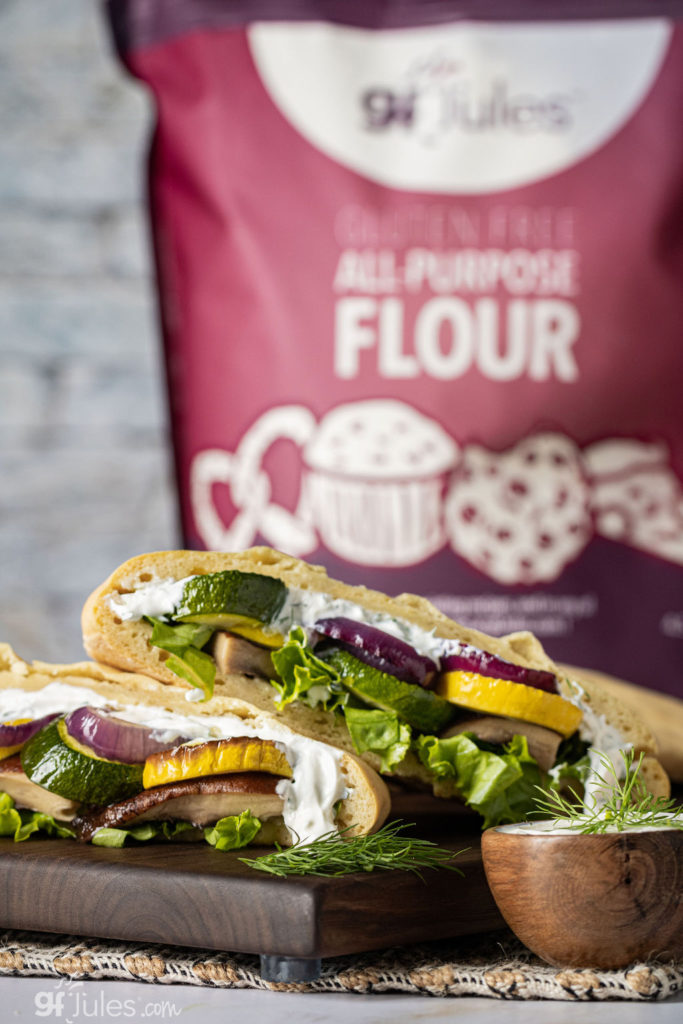
Gluten free flour blends are all very different (click here to read more about different kinds of gluten free flour); my award-winning gfJules™ Flour is fine, light, tasteless and adds stretch to recipes where ordinary gluten free flours fail.
That’s why it’s been voted #1 certified gluten free flour AGAIN in the Gluten Free Awards.

Don’t waste your time with gritty rice flour blends or funky tasting bean flours. Just don’t. If you want these yummy flatbread pitas to turn out right, use the right ingredients and you’ll be a happy baker. I promise!
So don’t be daunted by my trials and tribulations – you can bake this recipe with the right ingredients in a miscreant oven and still come out with pleasing results!
I even baked this gluten free pita or flatbreads recipe at our church with the 2nd grade Sunday School class and we all got our hands in the dough – it’s a wonderful, tactile experience that should be shared!
The recipe makes a wonderful gluten free Communion Bread option, too. Yeast-free and free of the top 9 food allergens plus gluten-free, it’s a Host that works well for intinction, as well. Even more inclusive if you use my grain-free gfJules Nada Flour!
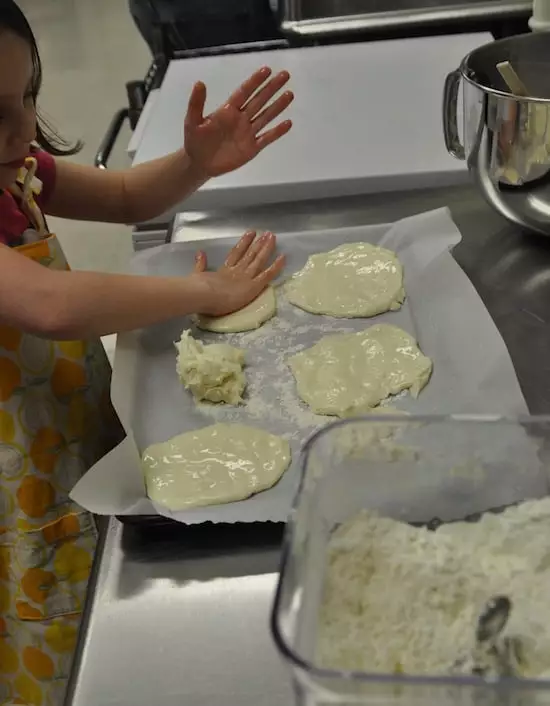
Keep in mind that if 2nd graders can spread this dough into delicious rounds, you can too. There are a few different ways of getting this dough into shape, some a bit less orthodox than others (pun intended) but none is wrong.
Beat it into shape with very well oiled hands or roll in more gfJules Flour and make it look a little neater. Again, no wrong answers.
Vegan, yeast-free, dairy-free, and of course, gluten-free or grain-free, there should be nothing keeping you from making this recipe soon and often!
If you’re looking for Gluten-Free or Grain-Free Naan Breads, check out my recipe for that flatbread as well!
Easy Gluten Free or Grain Free Pita or Flatbreads
Easy Gluten Free Pita or Flatbreads
Ingredients
- 1 3/4 cups (236 grams) gfJules™ All Purpose Gluten Free Flour OR gfJules grain-free Nada Flour (192 grams)*
- ¼ cup (16 grams) instant plain gluten-free mashed potato flakes (Idahoan® Original Mashed Potatoes; or Edward & Sons™ Organic)***
- 2 tsp. baking powder
- 1/2 tsp. baking soda
- 1/2 tsp. coarse sea salt
- 1/4 tsp. fine sea salt
- 3/4 cup + 2 Tbs. warm milk (dairy or non-dairy soy, coconut, almond, etc.)
- 1/4 cup warm yogurt (dairy or non-dairy soy, coconut, almond, etc.) OR 1/4 cup milk
- 1 Tbs. olive oil vegetable oil or coconut oil (melted)
- Additional oil to brush on tops
Instructions
- Preheat oven to 425° F.
- Place baking stone or metal baking sheet in oven while it is preheating. It should be on one of the upper-most racks, but not the very closest to the top of the oven.
- Whisk the dry ingredients together in a large bowl. Warm milk and yogurt, then add with oil to the bowl and blend, just until integrated.
- Mix until the dough pulls away from the sides of the bowl. If needed, add an extra 1 tablespoon or so of milk, to help the dough to hold together well; if the dough isn't holding together and pulling away from the sides of the bowl, it won't hold together when pressed into rounds, so be sure enough liquid is added at this stage. The goal is for the dough to hold together and be slightly sticky but not wet; not dry or crumbly at all.
- Sprinkle a dusting of my gfJules™ Flour or Nada Flour onto a pastry mat or clean counter. Roll the dough in a small amount of gfJules Flour to keep it from sticking. Gently roll into a wide log and cut into 5-6 equal sized portions.
- Roll each portion in a small amount of gfJules Flour and lightly roll out in all directions to a thickness of about 1/4 inch -- no thinner, and it does not need to be even thickness; some unevenness leads to more puffiness in the baked out breads. Transfer to a piece of parchment dusted with more gfJules Flour.
- Repeat with remaining dough. Brush the tops with oil and slide parchment onto hot stone or baking sheet that has been preheating in the oven.
- Alternatively, scoop out equal portions of dough onto parchment and spread with well-oiled hands, pressing out with the palms of your hands to an uneven thickness of around 1/4 inch. Slide parchment onto hot pan.
- I recommend monitoring this recipe in your oven the first time you try it. Bake for 10 minutes, OR until the breads are puffing up and browning slightly. Flip to the other side and bake for an additional 3-4 minutes. (You may also pan saute the breads lightly to brown the high points like traditional naan baked in a tandoor oven.)
- If you tear open one of the breads, it should be fully cooked and have some pockets of air; it should not be gummy or look uncooked inside. If it is gummy or not fully cooked, return to the oven and monitor until fully cooked. That being said, these breads may appear slightly gummy when hot out of the oven; let them cool for at least 5 minutes before tearing or cutting so the structure of the breads will set first. Note the times and temperatures for your oven, so that next time you bake these flatbreads, you will know what produces the best results with your oven.
Video
Notes
** Please keep in mind that nutrition information provided is per serving, which may vary. While we have taken care to provide you with the most accurate nutritional values possible, please note that this information may differ significantly depending on the exact ingredients and brands that you choose to use to make this recipe. Additionally, where options are given for ingredients, the resulting calculation may include all ingredient options instead of only one per line, skewing the totals significantly.
I can’t wait to hear what you think!
Pin this recipe for later!


Awesome recipe! I had Bobs GF 1/1 flour blend on hand so that’s what I used. I had to add another 1/4 cup of warm milk( probably because of the different flour) but they turned out fantastic!! I cut them into triangles and served them with a gf bruschetta cheeseball!!
I’m so glad you loved the recipe, and good to know you made it work with another blend. I’m always curious to see how that turns out. I’d love to know what you think if you try it with my flour next time.
Happy baking!!
~jules
are there any dairy free substitutes I could use?
Hi Leslieg – the recipe is written dairy-free. In fact, all my recipes are made dairy-free. Enjoy!
~jules
Hi I live in Perth,Australia and it appears this flour is only available in America or by mail. Do you know of an equivalent over here? They look great and wanting to try them for a dinner party tomorrow night. I have e been trying them with yeast to no avail. Hope you can help.
If you can get rice flour, tapioca flour, and xanthan gum, you can make your own flour mix that works great for everything. Mix together 24 oz. each of white rice, brown rice and sweet rice flour, 20 oz. of tapioca flour and 2 Tablespoons of xanthan gum. Be sure to mix well. This is the flour mix I use for all things baked. Hope this helps.
Hi Janelle, have a look at this article on gluten-free flours and creating your own blend with what you have on hand. I hope it helps! https://gfjules.com/gluten-free-flour-comparison/
~jules
Hi Jules! Jen and I want to make Roasted Vegetable flatbread recipe I found on Pinterest.
Can we make the flatbreads larger, like maybe the size of a small rectangular pizza?
Thanks. Dot
Hi Dot – sounds delish!!!! I can’t wait to see pics! You can make the flatbreads bigger and rectangular but I wouldn’t go to big to make sure they bake in the middle and aren’t gummy, you know what I mean? Let me know how it goes!
~jules
These look like some Cloud bread I made once. Are they similar? I don’t have the recipe I used.
I think cloud bread is only eggs and cream of tartar, at least the recipes I’ve seen.
thanks! That was my recollection that they were all eggs, but I couldn’t remember off the top of my head!
~jules
L, the cloud bread I made uses yogurt too.
It does look a little like cloud breads, but from the cloud bread recipes I’ve seen, they are very different and the texture inside is also different. Give it a try and let me know what you think!
When substituting yogurt for milk, does the milk need to be warm or cold? The 1/4 cup of milk in the recipe calls for it to be warm anyway, but seeing as yogurt is cold, i’m guessing the substitute milk should be cold too??? Or does it matter, so maybe room temperature then??
Hi Orla, it’s generally a good idea for all ingredients to be room temperature when adding to recipes, unless it’s something where the butter is specified to be cold. In this recipe though, there is no yeast and no egg, so it’s less critical for the milk and yogurt to be room temperature, although you may find that they integrate better when they are all the same temperature. I hope this helps!
~jules
Total disaster. They didn’t stick together and they stayed flat. I think they should be called Pita Pucks! I think they need an egg. Didn’t use your GF flour, but used RobinHood GF flour. Tell me what I did wrong. I followed the recipe exactly.
Hi Janice, I’m sorry you didn’t have success with this recipe, but if you’re not using my flour, that would be the problem. All gluten-free flour blends behave totally differently, and perhaps the blend you used would need more liquid or an egg. I haven’t worked with that blend before. Here’s some more information on different gluten free flours so you can compare what’s in that blend and maybe even make a blend yourself that would work better with the recipe I give. I know folks in Canada often make one of my homemade blends if they don’t live close enough to the border to order my flour more inexpensively. I hope that helps!
~jules
I am not able to find the flour that you suggest here in the UK.I am disabled and live in a rural area so even on-line shopping is not easy. It is very hard to find all of the difficult ingredients to make a flour blend and if recipes can only use a specific brand then it makes our lives even more difficult.
Hi Angela, have a look at this article on gluten free flours with a ratio recipe at the end. Hopefully you can find some of these component flours and make a blend at home that you can use in my recipes. All the best,
~jules
A real gf gyro?! Wow! Just finished the gf hamburger buns. They turned out great…just need a little longer baking time in my oven next time. Time to order more gfjules flour.
You bet, Marilyn! So excited you loved the hamburger buns, too! I can’t wait to hear what you think of having a real gyro again!
~jules
This bread looks absolutely delicious! Another must try recipe. Pinned!
Thanks, Elle! Can’t wait to hear what you think!
~jules
Wow! These look so light and fluffy and perfect for some great sandwiches! Thank you!
You are so very welcome, Jennifer – enjoy!
~jules
I have been thinking about Pita bread lately. We have a vegan/gluten free place that sells them for 4.00 a piece and I can’t bring myself to pay that price, but I love pita bread, I can’t wait to try this recipe!
OUCH! That’s a crazy expensive pita! Good that you’re now armed with the tools to make them yourself for coins, not dollars! 🙂
~jules
I totally want that pita wrap right now!! <3
Well, now you can make one anytime you like, Chandice! 😉
~jules
This looks fantastic! Can’t wait to try it!
Wonderful, Nancy! I can’t wait to hear what you think when you make them!
~jules
Im over the moon about how amazing these look!
Thanks Emily! It’s one of our favorites! I always have some in the freezer – they’re perfect for sandwiches or flatbreads made into pizzas or even to take to an Indian restaurant when I want my own naan.
~jules
Can the dough be frozen or do you mean to freeze the bread once it’s baked?
I haven’t tried to freeze this dough, but it once baked, it does freeze well.
~jules
Avoiding nightshades and gluten due to my skin condition, I have been looking for a GF bread recipe that would have a normal bread texture and I have just found it! Thank you Jules.
I did substitute all of the flour with 1.5 cups buckwheat and 0.5 cup cornflour, it turned out beautiful with lovely crust and fluffy inside. I am so happy, this will become a regular one for me
Oh Liisa, that is so fantastic to hear! I’m thrilled that you have a new go-to real bread recipe that suits your dietary needs. Happy Baking!!!
~jules
hi there
OMG! These are amazing!!! My world has just opened up. Thank you !!!
once these are made, are they freezable?
Hi Karla,
YES! I freeze them all the time. Actually what I do is cut them open (once cooled) and then put them in a freezer bag. I take out a pair and toast it for sandwiches at lunch and they’re fantastic! So glad you love the recipe, too!
~jules
Can you substitute. Almond meal for flour?
Hi Maryann, although you could use some portion of almond flour in place of my gfJules flour blend, I wouldn’t recommend a whole substitution. The almond meal has a totally different texture, consistency and moisture retention properties, as well as the fact that there would be no binders if you only used almond meal. I don’t think this recipe would turn out as you’d hoped, and certainly not as pictured. If you’d like to use some almond meal in place of my flour, I’d start with 1/4 cup and see how it turns out — take good notes so you know for next time, and let me know if you experiment. I’d love to hear about your results (I’d be in the kitchen all day every day playing around with this kind of thing if I could!). 🙂
~jules
Made this tonight and it was so good. I used it to make a pulled pork sandwich.
Last night I used your pizza crust mix. It was delicious, however, it seemed to result in “flaring” up a rash problem I have. I think I may need to avoid yeast. So that leads to the question, is there any yeast-free way to make your pizza crust mix?
I am wondering the same thing about your bread mix?
I recently purchased value size boxes of each of these and want to be able to use them. Thanks for any help you can provide. It is so nice to be able to eat somewhat closer to normal. And I love that your products have such excellent flavor.
Hi Mary, so glad you’re enjoying the recipes and my mixes!!
I have had readers tell me they’ve used my pizza mix without the yeast and they like it a lot – it will be more like a thin crust, cracker-style crust, but as you mentioned, the flavor will still be good. You could also try adding 2 teaspoons of baking powder to the mix to give it a little more puff!
There is already some baking powder and baking soda in the bread mix, so maybe bake the bread as rolls instead (use muffin tins) so there’s less weight in the dough for the chemical leveners to rise it.
Let me know how your experimenting goes!
~jules