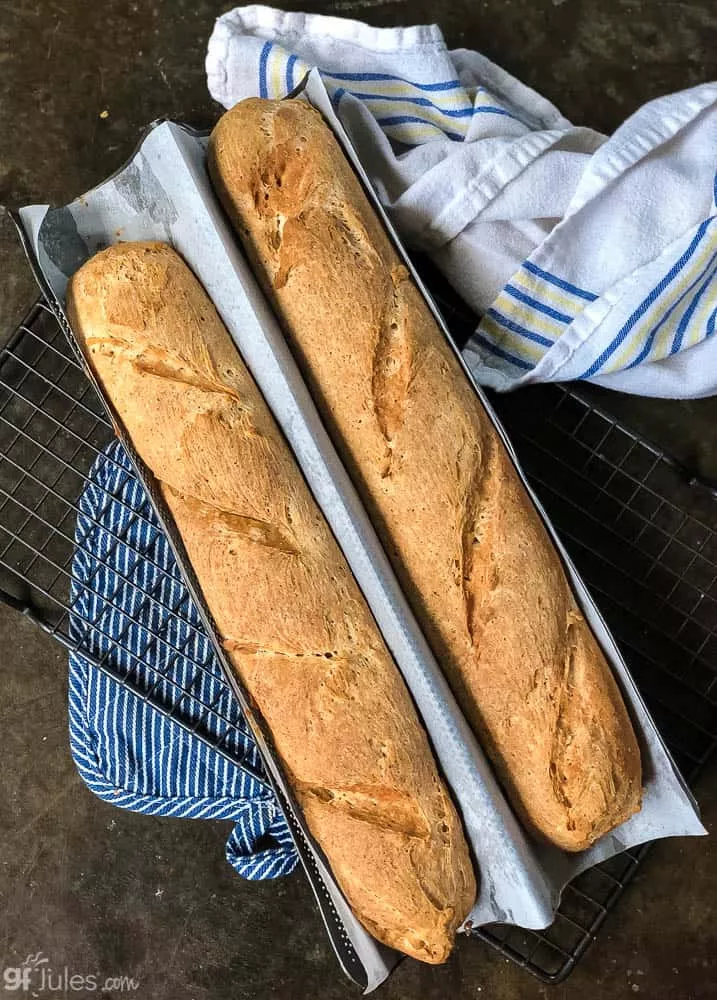
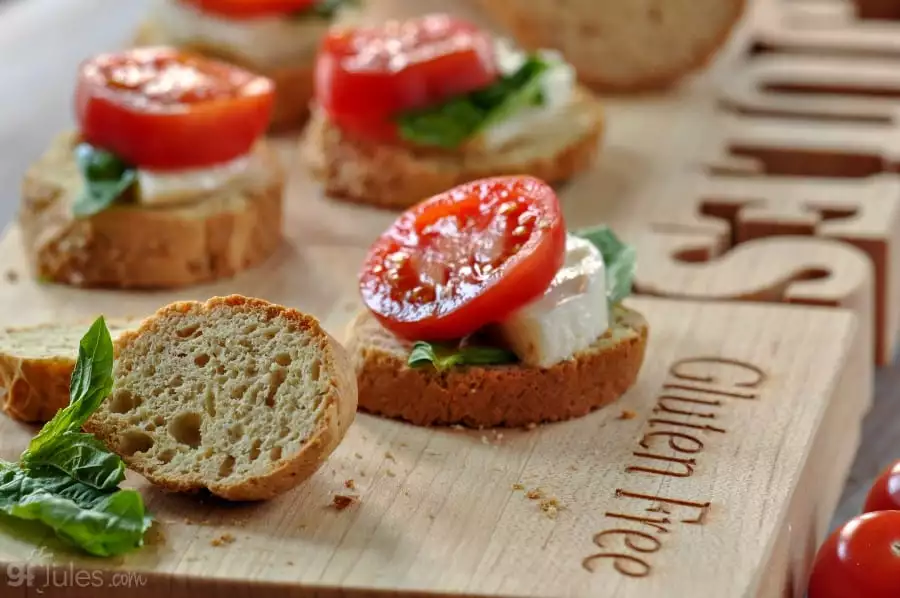
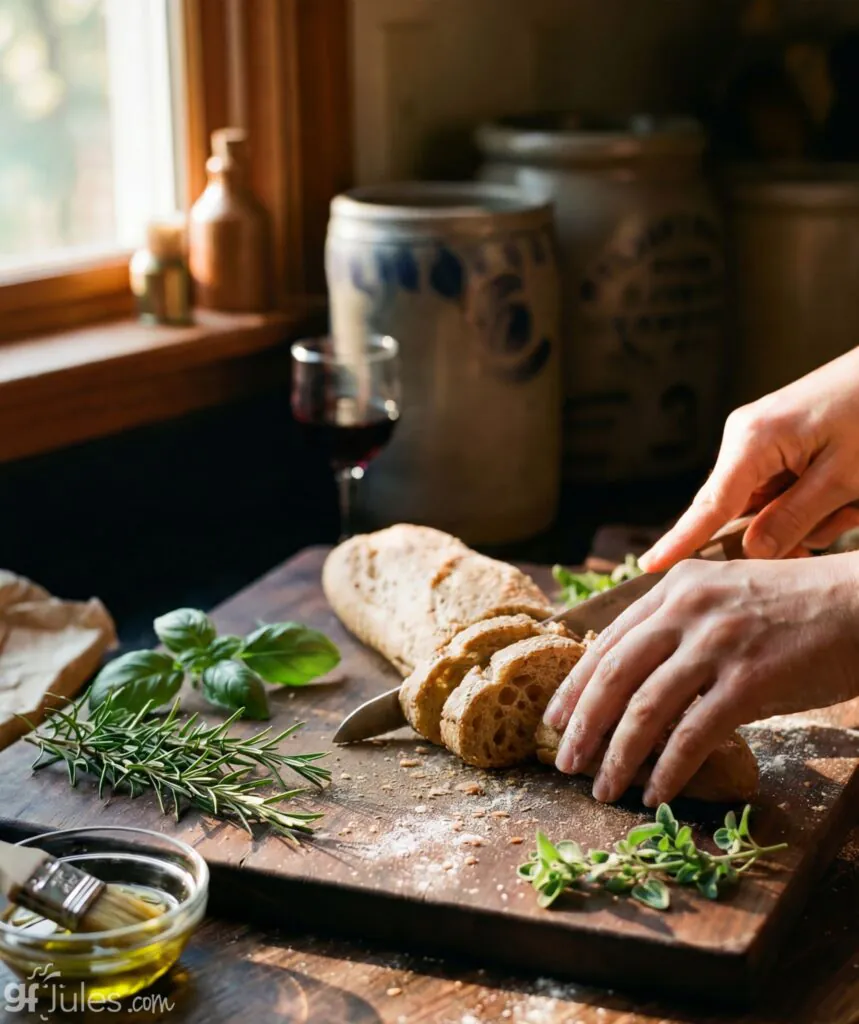
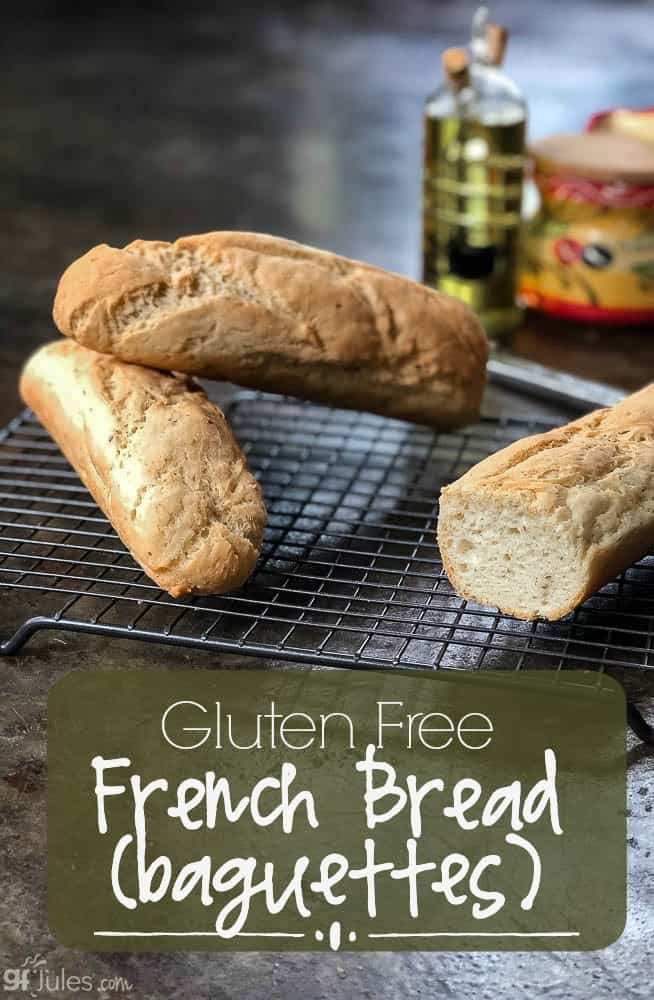
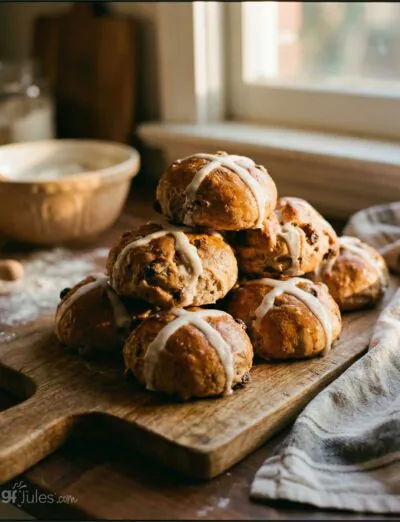
One of the most popular recipes I’ve shared at gluten free food expos is my gluten free baguette recipe. It draws a crowd every time. The smell of fresh-baked yeast bread, the classic crust, the crunch on the outside with the pillowy soft centers … I haven’t met anyone yet (gluten free or not!) who didn’t think this gluten free baguette was incredible.
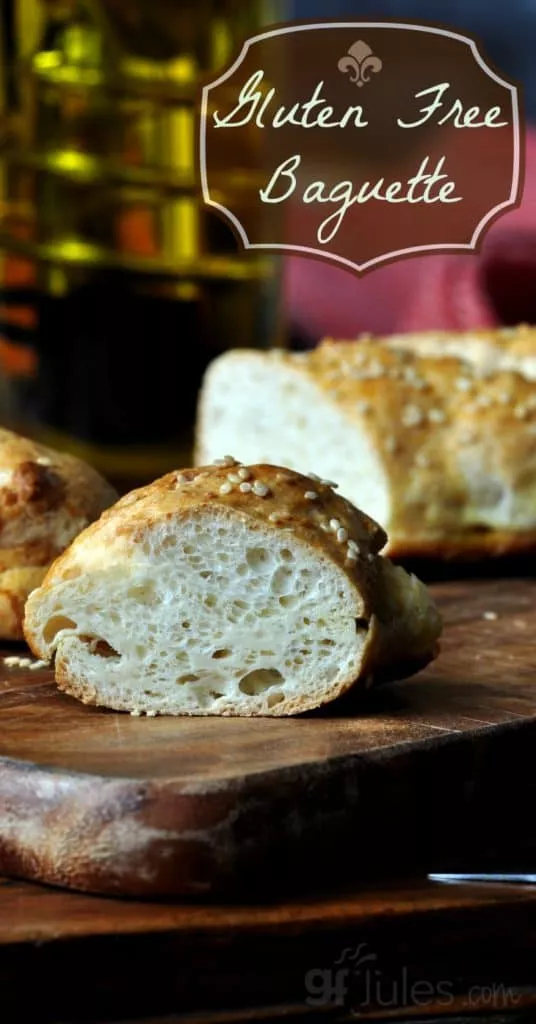
There are THREE ways to make this gorgeous gluten free baguette:
- Using my From-Scratch Gluten Free Baguette Recipe posted here (or click Jump to Recipe at the top of the page to skip right to it)
- Gluten Free Baguettes made with my gfJules Gluten Free Bread Mix (click here to jump to this recipe) and it’s vegan!
- Gluten Free Italian Loaves/Baguettes with my gfJules Gluten Free Pizza Crust Mix (click here to jump to this recipe)

What’s the Secret to Baking Great Gluten-Free Baguettes?
Over the years I’ve devised a few gluten free baguette making SECRETS which I’ll share with you (since we’re friends) to help get this gluten free French Bread just right. (Don’t miss out on the ingeniously simple technique I show in a quick video, so keep scrolling!)
But it all starts with the gluten free flour. Aside from water, it’s the primary ingredient, so you know it’s got to be right. My gfJules Flour is the key to so many great recipes, not least of all, great gluten free bread.
3 Methods To Making Gluten Free Baguettes
There are a couple easy ways to bake up heavenly bread like this beauty. One is to use my gfJules Pizza Crust Mix. I know it sounds crazy but it’s a no-fail, so-easy-you-could-make-it-every-night critical ingredient.
The gluten free Italian loaf / baguette recipe using my gfJules Pizza Crust Mix has the unmistakable herbs of your favorite Italian recipes baked in, plus the soft bread and old world crust combination we all love. (This recipe is easily doubled, by the way, just use the entire gfJules Pizza Crust Mix and have enough to share!)
Another version is made with my gfJules Gluten Free Bread Mix — with this updated mix, you don’t even need a pan or eggs! My gfJules Bread Mix also makes a delightfully crusty loaf without having to spritz with water or use a special baguette pan with holes. It makes things super easy all around.
Using one of these mixes is the most reliable way to get this delicious bread to work, since milk powders with the scratch version differ and produce varying results.

Of course you can always bake these gluten free baguettes from scratch with my gfJules Flour by simply following the recipe below.
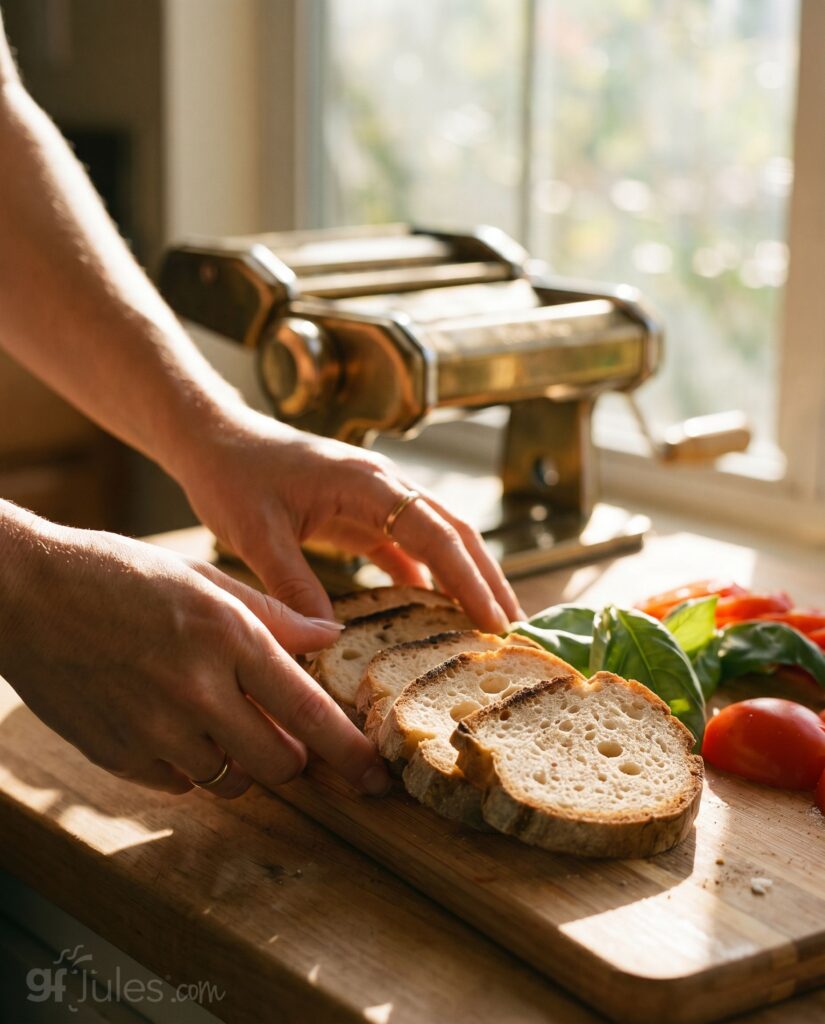
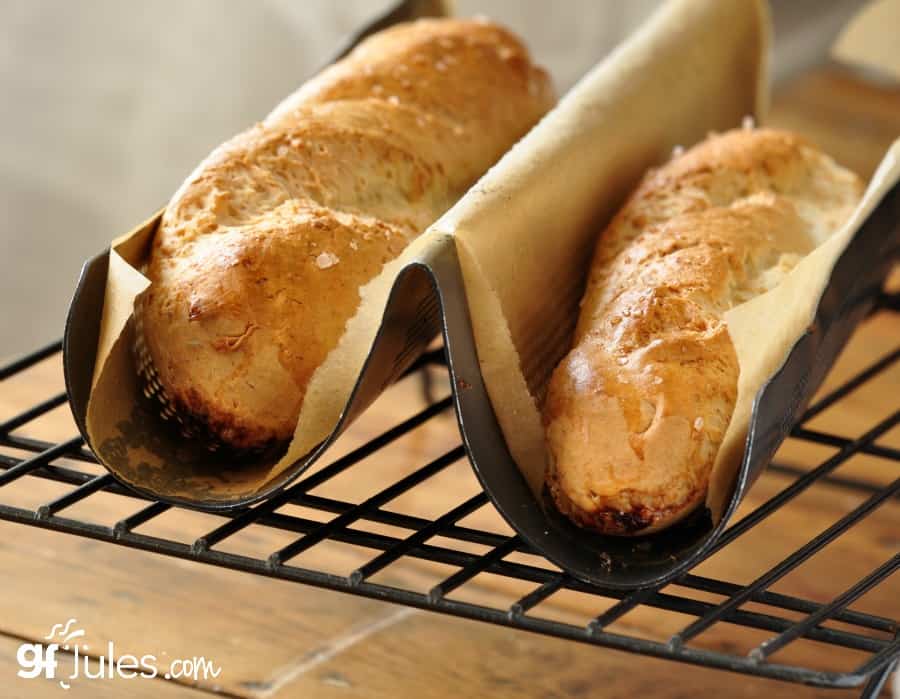
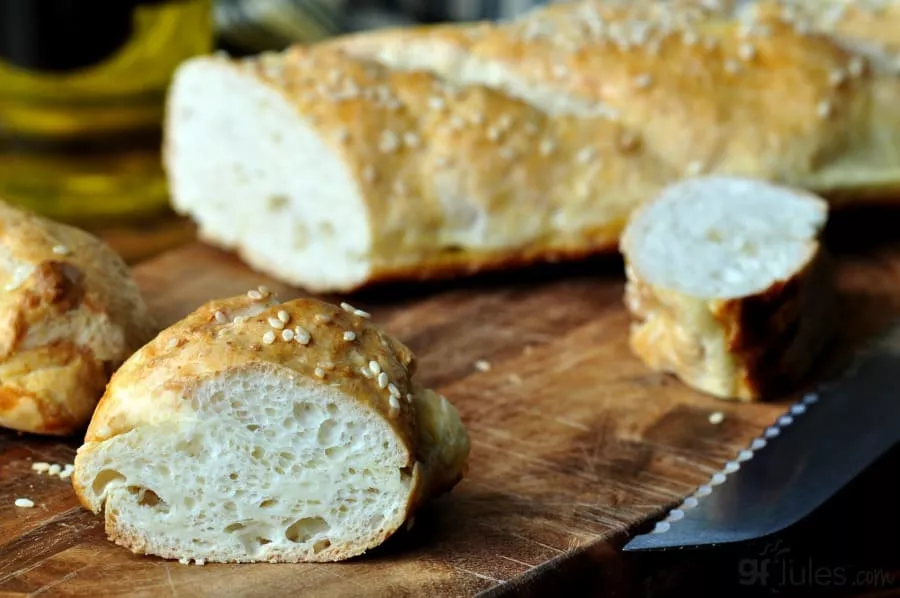
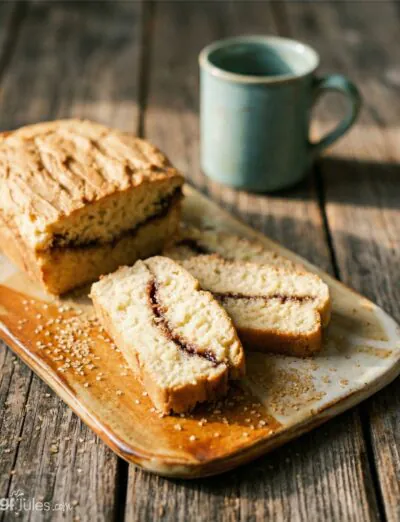
You can see from this photo that the texture is light, with nice air pockets throughout and a well-defined, crunchy crust. It’s a great way to get homemade bread quick! Only 20-30 minutes to rise and 20 minutes to bake — how’s that for a win-win?
There are other things you can do to help if you’re baking from scratch, though. The easiest trick is to hand spritz with a spray bottle of water and to place a baking sheet on the bottom rack of your oven with ice cubes on it to continually add steam to the oven during the bake.
You need a clean spray bottle and you’ll want to spritz, spritz, spritz throughout the baking process by peeking into your oven without letting too much heat out if you want your baguette to be more crunchy. Brushing with egg wash (1 full egg mixed with 1-2 Tbs. water) will also help to make the outside crunchier and nice and brown.
If you’d prefer to make a softer loaf, don’t spritz, and cover the bread during the second half of the bake time with foil to keep it soft all the way through.
A third secret is the method. Take a moment to watch my quick video to see just how easy it is to make a beautiful baguette without even getting your hands dirty! (This is the method you’ll use if baking from scratch or with my gfJules Gluten Free Pizza Crust Mix.)
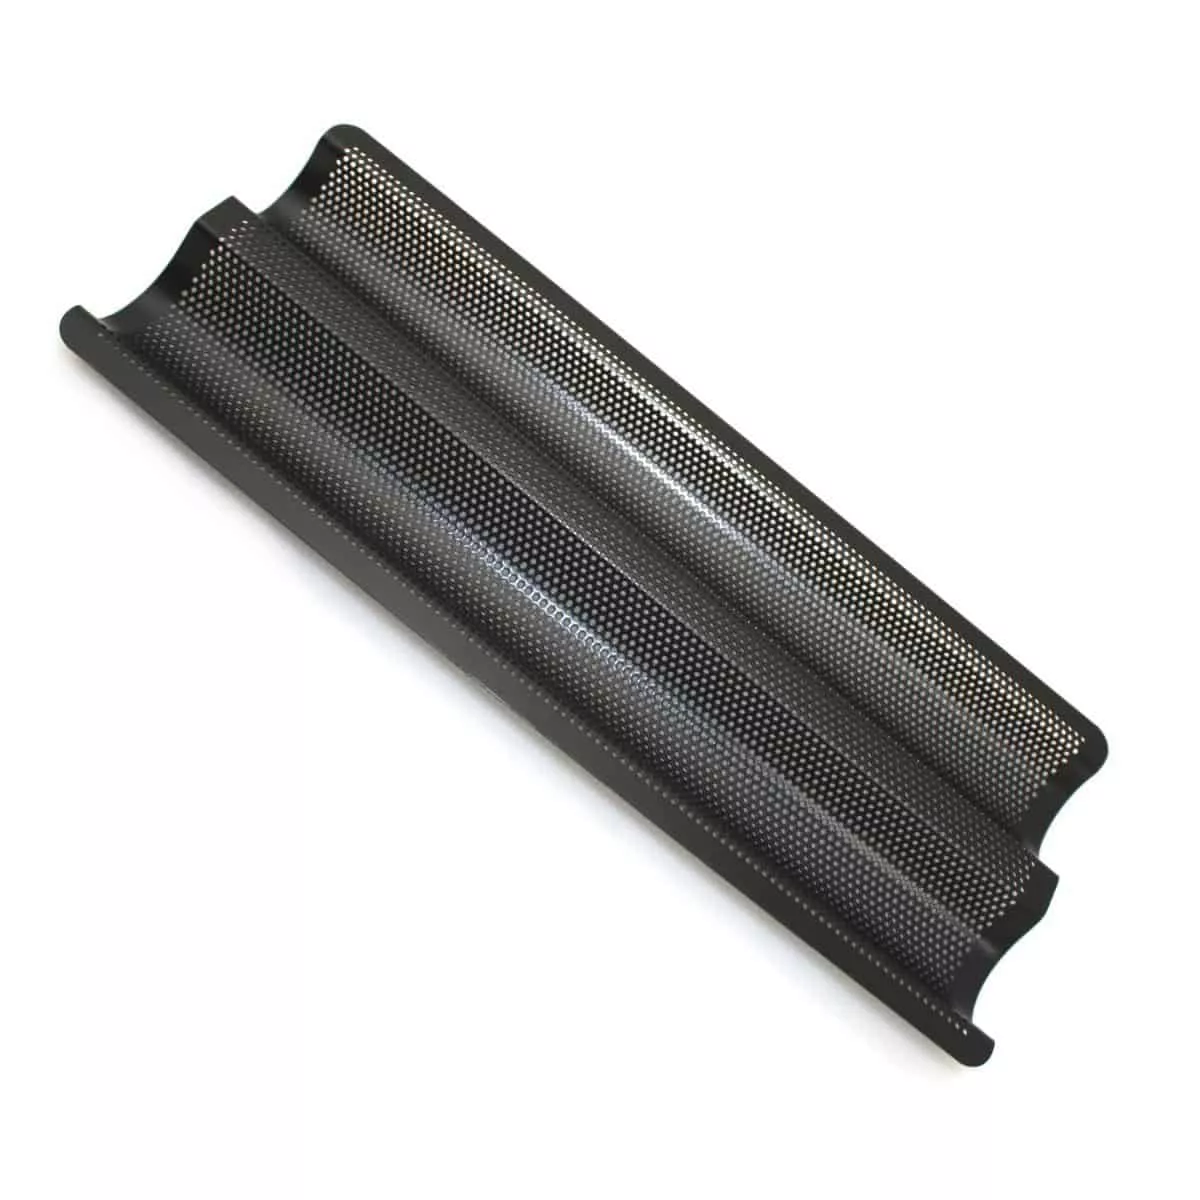
I suggest using a baguette pan for the best results when making from scratch or my original gfJules Gluten Free Pizza Mix, but you can use a cookie sheet lined with parchment in a pinch; the crust just won’t be as crunchy and it won’t be as nicely rounded, but it will still taste yummy!
So go forth and bake baguettes like a pro! In France, it’s routine to buy a fresh baguette every day — now you can make a gluten free one, easily!
What are you waiting for? Delicious bread is calling!
Gluten Free Baguette Recipe
Gluten Free Baguette Recipe
Ingredients
- 1½ cups (202 grams) gfJules All-Purpose Gluten-Free Flour
- 3 Tbs. (12 grams) milk powder, dairy or non-dairy (like coconut milk powder) OR plain GF potato flakes
- 1 ½ Tbs. (19 grams) sugar (optional, but add for crunchier crust)
- ½ tsp. salt
PLUS
- 2 egg whites room temperature (OR 4 Tbs. aquafaba OR 1 Tbs flaxseed meal or chia seed steeped in 4 Tbs warm water)
- 2 Tbs. extra virgin olive oil
- ½ tsp. apple cider vinegar
- 10 Tbs. (148 grams) warm water
- 2 1/4 tsp. rapid rise yeast gluten-free (1 packet) ** (for yeast-free directions, scroll to the bottom of the recipe)
- egg wash (full egg + 1 Tbs. water) to brush onto the dough (optional) OR more oil
- water to spritz onto dough
- toppings of choice (optional)
Instructions
- Whisk together dry ingredients except yeast; set aside.
- Combine egg whites, olive oil, cider vinegar and most of the water in a large mixing bowl.
- Using a stand mixer (preferably), slowly add in the dry ingredient mixture and yeast.** Gradually add remaining water to get a firm but very sticky dough.
- Beat on high for an additional 2-3 minutes. (Note: this recipe may be mixed by hand in a large bowl, using a fork or wooden spoon – stir until well mixed!).
- Prepare a baguette pan or baking sheet by lining with parchment and lightly oiling.
- Pour one teaspoon of olive oil into a gallon sized zip-top bag and spread around so the inside is coated. Cut a one-inch corner out of the bag. (see video)
- Scoop the dough out into the bag and squeeze dough toward the cut corner. Squeeze evenly so that the dough comes out of the corner of the bag and pipes down the length of the baguette pan or across the cookie sheet. If doubling the recipe, repeat the process until two baguettes are formed.
- Brush with egg wash or liberally brush with more oil. Use a sharp knife to cut across the tops diagonally 3-4 times so that the dough will rise evenly and spread open at the cuts. Sprinkle any additional toppings at this point.
- Lightly oil a sheet of parchment and lay on top of the baguette. Place in a warm place like an oven preheated to 200° F then turned off. Allow the baguette to rise for 20-30 minutes. Remove from oven to preheat to 500° F (static).
- Place a cookie sheet on the bottom rack in the oven and put ice cubes on the pan to create steam in the oven. (optional)
- Remove parchment covering the baguette and spritz with water for crunchiest crust. Place baguette on middle rack of the oven and bake for 5 minutes, spritzing again, and adding more ice cubes. Also reduce oven temperature to 475° F, baking for 15-20 more minutes (depending on baguette size). Spritz again during the bake for the crunchiest crust.
- Check by sticking a toothpick into the center of the baguette. If it has wet dough stuck to the toothpick when removed, bake for another 3 minutes, then check again until the toothpick comes out nearly clean or with dry crumbs attached. Internal temperature should have reached 205° F.
- The cooking time may vary depending on whether using a baguette pan, but when done, the baguette should be browned (more, if using egg wash to brush on top) and be crunchy when tapped.
- Remove to fully cool before slicing.
Video
Notes
** Yeast-Free Gluten Free Baguette Directions:
Add 2 tsp. vinegar + 2 tsp. baking soda + 2 tsp. baking powder. Chef Patrick Auger also recommends using club soda in place of the water in this recipe when baking yeast-free.** Please keep in mind that nutrition information provided is per serving, which may vary. While we have taken care to provide you with the most accurate nutritional values possible, please note that this information may differ significantly depending on the exact ingredients and brands that you choose to use to make this recipe. Additionally, where options are given for ingredients, the resulting calculation may include all ingredient options instead of only one per line, skewing the totals significantly.
I hope you love these baguettes as much as we do!
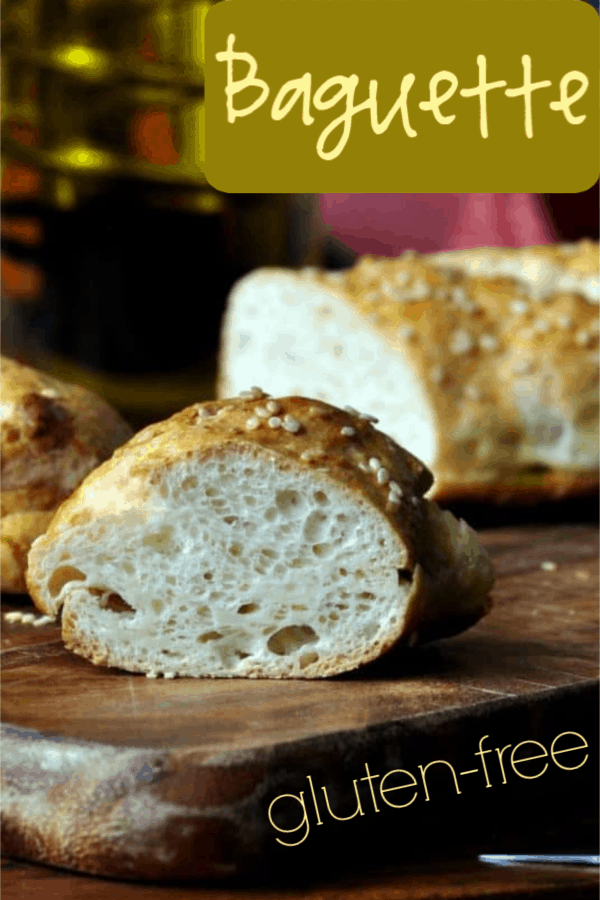
Pin it for later!


I wanted to get on and leave a rating but I couldn’t figure out how. This is a 5 Star gluten free bread! I have tried so many flours and “kits” from the store none have come anywhere closet this! It was amazing! My family loved it!!!!
Hi Koren: thanks for wanting to leave a rating for our products. Scroll down on each product’s page on our site, and, under the photos, you’ll see some light blue tabs with “Ingred. & Nutrit. Info,” and “Reviews,” etc. At the bottom of the existing reviews, you’ll see a place to leave you (which is so sweet of you!). Your reviews will help others who are unfamiliar with gfJules to buy with confidence, so we really appreciate them (rely on them actually)!
I made the baguette with your pizza crust using egg at room temp. It rose fine & looked great after baking but then sunk when it cooled. I took the parchment paper with the bread out of the baguette pan to cool. Was that my mistake? Flavor was good & I made croutons out of it.
So glad the flavor was good and you were able to make yummy croutons with it, Mary! About the sinking, I’m assuming you made this from scratch, not using my pizza mix? Let me know if so, and if you made any ingredient substitutions (GF flour, milk powder, eggs, etc.) and I’ll try to help you for next time.
~jules
I find using the zip-top bag cumbersome. I just spoon the dough onto my baguette pan, then oil my hands and shape the dough. They come out great this way!
Awesome! Thanks for sharing your method!
~jules
I don’t have a stand mixer. Can I do it in a food processor with a bread dough blade?
Also can I make the baguette into a round loaf instead? Maybe putting it in a round pottery bowl and maybe either parchment paper?
Hi Vicky, a food processor would work, or just mix in a bowl with a spoon — just make sure the yeast is well-integrated. I’d love to hear how this turns out baked with parchment in a pottery bowl. Please let me know!!!
~jules
Just thinking about this exact thing this am! Baguette using your pizza mix…
Well, Suz, there’s never a bad time for a baguette! 😉 ENJOY!
~jules
For the baguette recipe
When using the yeast free recipe do you beat it for 3 minutes also when you put in the soda,vinegar and baking powder?
Hi Gram, you do not need to beat it for 3 minutes when making it yeast-free. I add the soda, vinegar and baking powder all together once everything is mixed (when you would have added the yeast), then beat until integrated but no more. I hope that helps – enjoy the recipe!!!
~jules
Jules, I just made baguettes! They’re gorgeous! Can’t wait to taste them. I used an egg white wash. Next time I’ll use a whole egg to make them darker, but they are pretty.
That is WONDERFUL, Abby!!! I’m so excited for you to have real baguettes back!!!
~jules
Recipe is super easy to follow and the baguettes come out just like the picture. My husband felt like he was eating a subway sandwich. I can’t wait to experiment with this dough and try all your other products!
After trying your pizza crust for the first time and LOVING it, I can NOT waIt to try a baguette! The thought of a slice of that fabulous crusty herbed bread spread with a clove of warm roasted garlic…
Oh Debra, you’re going to LOVE it!!! There’s nothing like having delicious crusty baguettes back in your life … and they’re super easy to make! ENJOY!
~jules
The baguette recipe is why I wanted to try the pizza mix. Once it arrived, I made my very first double batch. SUPER EASY!! Being in higher altitude in a dry climate, I did proof the yeast with a tsp of sugar a a few Tbs of warm water before adding it to the recipe. Surprising water on the bread and in the oven really helped the bread rise! Once it was done, myself, my hubby and it two boys ate the bread and LOVED it! No one has any reaction at all!! This is the first gluten free mix that no-one had an issue with!! I can’t wait to order the sandwich bread mix next!! I’m a BELIEVER now. THANK YOU x A MILLION!!
I’m so glad it’s been proven at high altitudes, April! Thanks so much for letting me know. I’m thrilled that you all could eat the baguettes and have no reaction, and of course that they were so delicious! Happy baking!!!!
~jules
From reader Lilduck77 in Australia: I made this for my Mum yesterday and it was scrumptious!
It didn’t come out of the oven anything like it should look or feel but O.M.G the flavour was there! It was more like a flat turkish bread, just about an inch thick (so perhaps i worked the dough too long or didn’t let it rise enough?) but it still had that beautiful crunchy outer crust and soft on the inside.
We ate it warm, with nothing on it. Saved none for my husband who didn’t like hearing how mu h he’d missed out on. Trying again today!
Oh, i McGyvered the baguette pan by rolling up lengths of foil. My Dad is going to try and make me one this weekend. There is a good DIY plan on google.
I also couldn’t find corn meal. I used polenta on the bottom instead. Yum!
Mmm, before going gluten free, I used to pick up a fresh baguette for dinner every night. These baguettes are beautiful, Jules. Thanks for all the tips.
Hi Barbara – you will be so happy with this recipe if you were already a baguette lover! I can’t wait to hear what you think when you try it!!!
~jules
These are absolutely beautiful! I don’t think I have ever seen gluten-free baguettes this pretty.
I need to get me one of those baguette pans. I am sure my hubby will be thrilled for me to buy another specialty kitchen pan. :-/
At least this one’s not so very expensive, and it stores pretty snugly behind a bunch of cookie sheets (she said, speaking from experience!). Hope you get to try the recipe soon, Brianna!!!
~jules
Jules, you make it look so easy! I can see a couple pieces of cheese and some slices of tomato pinched between a loaf in my future.
Best,
Chrystal
Hahah – it’s only easy because it took me so long to get it right! Happy to share any tricks to make it easier for everyone else, too. Maybe we can share a loaf one of these days soon, Chrystal!
~jules
I have a terrible time making bread. I am trying the baguette but it doesn’t seem to rise. Not sure what I am doing wrong. I followed the recipe and watched the video. Any helpful hints?
Thanks,
Judy
Hi Judy, I’m happy to help! Can you first tell me about your ingredients: did you use an egg substitute? What milk powder did you use? Did you use my flour? What about milk – what milk and were your ingredients at room temperature? What about the yeast – what kind did you use? If it was a 3 pack, can you test another packet with 1 tsp. sugar and 1/4 cup warm water with the yeast and allow it to sit for 5 minutes and see if it starts to bubble. If it doesn’t start to bubble, the yeast is no longer active and you’ll want to buy new, fresh yeast. Review more tips in my 18 Bread Baking Tips article and see if any of those might help as well!
I followed the recipe using the pizza mix. I used egg white – the eggs were at room temperature as all the ingredients. The yeast was in the package with the pizza mix.
I check out the tips article and try again this weekend.
Thanks,
Judy
Thanks for getting back to me with details, Judy. Did it just not rise much before the bake time, or did it not rise at all? Did it bake all the way through? Keep me posted on the next loaf this weekend!
~jules
I also had a rather flat bread. I think I know went wrong with mine. I followed the directions to a tee but was not able to put the bread in the oven (200 and turned off), because I was already baking something else. So instead I tried the top of the stove, back burner but I think too much heat came through. That said I sliced the bread on an angle and have small slices but it is delicious and the crust is crunchy and wonderful! Next time I will make sure I do the oven for rising. I love all of your mixes Jules -they are superior to any others out there!
So glad you made the best of it, Jill! It’s wonderful to have crunchy crusted bread again, isn’t it? Can’t wait to see what happens on your next go!
~jules
Those are beautiful, Jules! I haven’t even given baguettes a try since going gluten-free, but these are making me thing now’s the time!
Thanks Raia! No time like the present — and hey, it’s a great way to start the new year off right!
~jules
I need to get my hands on some of those baguette pans and start cranking out some bread, they look fabulous!
I really love the pans, Sharon, and they’re not very expensive! I’ve also fashioned my own with dowels and aluminum foil, but really, this dough is thick enough to pipe out onto a cookie sheet without them. The holes in the pans made for the purpose help the bread to get crunchy all over and it makes all the difference! But softer, more Italian-style bread made without them is pretty awesome too! I can’t wait to see what you create!
~jules
I totally need a baguette pan! That’s what I forgot on my Christmas list 😉
January is for assessing what Santa forgot, and for getting it for yourself! 🙂
~jules
This looks delicious! Would you change anything for high altitude?
Hi Michaela – you shouldn’t need to make any changes, but have a look at my high altitude baking tips for some suggestions, just in case! https://gfjules.com/high-altitude-gluten-free-baking-tips/
~jules