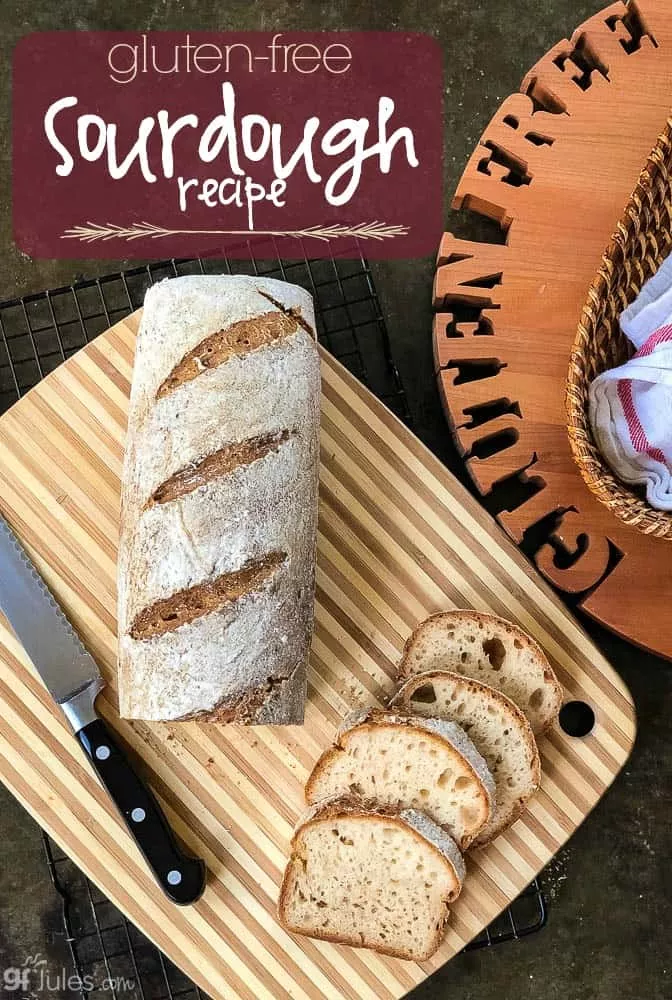
Sourdough is the most popular bread right now, and just because we’re gluten free doesn’t mean we’re left out of the fun! Isn’t it lovely to know that you, too, can bake a lovely gluten free sourdough in nearly any kind of pan, any time you like?
Different Methods for Baking Gluten Free Sourdough Breads
Here are a few ways you can bake out my recipe for gluten free sourdough bread. One recipe, you choose your method!
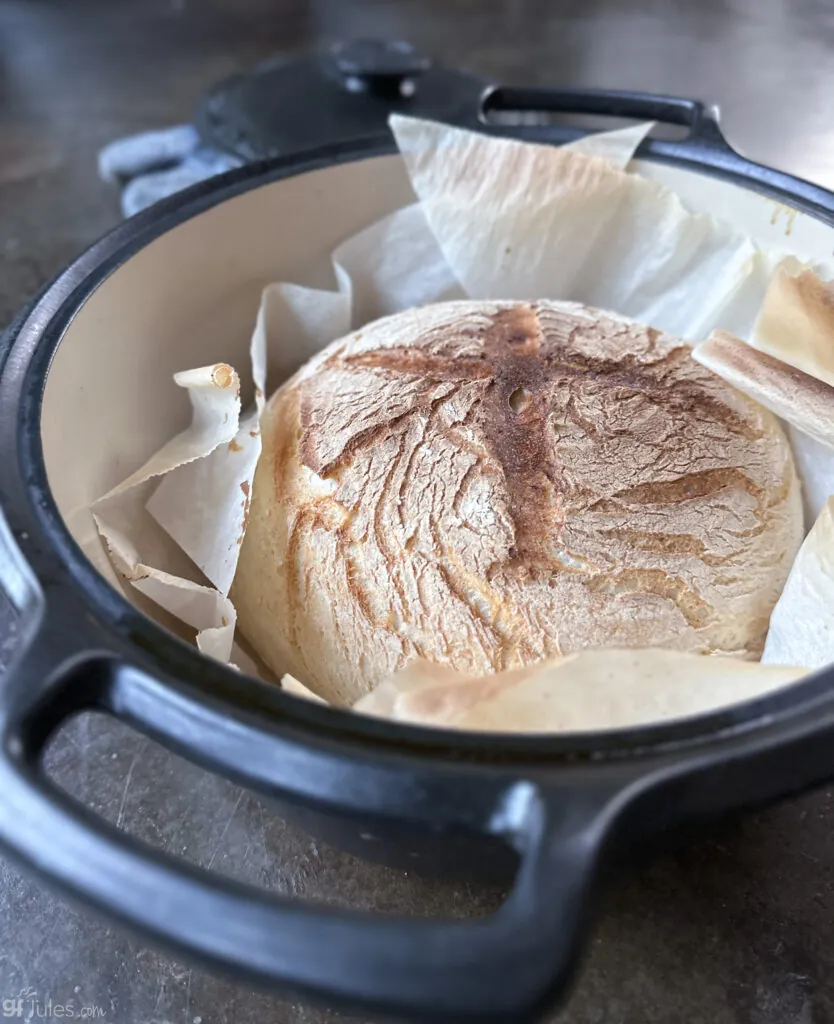
Gluten free sourdough baked in a 6 quart Dutch Oven.
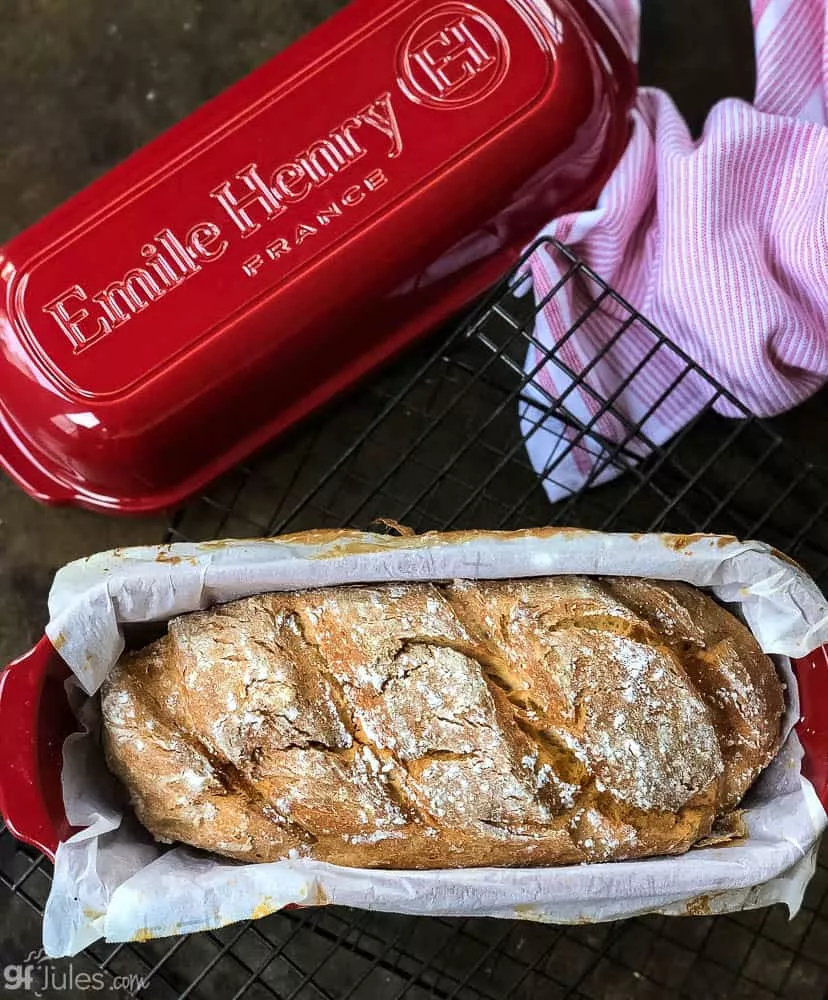
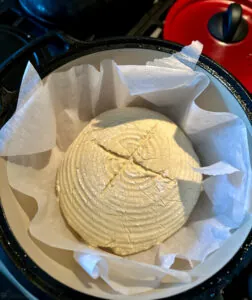
Gluten free sourdough made in an Emile Henry bread baker …
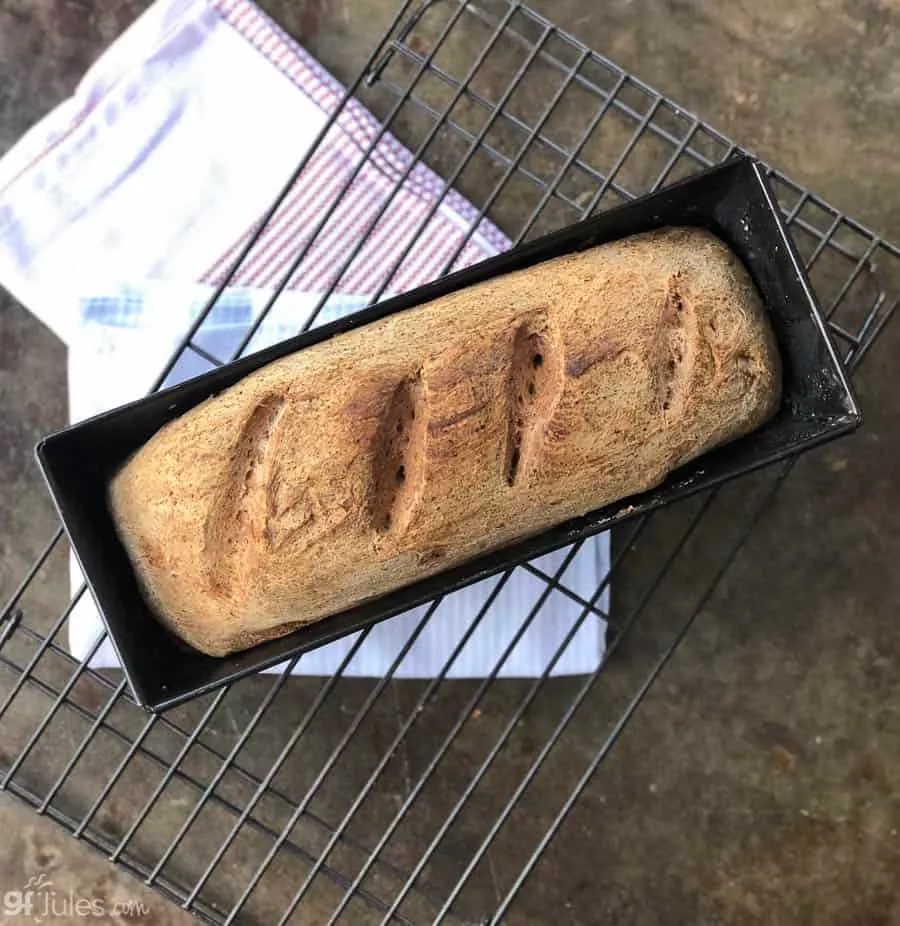
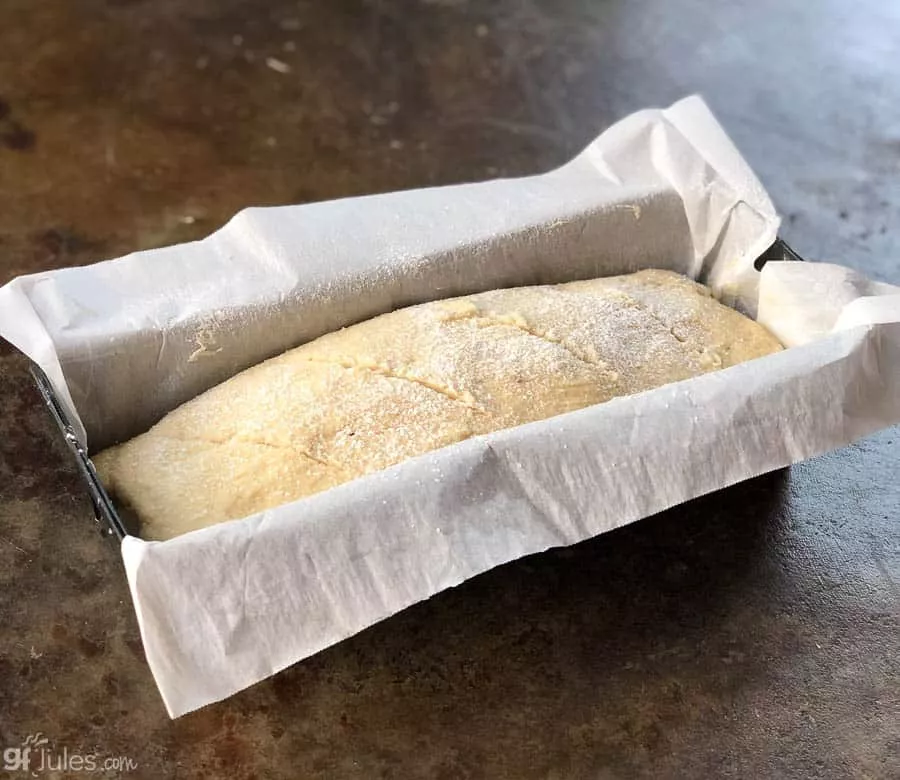
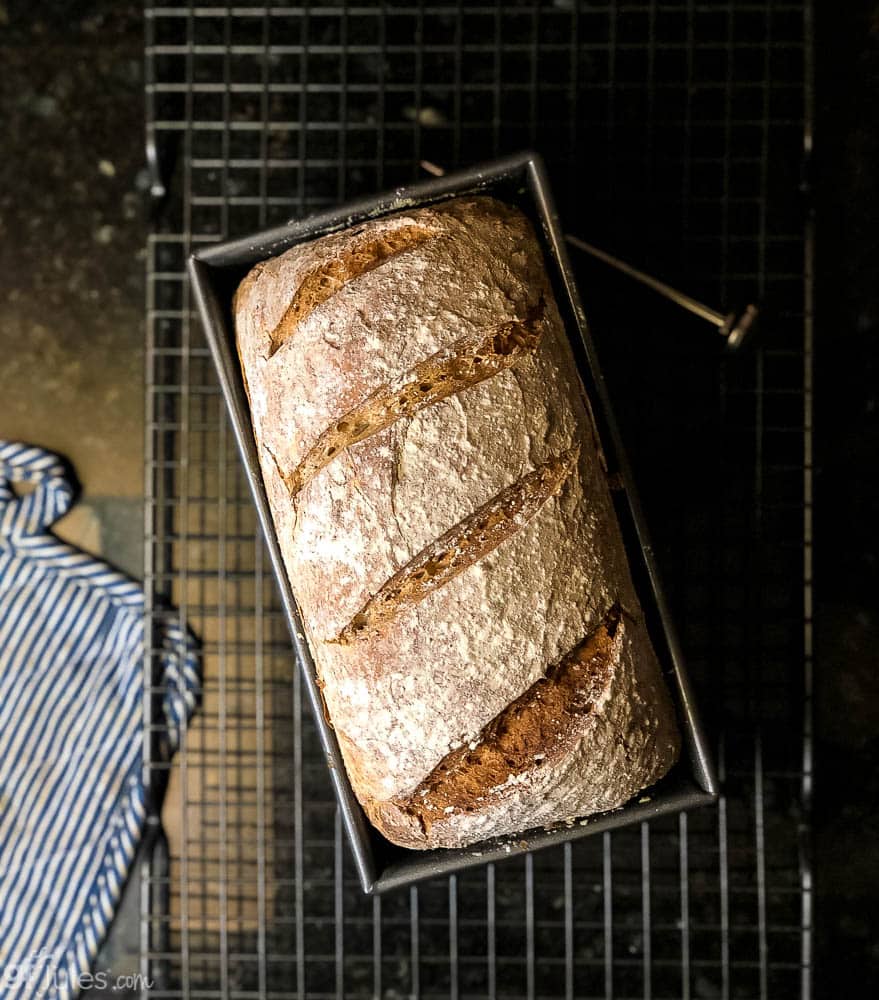
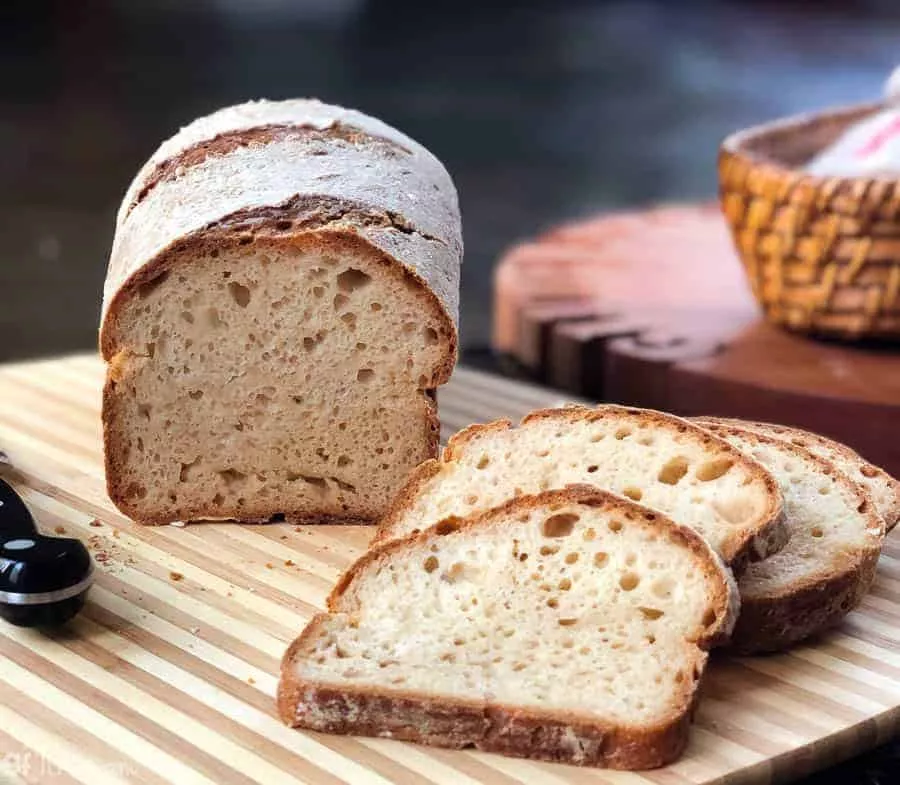
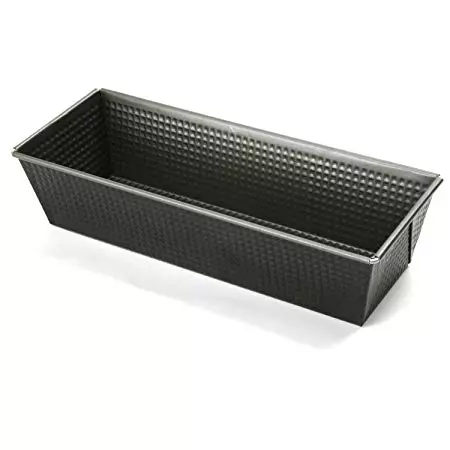
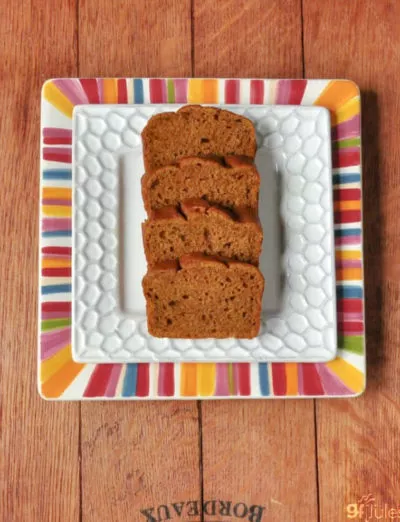
Gluten free sourdough baked in a Pullman Pan …
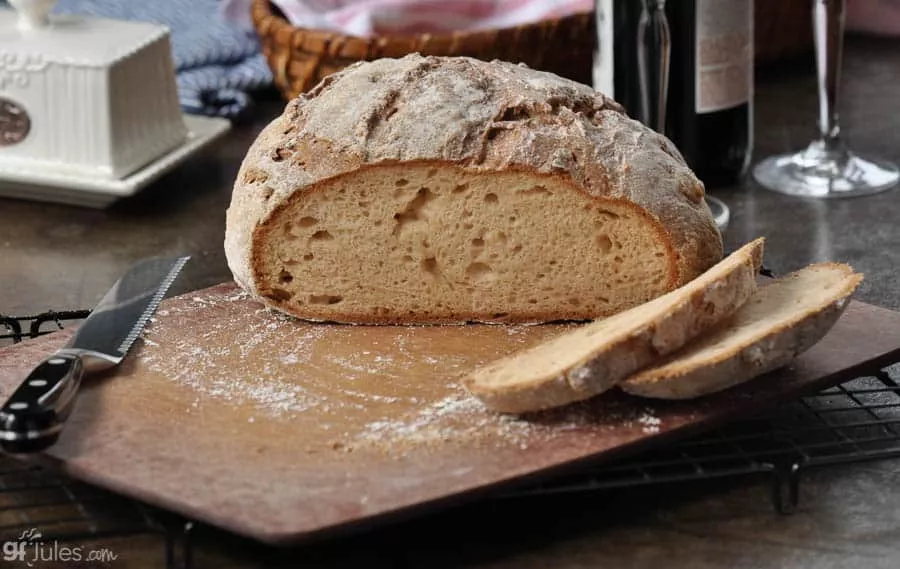
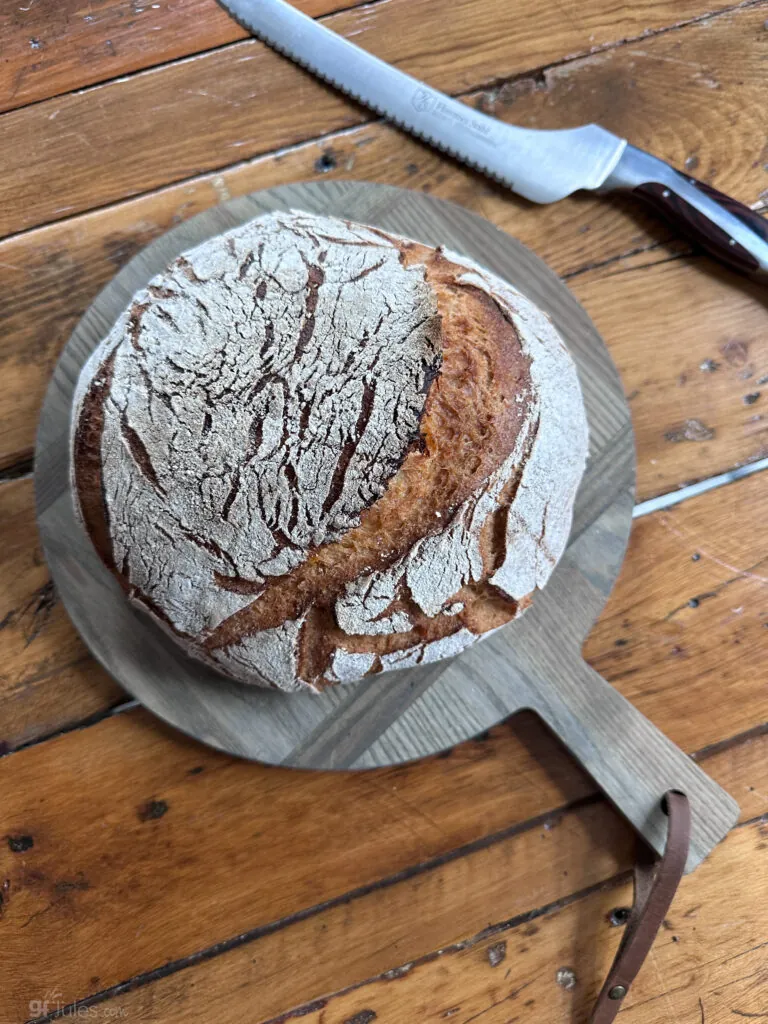
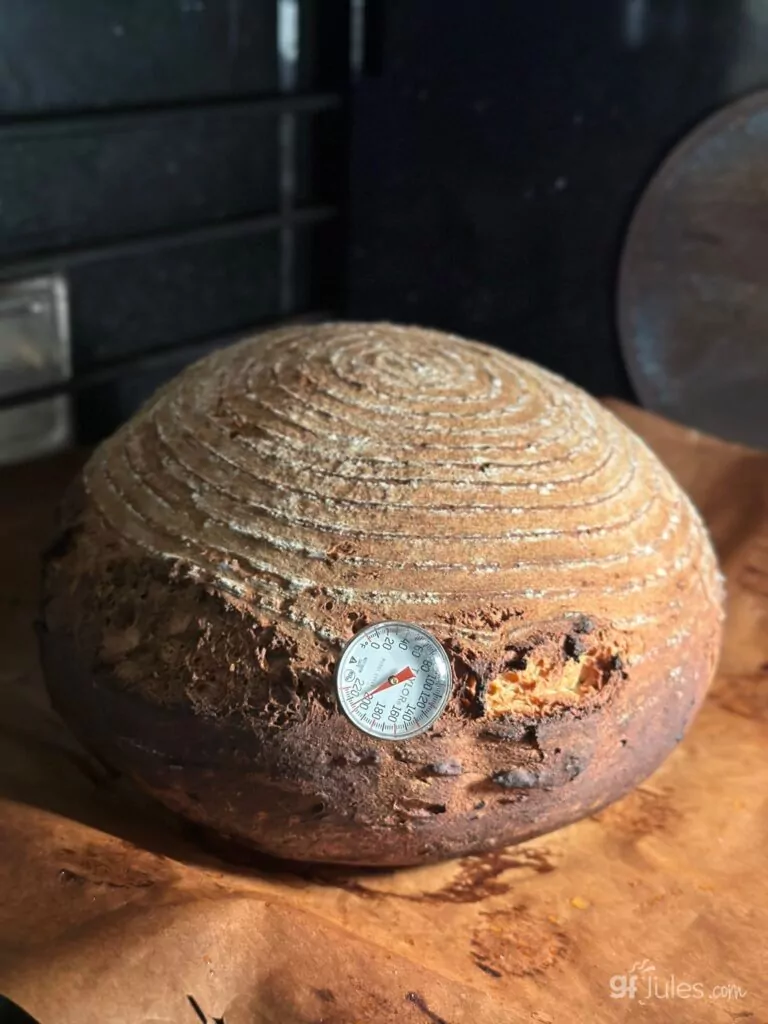
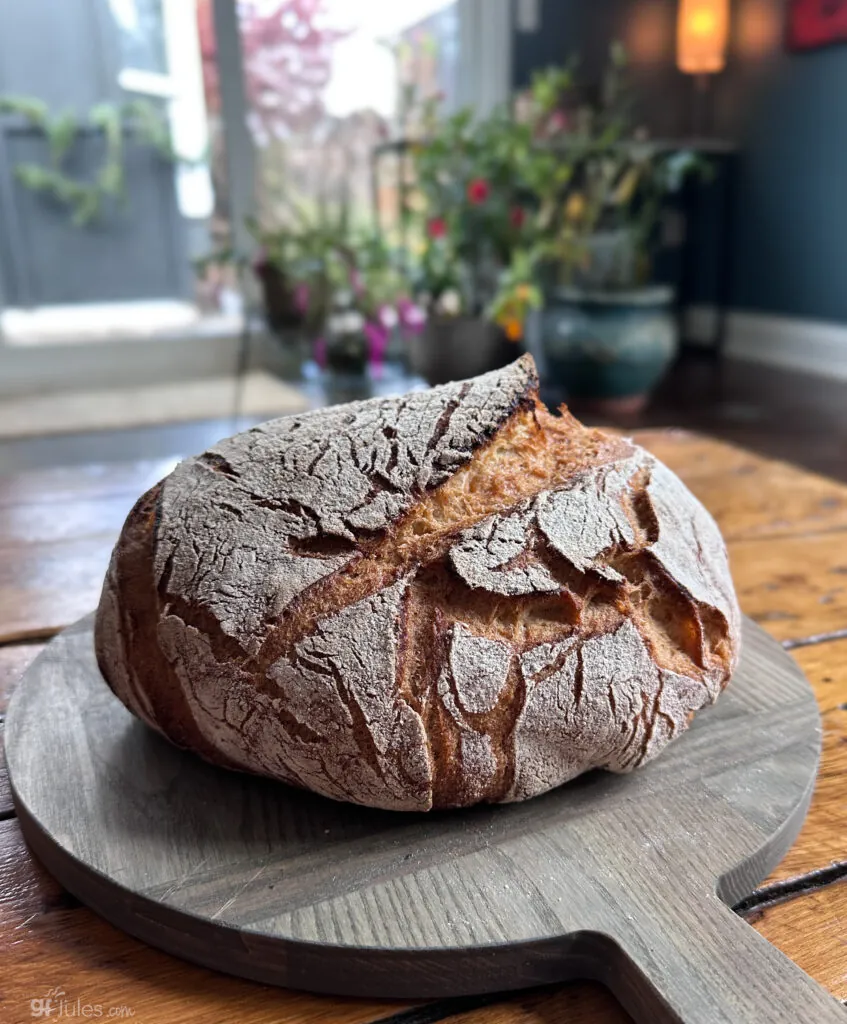
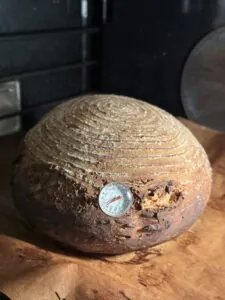
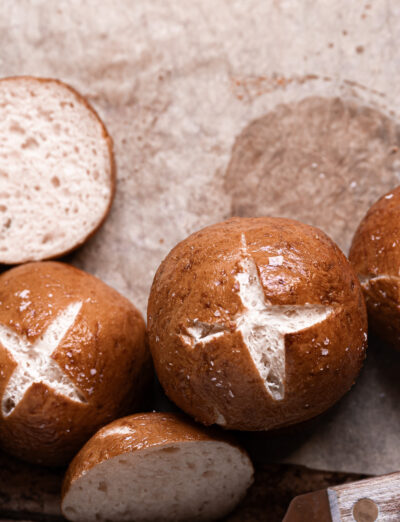
Gluten free sourdough baked as a boule without a pan …
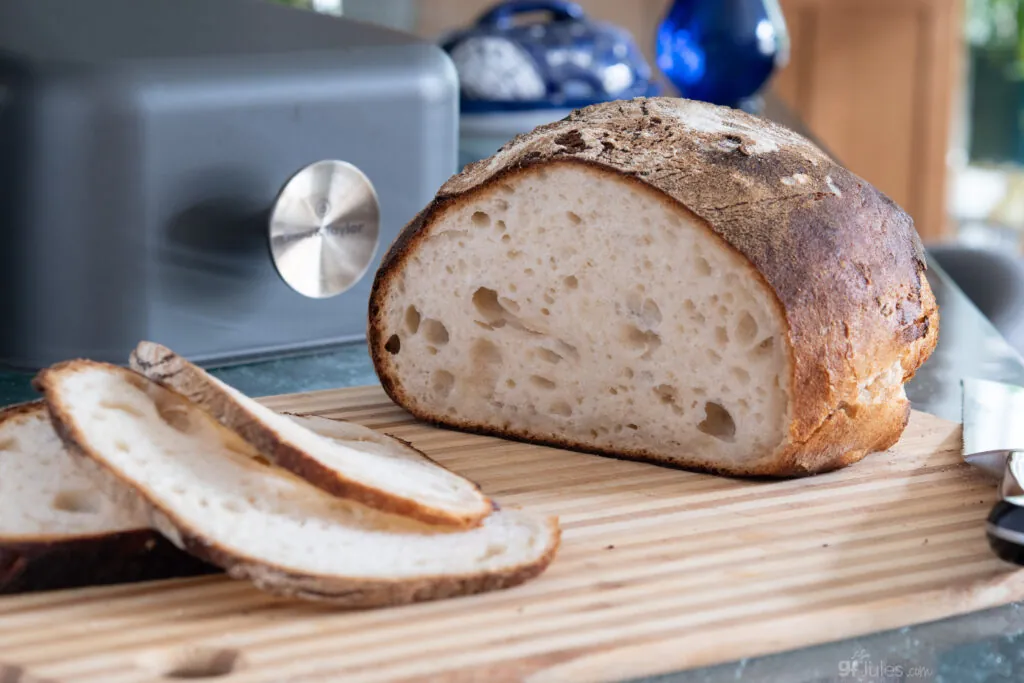
Gluten free sourdough baked on a baking steel and ultralight baking shell from Brod & Taylor. I’m loving this new-to-me method, by the way.
It’s similar to baking with a Dutch Oven, but the baking shell is so easy to handle and only weighs 1 pound 1 ounce! Comes in batard shape (shown here) or boule.
I’ve baked experiment after experiment, tweaking it here and there to account for lots of variables over the years, and I’m happy to share all my gluten free sourdough secrets and methods with you in this comprehensive post!
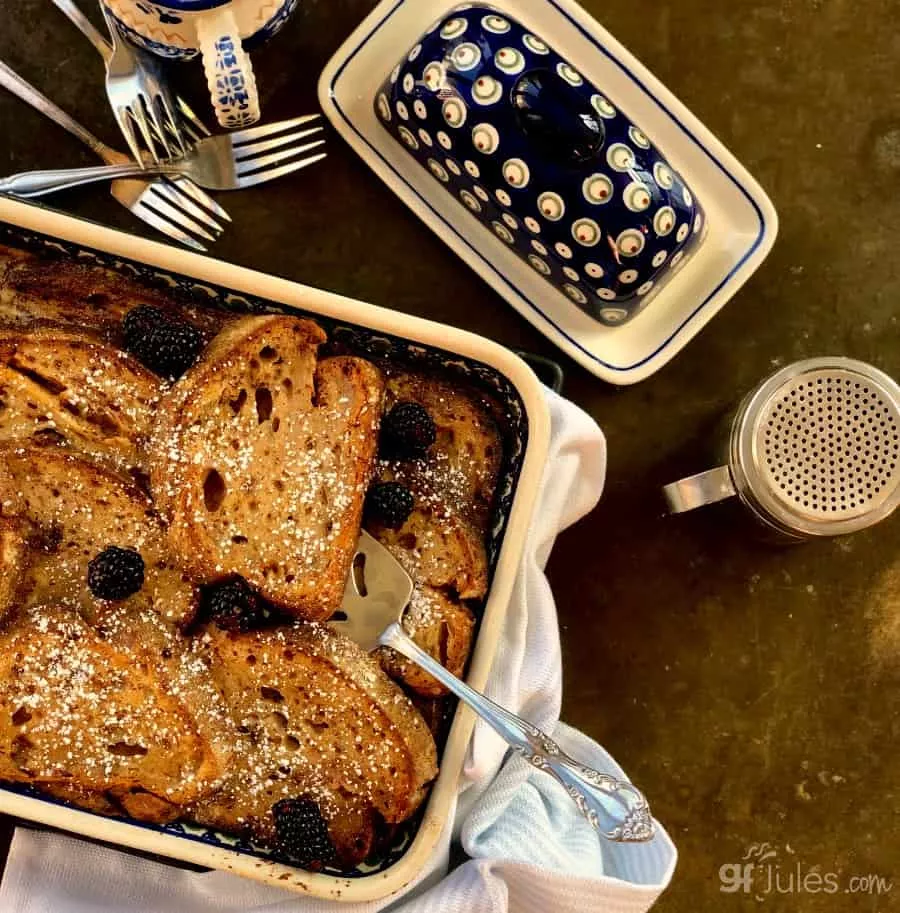
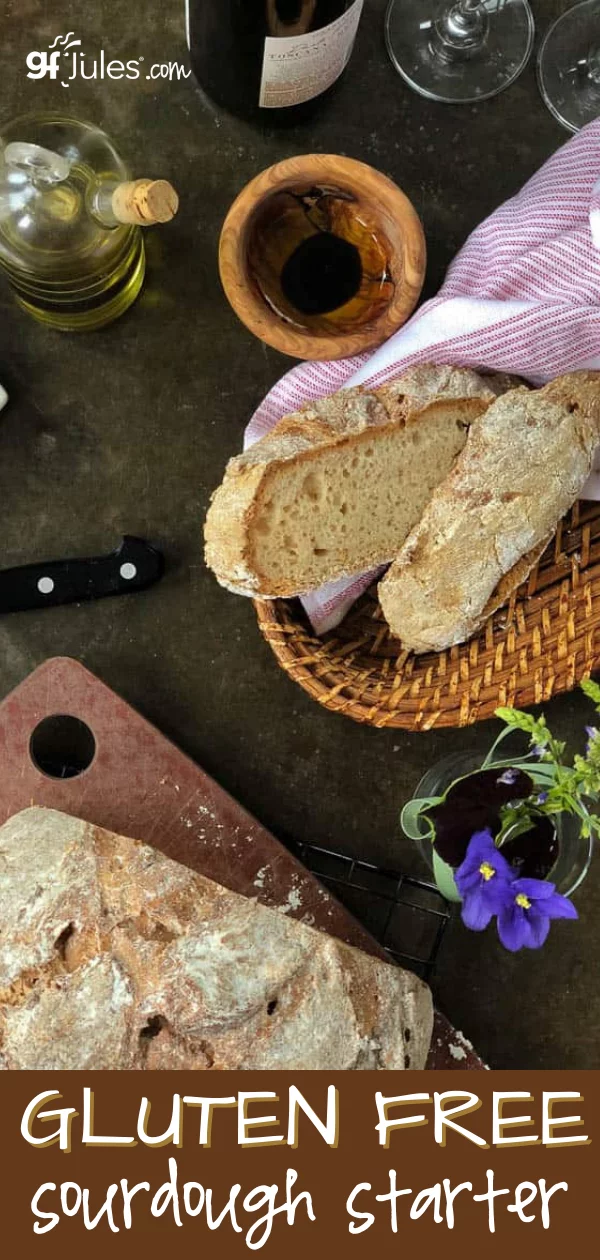
The creation of the first successful gluten free sourdough starter (click here for recipe) and gluten free sourdough bread recipe was a painstaking process, but at least we’ve enjoyed tons of gluten free sourdough along the way (leftover sourdough makes an insane overnight gluten free French Toast Casserole!).
I urge you to hang in there and read through my entire post, as I outline what has worked best and what has not worked best for me.
There are definitely some tricks of the trade, including how to get your gluten free sourdough to be sour!
Gluten Free Sourdough Basics
For those who love and miss sourdough, take heart! The art of making sourdough isn’t lost without the gluten. There’s still a lot of feeding, caring and waiting for the sourdough starter to mature and bloom into all its potential.
I’ve actually made so much starter that I’ve given much of it away to neighbors, but I just couldn’t throw any away when I’ve tended to it for so long! It’s like a little sourdough baby and you just can’t toss it out — I care about it! It’s “alive.”
Pro Tip: Use the search bar here at gfJules.com and search “sourdough” for lots of delicious gluten-free sourdough discard recipes so you don’t have to waste any of your precious discard either!
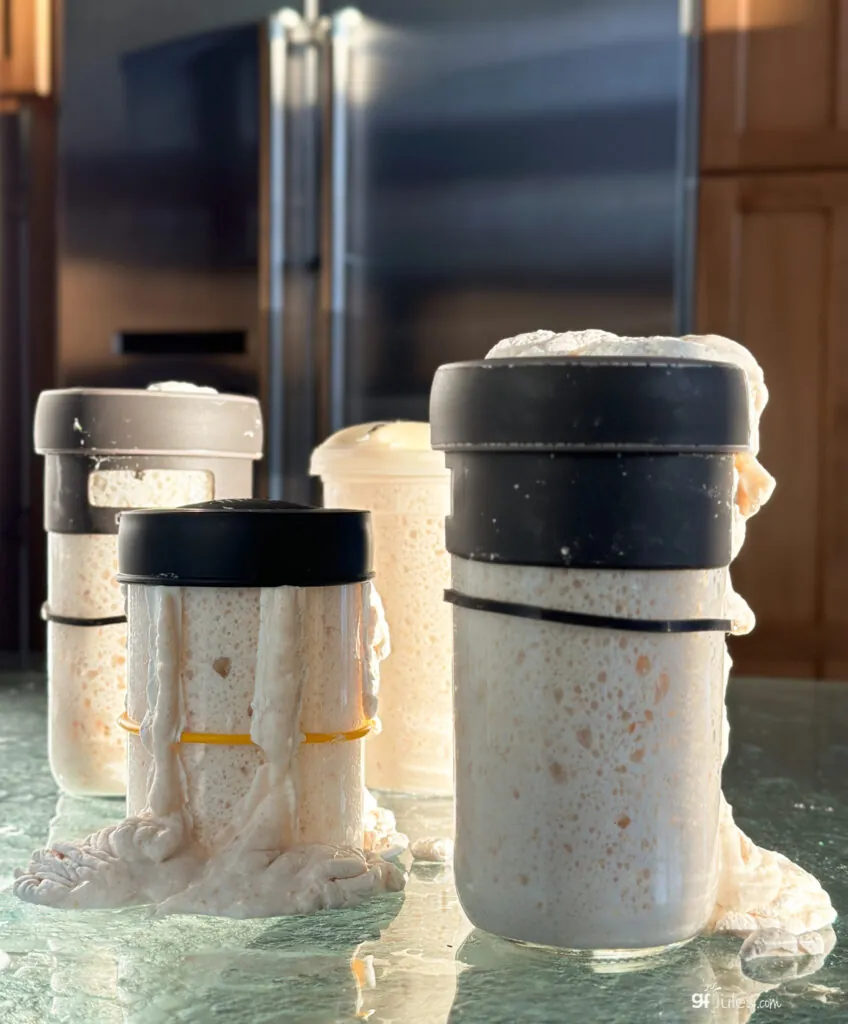
You’ll see when you make this gluten free sourdough starter; you’ll see. You won’t want to discard any of the “extra” either. It’s precious. Here’s how to make your very own gluten free sourdough starter!
Some things are the same about making gluten free sourdough bread as they are with making any other gluten free bread. There’s no kneading the bread and stretching the gluten because there’s no gluten! Just follow my instructions to the letter, use my gfJules Gluten Free All Purpose Flour or gfJules Multigrain Baking Flour and sit back to watch the magic happen.
Choosing the Right Gluten Free Flours for Gluten Free Sourdough Bread
In anticipation of many questions to come, this recipe and process was developed using my gfJules Gluten Free All Purpose Flour because it works, I can rely on it every time, it’s easy, and it doesn’t taste funky or have any grit to it. If you try this recipe with another gluten free flour or blend, it really may not work, so please please please don’t even bother to try! But if you do, please don’t leave comments about how it didn’t work, because I’m telling you so before you waste your time.
Gluten free flours are tricky business. It took me two years to develop my original blend way back in 2003 (I’ve been gluten free since 1999!) and I’ve been tweaking and improving it ever since. Just because you think you can read ingredients and intuit how much of anything to use or to buy something off the shelf that sounds similar … you can’t. It won’t be the same, and the results won’t look like those pictured.

Not to belabor the issue, but tenths of a percentage point difference in proportions and a different brand or country of origin for any given ingredient are things that can make huge changes in outcomes. It amazes me all the time how tiny variances make big differences.
Which is why I developed my gfJules Flour to begin with. Selfishly, I didn’t want to have to make it in my kitchen every time I baked! And unselfishly, I wanted to prevent fellow gluten-free bakers (and newbies to gluten free baking) from having to mess around with mediocre flours only to achieve mediocre results.
In the process of developing this gluten free sourdough recipe, I learned that my Gluten Free Multigrain Baking Flour is the PERFECT flour for sourdough starter. It goes crazy for it! So if you’re looking for the easiest way to get to gluten free sourdough nirvana, arm yourself with just two gluten free flour blends: gfJules Gluten Free All Purpose Flour and gfJules Gluten Free Multigrain Baking Flour. It’ll make your sourdough baking so much easier!
For more help with gluten free bread baking, in general, hop to my 18 Top Gluten Free Bread Baking Tips.
Baking Gluten Free Sourdough — Choosing the Right Pan
As you can see at the top of this post, there are many different options when it comes to baking your gluten free sourdough bread.
Follow along with one reader’s VIDEO of how she made her beautiful gluten free sourdough loaf using with this recipe and this artisan method following clicking here to watch!
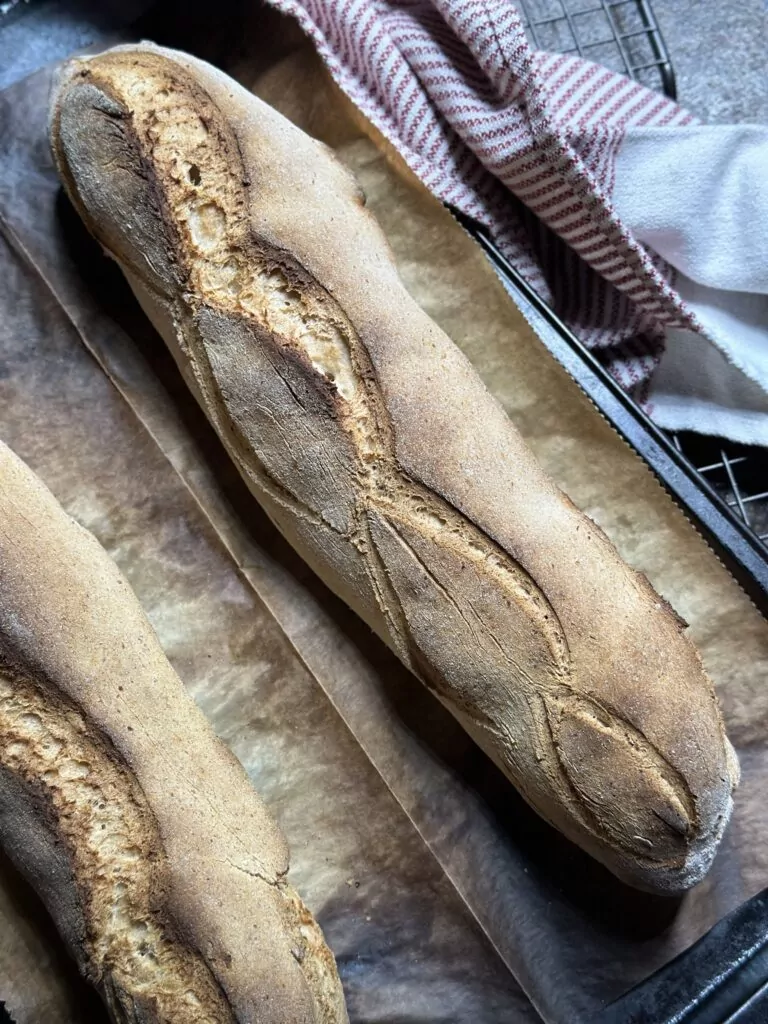
Artisan Style Gluten Free Sourdough Bread Method
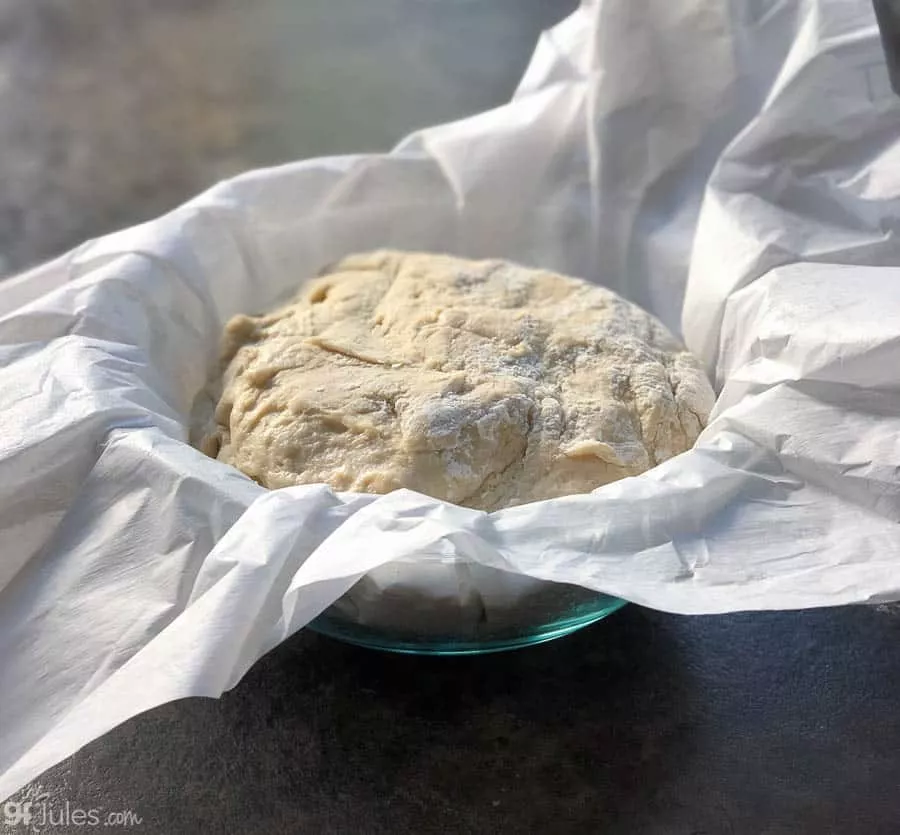
For an artisan-style boule, I prefer lining a banneton (proofing basket) or large glass bowl with oiled parchment sprinkled with more gfJules Flour to support the bread as it rises.
Once risen, I simply lift up on the parchment and lay it out onto a baking sheet for the bread to bake, or put it into a Dutch Oven, or slide onto a baking steel and cover with a baking shell.
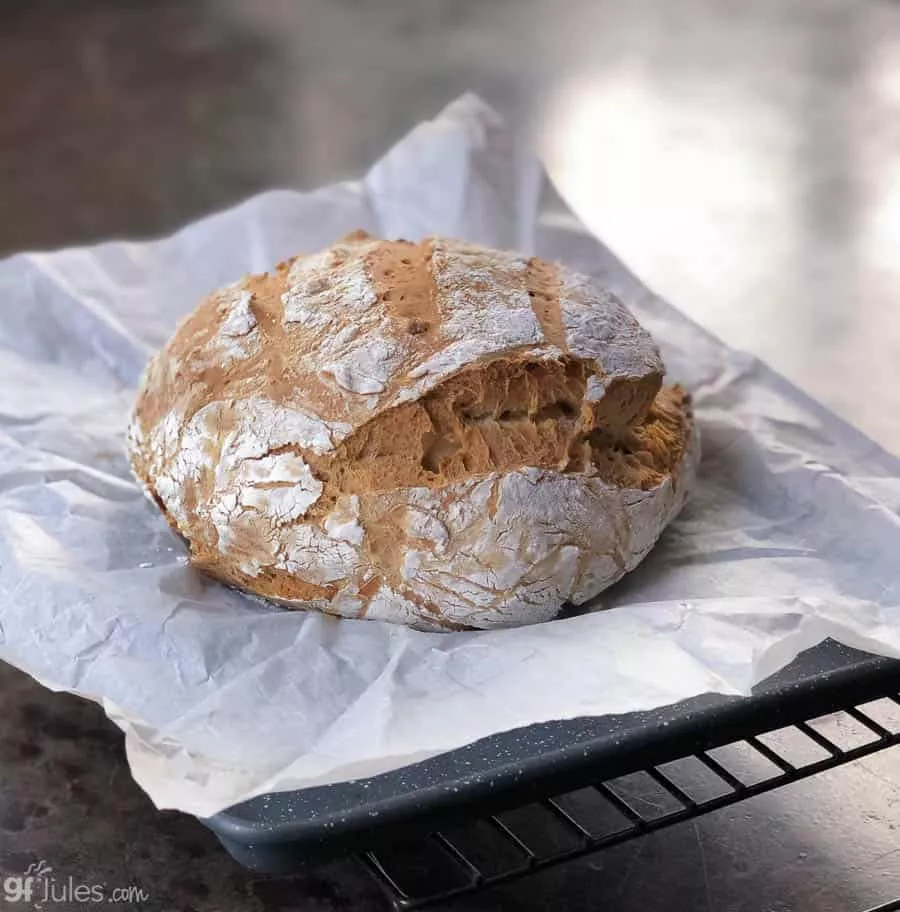
The bread will take more of a free-form shape, but it’s really beautiful and impressive!
Using either the artisan or bread pan method, you may choose to dust the top of the loaf with gfJules Flour before baking for a more rustic look, or simply brush olive oil onto the top, or both.
Loaf Pan Gluten Free Sourdough Method
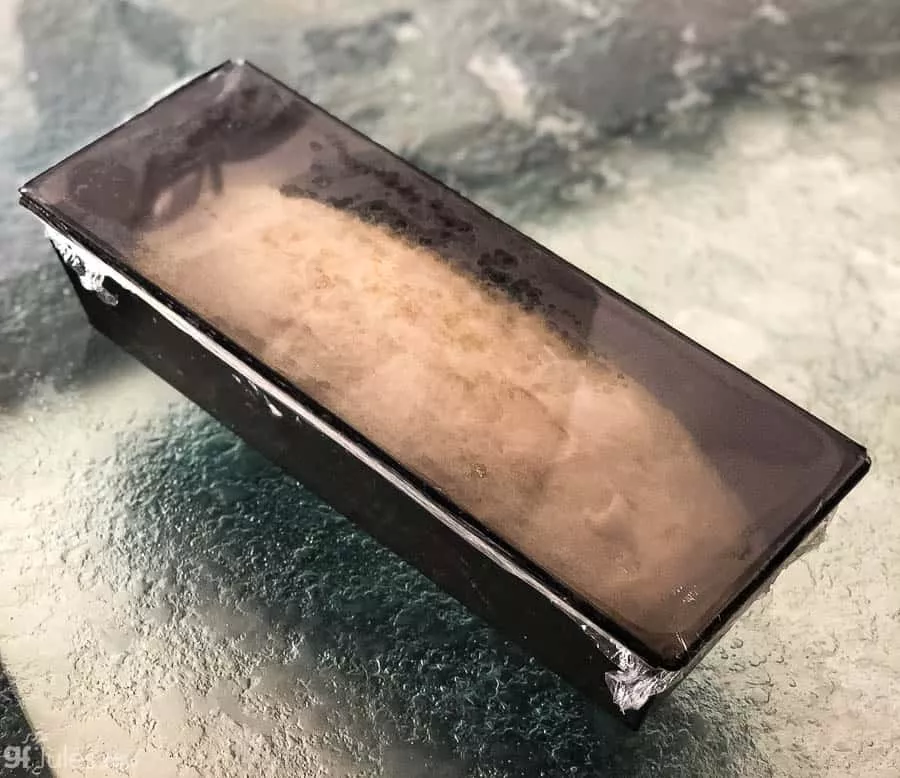
Place the dough into an oiled or parchment-lined pan and brush with oil. Allow the dough to rise covered with oiled plastic wrap to help keep the loaf warm and moist. I like putting the loaf into a preheated 200F oven, then turning the oven off, but turning the light on. I do this with the bread rising in either the bowl or the oiled and floured bread pan.
You can allow the bread to rise here for a minimum of 1 1/2 hours. I find around 2 hours is about right unless you’re choosing an overnight rise.

NOTE: The bread won’t have risen a lot, as most of the rising happens when it’s baking.
Feel free to oil and flour the bottom and sides of the pan or use lightly oiled and floured parchment for easier removal from the pan.
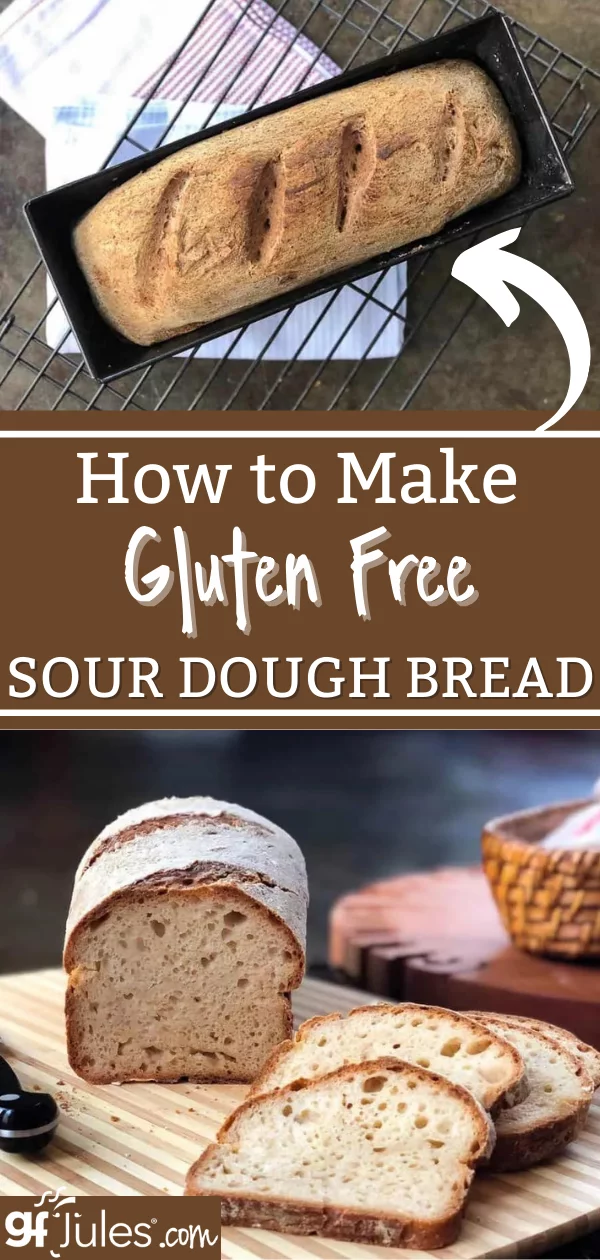
After rising, cut slits in the top of the loaf to direct the rise. Since the oil and/or the flour were applied before the slits were cut, the inside of the slits will appear different from the crust and it gives the sourdough the hand-made look it deserves.
Regarding bread pans, I experimented with all kinds and sizes. For loaves, I really like a Pullman Pan like I used in most of these photos, but a baker with a lid creates a Dutch oven effect which is great for the crust. The bread dough is a bit too voluminous for a traditional 9 x 5 (or smaller) bread pan; in those, this wet dough would rise high and then tended to collapse a bit, leaving some un-cooked looking areas in the center.
The Pullman Pan (mine is 12 x 4 1/2) seemed to be the perfect size to allow the bread to rise with support up the taller sides.
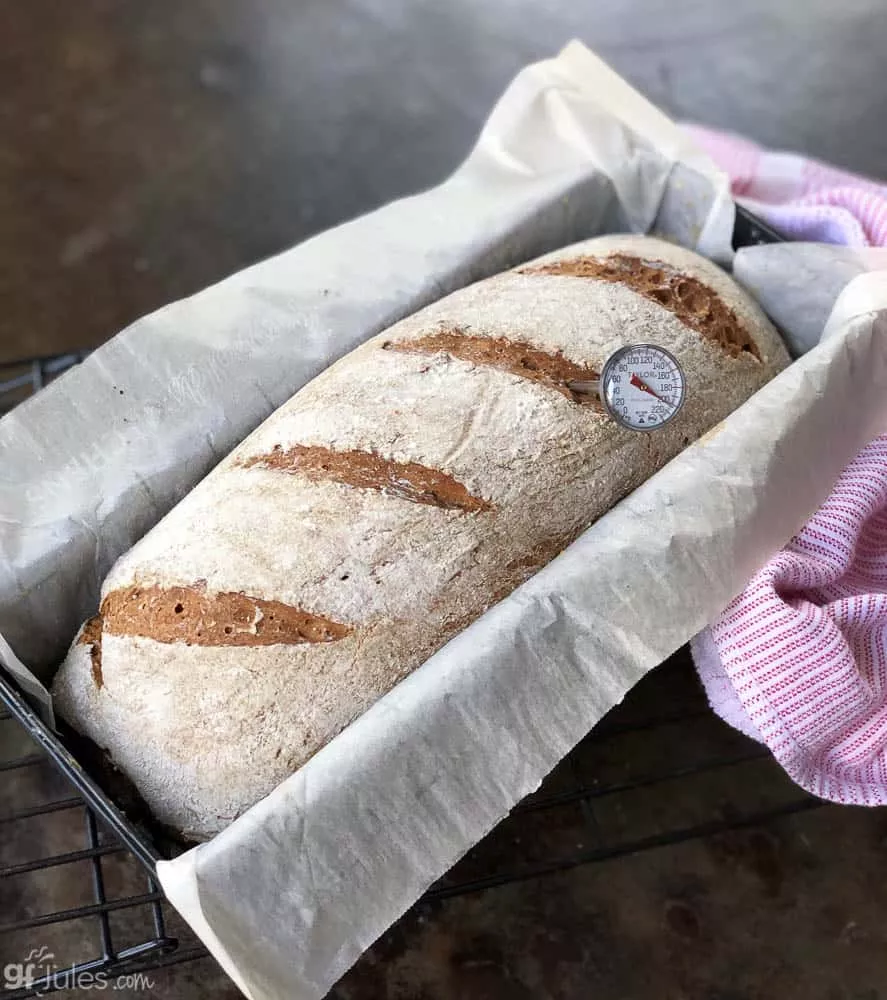
The time it takes to bake this bread will differ based upon the pan used and of course, on individual oven variations. I highly recommend buying an internal thermometer to take the bread’s temperature before removing it from the oven.
The internal temperature should be at least 205F before removing it from the oven to cool.
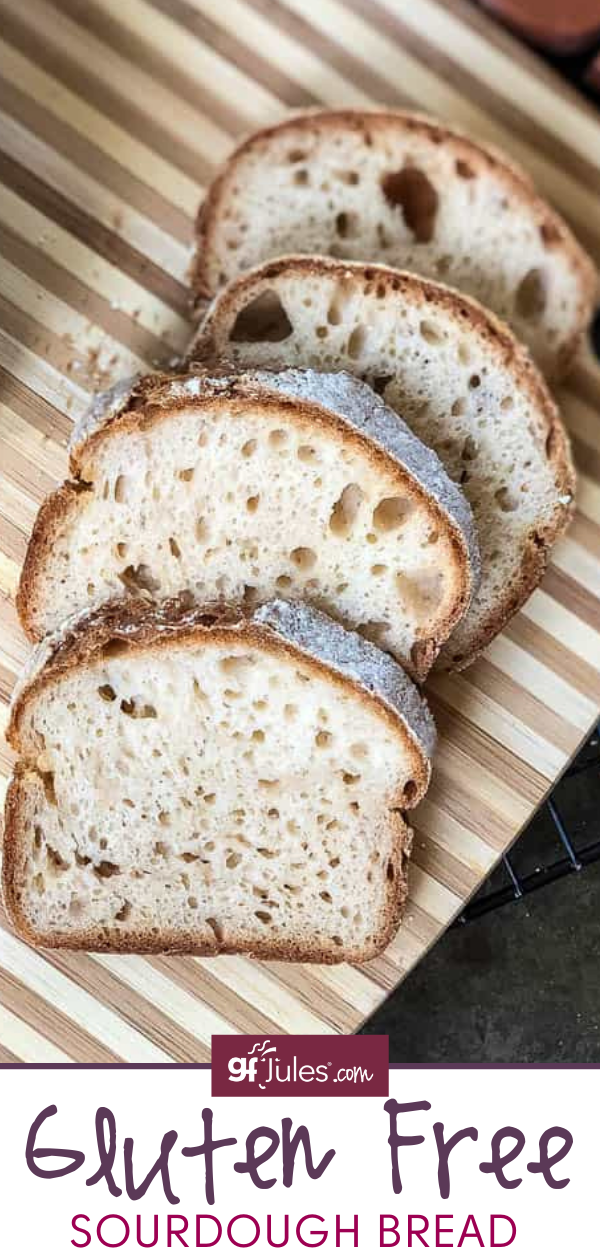
How to Make Gluten Free Sourdough Taste Sour
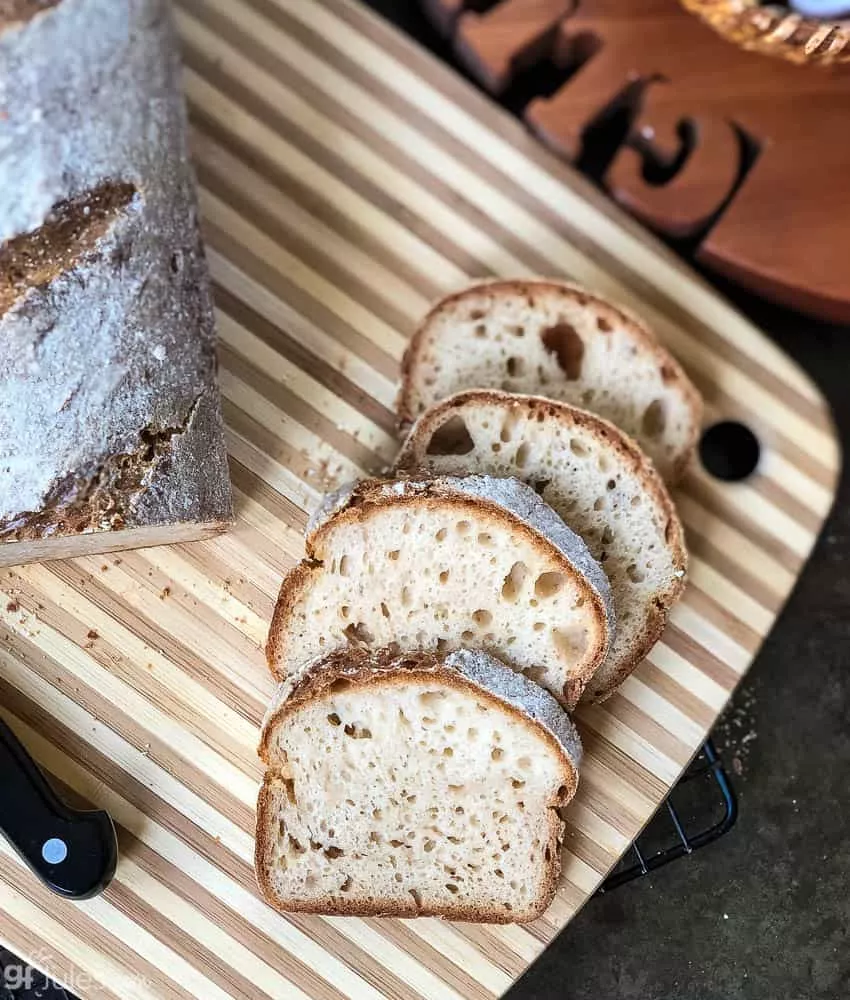
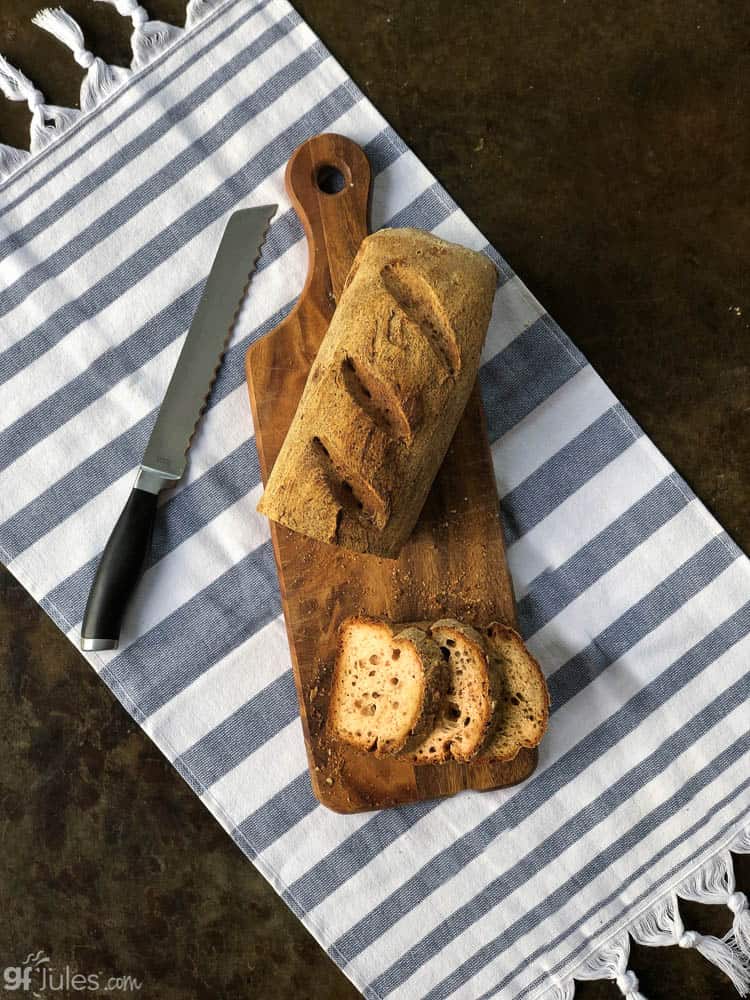
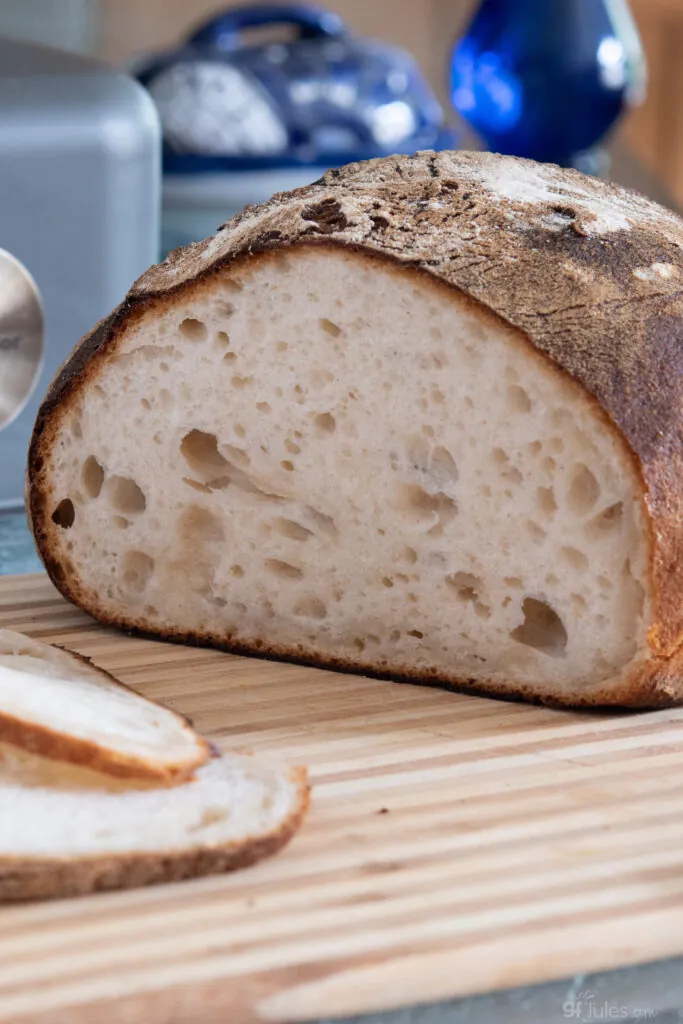
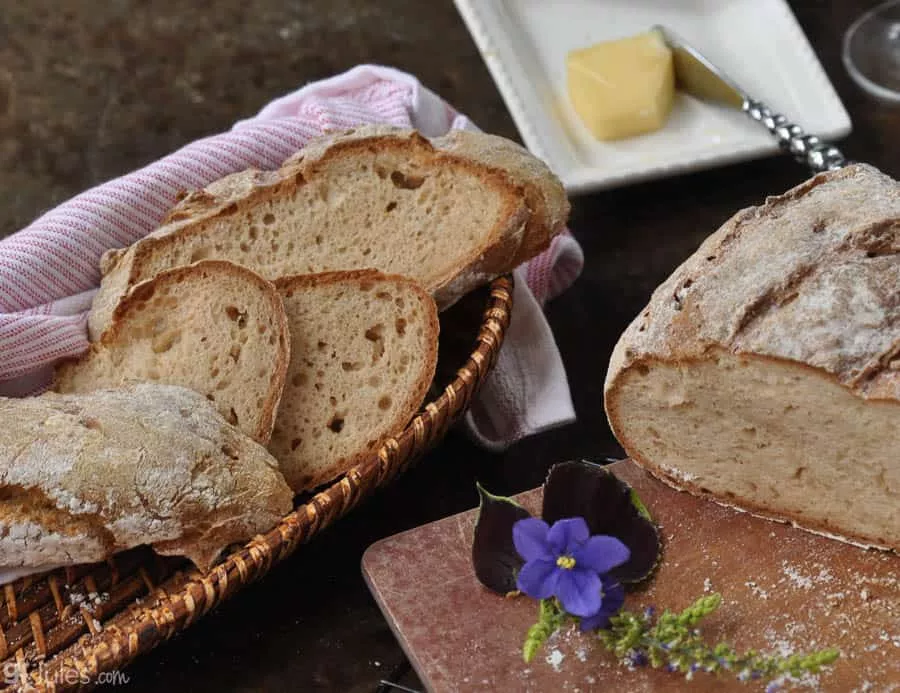
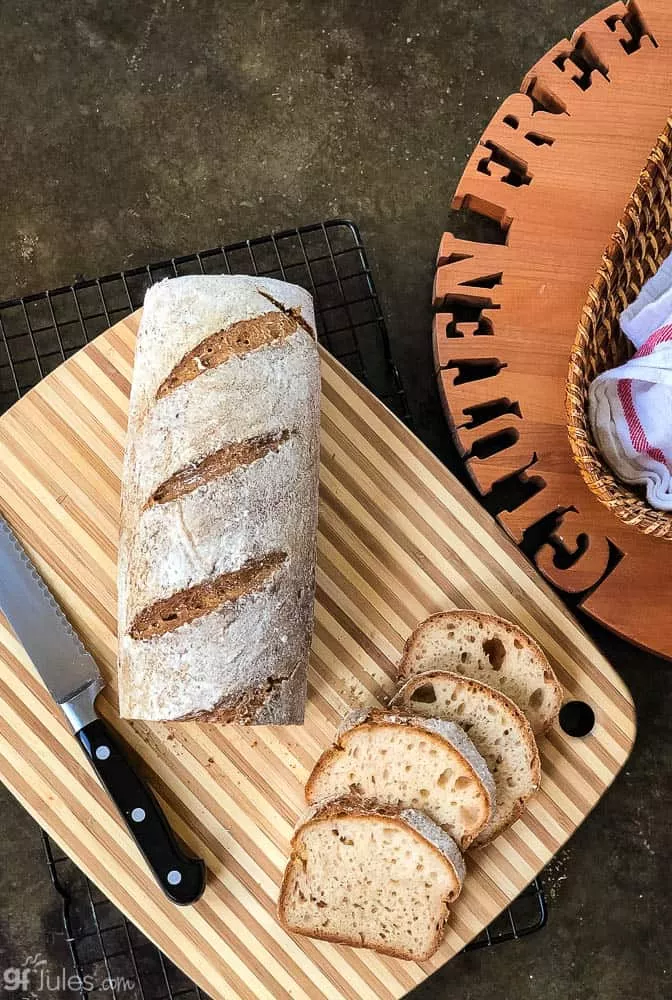
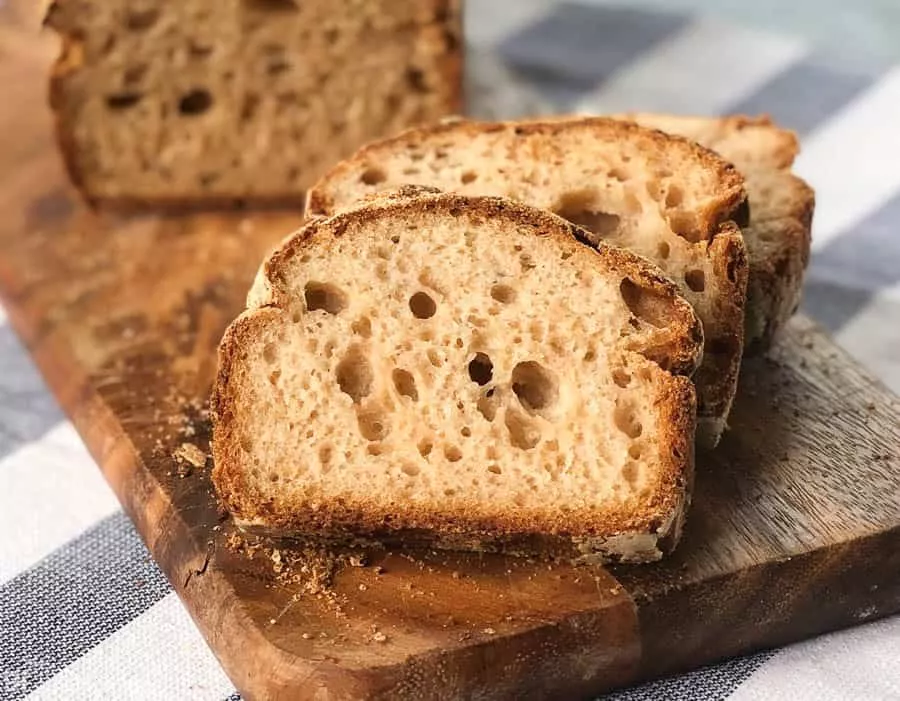
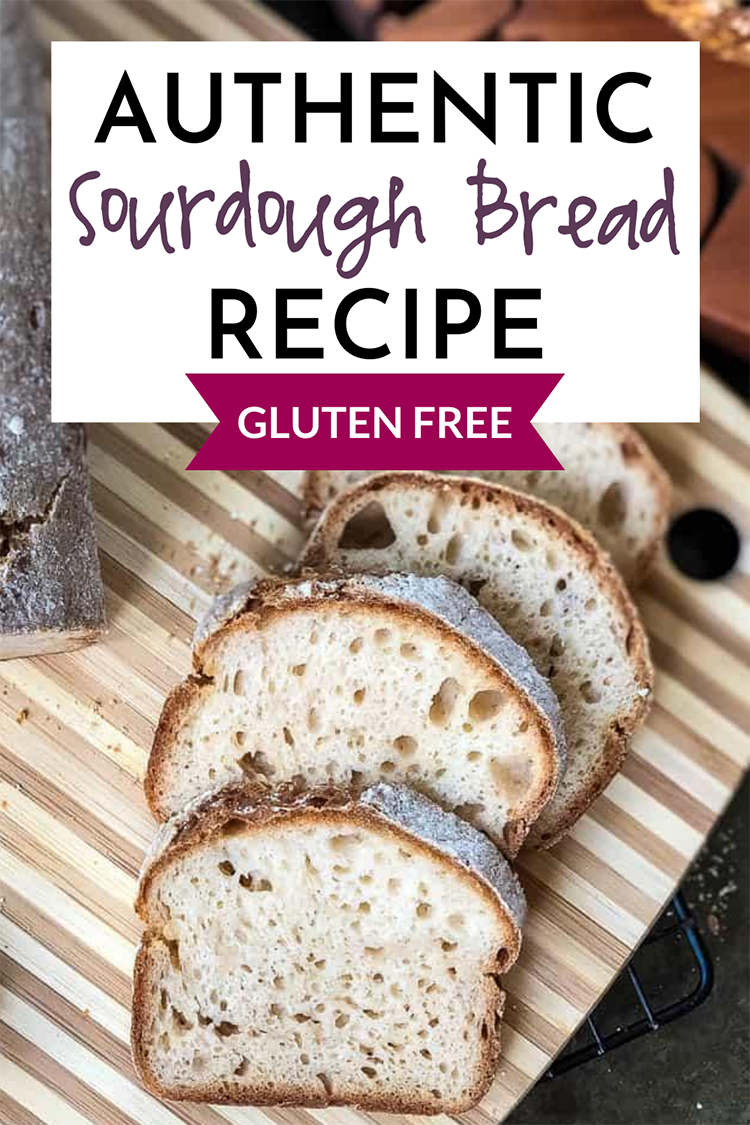
There are three main distinguishing features of sourdough: taste; smell; and texture. You might expect that the most difficult feature to achieve in gluten free sourdough would be texture, but as you can see from the photos, the artisan texture, open cell structure and crunchy crust are present in each of my loaves made with my gfJules Flour (plus psyllium husk) or my gfJules Bread Mix.
The smell is something that is quite noticeable from the starter. It should be tangy and rather sour smelling to know it’s really active. If your starter isn’t smelling very sour, it needs to age longer and/or be fed more.
But the sour taste was the thing that seemed to be most elusive for me in my early bread experiments.
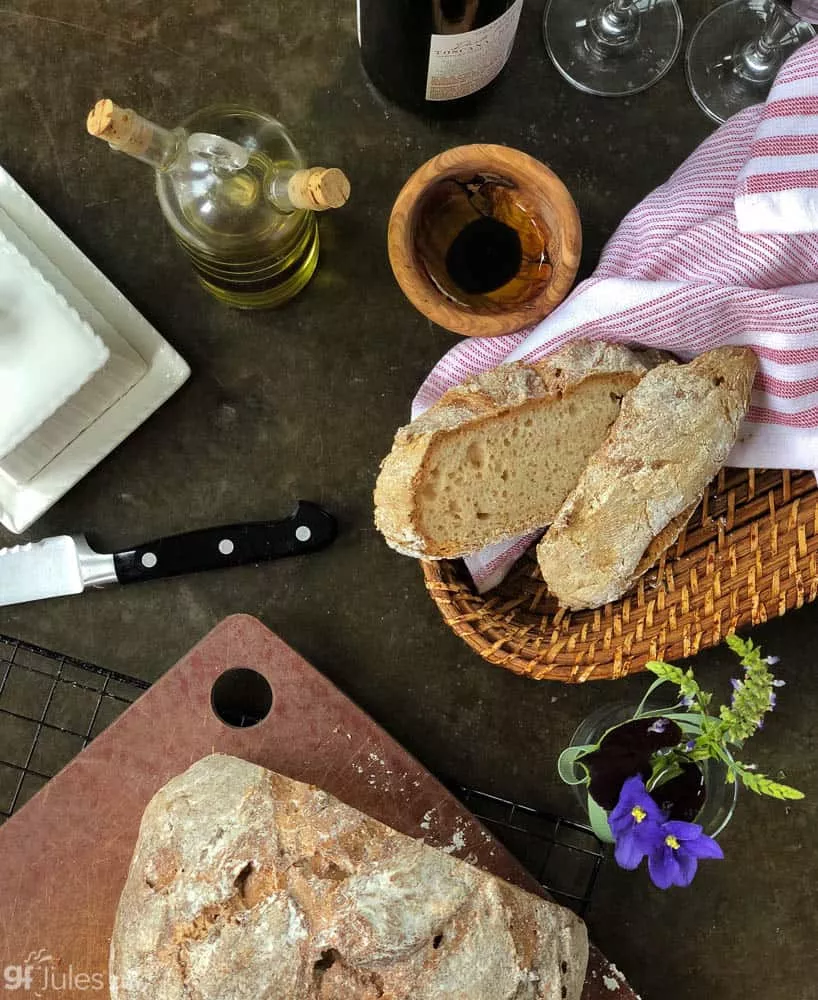
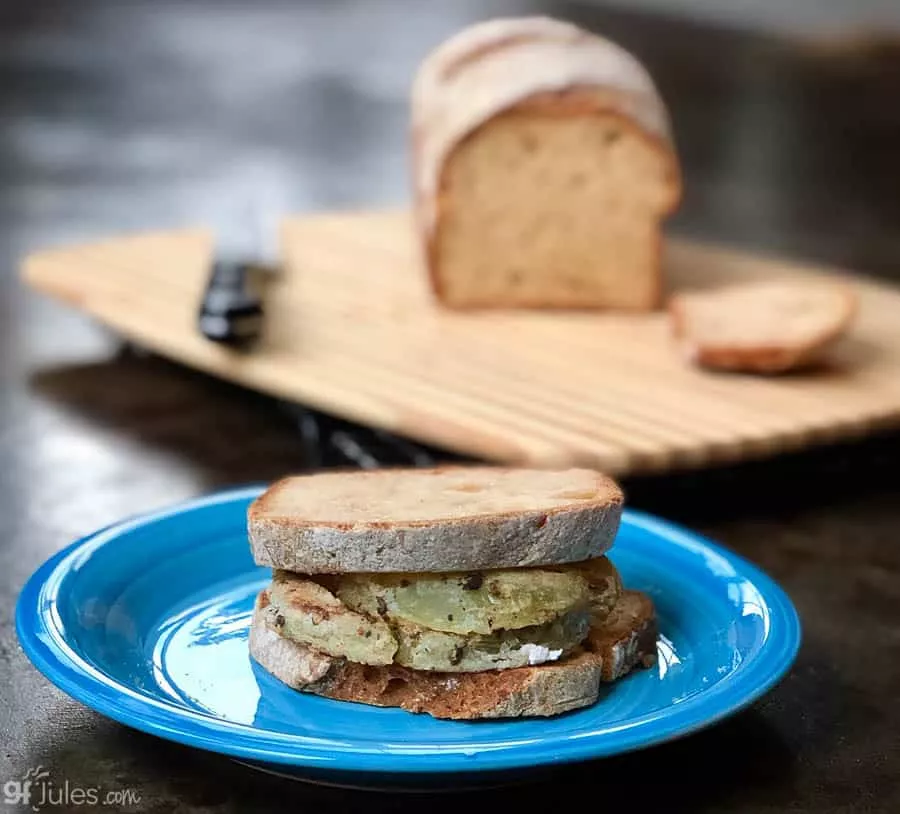
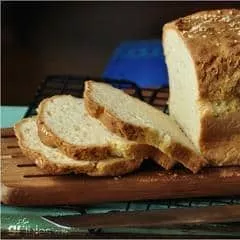
My first breads came out tasting yeasty and mild, just perfect for sandwiches or dipping in olive oil and balsamic (which we’ve been doing nearly every night for weeks now!).
No, the sour taste didn’t come easily. I did achieve it somewhat when I allowed the bread to rise overnight, so if you are searching for that sour, I recommend budgeting time for an overnight rise. But I wanted MORE SOUR. Lucky for you, I cracked the code on that too.
How Do I Make Gluten-Free Sourdough Taste More Sour?
- Overnight Rise. I allowed my bread to rise as I described above, then placed it in the refrigerator overnight (still covered), then removed it the next day to sit on the counter to come to room temperature before baking. THEN the sour started to show through! (note: if you’re baking egg-free, leaving the dough covered in the oven turned off overnight is a good way to get that sour taste.)
- But even more revolutionary, I’ve recently changed my recipe to remove any chemical leaveners (baking powder, baking soda) which altered the pH and allowed the sour flavor to shine through. Those ingredients counteract the sour tang, so adding them negates the sour. This tweak has really made the difference in my gluten free loaves tasting more sour.
- Another site has recommended NOT feeding your sourdough starter again before baking with it in order to increase the sour flavor of the bread. This will also decrease the rise and will necessitate a longer proofing time, however. (Go here for the recipe to make your own gluten free sourdough starter)
- Add more apple cider vinegar. You can always add another tablespoon or two, and reduce the liquid in your recipe to compensate.
If you do any experimenting of your own and find other ways to make this bread taste sour-er, please share in the comments below!
Storing Your Homemade Gluten Free Sourdough Bread
I always recommend storing your baked goods at room temperature in a sealed container, and this gluten free sourdough bread is no exception. The simple truth is that if you put baked goods into the refrigerator, they will dry out. You can put them into the freezer when they are fully cooled, but they will need to be warmed or toasted before enjoying again.
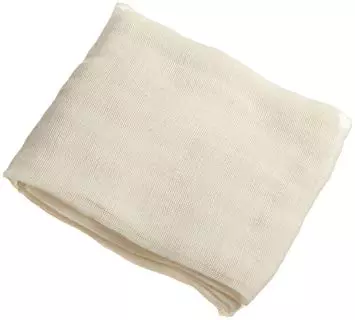
This gluten free sourdough bread is still soft and delicious after a few days in a zip top bag with the air squeezed out of it and stored at room temperature. Depending on the size of your loaf, you may need to cut it in half to get it to fit into a gallon sized bag, but other than that, it’s easy to just seal it up and grab a slice whenever you like! You can also store the bread European-style in a cloth or bread blanket.
If you’d like to bake a regular gluten free artisan loaf without the sourdough starter, check out my Gluten Free Artisan Bread Recipe. And of course, my award-winning gfJules Gluten Free Bread Mix works well for any kind of sandwich bread, oven or bread machine, hamburger/hot dog bun or baguette recipe! Click on the “description” tab to find links to all these gluten free bread recipes or use the search bar above.
Also note that if you don’t have an aversion to using actual yeast, the best way to get a great rise AND the sourdough taste is to use a little yeast in your bread along with the sourdough starter. In France, in fact, it is permitted to add up to .2% active yeast to sourdoughs and still call the bread a naturally leavened sourdough. You’ll see I’ve recently added an option to add 1 teaspoon active dry or instant yeast to the dough if you’d like to try that method.
So let’s get down to baking great gluten free sourdough, shall we?
To make a homemade gluten free sourdough starter, hop to this recipe!
Note that this recipe is constantly evolving, the more loaves I bake, the more research I do, and the more feedback I get from you, my readers! What was great gets even better, so keep checking back in for updates to the recipe!
Gluten Free Sourdough Bread Recipe
Gluten Free Sourdough Bread Recipe
Equipment


Ingredients
Sourdough Loaf or Artisan Bread Dry Ingredients
OR from scratch:
- 3 (420) cups (grams) gfJules® Gluten Free All Purpose Flour (for this recipe measure each cup to 140 grams/cup)
- 1/2 (70) cup (grams) gfJules Corn-Free Multigrain Flour (OR mixture of buckwheat flour OR cassava flour OR almond meal OR millet flour OR sorghum flour OR coconut milk powder)**
- 2 teaspoons kosher sea salt
- 1 teaspoon rapid rise yeast or active dry yeast like Red Star (this is OPTIONAL, but recommended if using young starter or less rise time)
PLUS These Other Ingredients
- 2 Tablespoons apple cider vinegar
- 1/4 (56) cup (grams) sugar
- 1 (11) Tablespoon (grams) psyllium husk powder (DO NOT ADD if using gfJules Bread Mix) optional with scratch recipe, but recommended (without psyllium, liquid may need to be reduced by 2-4 Tbs. if dough is too loose)
- 3/4 (185) cup (grams) active gluten free sourdough starter (feed 4-6 hours before)
- 1½ cup bubbly liquid like club soda, sparkling water, ginger ale OR naturally gluten free beer
Instructions
- Bring all ingredients to room temperature.
- Preheat oven to 200°F if rising there.
- Stir the following ingredients together in a large mixing bowl: apple cider vinegar, sugar, psyllium husk powder, and gluten-free sourdough starter. Mix until smooth and thickened, approximately 2 minutes. (If using gfJules Bread Mix, stir just until mixed, since you aren't adding psyllium.)
- In a separate bowl, whisk together remaining dry ingredients, then slowly add into the large mixing mixing bowl together with bubbly liquid. Use the paddle attachment on a stand mixer or a dough mixer hand tool. Mix until dough comes together. (If adding active dry yeast, proof yeast before adding.) Mix for two minutes with mixer, longer if by hand.
- Transfer dough to a clean counter or pastry mat dusted well with gfJules Flour. Turn dough several times in flour to smooth the dough and shape into a ball or a log for a loaf pan.
If Baking in Loaf Pan:
- Transfer dough to an oiled or parchment-lined Pullman Pan or 9x5 loaf pan, lightly dusted with gfJules Flour, or to floured parchment-lined pan or bowl for rising. Spritz with water, brush with olive oil, and dust the top of the dough with more gfJules Flour for best results.
- Cover with oiled plastic wrap and set inside oven warmed to 200℉. Turn oven off and turn light on.
- Allow the dough to rise for at least 1½ hours, or up to 3 hours before baking. Alternatively, after 3 hours, remove to refrigerator for further overnight rise. If refrigerating overnight, bring the dough to room temperature before baking the next day.
- Preheat oven to 350° F or 325° F convection.
- Remove plastic wrap and slice across the top of the dough as pictured to direct the rise.

- If you prefer a very crunchy crust, fill a spray bottle with water and spritz the dough again before baking, and again every 15-20 minutes while baking.
- Bake loaf in the pan for 75 minutes and test with a bread thermometer. The internal temperature should reach at least 205° F before removing to cool. If the bread is browning too much, cover with foil in order to keep baking.
- Once bread is fully cooked, remove to cool on a wire rack for 15 minutes before removing from the pan. Allow to fully cool before slicing.
If Baking Artisan Bread:
- Transfer to a proofing basket or oiled parchment-lined glass bowl.
- Cover loosely with a warm, damp tea towel or oiled cling wrap and place in a warm spot to rise at least 1½ hours, or up to 3 hours before baking. Alternatively, after rising, remove to refrigerator for further overnight rise. If refrigerating overnight, bring the dough to room temperature before baking the next day.
- Invert gently onto a parchment lined baking sheet and remove basket or bowl. Cut a slice across the top at an angle with a lame or sharp knife before baking.
If Baking in Dutch Oven or Using Baking Shell:
- Place Dutch Oven inside oven and preheat oven to 500°F. If using a baking steel and shell method, place the baking steel on the oven rack to preheat (no need to preheat the baking shell).Once the Dutch Oven is preheated, remove lid and place parchment with dough boule inside, spritz with water, then replace the lid and put the Dutch Oven back inside the oven. If using baking shell, transfer loaf onto parchment and slide onto hot steel in the oven (using a dough or pizza peel helps here) then cover with baking steel.Bake for 20 minutes covered, then remove the lid and reduce the oven temperature to 450°F and bake for 25 more minutes. *To prevent the bottom of the loaf from burning, place an oven safe pan at least the diameter of your Dutch Oven or steel on the rack just below and fill with ice cubes. This will provide both steam and a buffer between the heating element and the bottom of the pan.*

If Baking On Baking Sheet:
- If baking without pan, place bread on parchment lined pan in 500°F preheated oven, then immediately reduce the temperature to 450°F and bake for 35 minutes, test internal temp and continue to bake if needed -- bake until bread is browned and internal temperature reaches at least 205°F. *To prevent the bottom of the loaf from burning, place an oven safe pan at least the diameter of your bread on the rack just below your baking pan and fill with ice cubes. This will provide both steam and a buffer between the heating element and the bottom of the pan.*
- Using either method, once the bread is baked, turn the oven off but leave the bread inside the oven with the oven door cracked for another 20 minutes before removing. Allow to fully cool before slicing to prevent any gumminess.
Video
Notes
- 56 grams sugar
- 2 Tbs. apple cider vinegar
- 3/4 cup active sourdough starter (fed ~6 hours earlier)
- 1 1/4 cup warm water
** Please keep in mind that nutrition information provided is per serving, which may vary. While we have taken care to provide you with the most accurate nutritional values possible, please note that this information may differ significantly depending on the exact ingredients and brands that you choose to use to make this recipe. Additionally, where options are given for ingredients, the resulting calculation may include all ingredient options instead of only one per line, skewing the totals significantly.
Recommended Products
Any links to Amazon may earn me a small amount from qualifying affiliate purchases; this amount goes to fund this blog and does not cost you anything additional.
Viva Naturals
Bragg Live Food Organic Apple Cider Vinegar 946ml/32fl oz
Regency Wraps RW450N, 9 Sq. ft, Natural
gfJules All Purpose Gluten Free Flour
Norpro NOR-3952 12" Bread PAN, Non-Stick, 12 inch
Empty Amber Glass Spray Bottles with Labels (2 Pack) - 16oz Refillable Container for Essential Oils, Cleaning Products, or Aromatherapy - Durable Black Trigger Sprayer w/Mist and Stream Settings
gfJules Gluten Free Sandwich Bread Mix
Can I Make GRAIN Free Sourdough?
I’ve been getting this question a lot lately. Grain-free blends are very different from gluten free flour blends, and they behave differently in yeast breads. BUT … I have developed a mostly GRAIN-FREE Sourdough variation that is quite lovely with my gfJules Nada Flour.

Of note: the starter I used was based on my gfJules Multigrain Flour, so it does contain grains, thus, this loaf is not entirely grain-free.
I have not yet had time to develop a grain-free starter. Alas, I am but one baker. Someday ….

Mostly GRAIN Free Sourdough Bread Recipe
Ingredients
Sourdough Loaf or Artisan Bread Dry Ingredients
PLUS These Other Ingredients
- 2 large eggs OR 2 Tbs. flaxseed meal steeped 10 minutes in 6 Tbs. warm water
- 2 Tbs. apple cider vinegar
- 1/4 cup olive oil
- 1/4 cup 56 grams sugar
- 1 cup gluten free sourdough starter
- 1 cup club soda sparkling water, ginger ale, 7-Up, naturally gluten free beer, OR still water
Instructions
- Bring all ingredients to room temperature.
- Preheat oven to 200°F.
- Beat the following ingredients together in a large mixing bowl: eggs (or substitute), apple cider vinegar, oil, sugar, and gluten free sourdough starter. Mix until smooth.
- Slowly stir in dry ingredients with liquid, beating with paddle attachment on a stand mixer or using a wooden spoon until the batter is smooth and all dry ingredients are completely integrated. Mix for two minutes with mixer, longer with spoon method.
If Baking in Loaf Pan:
- Transfer dough to an oiled Pullman Pan or 9x5 loaf pan, lightly dusted with gfJules Nada Flour. Dust the top of the dough with more gfJules Nada Flour.
- Spritz with water and cover with oiled plastic wrap and set inside oven. Turn oven off and turn light on.
- Allow the dough to rise for at least 1 1/2 hours, or up to 3 hours before baking. Alternatively, after 3 hours, remove to refrigerator for further overnight rise. If refrigerating overnight, bring the dough to room temperature before baking the next day.
- Preheat oven to 425° F.
- Remove plastic wrap and slice across the top of the dough to direct the rise.
- If you prefer a very crunchy crust, fill a spray bottle with water and spritz the dough before baking, and again every 15-20 minutes while baking.
- Place uncovered loaf pan in oven, then reduce temp to 350° F. Bake loaf in the pan for 75 minutes before testing with a bread thermometer. The internal temperature should reach at least 205° F before removing to cool. If the bread is browning too much, cover with foil in order to keep baking. Bake for full 75 minutes, even if bread has reached internal temp earlier.
- Once bread is fully cooked, remove to cool on a wire rack for 15 minutes before removing from the pan. Allow to fully cool before slicing.
** Please keep in mind that nutrition information provided is per serving, which may vary. While we have taken care to provide you with the most accurate nutritional values possible, please note that this information may differ significantly depending on the exact ingredients and brands that you choose to use to make this recipe. Additionally, where options are given for ingredients, the resulting calculation may include all ingredient options instead of only one per line, skewing the totals significantly.
Recommended Products
Any links to Amazon may earn me a small amount from qualifying affiliate purchases; this amount goes to fund this blog and does not cost you anything additional.
Viva Naturals
Bragg Live Food Organic Apple Cider Vinegar 946ml/32fl oz
Regency Wraps RW450N, 9 Sq. ft, Natural
gfJules All Purpose Gluten Free Flour
Norpro NOR-3952 12" Bread PAN, Non-Stick, 12 inch
Empty Amber Glass Spray Bottles with Labels (2 Pack) - 16oz Refillable Container for Essential Oils, Cleaning Products, or Aromatherapy - Durable Black Trigger Sprayer w/Mist and Stream Settings
gfJules Gluten Free Sandwich Bread Mix
Many thanks to the indomitable Chef Patrick Auger for his help in developing this original recipe years ago. His passion for baking allergen-friendly foods has helped many a baker achieve amazing gluten free results like these!
I can’t wait to hear about your gluten free sourdough bread baking!
Pin for later!


I was wondering if I could substitute the 1/4 cup of buckwheat flour for 1/4 cup of your gf flour. The first time I made the bread using buckwheat flour it came out darker than I would have liked.
Other that the dark color we enjoyed the first loaf of gf sourdough bread.
Thank you for your reply.
Hi Helen, you likely could, although the buckwheat flour is there as a whole grain flour to add support where my gfJules Flour is a lighter, starchier flour to provide lift and airiness. I would first recommend trying another whole grain gluten free flour like millet (my other go-to whole grain gluten free flour). It is a lighter color and also mild-flavored. I think you’ll like the results better.
So glad to hear your enjoyed the gluten free sourdough recipe!!!
~jules
Thank you, I’ll add Millet to my shopping list next time I go. I did try the 1/4 cup of your flour to replace the buckwheat. The bread turned out a little on the heavy dense side. Will keep trying, each loaf gets better with each try.
Hi Jules,
I’ve been at this for over almost two weeks now and I’m getting absolutely no activity (no bubbles, no rise, etc) using your flour, water, apple cider vinegar and yogurt instead of the yeast as you’ve suggested (because I can’t get yeast anywhere during these crazy times!). From everything else I’ve read all over the web, it seems that even without adding yeast or yogurt, that I should expect wild yeast to eventually collect and start to make this active if I keep at it. Since I’ve almost run through an entire 4.5lb bag of flour with nothing to show for it, I’ve resorted to reducing the amounts that I’m feeding down to 1/4c of flour and 1/4c water, and only keeping about 1/2c of the starter to try and get something going, and I’ve been putting it in my oven with the light on (which is holding about 80F). It’s still pretty cold here in MA and my house never really gets over 68F, but the one day it reached into the 70s last weekend I did put it out on my counter with a cheesecloth over the top to try and grab some more wild yeast. I’ve been letting my filtered tap water sit on the counter just in case there’s chlorine to evaporate, and feeding daily. About 4 days in I added more apple cider vinegar and 5 days in more yogurt per your suggestions, and still nothing. Any suggestions on how I might kick start some wild yeast activity or any comments on what I might be doing wrong?
Hi JeffinMA, I can hear the frustration in your words, my friend! It sounds like there are a couple things at play: temp; yogurt (no straight yeast); oven.
I don’t think it’s a lost cause though!
A couple ideas I have (and unfortunately, I am not here to tell you I’m a sourdough whisperer or anything!) are to add a tough of honey or maple syrup to the starter and to add more water in case it’s too thick (should be pancake batter consistency). Definitely leave it on the counter, not the oven, because there won’t be much wild yeast in there, although I hear you on the temps. Cheesecloth is your friend in this case. Maybe even divide it into a couple containers, each with some cheesecloth covering it and put it in different locations in the house to see if you can “harvest” some airborne yeast in different locations. Add more yogurt, too. Because it’s chilly, that might be the biggest deterrent at this point.
Is it smelling sour at all? Is it thick or thin? Is it getting moldy? Just some more clues to the problem.
Those are my suggestions at this point.
Are you on Facebook? If so, join gfJules Gluten Free Recipe Share. There are several gluten free sourdough bakers in that group and they might have some ideas for you, as well. Fingers crossed for you, Jeff!!!
~jules
Thanks for the suggestions. I will definitely try with some more yogurt and honey and get it out of the oven (at least while it’s warmer during the day!) I was finally able to order some active dry yeast today, so if nothing’s going before that comes in late next week I’ll hopefully get this starter started that way!
Glad to hear you’re not giving up! Keep me posted! I heard from another reader who was having trouble with her starter not activating and the honey addition did the trick! Fingers crossed!!!
~jules
Hi all,
I think I have been caring for my starter with gf Jules flour and yeast ok but it is so huge after only 3 days. I have been second questioning the process as this is my first sourdough starter/bread making experience and I’m scared of running out of flour! Could I halve or quarter it and feed it less flour/water? It is slightly bubbly before feeding and deflates when I feed it each time and seems to be pretty airy inside with a pungent smell. Thank you!!!
It sounds like you’re a wonderful sourdough mama! I have wondered the same thing myself and intend to start over (pun intended) and try making starter with less and see if I can make it happy without using so much flour. If it seems so happy and healthy already, I would tend to think it’s going to be ok to add less, but I’m admittedly only a relative beginner in the gluten free sourdough realm myself. Maybe separate the starter into two bowls (I had to do this anyway because mine was so voluminous and I refused to throw any out!) and try your own experiment, adding less flour to one bowl to see if you find it makes any difference. And then by all means, please come back and let all of us know what happens!!! I think if the proportions added stay the same, and it doesn’t noticeably diminish in activity, you should be good to go, but this is a grand experiment, isn’t it? 🙂
Best of luck and happy baking!!!
~jules
Thank you Jules!! I did have to separate it into two containers and was unfortunately late feeding it so added the full cup to each half in hopes to liven it up. But next feeding I will experiment and see if half a cup does it.
Sounds like a plan! You certainly didn’t hurt anything adding a full cup. Can’t wait to see how it goes!
~jules
I can’t seem to get this recipe right. First time turned out all wrong. I thought I fixed all my mistakes, but this second time it’s now been in the oven 3 hours and is still not baked. The temp read 205 at one point, but it was still all gooey inside. What am I doing wrong??
Hi Maggie, what kind of pan are you using? What liquids and other ingredients from those listed did you choose? Was your starter definitely active (bubbly and smelled sour)? Did it rise? Any other clues about things that didn’t seem to look right besides the fact that the middle wasn’t cooked?
~jules
i made one loaf of gluten free sourdough bread which turned our ok . I was wondering if I could substitute the 1/4 cup of your flour for the 1/4 cup buckwheat flour so the bread wouldnt be so dark?
Thank you for your reply.
Helen Schueller
Hi I started my starter a few days ago. It smells wonderfully pungent but is not bubbly at all. Should I do anything or is it ok? How do you know when you can start baking with it?Thank you!
Hi Jal, that is the million dollar question, isn’t it?! Everyone seems to ask that same question, so rest assured you’re not doing anything wrong!
Did you start it with yeast or yogurt? It’s possible with yeast, of course, that the yeast was inactive at the start. It would be tragic, but since you said it never bubbled, it’s a possibility to consider.
Is it very thick? Sometimes if starter is too thick, it’s too thick to be bubbly, so I recommend adding some water. Also, try adding more apple cider to liven it up; maybe even a bit of honey or agave to feed it.
If it’s still never bubbled at all, I’m not sure that it’s active. With mine, they started out very bubbly then got less so as time went on, but stayed sour smelling and worked in my recipes. I do believe this starter recipe will work if you use half of the recipe (keep the same proportions, of course), so if you have to throw it out and start over, try it in a smaller quantity so at least there won’t be as much on the line. I hope these tips help!!
~jules
Thank you so much for your reply. I used yeast and I think it’s active. It’s not bubbly but between feedings it rises into something like a dome which deflates when I feed it. It is also very sour smelling. So I thinkit’s ok, yes?
Baked with my starter yesterday. Amazing bread!!!! Thank you! I wish I could post a photo.
Oh Jal, I’m so excited for you!!! Gluten free sourdough to the rescue!!! Send your photo to support at gfJules dot com! I’d absolutely love to see it!!!! Congrats on a great loaf of sourdough and many more to come!
~jules
I am so excited to begin my starter today. Will this pullman pan work? https://shop.kingarthurflour.com/items/pain-de-mie-pan-pullman-loaf-pan-13
Thank you!
Hi Jal, that pan should work just fine for this gluten free sourdough bread recipe! All pans will turn out different shaped loaves, but I really like the higher sided pullman pans for supporting the sourdough structure. You’ll have to be the judge of what you want your loaves to look like and what size you want the slices to be ultimately, but the pan should work for baking the loaf, yes, to answer your question. Happy baking! Can’t wait to hear how the sourdough-ing goes!
~jules
Have been very thrilled with your flour……..I use it for all my German recipes and no one even guesses its gf…………Could I substitute a starter I have already been using made with brown rice flour,instead of your starter and then proceed with the rest of your recipe…..I d like to try your version of sourdough?Thanks E
Hi E, I’m so happy to hear that you’ve been loving my gfJules Flour in your German recipes – that is exactly why I developed it! I want folks to be able to use all their family and favorite recipes again, gluten free! As for this sourdough, if you already have a gluten free starter you’ve made, give it a go! I can’t say for sure how it will turn out, of course, since the starter is made from brown rice, but it’s worth a shot since the starter is active and should behave itself. 😉
Let me know how it turns out — you’ve got me curious!
~jules
Hi Jules! So this might be a silly question, but when you half the starter… do you have to get rid of it or can you just use it to make multiple loafs? When I bread bake I typically try to make a few at a time… I would hate to throw it away too! This recipes intimidates me, but I’d like to give it a try!
Thanks!
Not a silly question at all, Kristi! I hate to toss any gluten free treasures! I didn’t toss any of the starter, but just kept putting extras in different containers. 🙂 I discuss this more in the writing above the recipe card, but traditionally, folks have tossed half the starter as they divide it. It’s a smart idea to make multiple loaves. When you’ve got everything out to do your baking, just keep on baking, I say!!
~jules
hi Jules!
I’m so excited to try this! My starter is on day 6, so maybe this weekend.
When you were perfecting this recipe, did you try using a dutch oven? If so how did it go? I see everyone using dutch ovens to help the rise and keep it moist, but thought I would see what you think?
Hi Eliza, I’m so excited for you to bake out your sourdough starter into a loaf!!! To answer the dutch oven question, I tried so many different pans, but not a dutch oven yet. There’s no reason to think it wouldn’t work with this gluten free sourdough though. Give it a go! Can’t wait to hear about your results, Eliza!
~jules
Hi Jules! am making the starter right now and I have to say your process and your flour is amazing! I had nearly given up on sourdough when I was diagnosed with Celiac. I do have a question though. I have only been feeding the starter for 5 days and it already bubbles and doubles in size every day. Do I still need to wait the full 8 days? Thank you!
Hi Elizabeth, thank you so much for your kind words. SO excited that you’re loving my flour and having a good time baking! It sounds like at this point you should be good to go with the gluten free sourdough since it’s so lively and seems like it’s eager to be baked into a loaf for you! I can’t wait to hear how it turns out!!!
~jules
I came out so nicely!!! I am super thrilled and my house smells amazing!!
I’m so happy to hear it, Elizabeth!! And yes, there is something about the smell of fresh baked yeast bread!!!!
Thanks for taking the time to let me know how well your homemade gluten free sourdough turned out! Happy bread baking!
~jules
My starter has doubled in 6 days! So excited to make this bread. I don’t have any psyllium seed husk. Can I leave it our or use something else?
Isn’t that exciting?!? I just love that science experiment and watching that starter GROW!!!! You will need psyllium husk or you could try something else for structure. Check out this article about gums and psyllium for another substitute to try in its place.
~jules
Two questions: Is the cassava (or buckwheat) flour necessary even if I use Jules’ bread mix? Also: Is there any other substitute for the dairy or coconut powder? I cannot have dairy, coconut, potato, or soy. Suggestions?
Hi Karyl, if you’re using my gfJules Bread Mix, you won’t need the milk powder at all, or the cassava or buckwheat flour. Those are all in the OR category after the gfJules Bread Mix ingredient is listed — yay! (to recap: if you have my bread mix you don’t add any of these dry ingredients:
3 cups (405 grams) gfJules Gluten Free All Purpose Flour
1/4 cups (30 grams) cassava flour (or buckwheat flour)
1/4 cups (30 grams) dry milk powder (or coconut milk powder)
1/2 tsp. baking soda
2 tsp. baking powder
1 tsp. sea salt)
However, I should point out that my bread mix does contain potato which you listed was one ingredient you can’t have, so I wanted to make sure you knew that. It’s free of soy and coconut and dairy though. I hope that information is what you were looking for.
~jules
That helps – thank you!
Wonderful! Happy baking, Karyl!
~jules
I wish I could find someone to make this for me! It’s far to involved and complicated for my old disabled body and brain to wrap my head around and I miss sourdough so much! I’ve bought loaf after loaf of ready made gluten free sourdough and none of them come close to my beloved San Francisco sourdough. I like mine crusty and sour!
Aw, Jeanne, I wish I could just whip up a loaf and drop it by your front door! It’s a long post and seemingly long recipe, but once the starter is made, it’s not so very complicated. Maybe one day you’ll decide to give it a try. If you’ve ever made a sourdough starter before, it’s the same process only using my gfJules Flour instead; where the difference comes in is in the process for making the sourdough loaf itself, and when it comes to making gluten free breads, it’s actually easier to make gluten free bread than to make gluten bread! At least there’s that! 🙂
Hoping you decide to give it a try one day knowing that homemade is always better than those storebought gluten free loaves!
All the best, Jeanne!
~jules
Hi Jules, I’ve enjoyed your flour and recipes for about 8 years now! You truly are a lifesaver. I’ve made this starter and am doing your bread recipe today in pans. I was wondering, though, if there is a bread machine version? Or directions for what to do differently with a bread machine? Thank you!
Is there a substitution for the coconut milk powder. Not crazy about the taste. Could you use potato flakes?
Hi Alice, there’s not really enough coconut milk powder in this bread to impart a coconut flavor, but you could certainly use another milk powder in place of it instead. Can you use dairy? I use coconut milk powder because we are dairy-free, but regular powdered dairy milk will work well. I suspect potato flakes would be a worthy substitute, but I haven’t tried it yet in this recipe, so I can’t tell you exactly how it will turn out.
~jules
So I’m experimenting with sourdough and my crumb is good, but the bake isn’t quite finishing. How do I know when it is done and how wet is your dough mixture before it goes in? What consistency is it?
Thanks!
I’ve had the same issue. Sometimes mine have come out a little gummy, especially towards the bottom of the loaf. And I was using an internal thermometer to check the temp. I believe the mistake I made was not measuring the temp all the way at the bottom of the loaf. I’ve had better success if I’m a little more careful. Unfortunately, there’s really no way of being able to tell when the loaf is done just by looking at it, so a thermometer is a big help. Lastly, oven temperatures are not exact. They vary quite a bit. Put an oven thermometer in your oven and you’ll see what I mean. Mine runs about 10º cool. So you might think you’re baking at 375º but you’re really not. Hope this helps!
I agree with Tim, both about the importance of the bread thermometer and of the oven thermometer since it’s so tricky to know from the smell and outside crust of the bread to know if it’s really done. Oven temperatures also vary with placement in the oven and can change over time and require calibration, especially if you bake a lot or it’s an older oven.
Also, for whatever quirky reason, I’ve had the best, most consistent luck with getting this bread to bake all the way through every time when using the Pullman Pan I link to and show in the recipe above. I think the higher sides have something to do with it — supporting the structure of the bread as it bakes and also the fact that there’s not so much volume so the outside isn’t overcooked but the middles still get baked through. At any rate, I hope those tips help you get to gluten free sourdough nirvana!
~jules
It would help if you mentioned the club soda in the instructions
She did – “Slowly stir in dry ingredients or gfJules Gluten Free Bread Mix with bubbly liquid,…” It doesn’t say club soda specifically in the instructions because in the list of ingredients there are different options for types of bubbly liquid. I’ve personally used, Sprite Zero, club soda, and ginger ale. They all turn out the same and surprisingly do not impart any flavor. Hope this helps.
If i just wanted to use bob’s red mill in this recipe, how many cups would I use?
Thanks!
HI Marcus, the recipe was created with my gfJules Flour, and all gluten free flour blends are completely different, so it’s hard to tell. When you say Bob’s Red Mill blend, there are two totally different versions under that corporate brand, for example. The short answer is to use the same amount as listed in this recipe; the longer answer is that it will still require some tweaking. Have a look at this article on gluten free flours for more information that I hope you find useful. https://gfjules.com/gluten-free-flour-comparison/
Happy bread baking!
~jules
We just made this today and loved it! Two questions – can we cook the artisanal loaf in our dutch oven? Ok to have a lid on it? And also, it’s fairly sweet. Do you need the sugar? Thank you!
Hi, I don’t see why a dutch oven wouldn’t work. That’s a cool idea. The sugar in bread recipes serves several purposes. It helps to absorb moisture, it feeds the yeast (which is not relevant in this recipe), and helps to brown the bread due to caramelization. You could add less, but there comes a certain point when the recipe (think of it as a formula) will become compromised and you won’t get the results you’re looking for. Hope this helps!
All great points, Tim. I completely agree and think that the Dutch Oven won’t harm anything; it will really just affect the crust, mostly. I’m eager to hear how it works out, so please come back and let us know!
Do you split the starter before or after you feed it when it becomes to voluminous?
Hi Tina, I split it after I feed it. Enjoy the process!!
~jules