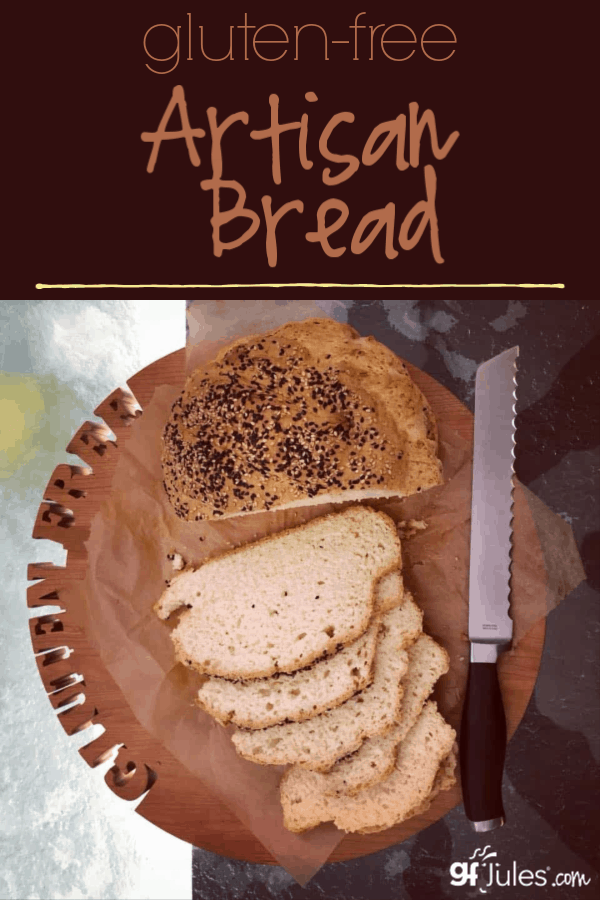
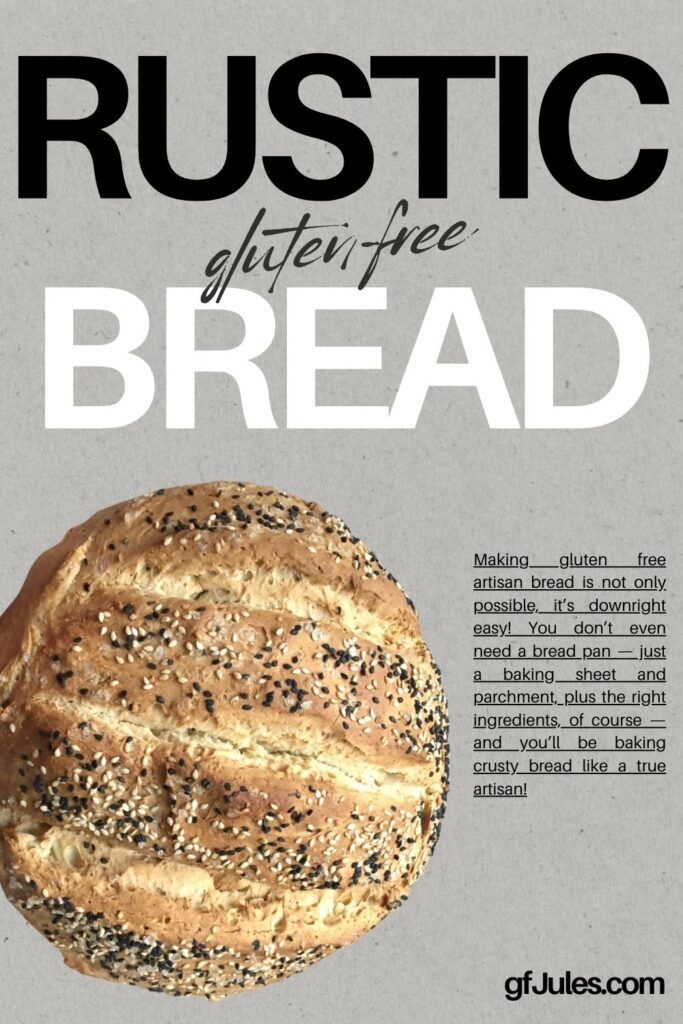
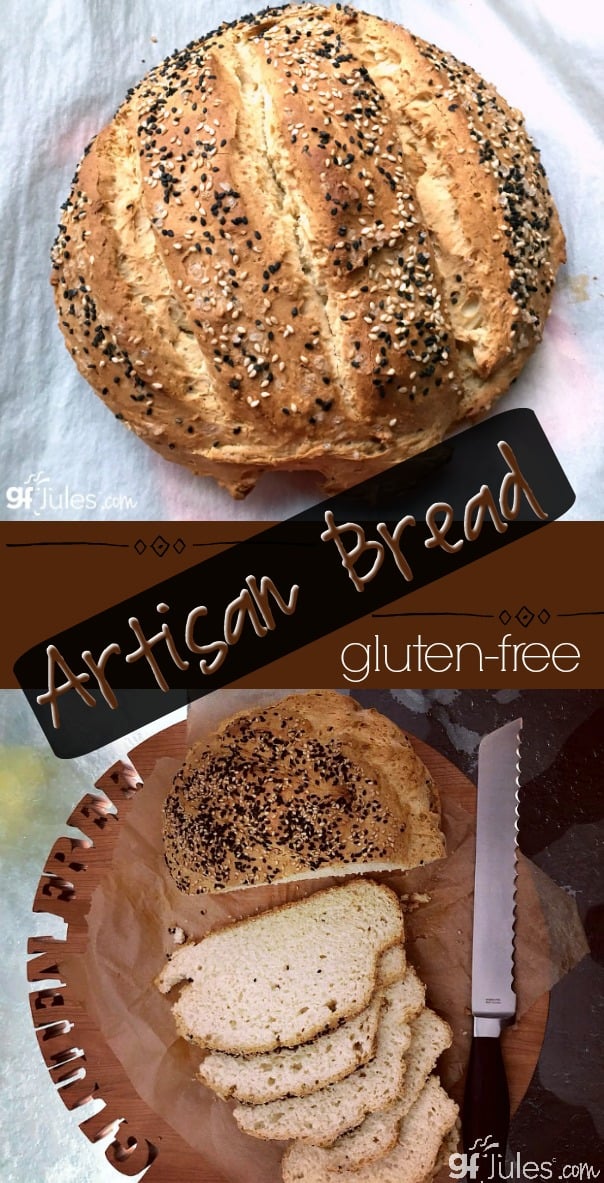
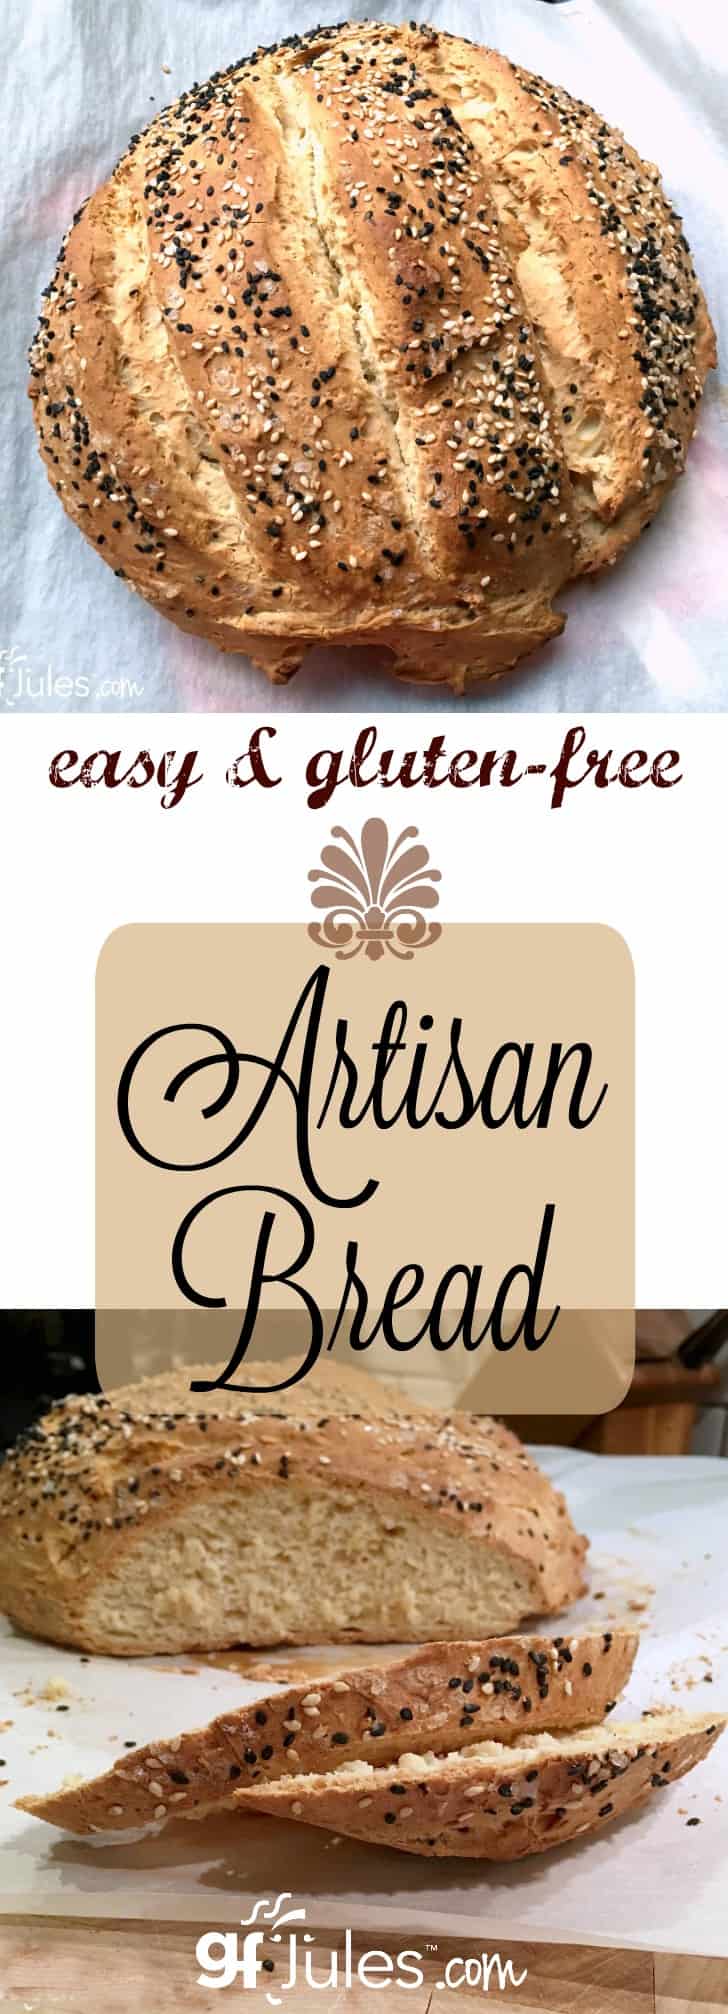
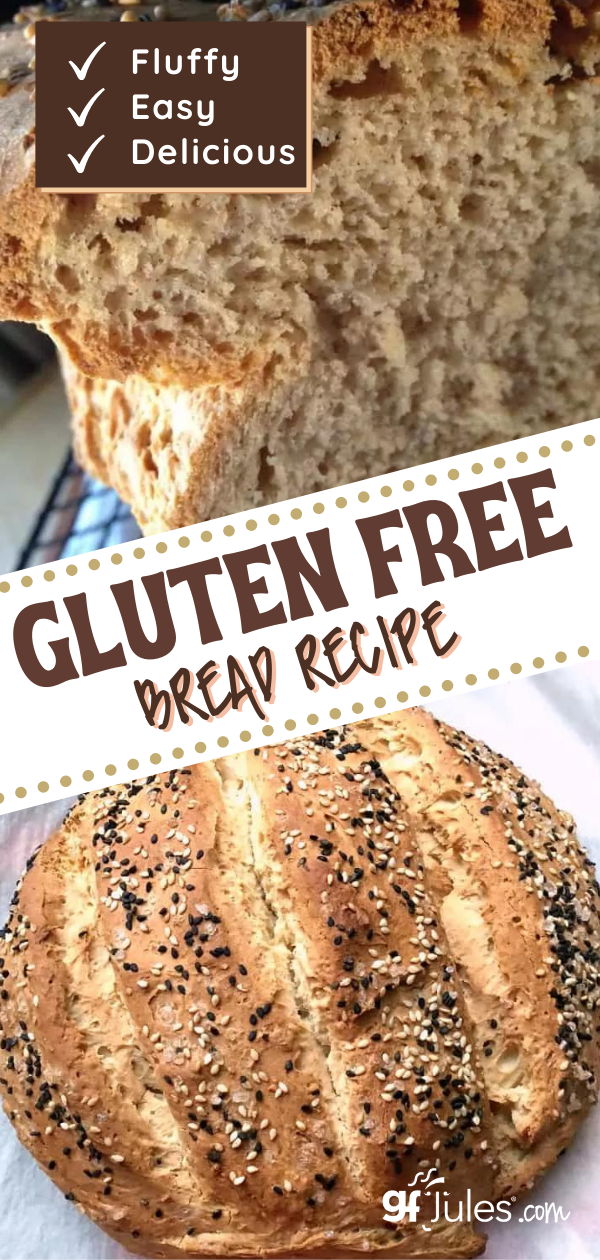
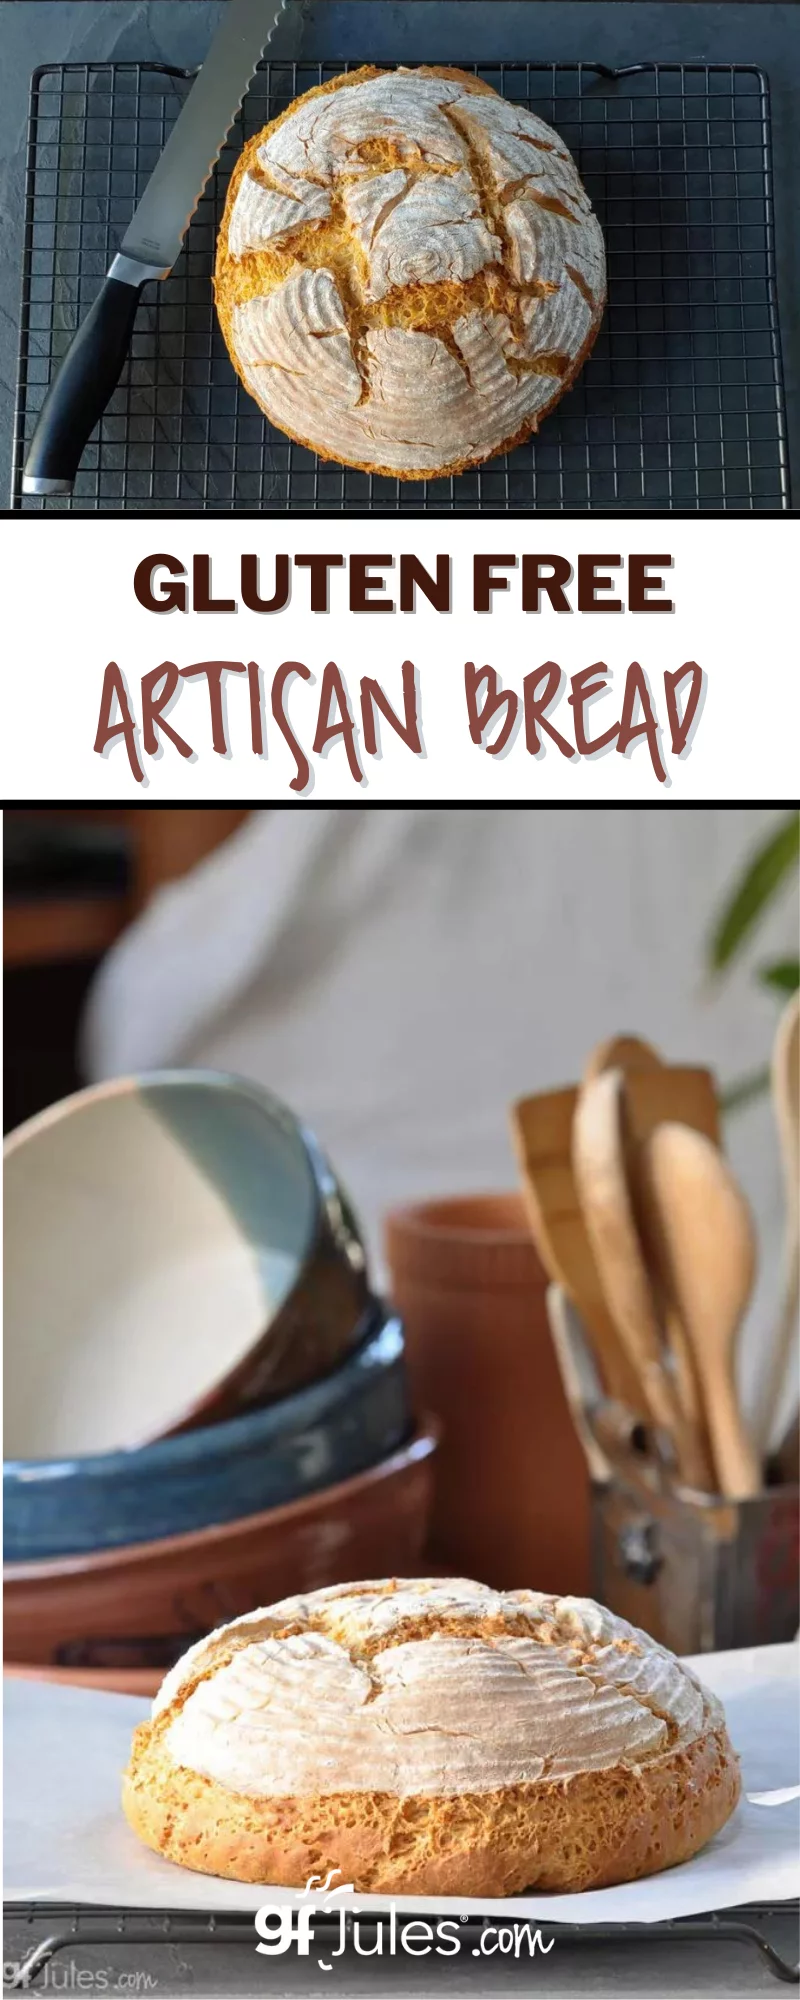
Making gluten free artisan bread is not only possible, it’s downright easy! You don’t even need a bread pan — just a baking sheet and parchment, plus the right ingredients, of course — and you’ll be baking crusty bread like a true artisan!
You don’t want to use heavy, gritty gluten free flours if you want your loaf to be light and airy like this one, so follow along and you’ll be serving beautiful, impressive, crusty gluten free artisan breads in no time!
How Do I Make Gluten Free Artisan Bread?
You know me — I’m always here for you with options! This gluten-free artisan bread recipe is no exception.
I give two options to make this delicious bread: use my award-winning super easy gfJules Bread Mix or my from-scratch recipe. And within that from-scratch recipe, there are two major options for baking without a pan for a true gluten free artisan bread look or partially baking in a round or springform pan for a more rounded loaf that even works well as a bread boule for soup!
Which will you choose?
Especially if using bubbly water or gingerale or even gluten free beer(!) as the liquid in this recipe, your dough will need some help holding together until mid-bake (*unless using my gfJules Gluten Free Bread Mix — see recipe cards).
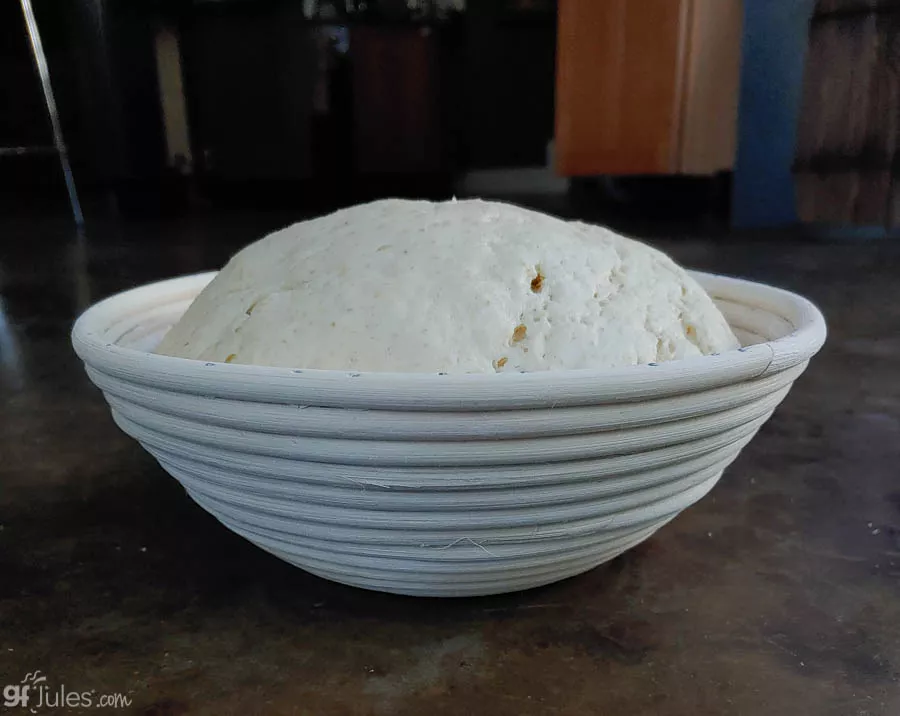
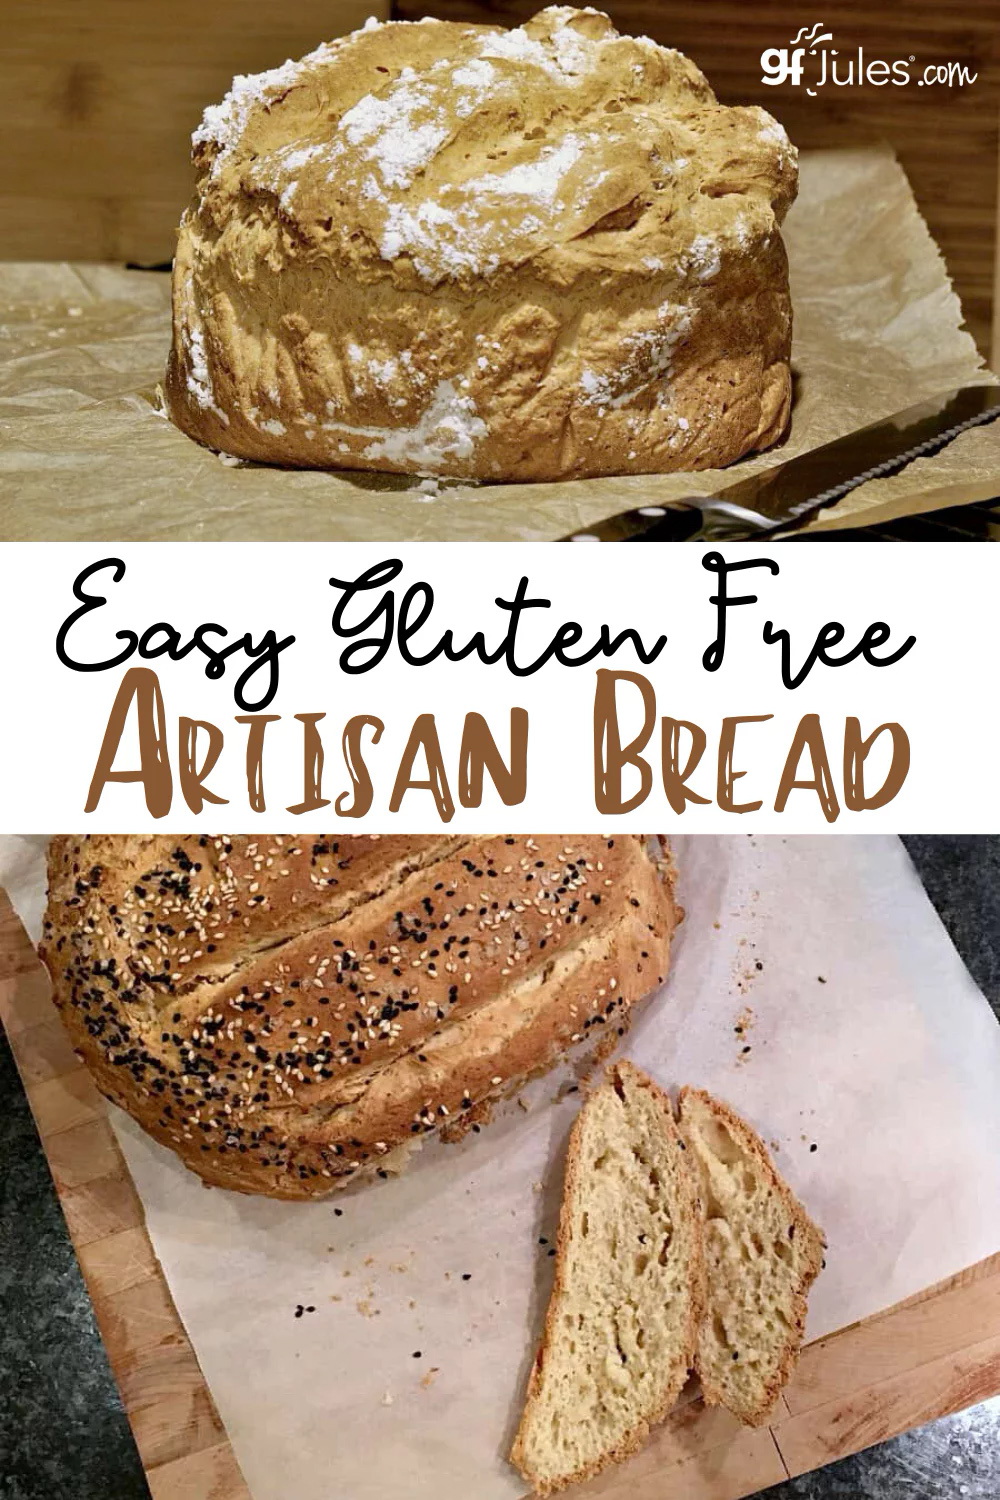
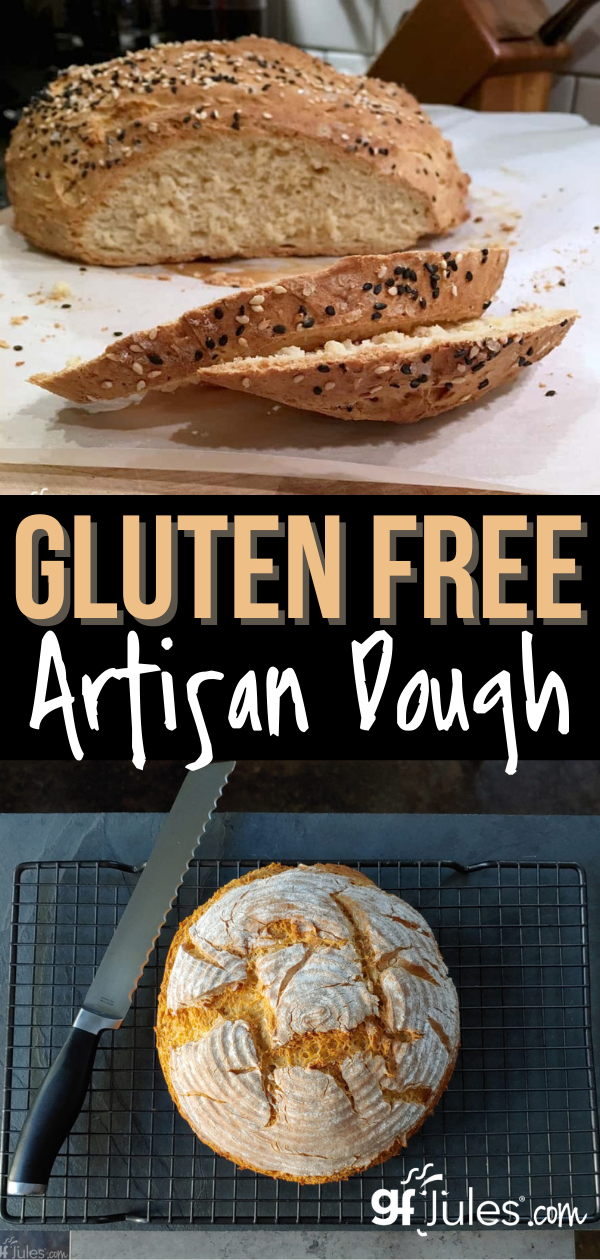
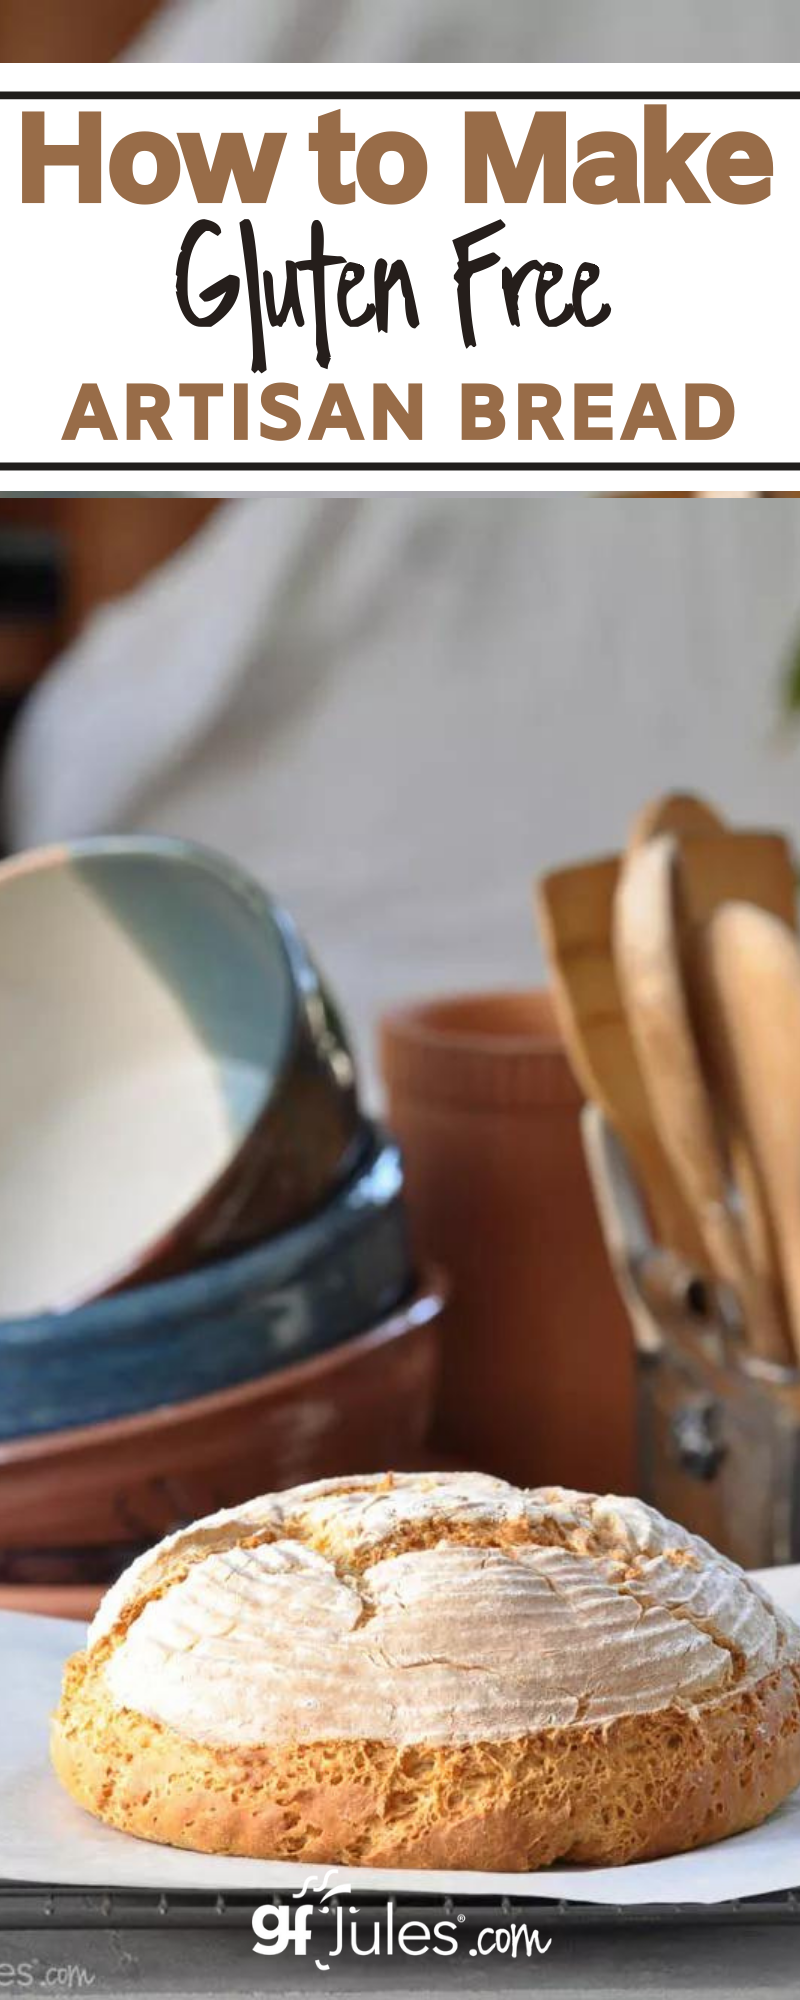
I prefer yogurt (I use vegan yogurt) for this recipe if baking from scratch and without a pan for the best, roundest shape, and using a bowl or proofing basket is always a handy way to help it rise in a rounder shape. How beautiful is this risen bread in a banneton?
Use a proofing basket like this one, a parchment-lined springform pan, or even a glass (oven-safe) bowl lined with oiled parchment, the dough can rest for as little as 30 minutes to overnight (covered) in the refrigerator while rising in the style of sourdough, if you like.
If using a thinner liquid in the recipe — like sparkling water or club soda — you may choose to leave it in the pan or bowl (not the basket) for half the bake time, then gently pull up on the parchment to remove it from the pan and place it (with parchment) onto a baking sheet and return to the oven.
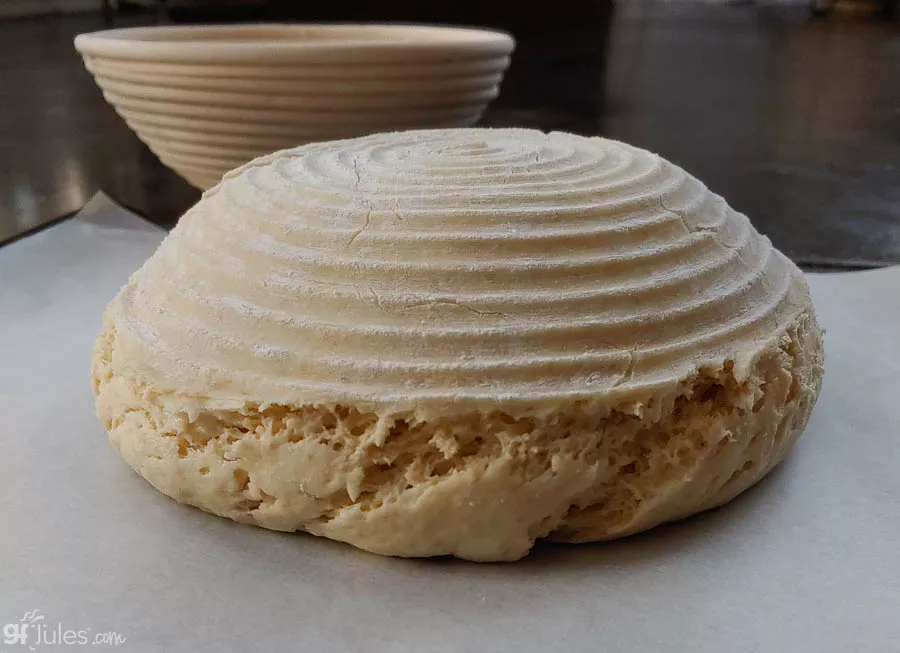
If using yogurt and a proofing basket, remove it before baking and it will keep a lovely round shape but not rise quite as high.
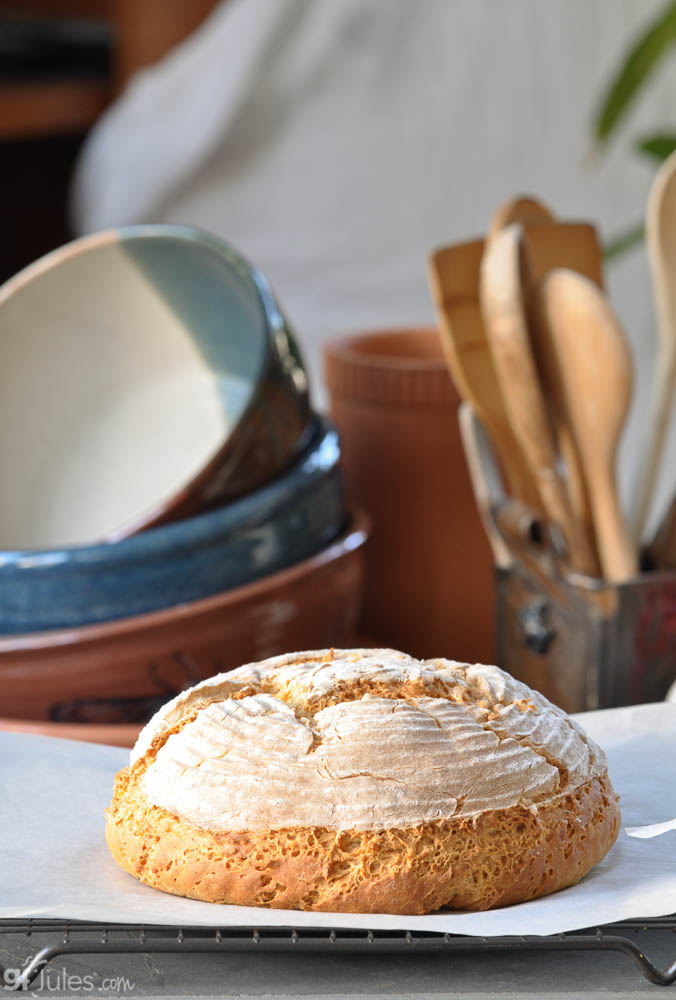
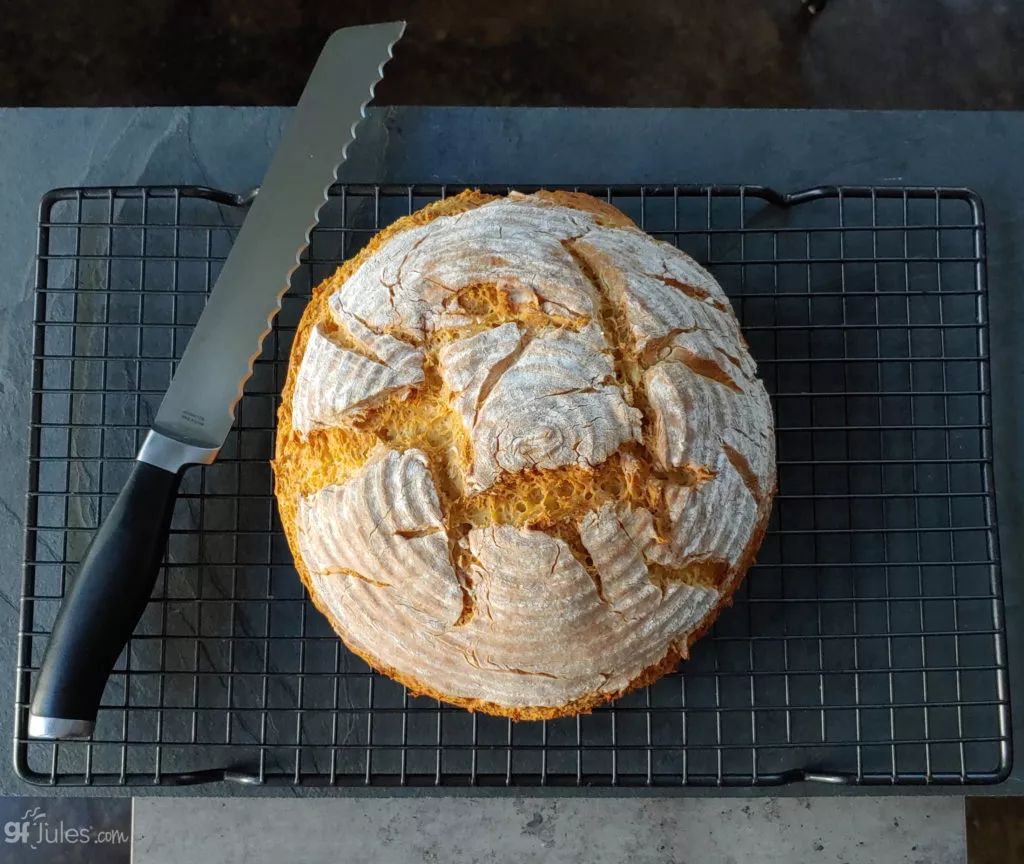
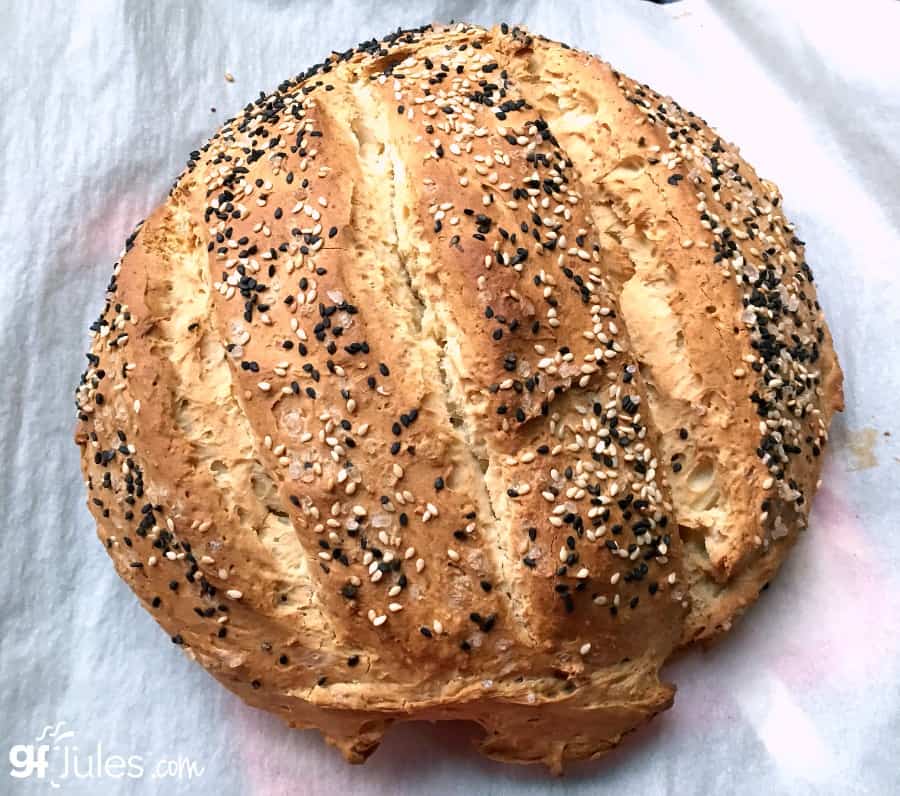
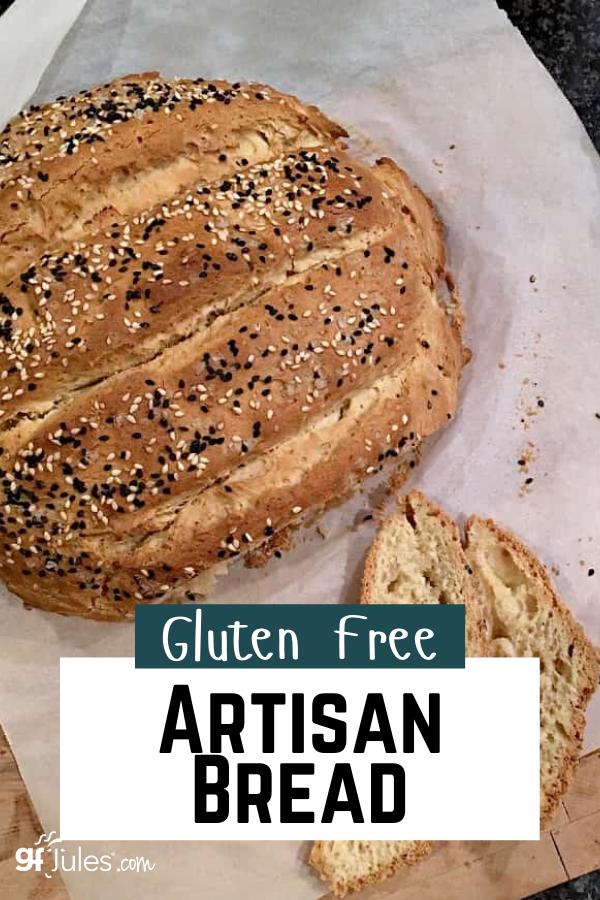
Every time you bake this gluten free artisan bread, it will take its own shape. It’s part of the beauty of this bread. No two breads will ever look alike, nor should they. Like snowflakes, they’re each unique and beautiful.
Here’s a picture of one reader’s lovely loaf. See, you can do it, too!
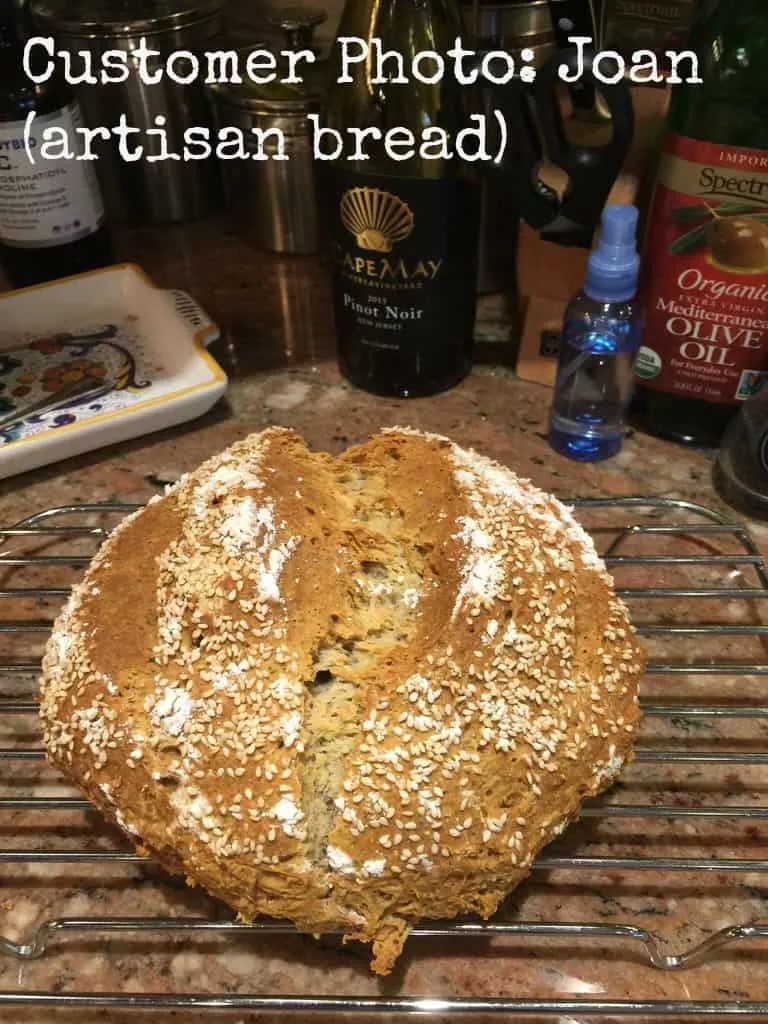
I can’t stop taking pictures of these loaves because every time they’re show-stoppers.
Check out the video below to watch me make gluten free artisan bread in a springform pan in case you don’t have any of these other options … so you know just how easy it is!
NOTE: my gfJules Gluten Free Bread Mix is now UPDATED and stays soft and fresh even longer! It also does NOT require a springform pan for rising in this recipe, although I love the look of it after rising in a banneton proofing basket!

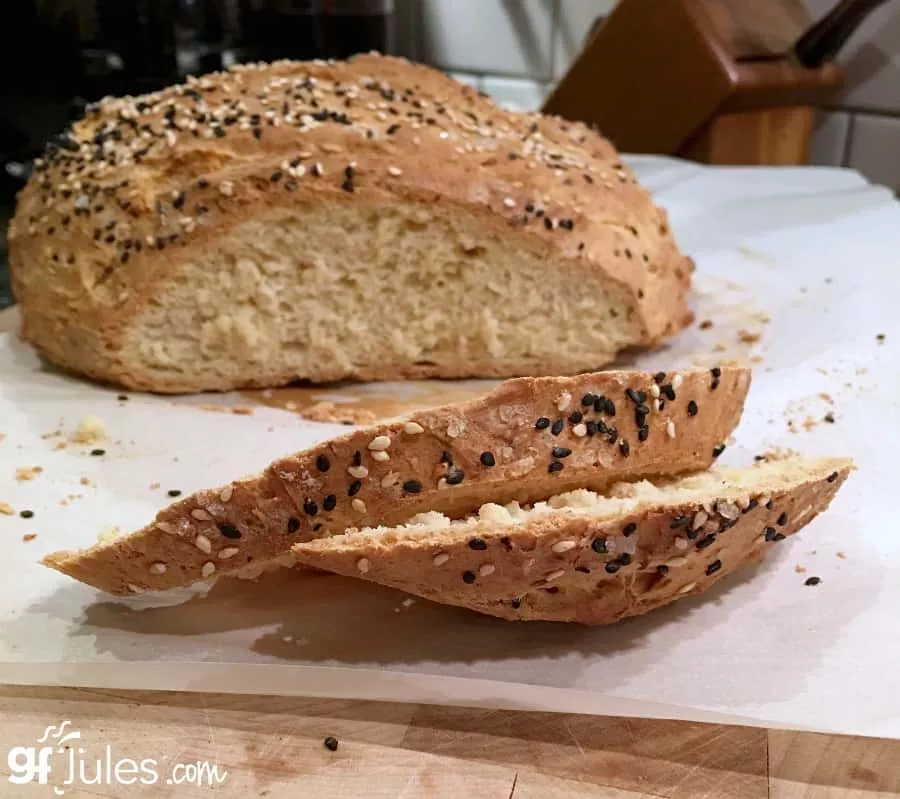
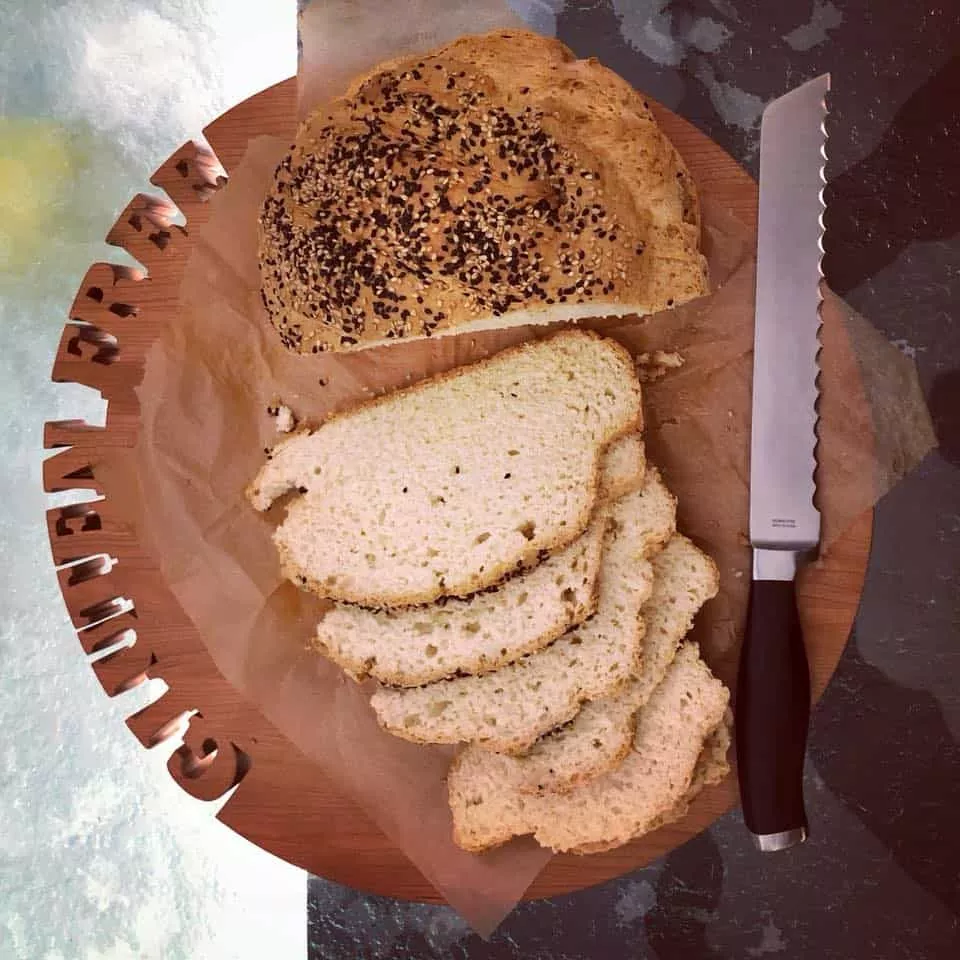
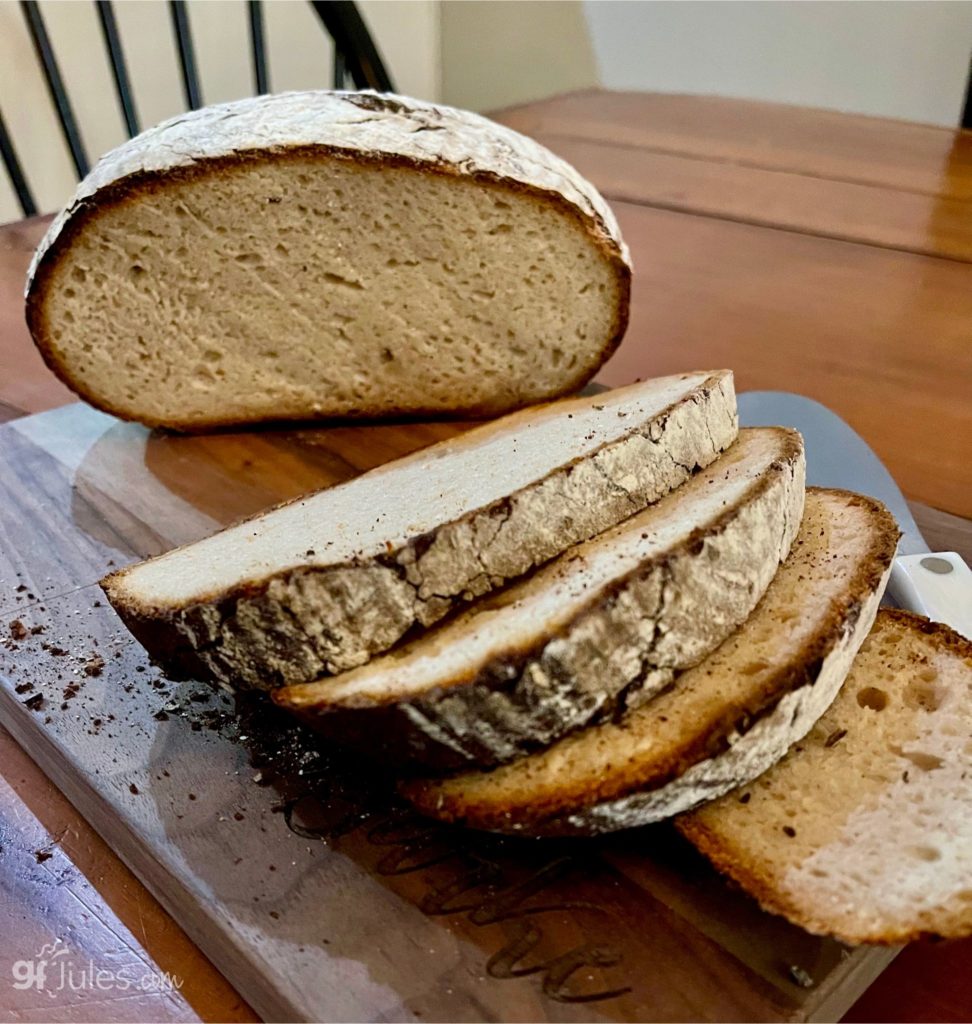
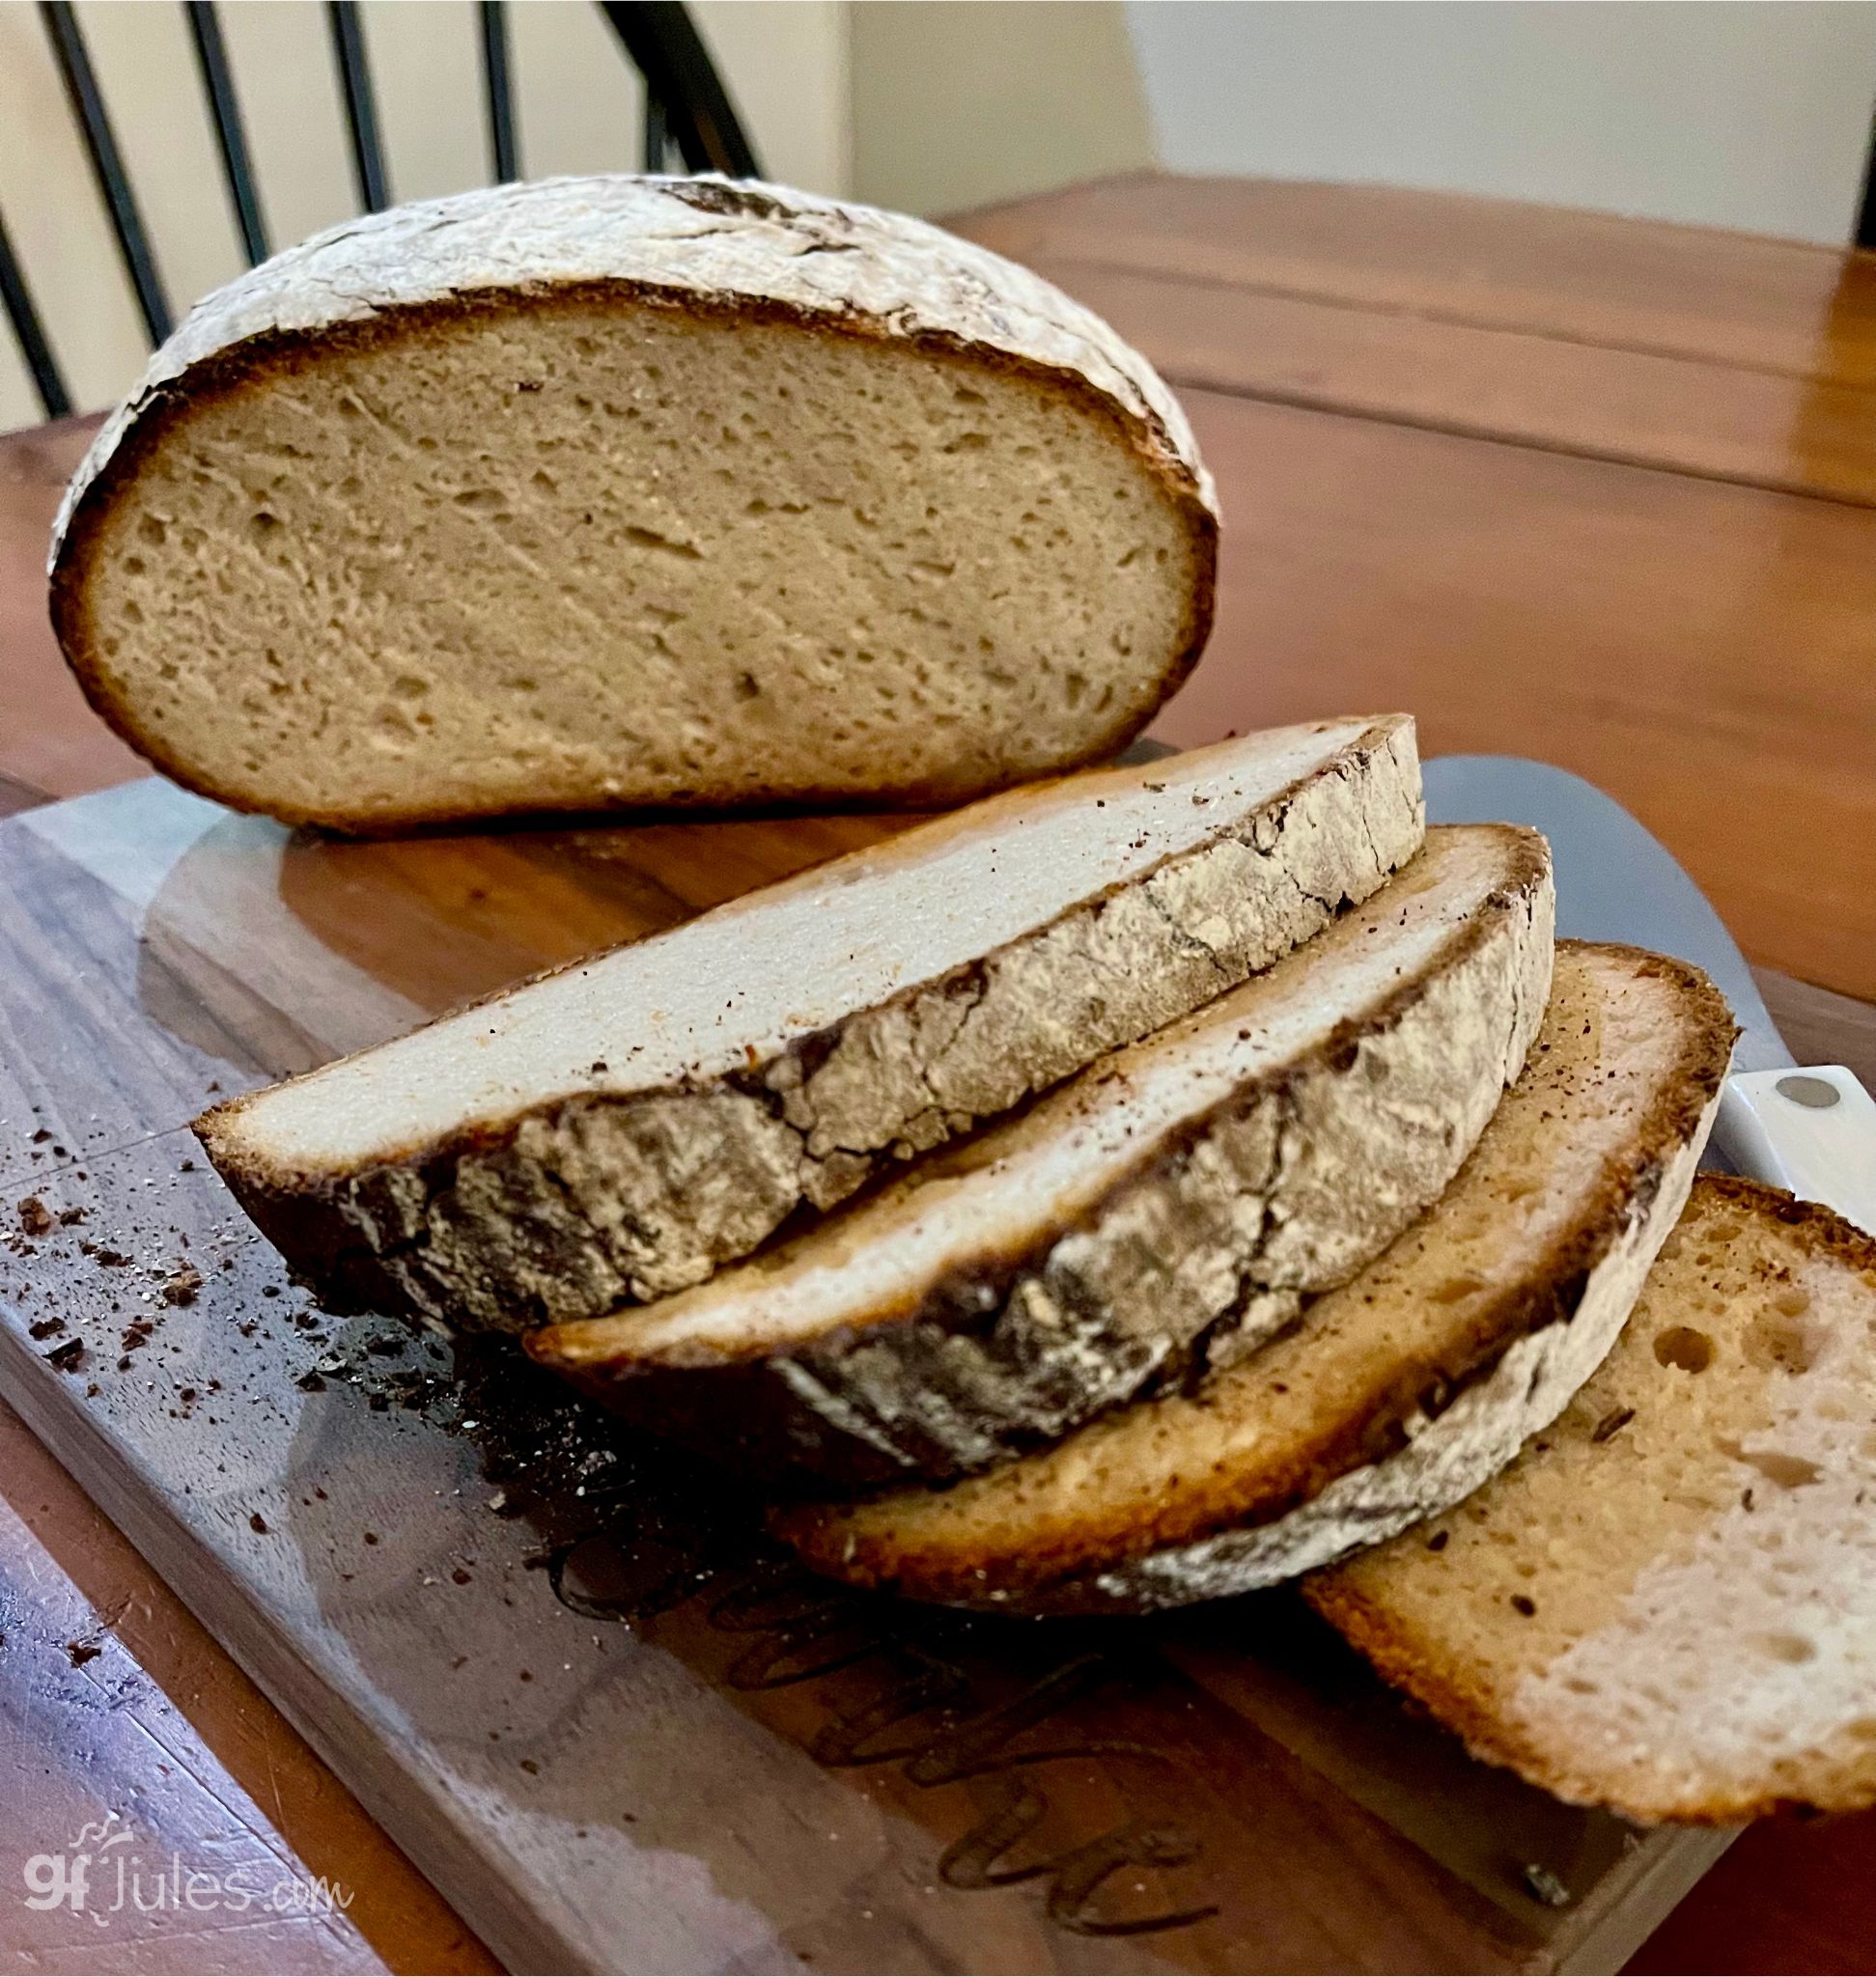
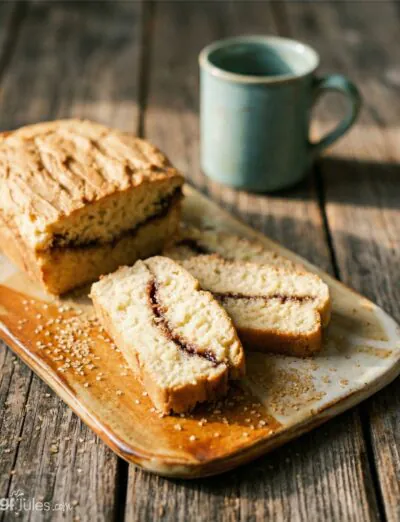
Here’s a look at it sliced. This bread, as baked is vegan (egg-free), but feel free to add an egg or two if you prefer a more open cell structure.
Gluten Free Artisan Bread Recipe made with gfJules Bread Mix
Gluten Free Artisan Bread Recipe made with gfJules Bread Mix
Equipment
Ingredients
PLUS
- 2 1/4 tsp quick rise yeast 1 packet like Red Star
- 4 1/2 Tbs. sugar 56 grams or sugar sub OR 3 Tbs. honey or agave or maple syrup
- 1 3/4 cups warm water OR bubbly liquid like GF beer or ginger ale or 1 1/2 cups water + 1 large egg
Instructions
- In the large mixing bowl of a stand mixer or just a mixing bowl, stir together the liquids with gfJules Gluten Free Bread Mix, yeast, and sugar by pouring slowly into the bowl while mixing with the paddle attachment. Beat well – 2-3 minutes.
- Dust a pastry mat or clean counter with more gfJules Flour and transfer the dough onto the surface, rolling gently in the flour to cover all sides. Knead to form a smooth ball.
- Transfer to a proofing basket (as pictured), bowl or oiled parchment-lined glass bowl.
- Cover loosely with a warm, damp tea towel or piece of oiled parchment paper and place in a warm spot to rise for 30 minutes - 1 hour.
- Preheat oven to 475º F (static) or 450º F (convection).
- Gently transfer to a parchment-lined baking sheet (flip so that the bottom of the proofing basket is the top of the bread). Remove proofing basket or bowl and dust with more gfJules Flour.
- Wet a large serrated knife or use dough lame and cut into the bread across the top or use the lame to cut into the bread in a decorative pattern. This will give the bread natural rifts to rise from, and make it even prettier once baked.
- Bake for 30-35 minutes on a lower rack, placing another baking pan on the rack below with ice cubes, testing with an instant read thermometer to ensure it's fully baked before removing from the oven. The thermometer should have reached 205º F. If the top of the bread is getting too dark, cover with foil.
- Remove to cool on a wire rack (at least 20 min) before slicing or the bread may get rubbery when pushed down upon while slicing.
** Please keep in mind that nutrition information provided is per serving, which may vary. While we have taken care to provide you with the most accurate nutritional values possible, please note that this information may differ significantly depending on the exact ingredients and brands that you choose to use to make this recipe. Additionally, where options are given for ingredients, the resulting calculation may include all ingredient options instead of only one per line, skewing the totals significantly.
Recommended Products
Any links to Amazon may earn me a small amount from qualifying affiliate purchases; this amount goes to fund this blog and does not cost you anything additional.
Gluten Free Artisan Bread Recipe from Scratch with gfJules Flour

Gluten Free Artisan Bread Recipe
Equipment


Ingredients
- 3 (405) cups (grams) gfJules® Gluten Free All Purpose Flour
- 1/4 cup flax seed meal or gfJules Gluten Free Multigrain Baking Flour
- 1/4 cup dry milk powder dairy or non-dairy (e.g. Coconut Milk Powder) - preferred - OR almond meal (in a pinch)
- 1/2 tsp. baking soda
- 2 tsp. baking powder
- 1 tsp. sea salt
- 1 tsp. apple cider vinegar
PLUS:
- 2 Tbs. honey agave nectar or coconut palm nectar
- 1 1/4 cup room temperature liquid: EITHER plain yogurt* OR milk not skim OR sparkling water OR ginger ale OR gluten free beer (bubbly liquids make the bread rise higher and lighter but will need support from a bowl to rise and partially bake - see intro before recipe card)
- 1/4 cup extra virgin olive oil
- 2 large eggs OR 2 Tbs. flax seed meal steeped for 10 minutes in 6 Tbs. hot water
- 2 1/4 tsp. one packet rapid rise or bread machine yeast, gluten-free (Red Star Quick Rise®)
toppings (optional):
- flaxseeds or sesame seeds
- coarse sea salt
- egg mixed with 1 Tbs. water to brush onto crust for darker color optional
- oil to brush on top
Instructions
- Whisk these dry ingredients together in a large bowl: flours, milk powder, baking soda, baking powder and salt. Set aside.
- In the large mixing bowl of a stand mixer or just a mixing bowl, stir together the wet ingredients (honey, yogurt, apple cider vinegar, oil, and egg or flax seed and water mixture). Gradually add the dry ingredients in with the wet by pouring slowly into the wet bowl while mixing with the paddle attachment. Once incorporated, add the yeast granules, and beat well – 2-3 more minutes.
If baking with yogurt:
- The dough will be very thick (much more like regular wheat flour bread dough than you may be used to with gluten free); however, if the dough seems too thick or dry, gradually mix in milk, one tablespoon at a time, until the dough is still thick, but able to be smoothed with a spatula.
- Liberally dust a pastry mat or clean counter with more gfJules Flour and transfer the dough onto the surface, rolling gently in the flour to cover all sides. Knead slightly, if necessary, to form a smoother ball.
- Transfer to a proofing basket, bowl or oiled parchment-lined glass bowl.
- Cover loosely with a piece of oiled parchment paper and place in a warm spot to rise for 30 minutes - 1 hour.
- Preheat oven to 350º F (static) or 325º F (convection).
- Gently transfer to a parchment-lined baking sheet.
- Brush with egg wash or oil, then lightly dust the top with more gfJules Flour.
- Wet a large serrated knife and press into the bread in 2 or 3 lines 1/2 inch deep, rocking the knife back and forth to open the cuts slightly wider or use a lame to cut into the bread in a decorative pattern. This will give the bread natural rifts to rise from, and make it even prettier once baked.
- Spritz with water once risen, if you prefer an even crunchier crust.
- Place an oven-safe bowl or pan on the bottom shelf of your oven and fill with ice cubes. The steam from melting ice cubes will help your bread get even crustier!
- Bake for 30-40 minutes, testing with an instant read thermometer to ensure it's fully baked before removing from the oven. The thermometer should have reached 200º F.
- Remove to fully cool on a wire rack.
If baking with another liquid:
- The dough will be more batter-like, so it still needs some support while rising and baking. Choose an oven-safe deep, round pan or bowl, pyrex, or even a springform pan. Line with oiled parchment and transfer the dough to the pan, smoothing the top with a wet spatula and mounding it more in the middle of the pan rather than flattening it out.
- Cover loosely with a piece of oiled parchment paper and place in a warm spot to rise for 30 minutes - 1 hour.
- Brush with egg wash or oil, then lightly dust the top with more gfJules Flour.
- Wet a large serrated knife and press into the bread in 2 or 3 lines 1/2 inch deep, rocking the knife back and forth to open the cuts slightly wider or use a lame to cut into the bread in a decorative pattern. This will give the bread natural rifts to rise from, and make it even prettier once baked.
- Spritz with water once risen, if you prefer an even crunchier crust.
- Preheat oven to 350º F (static) or 325º F (convection).
- Place an oven-safe bowl or pan on the bottom shelf of your oven and fill with ice cubes. The steam from melting ice cubes will help your bread get even crustier!
- Bake for approximately 15 minutes, then lift up on parchment and remove the bread from the pan. Lay parchment with bread on top of a flat baking sheet. Otherwise, leave dough inside the pan for support.
- Bake for 20-25 more minutes, testing with an instant read thermometer to ensure it's fully baked before removing from the oven
- Depending on the size of the pan used, and therefore the height of the loaf, it may need to cook longer to be fully done. The thermometer should have reached at least 200º F.
- Remove to full cool on a wire rack for 10 minutes.
Video
Notes
** Please keep in mind that nutrition information provided is per serving, which may vary. While we have taken care to provide you with the most accurate nutritional values possible, please note that this information may differ significantly depending on the exact ingredients and brands that you choose to use to make this recipe. Additionally, where options are given for ingredients, the resulting calculation may include all ingredient options instead of only one per line, skewing the totals significantly.
Recommended Products
Any links to Amazon may earn me a small amount from qualifying affiliate purchases; this amount goes to fund this blog and does not cost you anything additional.
No matter which liquid you choose, no matter which rising method, be sure to use my award-winning gfJules Flour or Bread Mix for the absolute best results.
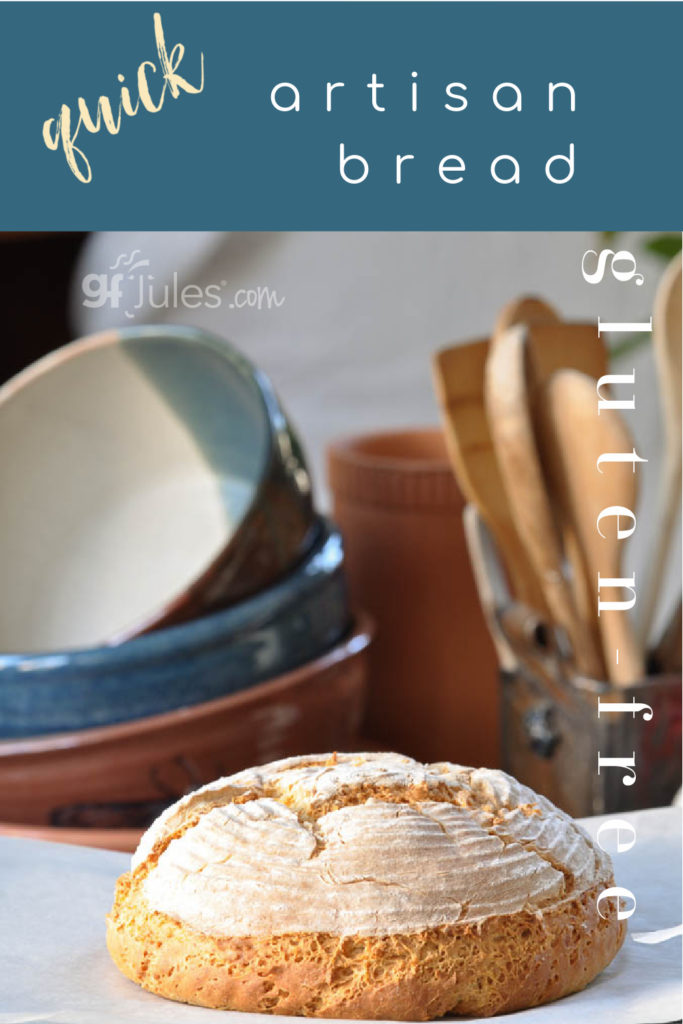
Pin for later!


What size of springfrom pan did you use in the video. please.?
If you have noted this somewhere please excuse me but I cannot find it.
thank you……….
And this recipe does not have xantham gun. I don’t know how I got where I was, but you might want to find that, if you want people to come to this page first. And there was also a note about why you do not use brown rice flour, and a link to the note about xantham gum. Maybe once I clicked on your video, I got a different recipe? Honestly, I do not know what I did. What I can say is I was directed to your site from a site that offers the 20 best gluten free bread recipes. Maybe that at first sent me to an old version of your website.
Ellen
I don’t know how, but somehow I was taken to another version of your recipe, and that is the one I was responding to. Now I cannot even find that one. So you can please ignore my first email to you, as none of those things I referred to are in this one, and I would guess are also nowhere else on your site.
If you can think of something to use instead of corn flour, and not sorghum flour, I would appreciate it. I cannot touch corn flour.
Many thanks, Ellen
Hi Ellen, take a look at my article on gluten free flour blends. I give options for making a homemade blend and you can sub for the corn flour according to that recipe. I hope that helps!
~jules
What is the expected consistency of the finished bread? I tried this recipe using yogurt and bobs red milk 1 to 1 flour (I ordered some of yours but didn’t get it yet and was impatient!) and it was very dense and heavy. It is delicious so I’m not at all disappointed but was wondering if it supposed to be so dense? If not, is it because of the flour? Or does using yogurt make it dense? Just curious so I know what variation to try next!!
Hi Bre, I would expect the Bob’s Red Mill product to produce a heavier loaf, but yogurt will also contribute to the density. Yogurt helps the bread to stay soft for longer, but it will diminish the rise and the airiness of the crumb. I’ve heard from some readers that they are using one container of yogurt (~6 ounces) and the rest bubbly water or club soda and are loving the “happy medium” results. I can’t wait to hear what you think when you try it with my gfJules Flour!
~jules
I don’t have a stand mixer but I have a GF bread machine. Can the recipe be adapted for a bread machine?
Hi Patricia, you can certainly use your bread machine to mix the dough and then take it out and bake it in the oven as the directions indicate, or you can just bake it in the bread machine — here’s more info on how to do that: https://gfjules.com/recipes/gluten-free-sandwich-bread-dinner-rolls-recipe/
Depending on your bread machine, the loaf will be crustier or have a softer crust, and either way, it will be loaf shaped like your bread pan, but it will be just as delicious!
~jules
What if I don’t have a stand mixer?
Hy Cynthia, you can absolutely mix this dough with a bowl and wooden spoon. I wouldn’t recommend using a hand mixer as it might burn out your motor. I’ve made it plenty of times by hand, though. Enjoy!
~jules
Hi, after reading all the posts I want to try this. To be clear, I can use sparkling water instead of yogurt?
Thanks
Hi Jennifer, you can use sparkling water instead of yogurt, but because this recipe does not use a pan, the bread dough will spread out more since the dough/batter will be thinner. It will still be yummy, but the loaf will look flatter. Hope that helps!
~jules
Why do you always leave off Pinterest?
Hi Pat – what do you mean? There is a pin at the bottom of most of my posts (like this one) and you should be able to pin any of the images. Are you having trouble pinning from my site?
~jules
Just finished my first loaf of your artisan bread, and first ever sourdough GF. Waiting for it to cool. I used a GF sourdough starter rather than yeast. I substituted 3/4c of RedMill Baking flour for 1c starter. I neglected to account for the liquid in the starter, so added another 1/4c of RedMill flour. The consistency was just a tad thin, but worked fine. Rise time is much longer, and left it covered in 85 deg plus outside overnight. Placed in 350 deg oven in the original glass bowl (I didn’t have another non-metal bowl and I didn’t think it would stand on its own well enough). Required 51 min to reach 200+ deg. (Thanks for your temperature recommendation). It is resting/cooling right now. Will taste later this morning. Otherwise, it looks a bit darker than expected (not like your pictures). Will let you know later how it tastes. Thanks for the recipe.
In actuality, having tried a slice, there is a modest sourdough flavor, a medium density to the bread, nice flavor and texture. Overall on a scale of 1-10, 7-3/4 for my first attempt. I may try an egg wash next time, use regular yeast to compare, and do a free standing or use my cast iron skillet. Thanks for the recipe. I will use it again!
The egg wash will definitely change the color and sheen of the crust, and also make it a bit crunchier. So glad you’re encouraged to keep at it. I’ll look forward to hearing your results on the next loaf! Meanwhile, enjoy that one – sounds like it turned out quite nicely!
~jules
I followed the directions in this recipe. The dough was very sticky and got all over my hands as I tried to knead it on the countertop. How much flour would you say is on the countertop prior to placing the bread down?
Hi Heagan, there should be enough flour on the counter to coat the outside of the dough when you roll the ball of dough on the counter. Did you use yogurt in the recipe?
Sounds like your method was solid – letting it rise overnight will also contribute to the sourdough flavor. How long have you been using the sourdough starter you used for this bread (just curious – I always like to know more!)? Did you use my gfJules Flour for the bread and the other brand for the starter itself? Just thinking on reasons why it would be a darker finished product. Thanks for filling me in on your method and how it went, Jon!
~jules
This recipe was fabulous! It will now be my daily bread.
So happy to hear it, JoEllen! I’m thrilled that you love it, too!
~jules
Hi Jules,, would you have any idea what I could substitute yeast for in this recipe? Also don’t think I could find a non dairy dry milk powder in Ireland and wer trying to cut down on nuts in this house too. Any suggestions for that also??
Orla
Hi Orla, check out my yeast free bread recipe linked here. Follow those ingredients and use the directions for the artisan bread if you’d like to bake it that way. Do you have coconut milk powder or any other alternative like that (assuming you can’t have regular milk powder)?
~jules
A friend gave me a box with ten packages of GF pizza mix. This is my first experience with your mixes. Can I make just regular GF Bread with this? .
Hi Peter – what a great friend!
The pizza mix is perfect for lots of things, but not so much making a loaf of bread, since it wasn’t designed for that. Here are a few recipes you can use the pizza mix in with great success:
Baguettes
Calzones
Stuffed Crust Pizza
Pizza Rolls
and of course, Pizza!
To make regular bread, you would want to use either my gfJules Bread Mix or my gfJules Flour.
I hope that helps!
~jules
This is my first time ever trying to bake bread and I followed the recipe on the back of the Sandwich Bread mix. Surprise! It actually turned out. I added too much Stevia and it tastes more like a delicious cake than sandwich bread. My question is: it was very gooey after I mixed it up in the mix master. Did I mix it too much? Was it supposed to be that gooey? Next time I’m not going to add any sweetener and add more seeds. What consistency can I expect?
Hi Nancy, so happy you tried it and didn’t give up on bread! What liquid did you choose to use in the recipe? Thinner liquids like sparkling water or gingerale will produce a more batter-like bread, but not gooey. Did the texture turn out well after baking? If so, I wouldn’t worry too much about the consistency of the dough/batter. If not, then don’t mix as much next time. Let me know how it goes!
~jules
I just made this bread and it’s delicious! Doesn’t even taste gluten-free! I used Jule’s GF flour, 1/4 cup oat flour in place of flax meal, sparkling water, honey and used 1/4 cup almond meal instead of milk powder. I sprinkled Trader Joe’s Everything but the Bagel seasoning on top before baking. My loaf looks just like the picture. Thanks for such a great recipe!
Hi Susie, that everything topping sounds awesome! So glad you tried the recipe and thanks for sharing the substitutions you used so others will know those are good to try, too. May all your bread baking be happy from here on out!
~jules
can I make this in a bread machine?
Hi Thetis, this base recipe is for baking my gfJules Bread Mix or scratch recipe in this artisan shape on a baking sheet. You can certainly use my mix or scratch recipe in a bread machine instead. Here’s more information on how to do that.
Happy baking!
~jules
Jules! I have tried making gf bread without much success at all. This recipe was my first time making a bread without a machine. I am so happy to report it looked and tasted good! Thank you for your products and helping to make being gf that much easier.
Oh Abbey, I’m so excited for you to have great gluten-free bread! And thanks so much for taking time to let me know of your success! My goal is just to help others live gluten-free happily and easily, so it is so heart-warming to know that my products have helped you!!! Onward to more great baking!!!
~jules
Can this recipe be baked in a cast iron skillet or cast iron dutch oven? If yes, what size would you recommend?
Hi Marcia,
Yes, it could be baked in one of those. It really all depends on how wide and tall you want your loaf: the wider the pan, the flatter the bread. Either way, check the inside with an internal thermometer to see that it’s reached 205F and then it’s done. Happy baking!
~jules
How much does it rise when contained? I’m considering it in my cast iron skillet which is 8 or 9 inches across, but only a couple deep. Will it just rise over the edge, or will it ballon and overflow?
Hi Cindy, that skillet is so wide that it won’t rise and spill out over – it will expand to the 8-9 inches across and then should dome in the middle but won’t be super tall because of the width.
~jules
Well, I decided on freeform this time, but it turned out nice! I’m not sure why mine got so much darker (maybe because I wasn’t using your flour blend?) but the family enjoyed it and I’ll definitely be using this recipe again!
Pics at https://www.instagram.com/p/BcYiQ1Zl1Jy/
Hi Cindy, if there were no other variances, the flour blend must have been the issue. What liquid did you use? When I made this bread again last week, I used a gluten-free stout and it was very dark, lending the bread a darker color but also a rich aroma during the bake and after, actually!
I’d love to know what you think when you try the recipe with my gfJules Flour!
~jules
I used ginger ale. If you look at the second pic in the instagram post, you can see the inside, too. It was similar to a whole grain wheat bread, great texture. I made some herb butter to go with it, and we had the leftovers toasted with melted cheese on it. I”ll definitely be making it again!
I work at a small church and we are looking for a good GF bread for communion. This seems perfect. I am wondering if we could divide and freeze the dough and bake small 1/4 sized loaves at a time. How long do you think would the frozen dough keep?
THANKS!
Hi John, I imagine that would work just fine. The key would be bringing the frozen loaves to room temp and then allowing them to rise and then bake. I would think if wrapped well, they would keep in the freezer for at least 6 weeks. The other option is to make gluten-free communion wafers. I bake those for my church and they keep them in a tupperware in the refrigerator, bringing out as many as they need each week and those last a few months in the fridge. Here’s the recipe: https://gfjules.com/recipes/gluten-free-communion-wafers/
Let me know what you decide to do!
~jules
I’m diabetic so it’s important that I control my calories intake. I find whole grain bread is lowest in calories among high protein. So I’m looking for gluten free recipe.
Gluten free bread isn’t always the best choice for diabetics (if you can tolerate whole grains).
GF recipes CAN have a higher glycemic index (GI) depending on the flours used – Rice, potato and maize are quite starchy and have calorie/sugar content than regular flours like whole wheat and oat flour.
I hope this helps! 🙂
Hi!! How’s the best way to store the loaf after you cut it? It’s in the oven cooking and I’m so excited to try it but this is the first time I’ve baked bread from scratch so I don’t know how /where to store it so it stays fresh. Thank you!!
Hi Devra, congratulations on baking bread!!! The way I usually store it is to just squeeze the air out of a zip-top gallon sized bag and store the bread there on the counter; don’t refrigerate because that just dries baked goods out. If you’ve been munching on the bread for a few days and you still have some left, you can also slice it and put wax paper between the slices and then freeze it in that zip-top bag. The wax paper helps you to just grab one piece whenever you need it. Or of course you could make the best French Toast ever with your homemade bread! And then bake some more! 🙂
~jules
Thank you, that’s exactly what I did! I just baked my second loaf with ginger-style gf beer instead of yogurt and I love it just as much! 🙂
wonderful!!!!
~jules