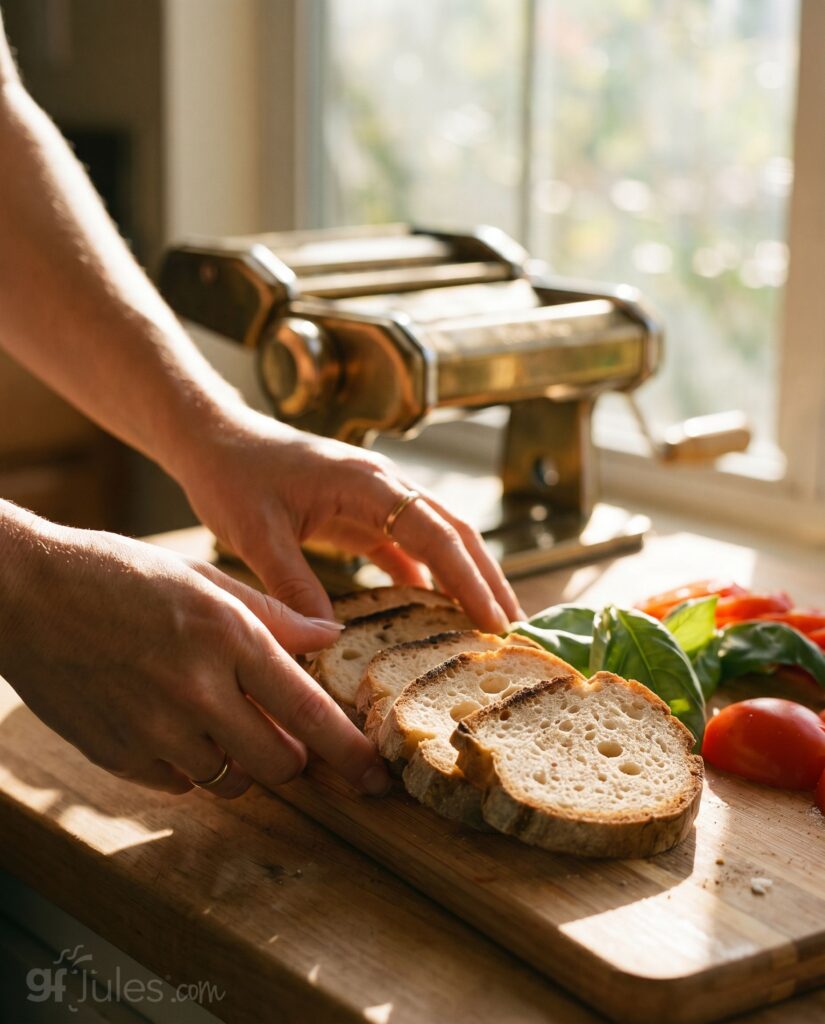
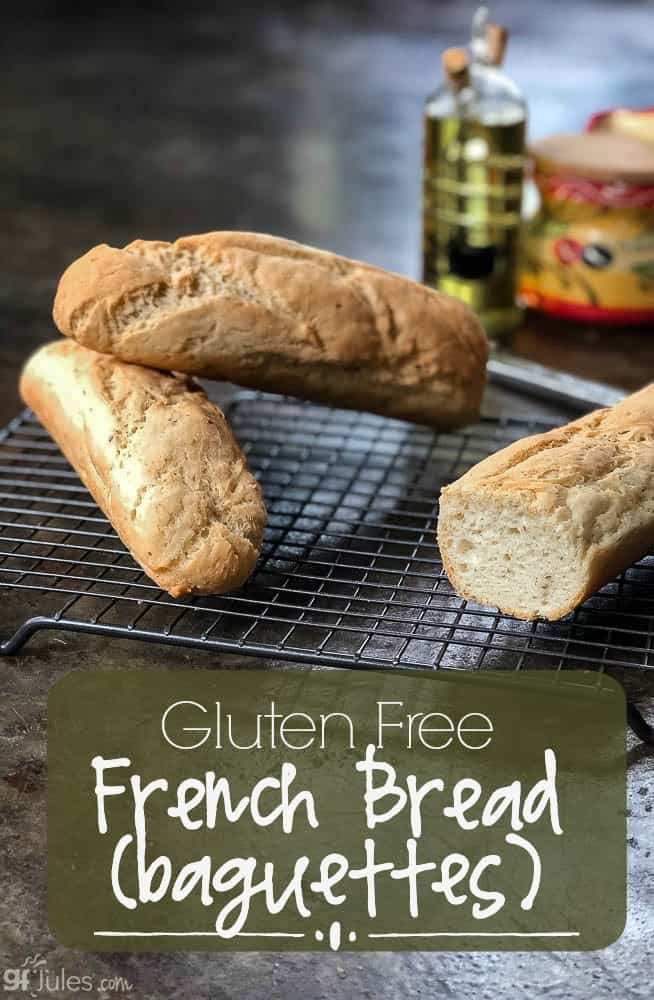
One of the most popular recipes I’ve shared at gluten free food expos is my gluten free baguette recipe. It draws a crowd every time. The smell of fresh-baked yeast bread, the classic crust, the crunch on the outside with the pillowy soft centers … I haven’t met anyone yet (gluten free or not!) who didn’t think this gluten free baguette was incredible.
There are THREE ways to make this gorgeous gluten free baguette:
- Using my From-Scratch Gluten Free Baguette Recipe posted here (or click Jump to Recipe at the top of the page to skip right to it)
- Gluten Free Baguettes made with my gfJules Gluten Free Bread Mix (click here to jump to this recipe) and it’s vegan!
- Gluten Free Italian Loaves/Baguettes with my gfJules Gluten Free Pizza Crust Mix (click here to jump to this recipe)

What’s the Secret to Baking Great Gluten-Free Baguettes?
Over the years I’ve devised a few gluten free baguette making SECRETS which I’ll share with you (since we’re friends) to help get this gluten free French Bread just right. (Don’t miss out on the ingeniously simple technique I show in a quick video, so keep scrolling!)
But it all starts with the gluten free flour. Aside from water, it’s the primary ingredient, so you know it’s got to be right. My gfJules Flour is the key to so many great recipes, not least of all, great gluten free bread.
3 Methods To Making Gluten Free Baguettes
There are a couple easy ways to bake up heavenly bread like this beauty. One is to use my gfJules Pizza Crust Mix. I know it sounds crazy but it’s a no-fail, so-easy-you-could-make-it-every-night critical ingredient.
The gluten free Italian loaf / baguette recipe using my gfJules Pizza Crust Mix has the unmistakable herbs of your favorite Italian recipes baked in, plus the soft bread and old world crust combination we all love. (This recipe is easily doubled, by the way, just use the entire gfJules Pizza Crust Mix and have enough to share!)
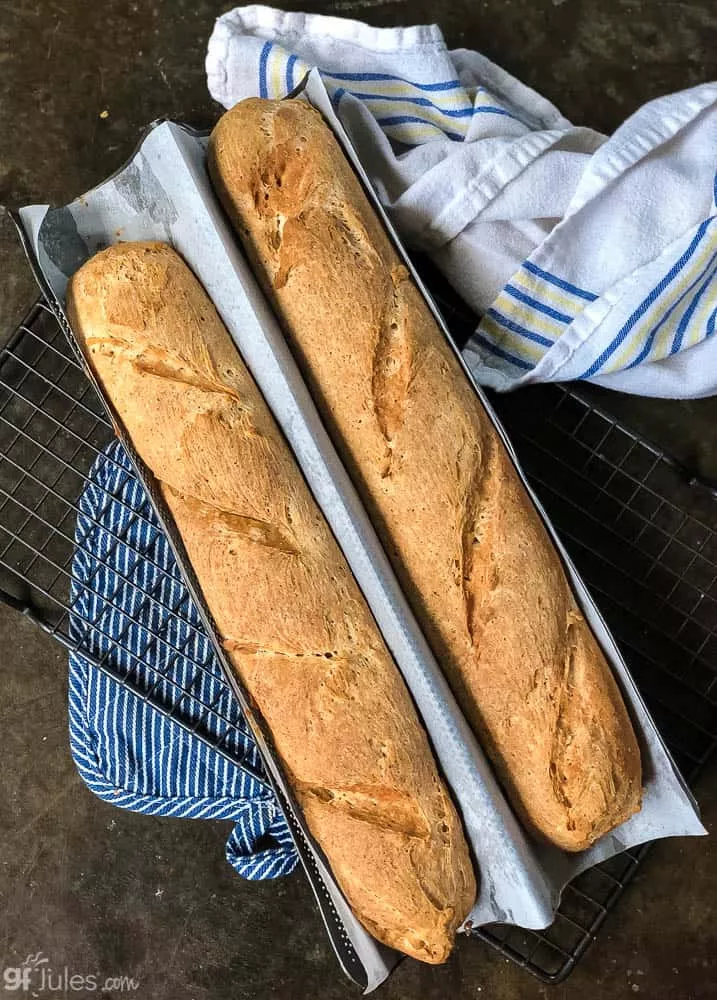
Another version is made with my gfJules Gluten Free Bread Mix — with this updated mix, you don’t even need a pan or eggs! My gfJules Bread Mix also makes a delightfully crusty loaf without having to spritz with water or use a special baguette pan with holes. It makes things super easy all around.
Using one of these mixes is the most reliable way to get this delicious bread to work, since milk powders with the scratch version differ and produce varying results.

Of course you can always bake these gluten free baguettes from scratch with my gfJules Flour by simply following the recipe below.
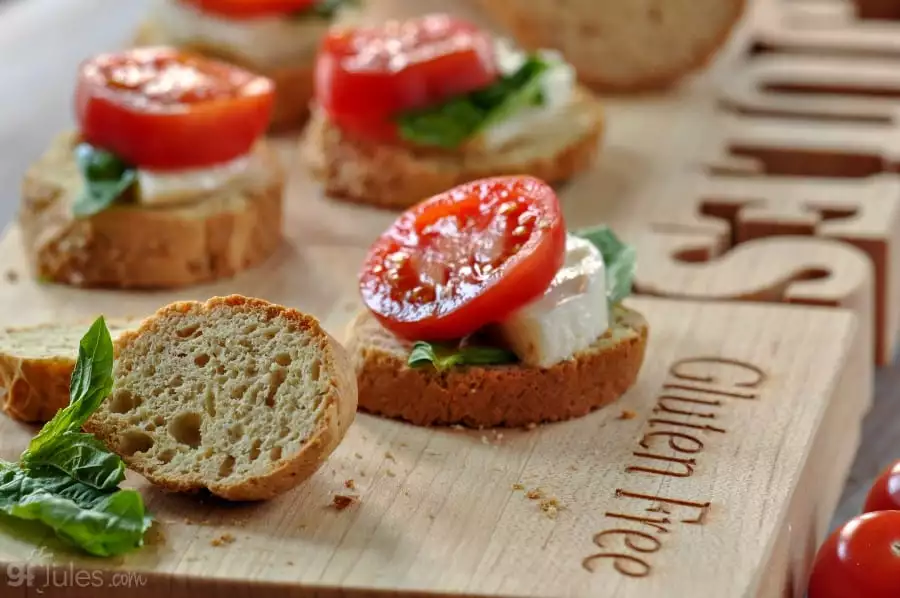
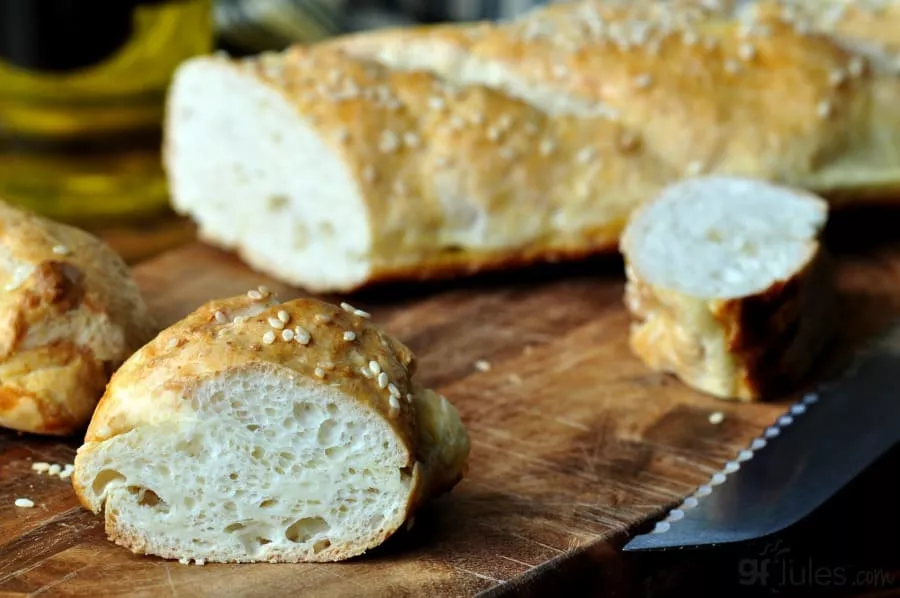
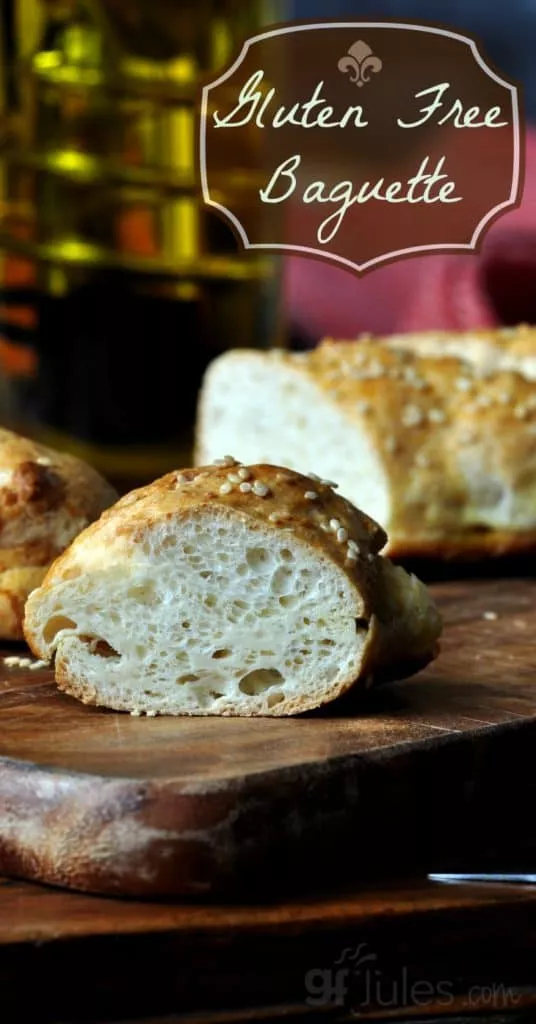
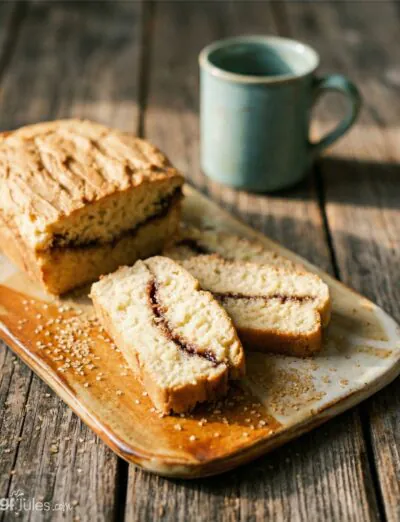
You can see from this photo that the texture is light, with nice air pockets throughout and a well-defined, crunchy crust. It’s a great way to get homemade bread quick! Only 20-30 minutes to rise and 20 minutes to bake — how’s that for a win-win?
There are other things you can do to help if you’re baking from scratch, though. The easiest trick is to hand spritz with a spray bottle of water and to place a baking sheet on the bottom rack of your oven with ice cubes on it to continually add steam to the oven during the bake.
You need a clean spray bottle and you’ll want to spritz, spritz, spritz throughout the baking process by peeking into your oven without letting too much heat out if you want your baguette to be more crunchy. Brushing with egg wash (1 full egg mixed with 1-2 Tbs. water) will also help to make the outside crunchier and nice and brown.
If you’d prefer to make a softer loaf, don’t spritz, and cover the bread during the second half of the bake time with foil to keep it soft all the way through.
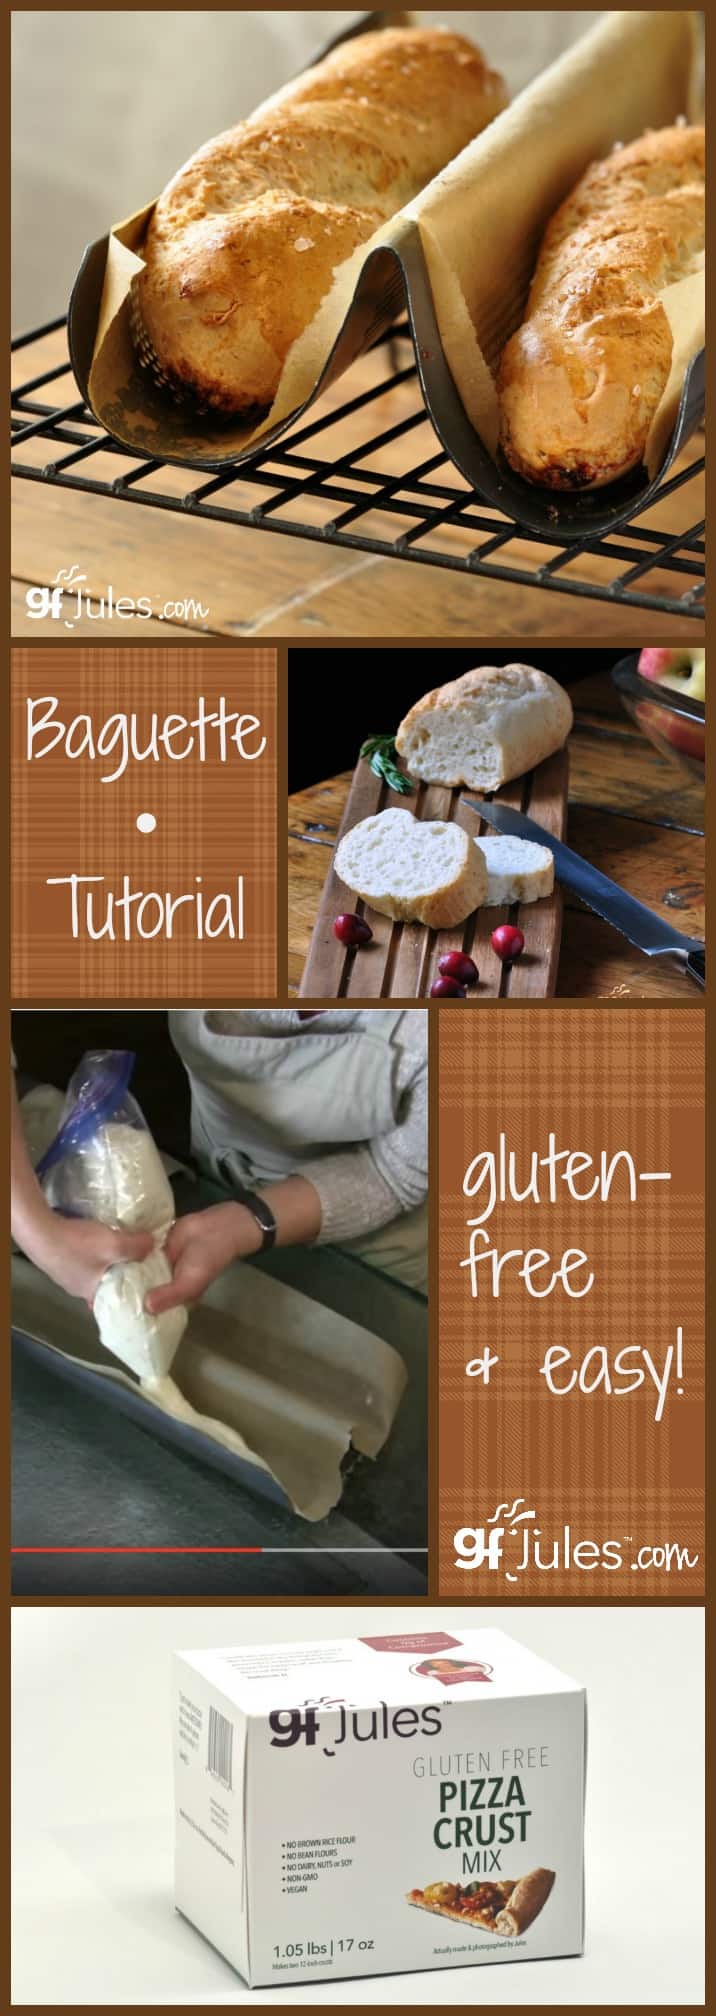
A third secret is the method. Take a moment to watch my quick video to see just how easy it is to make a beautiful baguette without even getting your hands dirty! (This is the method you’ll use if baking from scratch or with my gfJules Gluten Free Pizza Crust Mix.)
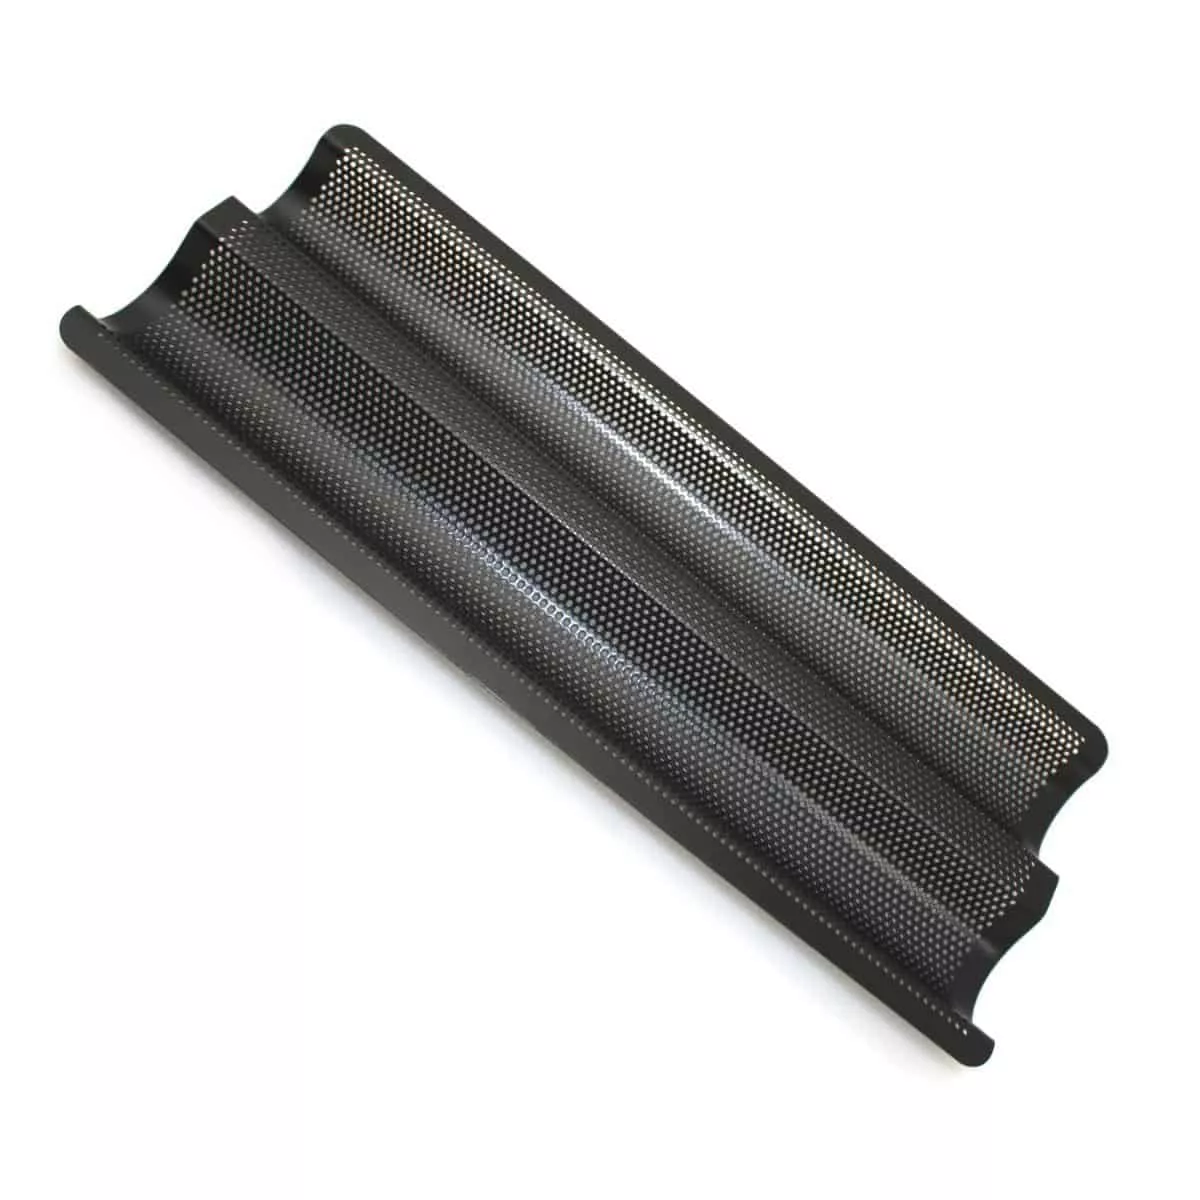
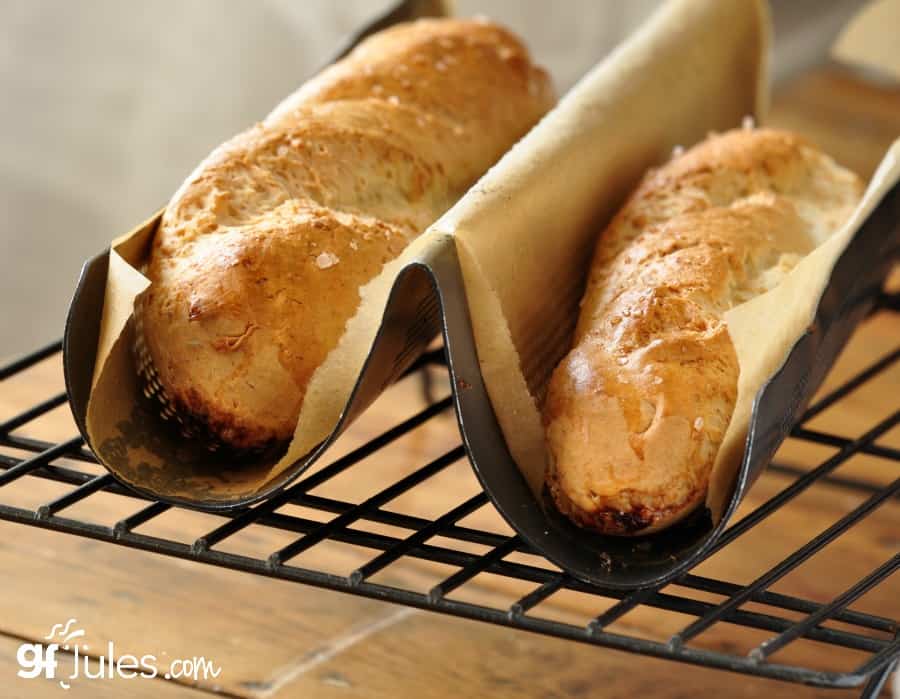
I suggest using a baguette pan for the best results when making from scratch or my original gfJules Gluten Free Pizza Mix, but you can use a cookie sheet lined with parchment in a pinch; the crust just won’t be as crunchy and it won’t be as nicely rounded, but it will still taste yummy!
So go forth and bake baguettes like a pro! In France, it’s routine to buy a fresh baguette every day — now you can make a gluten free one, easily!
What are you waiting for? Delicious bread is calling!
Gluten Free Baguette Recipe
Gluten Free Baguette Recipe
Ingredients
- 1½ cups (202 grams) gfJules All-Purpose Gluten-Free Flour
- 3 Tbs. (12 grams) milk powder, dairy or non-dairy (like coconut milk powder) OR plain GF potato flakes
- 1 ½ Tbs. (19 grams) sugar (optional, but add for crunchier crust)
- ½ tsp. salt
PLUS
- 2 egg whites room temperature (OR 4 Tbs. aquafaba OR 1 Tbs flaxseed meal or chia seed steeped in 4 Tbs warm water)
- 2 Tbs. extra virgin olive oil
- ½ tsp. apple cider vinegar
- 10 Tbs. (148 grams) warm water
- 2 1/4 tsp. rapid rise yeast gluten-free (1 packet) ** (for yeast-free directions, scroll to the bottom of the recipe)
- egg wash (full egg + 1 Tbs. water) to brush onto the dough (optional) OR more oil
- water to spritz onto dough
- toppings of choice (optional)
Instructions
- Whisk together dry ingredients except yeast; set aside.
- Combine egg whites, olive oil, cider vinegar and most of the water in a large mixing bowl.
- Using a stand mixer (preferably), slowly add in the dry ingredient mixture and yeast.** Gradually add remaining water to get a firm but very sticky dough.
- Beat on high for an additional 2-3 minutes. (Note: this recipe may be mixed by hand in a large bowl, using a fork or wooden spoon – stir until well mixed!).
- Prepare a baguette pan or baking sheet by lining with parchment and lightly oiling.
- Pour one teaspoon of olive oil into a gallon sized zip-top bag and spread around so the inside is coated. Cut a one-inch corner out of the bag. (see video)
- Scoop the dough out into the bag and squeeze dough toward the cut corner. Squeeze evenly so that the dough comes out of the corner of the bag and pipes down the length of the baguette pan or across the cookie sheet. If doubling the recipe, repeat the process until two baguettes are formed.
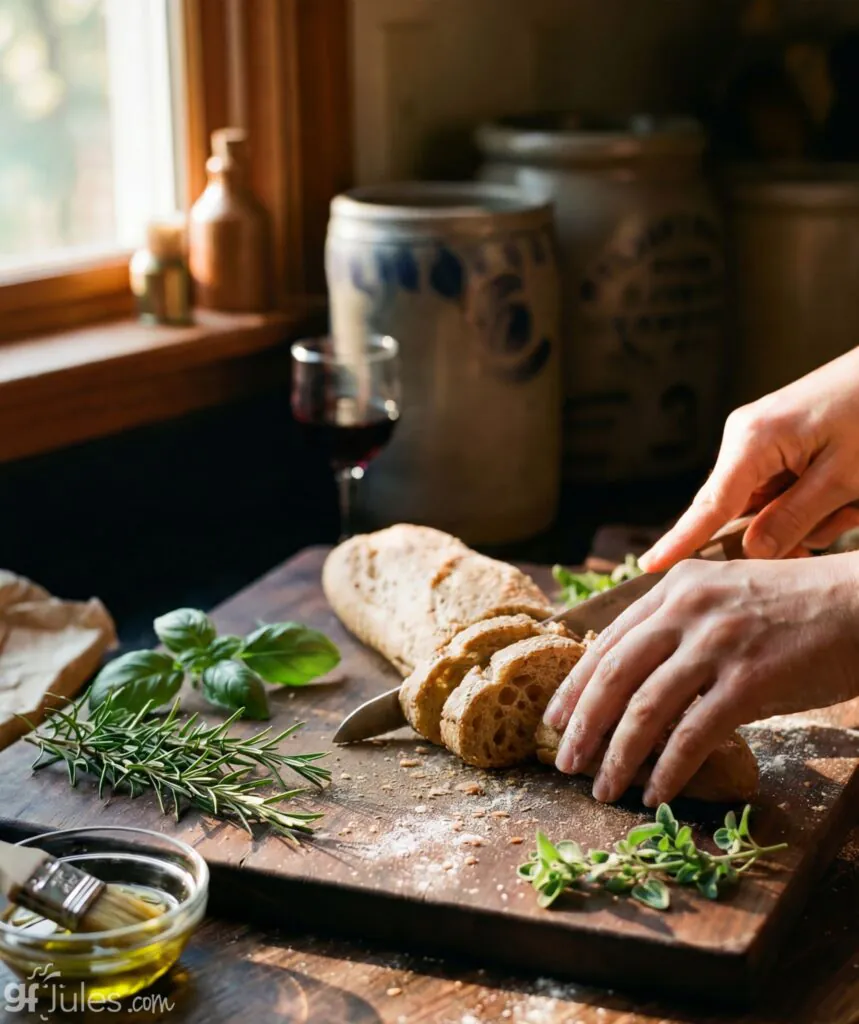
- Brush with egg wash or liberally brush with more oil. Use a sharp knife to cut across the tops diagonally 3-4 times so that the dough will rise evenly and spread open at the cuts. Sprinkle any additional toppings at this point.
- Lightly oil a sheet of parchment and lay on top of the baguette. Place in a warm place like an oven preheated to 200° F then turned off. Allow the baguette to rise for 20-30 minutes. Remove from oven to preheat to 500° F (static).
- Place a cookie sheet on the bottom rack in the oven and put ice cubes on the pan to create steam in the oven. (optional)
- Remove parchment covering the baguette and spritz with water for crunchiest crust. Place baguette on middle rack of the oven and bake for 5 minutes, spritzing again, and adding more ice cubes. Also reduce oven temperature to 475° F, baking for 15-20 more minutes (depending on baguette size). Spritz again during the bake for the crunchiest crust.
- Check by sticking a toothpick into the center of the baguette. If it has wet dough stuck to the toothpick when removed, bake for another 3 minutes, then check again until the toothpick comes out nearly clean or with dry crumbs attached. Internal temperature should have reached 205° F.
- The cooking time may vary depending on whether using a baguette pan, but when done, the baguette should be browned (more, if using egg wash to brush on top) and be crunchy when tapped.
- Remove to fully cool before slicing.
Video
Notes
** Yeast-Free Gluten Free Baguette Directions:
Add 2 tsp. vinegar + 2 tsp. baking soda + 2 tsp. baking powder. Chef Patrick Auger also recommends using club soda in place of the water in this recipe when baking yeast-free.** Please keep in mind that nutrition information provided is per serving, which may vary. While we have taken care to provide you with the most accurate nutritional values possible, please note that this information may differ significantly depending on the exact ingredients and brands that you choose to use to make this recipe. Additionally, where options are given for ingredients, the resulting calculation may include all ingredient options instead of only one per line, skewing the totals significantly.
I hope you love these baguettes as much as we do!
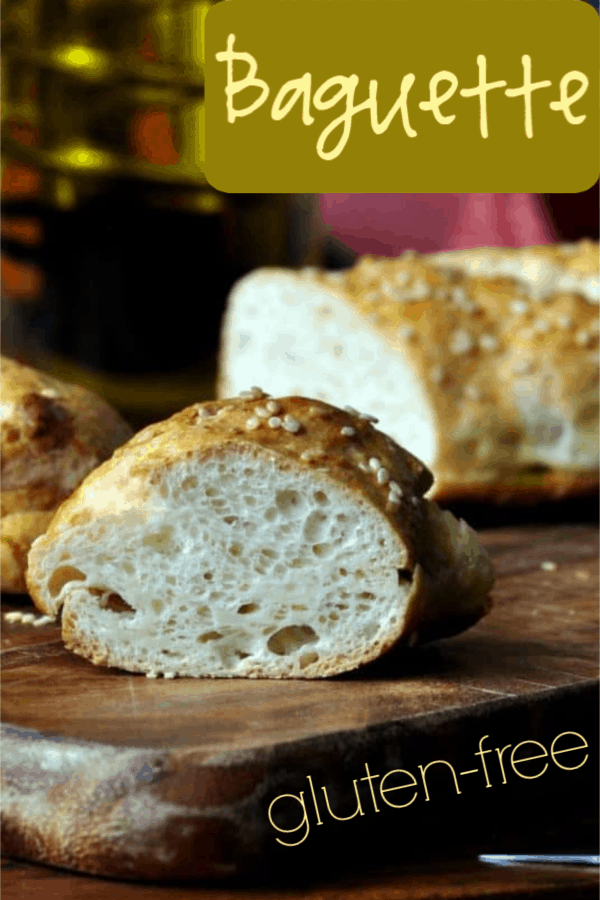
Pin it for later!


On the package of the Pizza dough it doesn’t give instructions on how to make the baguettes! I am new to baking but everything I have made with your products have been amazing. Already received my third shipment!!!
So excited for you to try all these recipes, Jessica!!! I wish I could fit them all on the packages, but there’s just no way! I’m glad you found the baguette recipe on my site, though! It’s better to have the gluten free baguette recipe on my website anyway, so you can see the videos here, too. 🙂 Hope they help!
Happy baking!
~jules
I’ve tried the baguette twice now, using the flour not the mix. The first time it was a bit undercooked and gummy in spots. I tried again today, measured the flour, etc,. It looked great in the oven, puffed up nicely, then flattened out when it came out of the oven. What am I doing wrong?
HI Barb, do you have a baguette pan? Are you testing it with a toothpick in the center to be certain it’s done before removing? Do you brush with egg wash before baking and/or spritz with water … and second part of that question, does it get crunchy on the outside at all? Any other substitutions (like egg?).
~jules
I live in the UK, so can I substitute your all purpose flour for a good quality gluten free plan flour over here in Blighty please. Thanks
Hi Anne, check out this article on gluten free flours and comparing them. I hope it helps you find something there that will work for you, or to make your own. Please also note that we DO ship to the UK from our shop. Just put what you like into your cart, add your address and see what the shipping options are. Play with the amounts you put into the cart as that will change the shipping cost to see if any of that works for you.
Happy baking!
~jules
Thank you for this easy and delicious recipe. I may be brave enough to make more loaves for my friend’s upcoming wedding party.
Oh I do hope so, Kenny! Baking bread for others is a gift that truly feels so good to give!!! Thrilled to hear this recipe may have empowered you to do it!
~jules
Hi,
I used 1 packet of Fleischmann’s rapid rise instant yeast-fast acting, Jules GF all-purpose flour, instant potato flakes, baguette with the air hole pan, spritzed it few times with oil, and added some warm water in a pan. It did not rise much at all. Did I miss something because I am not sure why it was so dense?
Hi Maria, how long did you let it rise before baking? There should be a nice rise showing before putting it in the oven to bake. If it doesn’t rise much, I would worry either that the yeast might not have been good (did it smell really yeasty?) and/or that the proportions might be off in measuring. If the dough is too dense and thick/tight, the yeast won’t be able to stretch the dough with the bubbles that give it that nice rise. Check this article on the proper way to measure gluten free flour first, then also check this article on gluten free bread baking tips and see if any of these apply to your situation for help. You can always try either my gfJules Bread Mix or gfJules Pizza Crust Mix next time and see if one of those works better for you, since each is different from the scratch recipe and they also come pre-measured. Sometimes in the spirit of a good experiment, it’s good to eliminate variables and that would be a good way to test that your oven is working properly, for example. Just another idea. Let me know how it goes!!!
~jules
Hi Jules,
.
Thank you so much for responding and I will give that a try and let you know
Great!
Questions about making the baguettes. I’m using the pizza crust mix.
1. If I want two baguettes do I use the entire 17 oz. container?
2. I do NOT use the packets of yeast for these baguettes, correct?
3. Do I double these ingredients: 2 tsp vinegar + 2 tsp baking soda
+ 2 tsp. baking powder, if using the entire 17 oz. mix, do I use any “Plus” ingredients?
thank you
Hi Beverly, if you’re using my gfJules Pizza Crust Mix to make the baguettes, and you want two baguettes, use the ENTIRE CAN and ALL the ingredients listed on the can, including the TWO yeast packets. So, for two baguettes, use 1 can of Pizza Mix +
4 egg whites, room temperature OR 2 Tbs flaxseed meal or chia seed steeped in 8 Tbs warm water
4 Tbs. extra virgin olive oil
1 tsp. apple cider vinegar
1 cup warm water
2 packets yeast (included in mix)
ENJOY!
~jules
Thank you for the clarification! I’m off to make them now.
Not cool to make people read all this and then hide the flour recipe.
Hi Bruce, I’m not sure what you mean about hiding the flour recipe? My gfJules Flour is linked all over this post, and I also give options to use my gfJules Pizza Crust Mix or gfJules Bread Mix instead, as that makes the recipe even easier to make. Here’s another link for you to hop to my gfJules Flour as well, to make it easier. I’m certainly not trying to hid anything!
I hope you enjoy the recipe — these gluten free baguettes are well worth making!
~jules
Hi. Mine is in the oven now, but it didn’t look like it raised much before putting in the oven. Can I activate my yeast before I add it to the mix? My yeast is new so I don’t think that’s the issue.
Hi Tammy – what kind of yeast did you use? If it’s regular active yeast, then YES! You can absolutely proof it first; for quick rise yeast, proofing isn’t recommended. Here’s more info on yeast in general for you.
~jules
I was wondering if the pizza dough mix could be used in a muffin pan to make crunchy rolls instead of baguettes?
Hi Cindy – that’s a fantastic idea! That sounds delicious!!! I’ve used it to make gluten free pizza rolls baked altogether in a casserole dish with this recipe, but I love the idea of baking the dough in muffin pans! Post a pic when you make them, I can’t wait to hear how they turn out!
~julese
I made this, but it came out dense and stodgy. Yet, my family still ate it and said it tasted great. The crust was great, but there weren’t many air bubbles in the middle of the loaf, or any at all. I used Jules GF all purpose flour and milk powder, and then followed the recipe to a T. I don’t have a stand mixer, however, and it’s not really in our budget for the future either. Could I have kneeded this dough by hand to really get it mixed? I don’t know enough about bread making to know when that is and isn’t okay. I let it rise for 30 min, but it didn’t look like it did much. I did use the Red Star quick rise yeast. Thank you!
Hi Tara, can I just say that I loved that you used the word stodgy?! 😉 Sorry that you used it, but I it always makes me think of Mary Berry! Ok, on to troubleshooting!!
The trick with this recipe I think is a couple things — one, you’ve already identified, and that’s the mixing. Did you mix it by hand or use a hand mixer? There’s not really a kneading option for this dough, as you would be incorporating too much extra flour into it if you were to start hand kneading. Two, the milk powder. What kind did you use? Three, the measuring of the dry ingredients. This is always a big issue. Check out my gluten free baking FAQs for more info here. And take a sec to review my gluten free bread baking tips when you have time as well. The last question is whether you used a baguette pan, as it really does make a big difference in this recipe. Ok, I think that covers it, at least my first pass!
~jules
Hi! Thanks for your reply. Yes, totally learned it from Mary. And that’s whst she would have called my bread, lol! I’ve made it three times now. Third time was the best, but still not the best. I’ve used your flour for christmas cut outs and scones and all of those are excellent! I just can’t master bread. We don’t have a stand mixer. I did mix by hand. I did use a bagette pan. And I’m using NOW brand non-fat dry milk powder. It never really rises much and it doesn’t get crispy on top and I do the spritzing method with water.
Hi Tara, so glad you’re loving my gfJules Flour for gluten free cut out cookies and scones! Gluten free yeast breads aren’t tricky, but they do need to be mixed well, and not having a mixer is probably one of the big contributing factors here, but I think also the milk powder you’re using. I try to give from-scratch options for people to use, but there are so many variations. This recipe was originally created for use with my gfJules Pizza Mix, which is not something that is easily translatable into consumer-available ingredients. The closest things I’ve been able to find to suggest to people to use to make it from scratch are milk powders like the one I linked to in my recipe that actually contain more than just milk — they also have maltodextrin and fiber, as well. You could try buying that product instead, and brushing on an egg wash in addition to the spritzing. If you have a convection oven, that’s a great way to help crisp it up, as well, since that’s more akin to the commercial bakery ovens used to make baguettes. The easiest way to make these baguettes most successfully though, would be to either use my gfJules Pizza Crust Mix or my gfJules Bread Mix (makes more of an Italian Bread — less crispy on the outside, but no herbs in the mix). That would be the next thing I would honestly suggest for you to try if you really want to see how good the bread can be, and then decide if you want to make it that way from now on, or keep experimenting with the scratch recipe, given your limitations with mixer, oven, etc. I hope that helps!
~jules
Amazing Recipe! I love french bread, I have eaten it many times. I have never tried it at home. I usually eat it in restaurants only. I will definitely try it at home now and let you know. Thank you for sharing this great blog. I loved it.
Your recipe is unclear using the pizza dough as to how much water goes into the dough recipe and do you proof the yeast first or just pour it in dry mainly how much water.
I bought 3 canisters of the pizza dough, and am afraid I am not understanding the web recipe. Too many OR items. Can you please clear up.the instructions for mixing the dough.
Those are beautiful and do not even look gluten free! They look normal! I can’t wait to try them, I’m always looking for gluten free recipes, thank you. 🙂
Thanks Becky – I hope you love the gluten free baguette recipe!
~jules
I was diagnosed as celiac 2.5 years ago and thought it was the end of the world. I’ve been discouraged by 90% of bread and baked gluten free products I’ve tried – until now. This brought peroghy back into my life and pizza. I love the taste of the pizza dough and the baguettes, but mine aren’t coming out airy. Is there anything you can tell me that will help? I’m in Canada so I “create” the pizza mix, follow the instructions (using egg) and fresh yeast. I’m bringing everything to room temp but my baguettes and pizza crust are coming out dense and heavy. LOVE the taste, but I’m missing that final piece to be able say I’ve conquered gluten free. Is there anything you can tell me to make these the perfect baguettes/crusty pizza dough? If it help, I’m also using a kitchenmaid mixer (paddle). Please help me!
Being slightly less dramatic – your flour mix has changed everything for me!
First off Sarah, I have to say I was right there with you after my celiac diagnosis! I hear you on that end of the world feeling. SO glad you found my gfJules Flour and have been able to move beyond those dark days and start baking again! As for the airiness you seek, I’m willing to bet the issue is probably with the other ingredients you’re adding since you’re having to make it from scratch instead of using my pizza or bread mix. Like the milk powder — what kind are you using? I would suggest trying something like this one that not only has the milk powder in it, but also a stabilizer to help with the density issue. Not having seen your baguettes and pizza, I’m guessing that maybe they’re rising and falling and that’s where the density is coming in? There are many variables — the kind of pan, placement in the oven, thickness of the crust/baguette, etc. but this would be one thing you could experiment with to see if it helps. You can also use a convection setting on your oven if you have one — it can really help. Try moving the pans around your oven and see if that helps, as well — every oven bakes a little differently. For baguettes, pipe them thinner (I assume you have a baguette pan?) so there’s less dough to have to hold itself up and then to fall; for pizza, experiment with different pans like a crisper pan maybe and then be sure to press it out really thin in the middle and then give yourself the thicker crust on the outside where there isn’t any topping to weigh it down. The best part of all this experimenting is that you get to eat the experiments! But be sure to take good notes and you’ll eventually figure out what works for you with the ingredients, oven, pans you have access to. Luckily you like the taste already, so the rest is really just tweaking!
You can always feel free to reach out to me via email and we can walk through more ideas together — support@gfJules.com.
Best of luck and have fun experimenting!
~jules
First time, i tried the baguette its came out well.
So glad to hear it, Nancy!
~jules
Hi Jules,
I’m interested in making this recipe but I just had a few questions if you don’t mind answering them!
What is the purpose of the egg whites? Does it act as a binding agent?
And why doesn’t the dough need to be left to rise?
Thanks!
Avril
Hi Avril, happy to help! The egg whites add volume, some structure and leavening in this recipe. And the dough does sit to rise for 20-30 minutes, as noted in the recipe. Hope that answers your questions!
~jules
I made this bread and the crust and texture was amazing! However, you could really taste the egg in the bread. I used the gfJules all purpose gluten free flour with milk powder (I used judee’s whole milk powder). I have no idea what I did wrong, any thoughts?
Hi Jenn, I’m so glad you loved this gluten free baguette recipe crust and texture! That’s definitely 9/10ths of the gluten free bread battle! I’m interested to hear that you could taste the egg in the bread. Did you use an egg wash on the outside? Maybe that was it? I’ve never heard anyone say that they could taste it IN the bread … there are only 2 egg whites/1 egg in a large baguette, so that shouldn’t cause an eggy flavor. Do you think maybe it was the egg wash that was causing the egg flavor to be noticeable?
~jules
Hi Jules, we did use the egg wash. We’ll try again with just spritzing water on the outside! Thanks for the help!
Sure thing – fingers crossed!
~jules