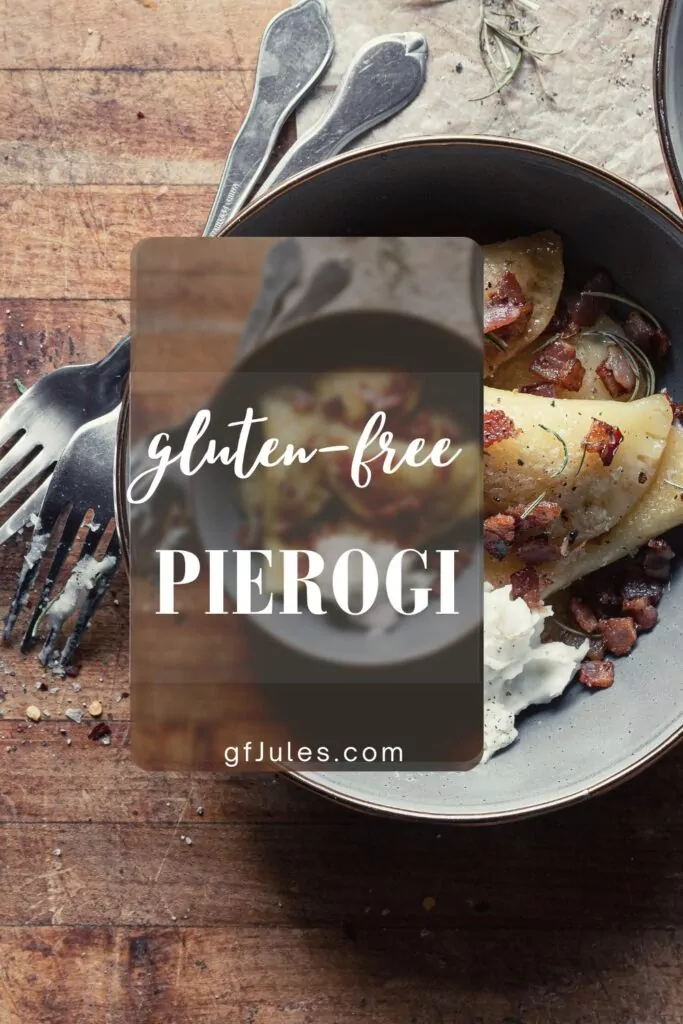
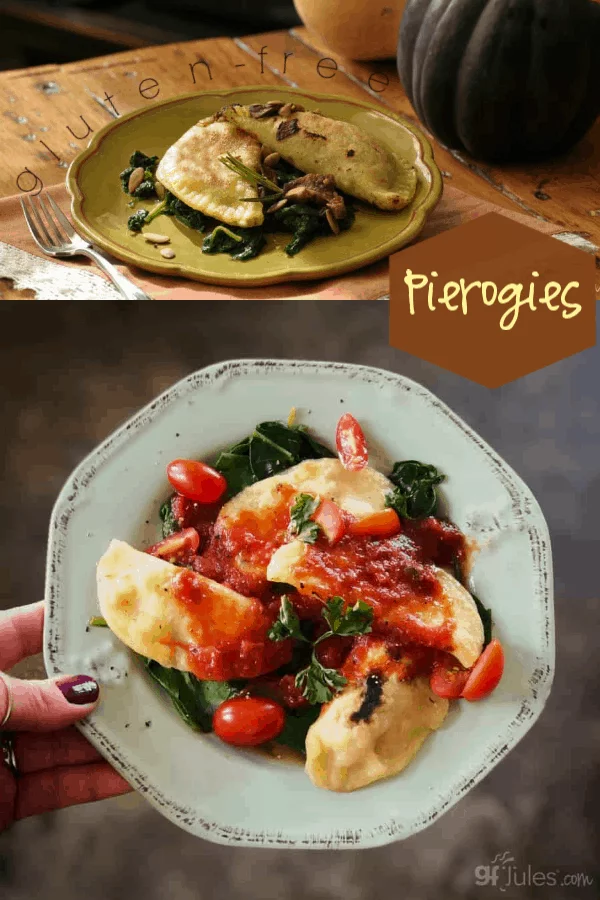
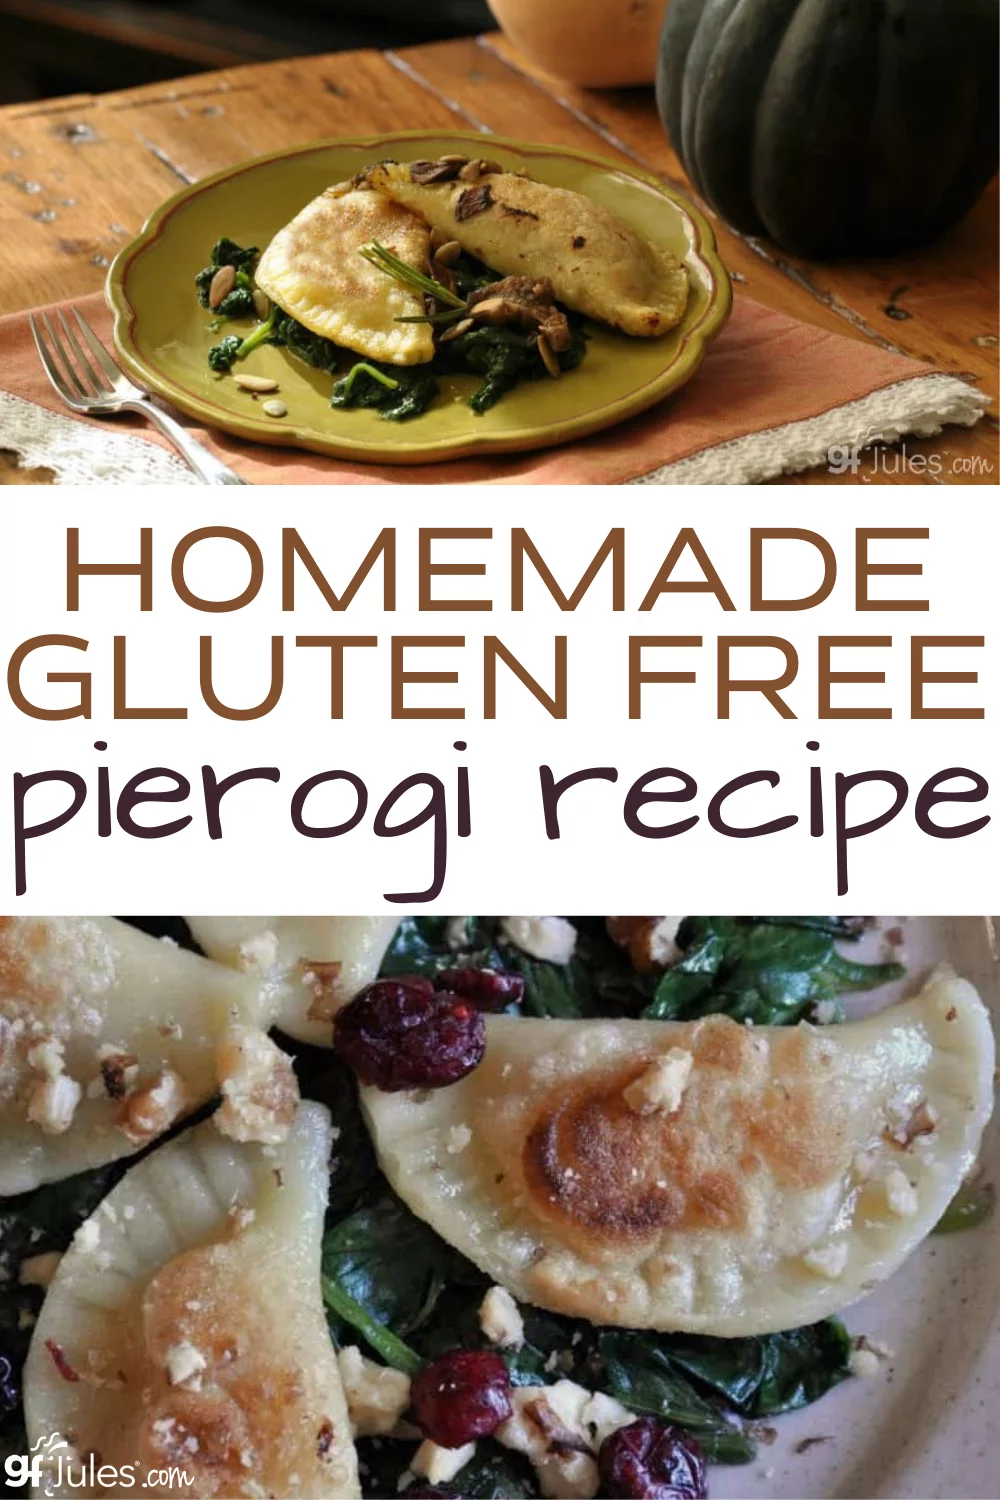
Meet the gluten free pierogi: delicious pockets of gluten free dough stuffed with yummy fillings like mashed potatoes and cheese, sweet potatoes, sauerkraut or even Irish Colcannon. Actually, these gluten free pierogi are stuffed with anything you like, because they’re your homemade gluten free pierogi.
These traditional Polish dumplings (not traditionally gluten free) are boiled then baked or pan fried, and served as a main dish or as an appetizer.
I have even filled these gluten free pierogi with sweet potatoes and sprinkled them with cinnamon and sugar as a sweet after supper treat.
THAT’s how easy and versatile this dough is to work with, when you use my gfJules Flour to make it.
Best pierogie recipe ever! My whole family switched to the GF version once they tried these – and they’ve been making pierogies for three generations! These freeze well, just don’t overlay them or they will stick to each other.~A Luvrly Life (Pinterest)
The key here really is my award-winning gfJules Flour. It adds stretch to all kinds of doughs like this gluten free pierogi, or gluten free ravioli, gluten free pie crust, gluten free puff pastry and more, so they don’t fall apart and the dough is a dream to work with.
And because my gfJules Gluten Free All Purpose Flour is not made with gritty or funky tasting flours, the fillings really shine in this clean, light pasta recipe.
It makes baking and cooking EASY and makes recipes reliable. And now that we have gluten free pierogi in our lives, we can stuff them with anything that inspires us!
You have changed my life for the better over and over! Thank you so much
Pierogies are amazing as are all your recipes that I’ve tried. ONLY gfjules products for me. (Live and learn)
Just want to comment that as a new baker your videos are so helpful. The best.~Mary Pat

Why Make Gluten Free Pierogi
In Fall of 2009, I was in Pittsburgh giving a lecture at the Center for Digestive Health and Nutrition’s 3rd Annual Conference on Celiac Disease, and teaching gluten free cooking classes.
I was repeatedly asked for recipes for homemade gluten free gnocchi and gluten free pierogi.
First, second and third generation eastern Europeans all over the world wax nostalgic at the thought of this comfort food, so you’ll understand the urgency for a gluten free recipe if you’re one of those who also finds themselves unable to eat gluten.
I have already published my amazingly easy recipe for gluten free potato (or sweet potato) gnocchi, so I thought I would tackle the pierogi while it’s still bitter cold outside and we are all craving yummy foods like these to warm us from the inside out!
Pierogi is also a Christmas tradition for many, and no one should have to go without treasured food traditions on the holidays!
How to Make Gluten Free Pierogi
This gluten free pierogi recipe is not difficult, but it does involve several steps, so I’ve laid them out below with several in-process photos to help those who are following along on their tablet, phone or pc while making the recipe.

Don’t miss my gluten free pierogi making video! It’s super old and retro. Try not to laugh at me! But the principles are the same, and it’s shows how easy the dough is to make (this recipe video is so old it’s made with my flour back when it was called Jules Gluten Free Flour!)
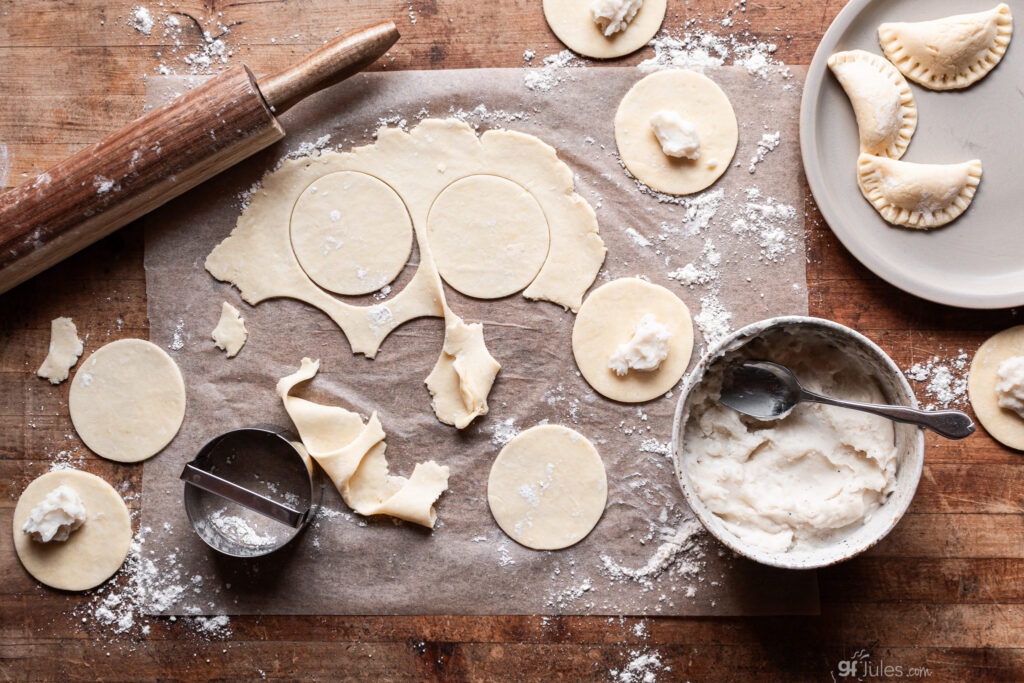
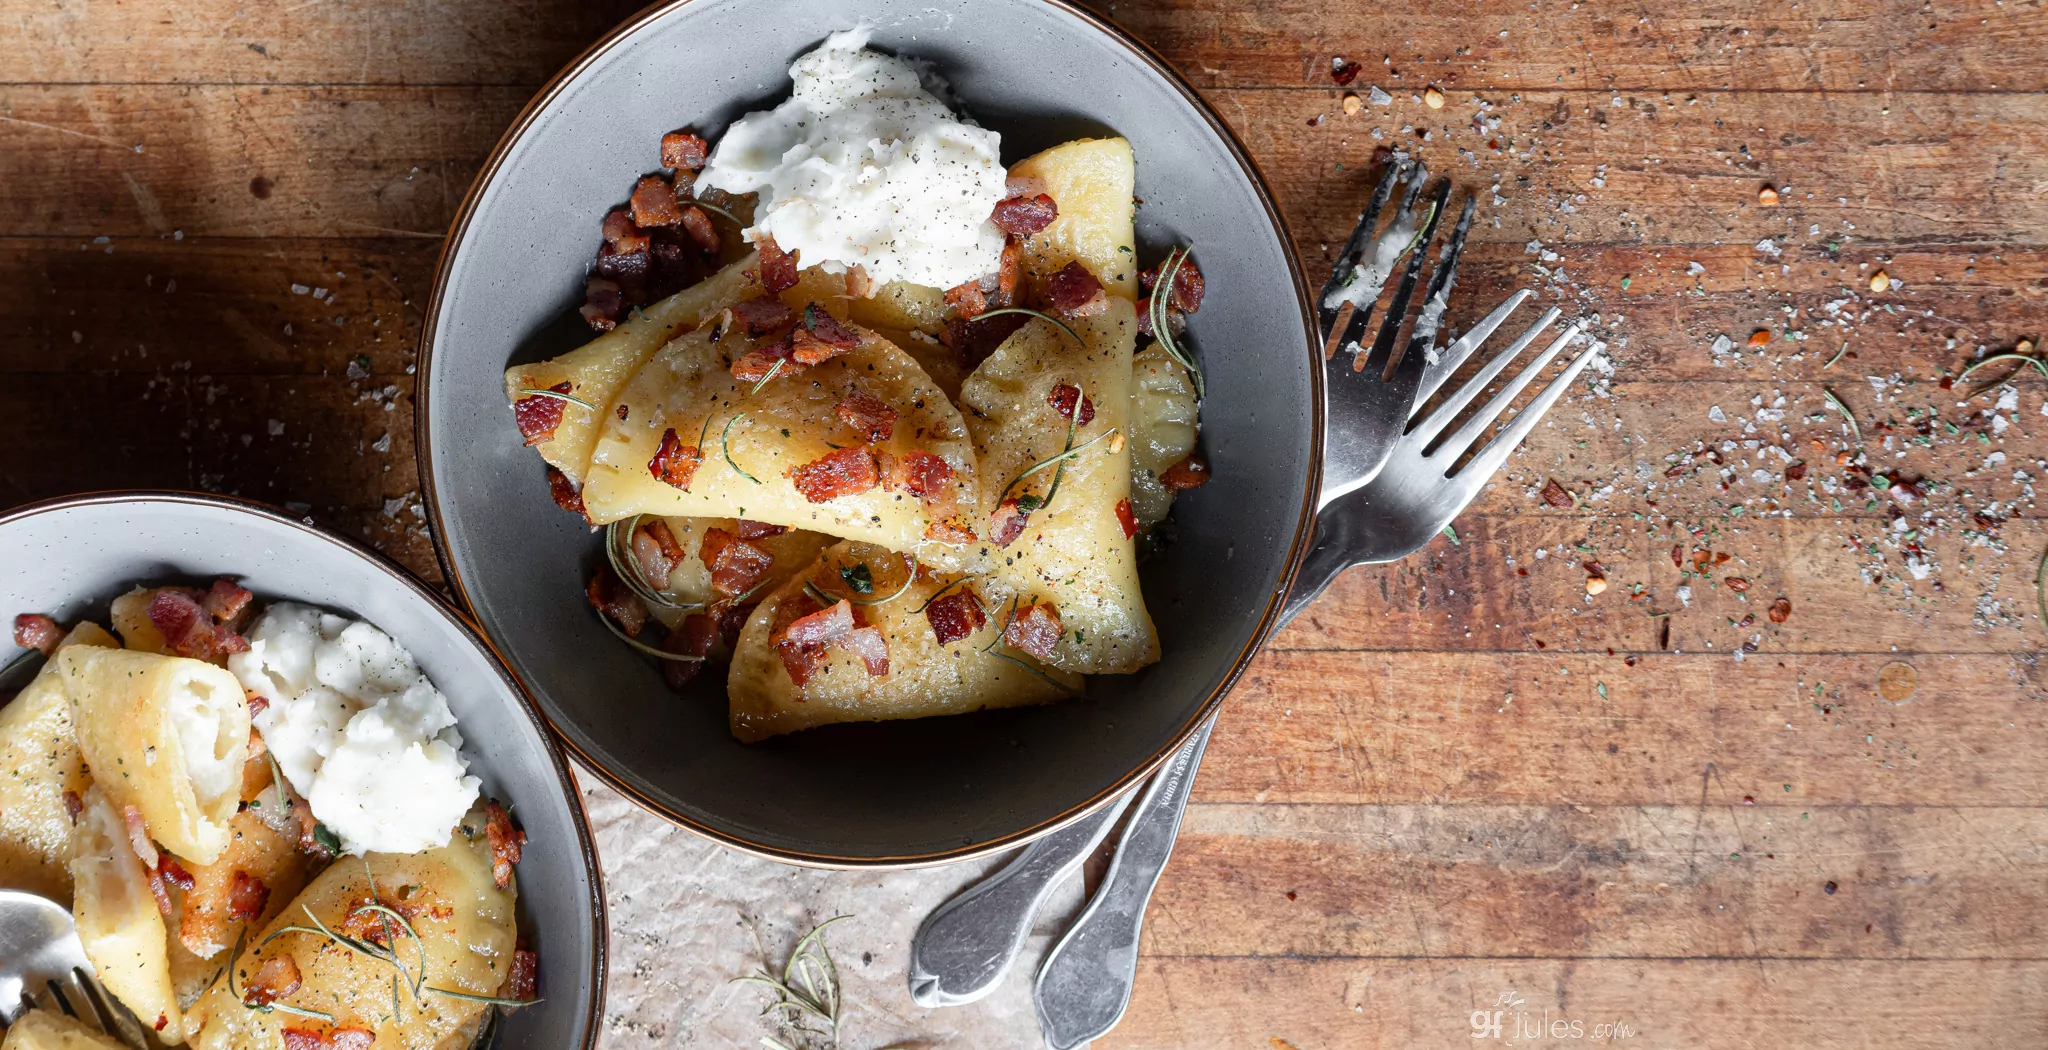
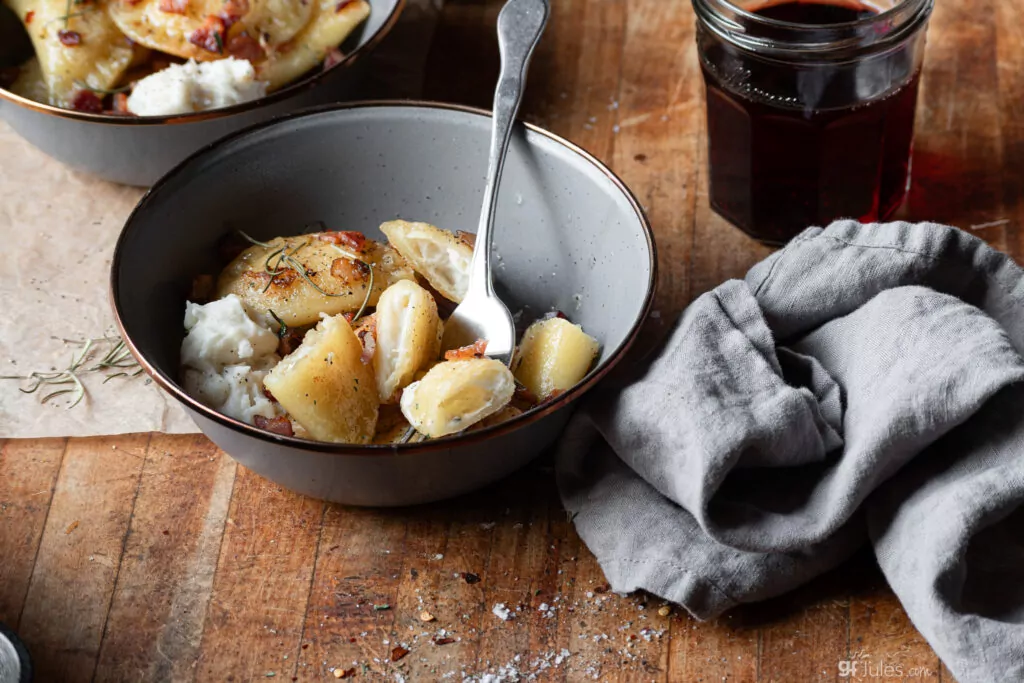
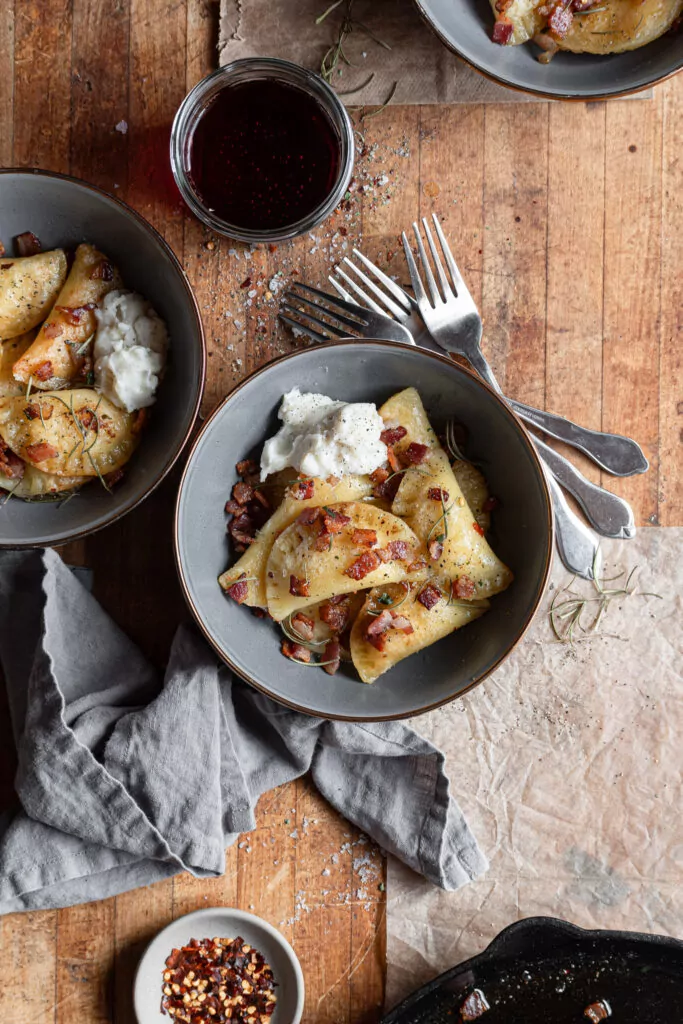
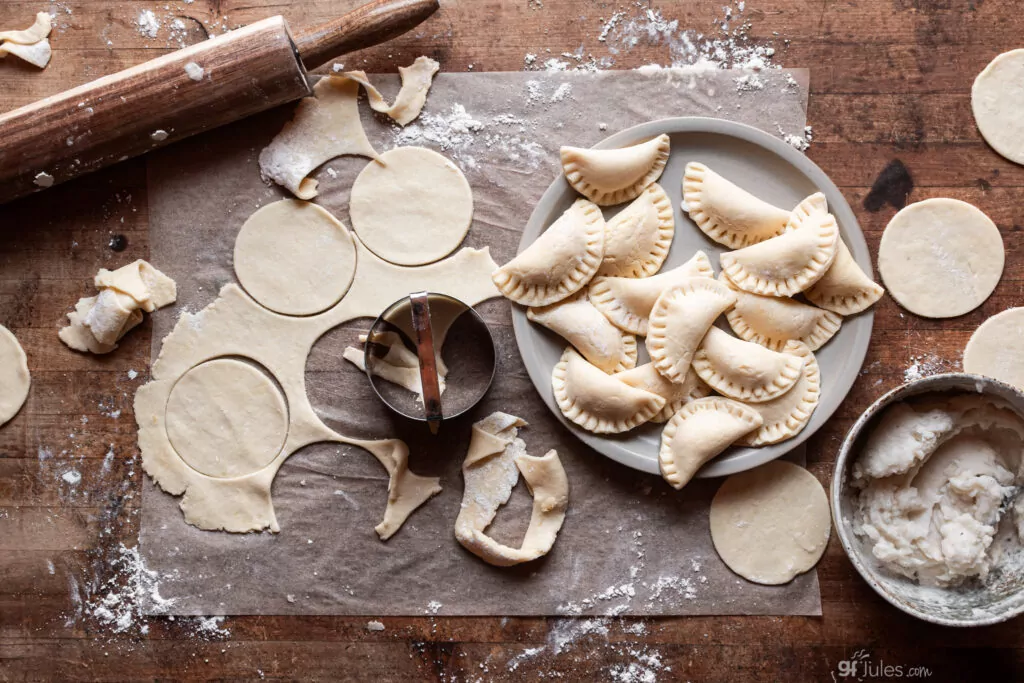
To recap though, simply use a round cutter like a biscuit cutter and cut out your gluten free pierogi dough. Then place a dollop of filling towards one side of the circle. Wet your finger and go around the outside of the dough circle so that the dough will stick to itself when pressed together.
Fold the dough over itself to form a crescent shape and press together, then seal well by pressing with the tines of a fork. That’s it!
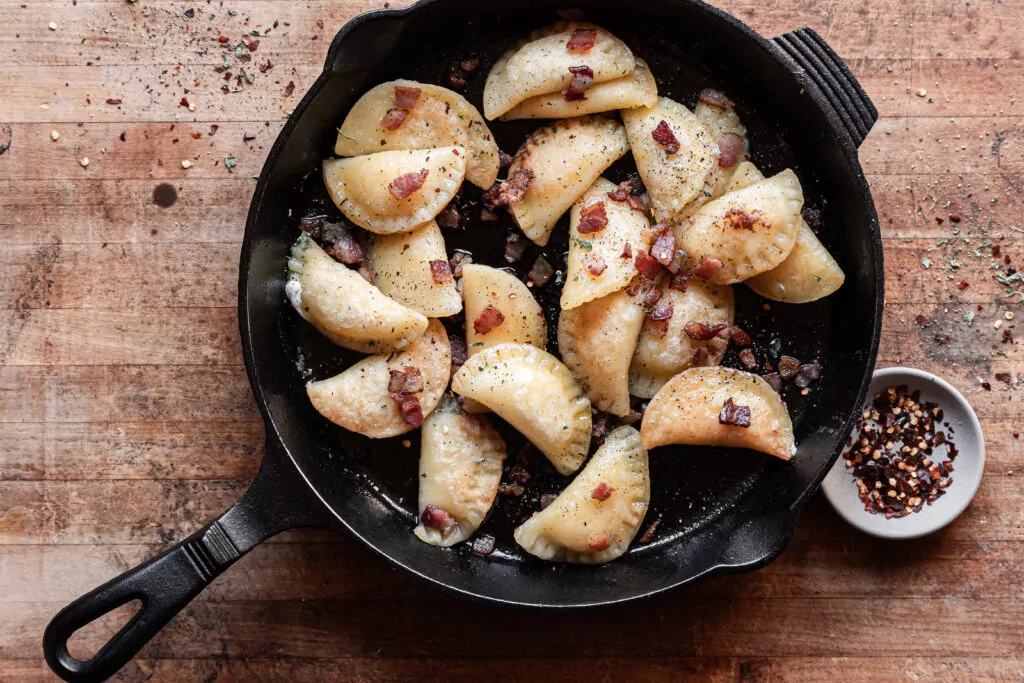
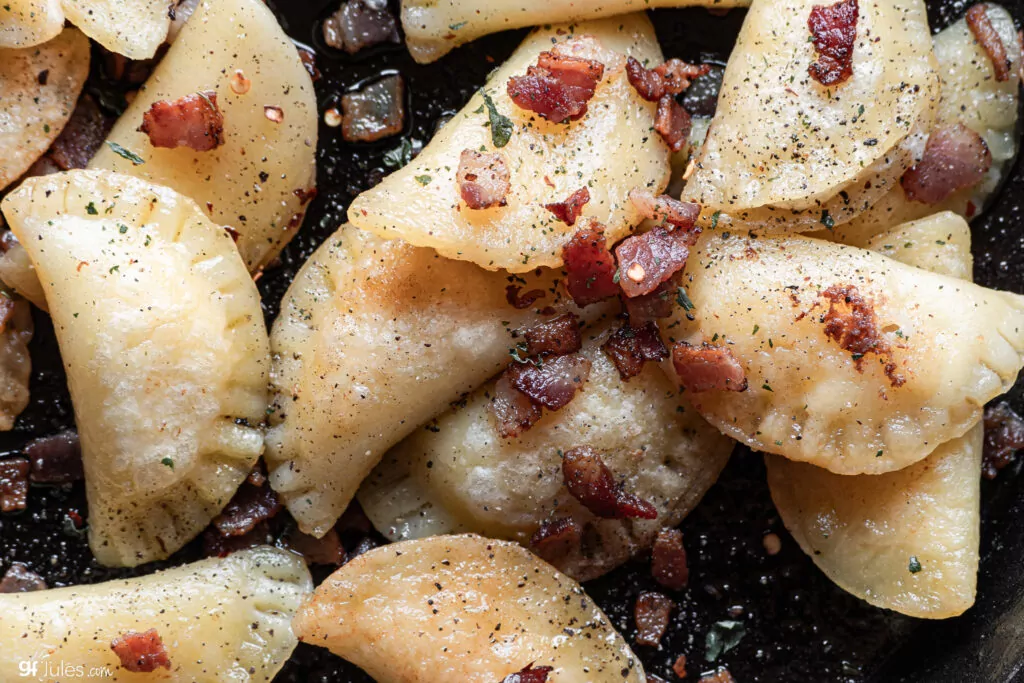
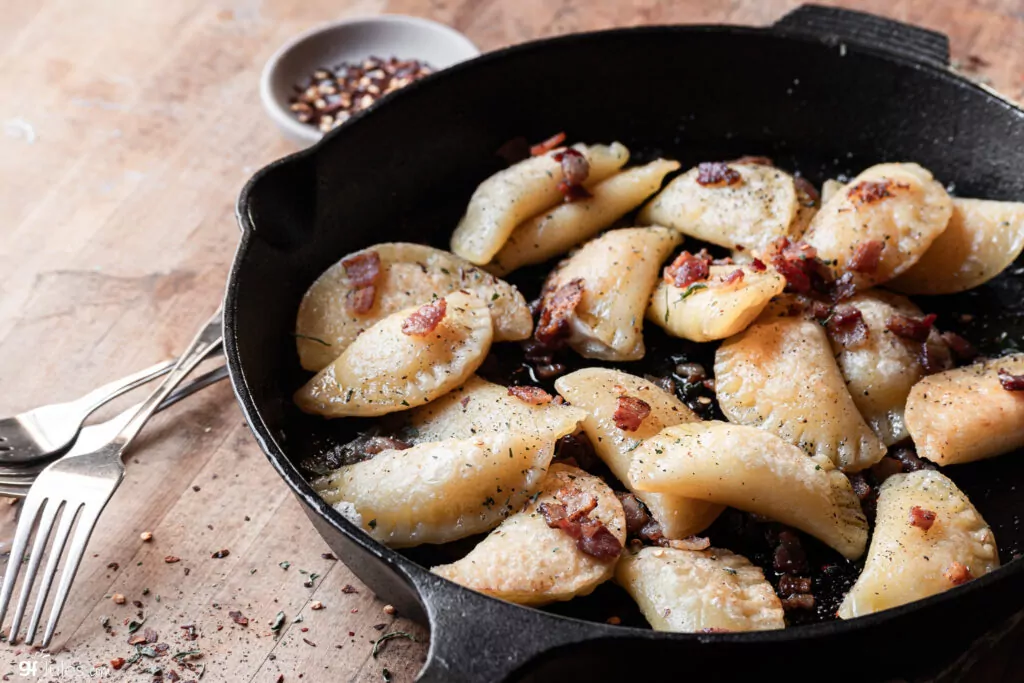
Boil and then pan fry if you like, or don’t if you don’t!
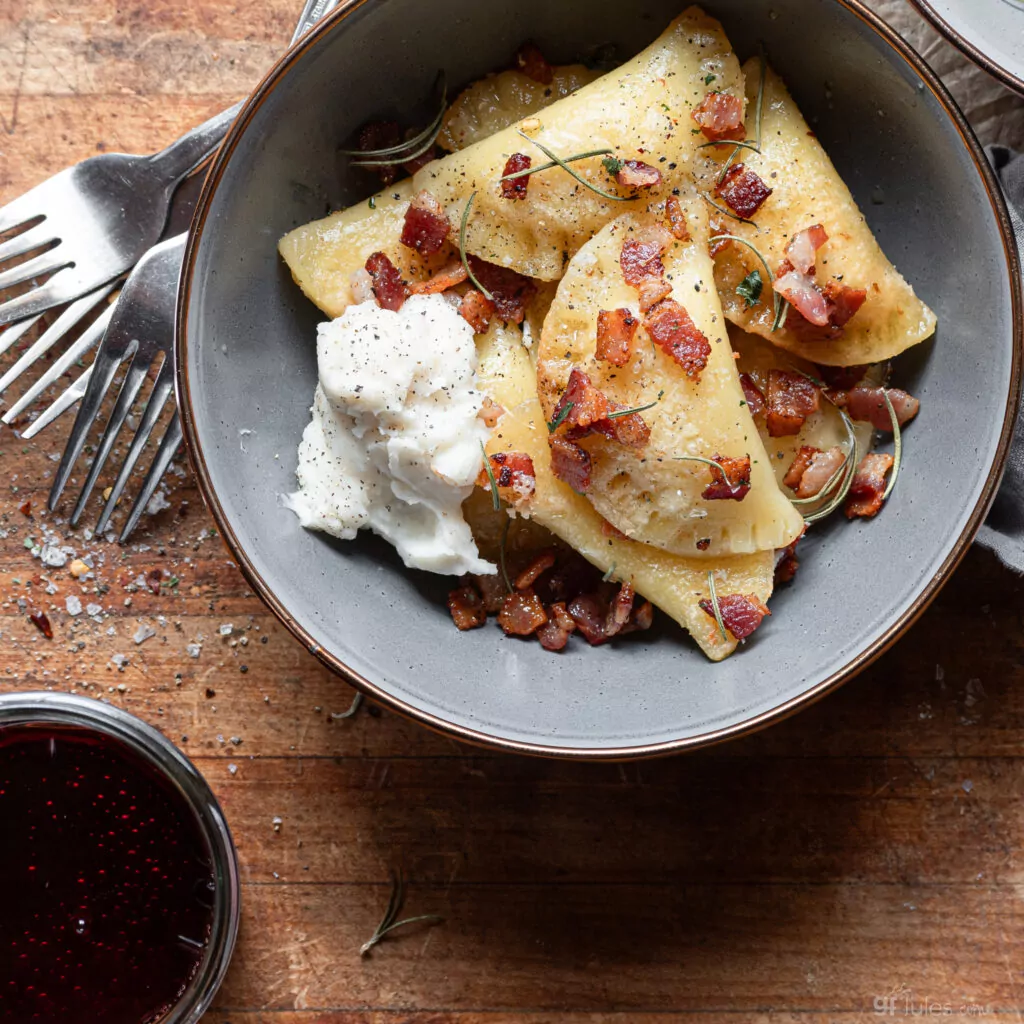
Serve with your favorite sauces or sides. I can’t emphasize enough how versatile this recipe is, and how much you can vary the flavors to suit your tastes and your meal!
If you’d like to make these ahead and freeze for later, parboil them only until they begin to float, then drain them and allow them to cool. Place in a freezer bag with parchment or wax paper between them so they don’t stick to each other. When ready to serve, place frozen pierogi in boiling water and boil another 7-8 minutes, or until cooked through.
I can’t wait to hear about what you serve with your gluten free pierogi! Please leave a comment and a photo, and if you love this recipe, please leave a 5-star review!
Gluten Free Pierogi Recipe

Gluten Free Pierogi Recipe

Ingredients
- 2 cups (270 grams) gfJules™ All-Purpose Gluten-Free Flour
- 1/2 tsp. salt
- 1/4 cup extra virgin olive oil
- 1 large egg or egg substitute
- 1/4 cup sour cream dairy or non-dairy alternative (vegan sour cream or plain vegan yogurt)
- 1/4 cup +/- very warm water
Instructions
- In a large-bottomed bowl, whisk together the gfJules™ All Purpose Gluten Free Flour and salt. Whisk together with a fork. Form a well in the center and pour the oil and cracked egg (or substitute) into the well.
- Gradually begin stirring the flour in with the wet mixture in the center. Meanwhile, pour 1/8 cup of water on top of the dry ingredients and stir that in as well. As the dough gets too dry, add in the additional 1/8 cup water; add more water as needed to get the dough wet enough to hold together well in a ball. Continue stirring with the fork until all the liquid is completely integrated. The dough should hold together without being overly wet and sticky.
- Gather the dough into a ball and wrap tightly with plastic wrap. Set out on the counter for at least 30 minutes while you prepare your fillings like mashed potatoes or sweet potatoes.
- Begin rolling the dough by rolling gently in one direction, then in the other, to form a 1/8 inch thick round of dough. Don't make the dough too thick, but if it's too thin, the fillings will break through.
- Scoop out a marble-size ball of your prepared filling and place it just off the center line of one pastry circle. Press each ball into a longer shape, more like the last knuckle of your index finger, so that the filling will fill the cavity of the crescent formed by folding the dough over itself.
- Dip your finger in water and lightly dab around the edge of each pastry circle to wet it, helping one side to adhere to the other when folded over the filling. Fold one side of the pastry over the filling, forming a semi-circle. Press gently, being sure to seal the edges, then press again lightly with the tines of a fork. Set each formed pierogi aside and cover with a damp towel until ready to boil.
- Bring a large pot of water to boil and gently submerge each pierogi in the boiling water. Put only as many pierogi into the pot as can boil without crowding (I boiled 6 at a time). Stir once in awhile, if necessary to prevent them from sticking together. Once they begin to float, boil another 5 minutes – total boil time should be approximately 6-7 minutes.
- Remove with a skimmer or slotted spoon to rinse and drain. Try not to let the pierogi touch while they are draining, so that they will not stick to one another. Repeat until all pierogi are boiled.
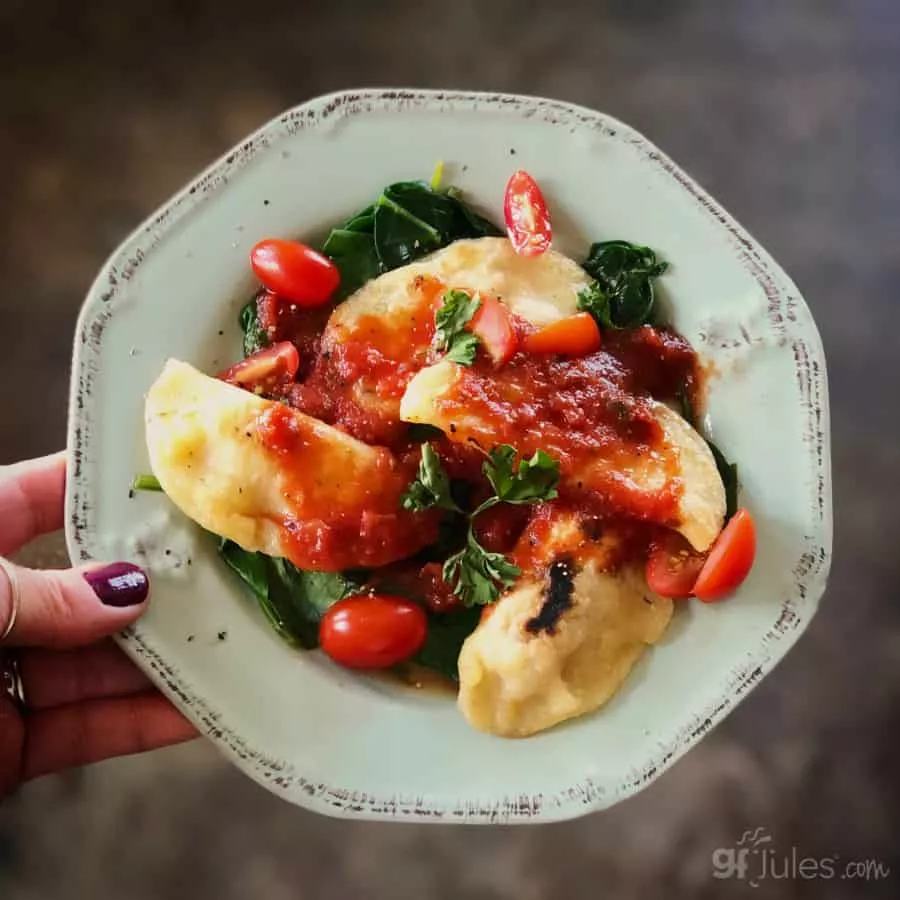
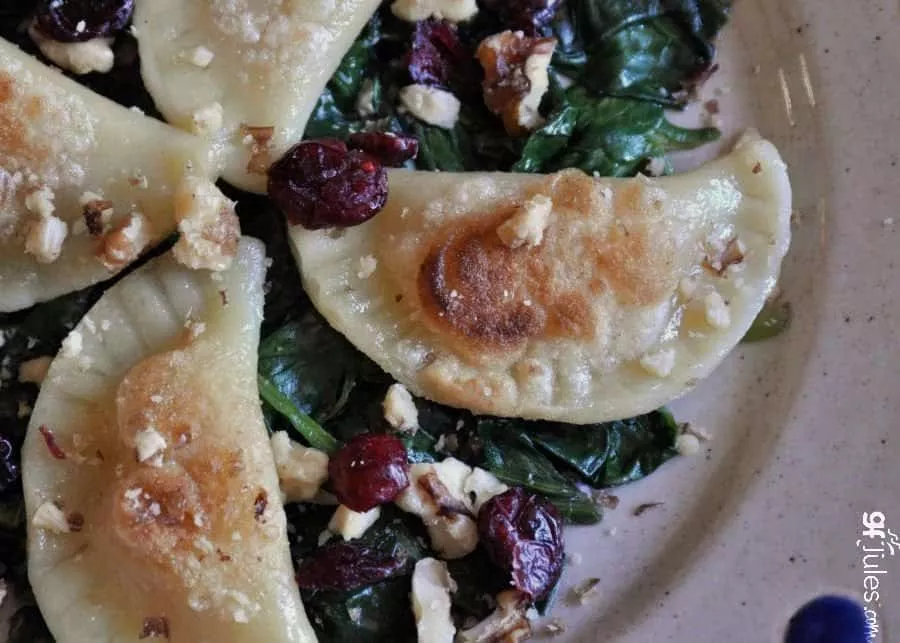
- Serve at this point, or pan fry in butter or non-dairy alternative until slightly crisp. Serve alone or atop a bed of wilted spinach with walnuts, craisins, raisins, chopped apples, or any other accompaniments that suit you. Also try serving with my Onion-Mushroom Sauté (as pictured in the banner at the top of this recipe).
Video
Notes
** Please keep in mind that nutrition information provided is per serving, which may vary. While we have taken care to provide you with the most accurate nutritional values possible, please note that this information may differ significantly depending on the exact ingredients and brands that you choose to use to make this recipe. Additionally, where options are given for ingredients, the resulting calculation may include all ingredient options instead of only one per line, skewing the totals significantly.
Recommended Products
Any links to Amazon may earn me a small amount from qualifying affiliate purchases; this amount goes to fund this blog and does not cost you anything additional.

Pin it for later!


Made these for the first time tonight using your flour blend. First time making pierogies EVER. I was surprised at how simple they are but very time consuming! We stuffed them with garlic rosemary mashed potatoes and pan fried them with butter and sweet onions and they were DELICIOUS!! But definitely won’t be making them on week nights. We need to have a few hours to be able to assemble them.
Thank you Jules for another great recipe!!!
YAY! Congratulations on making your first pierogi!!! Sounds like they were a hit, but yes, the whole process can be time consuming! 🙂 Thanks so much for taking the time to let me know how well they turned out for you!!!
~jules
The dough is very crumbly when I fold it for the perogi, not sure what to do to adjust
Hi Wendy, are you using my gfJules Flour? You shouldn’t experience any crumbliness with the dough using my flour unless it was measured wrong. Check out this article on measuring gluten free flours. If you’re stuck in the middle of this recipe and it the dough is crumbly, you’ll definitely need to adjust, as the pierogi dough needs to hold together well in order to hold the fillings in when boiled. You could try adding an extra egg or extra sour cream or milk to the dough until the consistency sticks together.
I didn’t use your recipe for pierogi but definitely used your flour. It is the best and my pierogi came out delicious topped with lots of caramelized onions. I used the recipe I’ve had before becoming gluten free and the taste and texture is exactly the same as it was then. Thanks Jules for making such great flour!
So glad you were able to use your favorite pre-gluten-free pierogi recipe with my gfJules Flour, Carol! That’s what it’s all about — you should be able to make those switches relatively seamlessly and enjoy your favorites again! I’m so glad they turned out so well for you! Thanks for sharing your pic!!!!
~jules